Mã Arduino và Video cho màn hình SSD1306 OLED 128 x 64
Trong hướng dẫn này, chúng ta sẽ khám phá cách sử dụng màn hình OLED SSD1306 128 x 64 với Arduino. SSD1306 là một màn hình đa năng cho phép bạn hiển thị văn bản, đồ họa và nhiều hình dạng khác nhau một cách dễ dàng. Đến cuối bài viết này, bạn sẽ có thể thiết lập màn hình và chạy mã chứng minh các khả năng của nó.
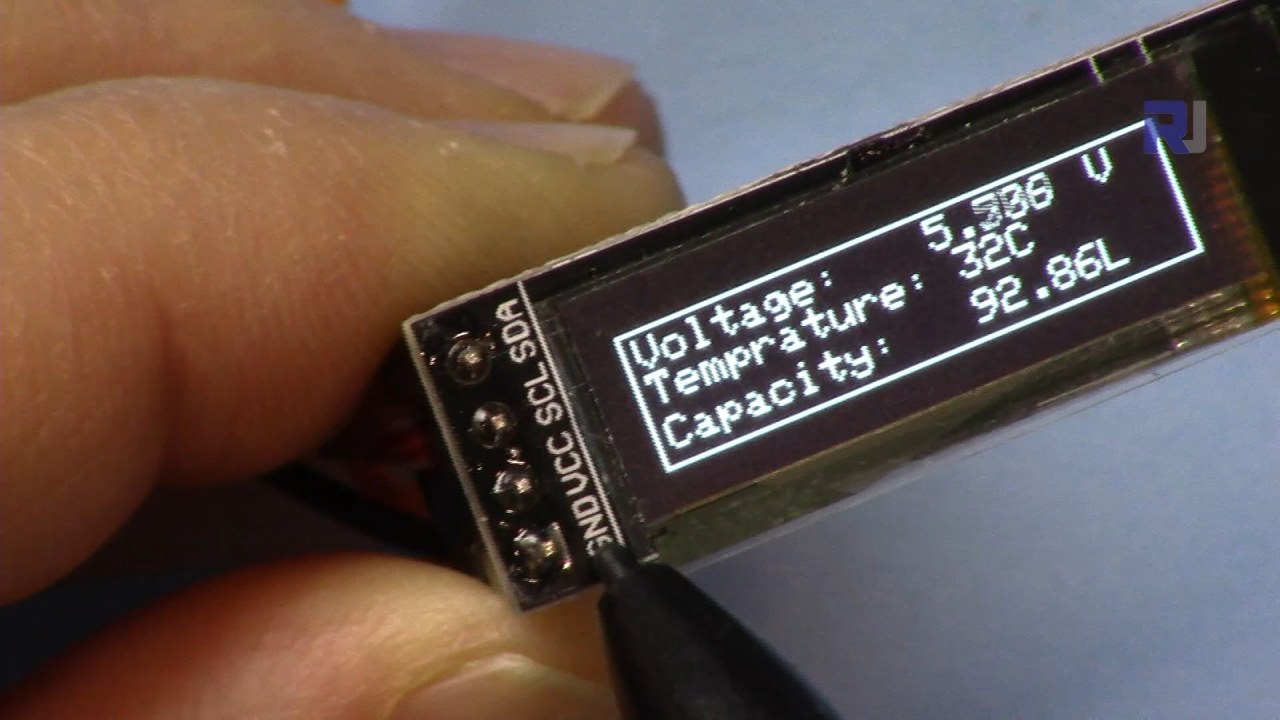
Chúng tôi sẽ hướng dẫn bạn qua các kết nối phần cứng cần thiết và cung cấp các đoạn mã để giúp bạn hiểu các định danh chính được sử dụng trong chương trình. Để có giải thích trực quan hơn, hãy xem video liên quan (trong video tại 00:00).
Phần cứng được giải thích
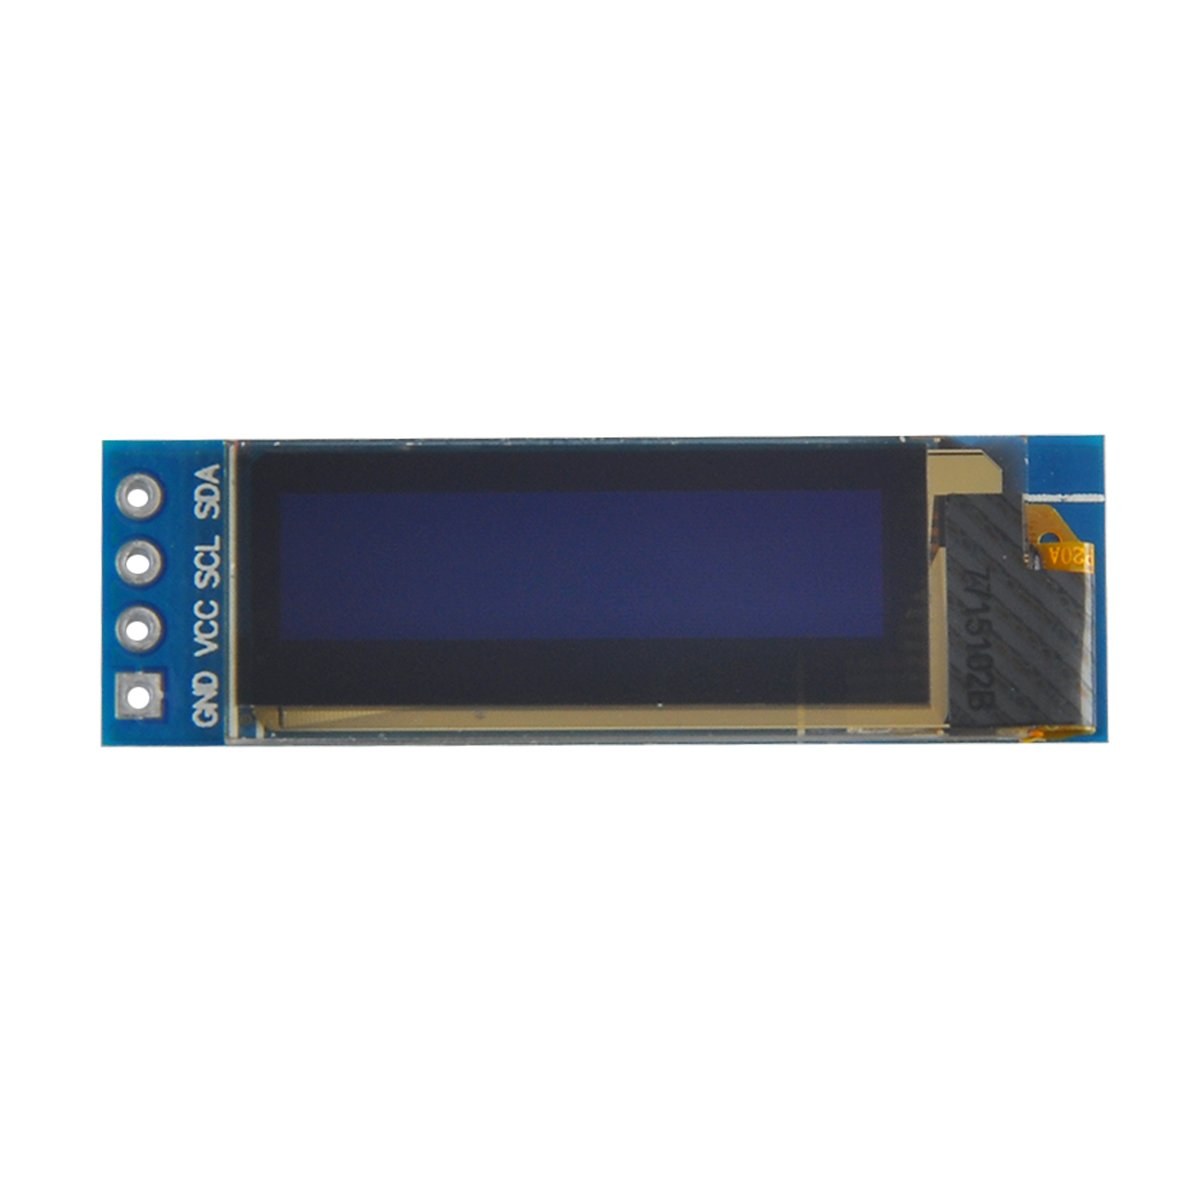
Các thành phần chính của dự án này bao gồm bo mạch Arduino và mô-đun màn hình OLED SSD1306. Màn hình SSD1306 sử dụng giao thức truyền thông I2C, giúp đơn giản hóa việc nối dây chỉ bằng hai đường dữ liệu: SDA cho dữ liệu và SCL cho tín hiệu xung nhịp. Màn hình hoạt động ở điện áp từ 3.3V đến 5V, tương thích với hầu hết các bo mạch Arduino.
Ngoài màn hình, bạn sẽ cần dây jumper để kết nối mô-đun với Arduino của mình. Các kết nối bao gồm VCC với nguồn, GND với đất, SDA với chân dữ liệu của Arduino và SCL với chân xung nhịp. Thiết lập này cho phép giao tiếp dễ dàng giữa Arduino và màn hình OLED.
Chi tiết từ bảng dữ liệu
| Nhà sản xuất | Adafruit |
|---|---|
| Số bộ phận | SSD1306 |
| Điện áp logic/IO | 3.3 V - 5 V |
| Điện áp cung cấp | 3.3 V - 5 V |
| Độ phân giải màn hình | 128 x 64 pixel |
| Địa chỉ I2C | 0x3C |
| Giao diện | I2C |
| Đóng gói | Mô-đun |
- Đảm bảo nối dây đúng: VCC với 3.3V hoặc 5V, GND với đất, SDA với A4, SCL với A5 (đối với Arduino Uno).
- Màn hình yêu cầu điện trở kéo lên trên các đường SDA và SCL nếu chưa được tích hợp sẵn.
- Xác minh địa chỉ I2C được đặt chính xác trong mã, thường là 0x3C cho màn hình này.
- Sử dụng thư viện phù hợp như Adafruit_SSD1306 để tích hợp dễ dàng.
- Xóa màn hình trước khi vẽ đồ họa mới để tránh các hiện tượng chồng chéo.
Hướng dẫn nối dây
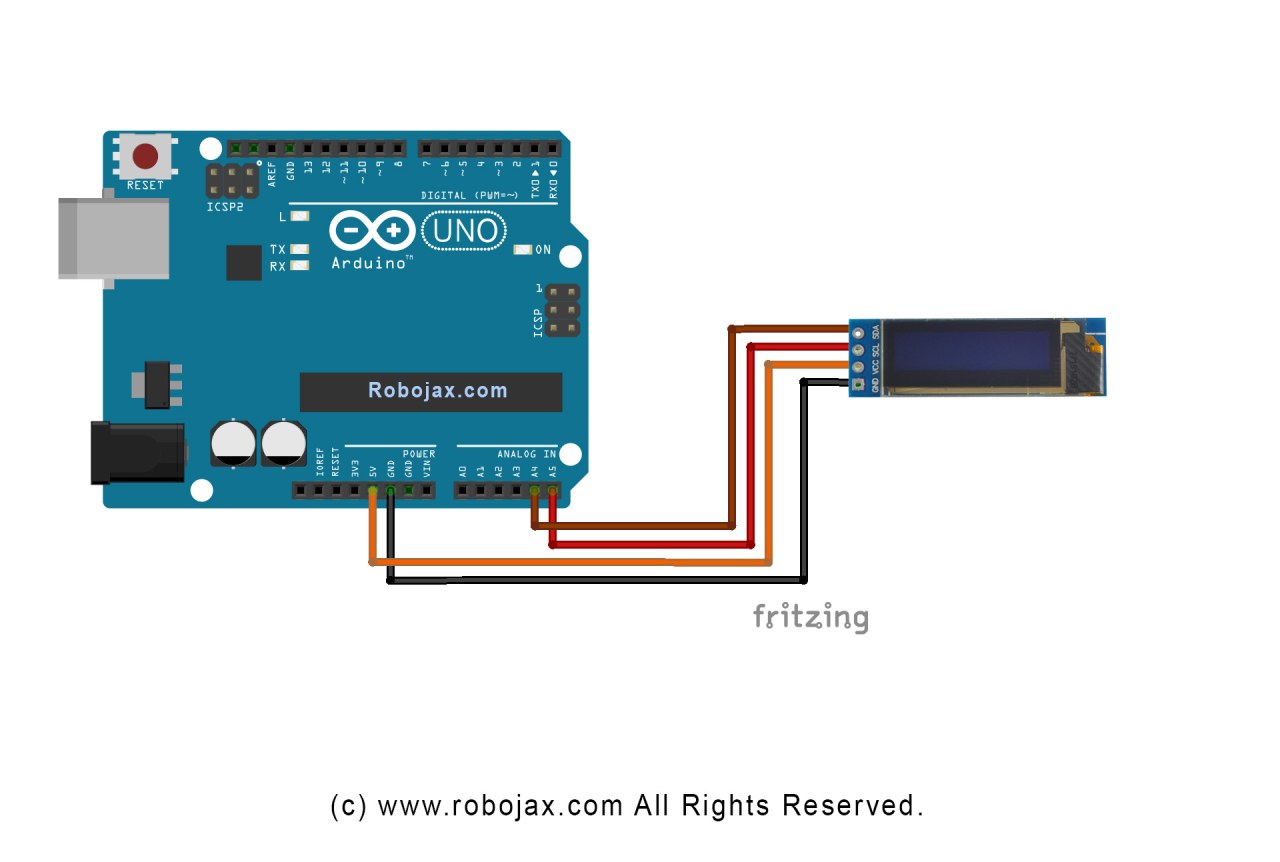
Để nối dây màn hình OLED SSD1306 với Arduino của bạn, hãy làm theo các bước sau:
Kết nối chân VCC của màn hình OLED với chân 5V (hoặc 3.3V) trên Arduino. Tiếp theo, kết nối chân GND của màn hình với chân đất trên Arduino. Đối với giao tiếp I2C, kết nối chân SDA của màn hình với chân A4 trên Arduino và chân SCL với chân A5. Thiết lập này sẽ cho phép Arduino giao tiếp với màn hình OLED bằng giao thức I2C.
Đảm bảo rằng tất cả các kết nối đều chắc chắn và kiểm tra lại rằng bạn đang sử dụng đúng điện áp cho mẫu màn hình cụ thể của mình. Nếu bạn đang sử dụng một mẫu Arduino khác, các chân SDA và SCL có thể khác nhau (ví dụ: đối với Arduino Mega, SDA nằm trên chân 20 và SCL nằm trên chân 21).
Ví dụ mã và hướng dẫn chi tiết
Trong mã, chúng ta khởi tạo màn hình và thiết lập các tham số như địa chỉ I2C và kích thước. Một định danh chính là display, đại diện cho phiên bản của màn hình SSD1306. Đây là một đoạn mã từ hàm thiết lập:
void setup() {
  Serial.begin(9600);
  display.begin(SSD1306_SWITCHCAPVCC, 0x3C);  // khởi tạo với địa chỉ I2C 0x3C
}
Trong đoạn mã này, hàm display.begin khởi tạo màn hình với địa chỉ I2C được chỉ định. Điều quan trọng là phải khớp địa chỉ với màn hình của bạn để đảm bảo giao tiếp chính xác.
Tiếp theo, trong hàm vòng lặp, chúng ta sử dụng phương thức display.clearDisplay() để xóa màn hình trước khi vẽ nội dung mới. Chúng ta có thể đặt kích thước và vị trí văn bản bằng các phương thức setTextSize và setCursor:
void loop() {
  display.clearDisplay();
  display.setTextSize(2);
  display.setCursor(2,1); // đặt con trỏ ở góc trên bên trái
  display.println("Robojax"); // hiển thị văn bản
}
Ở đây, văn bản "Robojax" được hiển thị tại tọa độ (2,1) trên màn hình. Điều này cho phép đặt văn bản chính xác trên màn hình OLED.
Cuối cùng, để hiển thị các thay đổi trên màn hình, chúng ta gọi display.display(). Hàm này gửi tất cả các lệnh đã được lưu trong bộ đệm đến màn hình để cập nhật nội dung:
display.display();Đây phải là dòng cuối cùng trong hàm vòng lặp của bạn để đảm bảo tất cả các lệnh vẽ được thực thi. Nếu bạn quên bước này, sẽ không có gì xuất hiện trên màn hình.
Hãy nhớ rằng, mã đầy đủ được tải bên dưới bài viết để bạn tham khảo.
Trình diễn / Điều gì sẽ xảy ra
Sau khi tải mã lên Arduino của bạn, bạn sẽ thấy văn bản "Robojax" được hiển thị trên màn hình OLED. Mã cũng trình diễn văn bản cuộn và vẽ các đường, hình dạng và đồ họa khác trên màn hình. Hãy chú ý đến các lỗi thường gặp, chẳng hạn như nối dây sai hoặc địa chỉ I2C không khớp, có thể ngăn màn hình hoạt động chính xác (trong video tại 10:00).
Mốc thời gian video
- 00:00 - Giới thiệu về màn hình OLED SSD1306
- 02:30 - Nối dây màn hình
- 05:00 - Hướng dẫn chi tiết mã
- 08:00 - Trình diễn các tính năng của màn hình
- 10:00 - Các vấn đề thường gặp và khắc phục sự cố
Hình ảnh

/*
 * Original source: https://github.com/adafruit/Adafruit_SSD1306
 * This is the Arduino code for the SSD1306 OLED 128 x 64 Display.
 * Watch the video for details and demo: http://youtu.be/UmYiHTOz-5k
 * This code has been modified to print specific elements such as text, lines, circles, rectangles, etc.
 * I have added a custom method to make printing text easy.

 If you get the error: Adafruit_GFX.h not found, download the Adafruit-GFX Library from:
 https://github.com/adafruit/Adafruit-GFX-Library

 Purchase this OLED module from Amazon: https://amzn.to/36zFvTb

 *  *
 * Written by Ahmad Shamshiri for Robojax Video channel, www.Robojax.com
 * Date: December 17, 2017, in Ajax, Ontario, Canada
 * Permission granted to share this code, provided that this
 * note is kept with the code.
 * Disclaimer: This code is "AS IS" and for educational purposes only.
 * This code has been downloaded from https://robojax.com
 *
 */

/*********************************************************************
This is an example for our monochrome OLEDs based on SSD1306 drivers.

  Pick one up today in the Adafruit shop!
  ------> http://www.adafruit.com/category/63_98

This example is for a 128x64 size display using I2C to communicate.
3 pins are required to interface (2 I2C and one reset).

Adafruit invests time and resources providing this open source code,
please support Adafruit and open-source hardware by purchasing
products from Adafruit!

Written by Limor Fried/Ladyada for Adafruit Industries.
BSD license, check license.txt for more information.
All text above, and the splash screen must be included in any redistribution.
*********************************************************************/

#include <SPI.h>
#include <Wire.h>
#include <Adafruit_GFX.h>
#include <Adafruit_SSD1306.h>

#define OLED_RESET 4
Adafruit_SSD1306 display(OLED_RESET);

#define NUMFLAKES 10
#define XPOS 0
#define YPOS 1
#define DELTAY 2


#define LOGO16_GLCD_HEIGHT 16 // do not change this. Error in video
#define LOGO16_GLCD_WIDTH  16 // do not change this. Error in video
static const unsigned char PROGMEM logo16_glcd_bmp[] =
{ B00000000, B11000000,
  B00000001, B11000000,
  B00000001, B11000000,
  B00000011, B11100000,
  B11110011, B11100000,
  B11111110, B11111000,
  B01111110, B11111111,
  B00110011, B10011111,
  B00011111, B11111100,
  B00001101, B01110000,
  B00011011, B10100000,
  B00111111, B11100000,
  B00111111, B11110000,
  B01111100, B11110000,
  B01110000, B01110000,
  B00000000, B00110000 };

    // look at line 27 to 30 of Adafruit_SSD1306.h inside the library to select the dimensions
#if (SSD1306_LCDHEIGHT != 64)
#error("Height incorrect, please fix Adafruit_SSD1306.h!");
#endif

void setup()   {
  Serial.begin(9600);

  // by default, we'll generate the high voltage from the 3.3v line internally! (neat!)
  display.begin(SSD1306_SWITCHCAPVCC, 0x3C);  // initialize with the I2C addr 0x3D (for the 128x64)
  // init done

}


void loop() {
 display.clearDisplay();
  robojaxText("Values", 3, 0, 2, false);
  robojaxText("V: 41v", 3, 22, 2, false);
  robojaxText("Temperature: 32C", 4, 45, 1, true);
  display.drawLine(1, 37, 100, 37, WHITE);
  display.drawRect(1, 20, 100,40, WHITE);
  //display.drawCircle(63,31, 31, WHITE);
   //display.startscrollright(0x00, 0x0F);
  display.display();
   delay(20000);
}

/*
 * robojaxText(String text, int x, int y, int size, boolean d)
 * text is the text string to be printed.
 * x is the integer x position of the text.
 * y is the integer y position of the text.
 * size is the text size (1, 2, 3, etc.).
 * d is a boolean value (true or false).  Its purpose is unclear, use true.
 */
void robojaxText(String text, int x, int y,int size, boolean d) {

  display.setTextSize(size);
  display.setTextColor(WHITE);
  display.setCursor(x,y);
  display.println(text);
  if(d){
    display.display();
  }

  delay(100);
}/*
* Original source: https://github.com/adafruit/Adafruit_SSD1306
* This is the Arduino code for the SSD1306 OLED 128 x 64 Display
* watch the video for details and demo http://youtu.be/UmYiHTOz-5k
* This code has been modified to print specific elements such as text, lines, circles, rectangles, etc.
* *
* *
* Written by Ahmad Shamshiri for Robojax Video channel www.Robojax.com
* Date: December 15, 2017, in Ajax, Ontario, Canada
* Permission granted to share this code given that this
* note is kept with the code.
* Disclaimer: this code is "AS IS" and for educational purposes only.
* This code has been downloaded from https://robojax.com
*
*/
/*********************************************************************
This is an example for our Monochrome OLEDs based on SSD1306 drivers
Pick one up today in the Adafruit shop!
------> http://www.adafruit.com/category/63_98
This example is for a 128x64 size display using I2C to communicate.
3 pins are required to interface (2 I2C and one reset).
Adafruit invests time and resources providing this open source code,
please support Adafruit and open-source hardware by purchasing
products from Adafruit!
Written by Limor Fried/Ladyada for Adafruit Industries.
BSD license, check license.txt for more information
All text above, and the splash screen must be included in any redistribution
*********************************************************************/
#include <SPI.h>
#include <Wire.h>
#include <Adafruit_GFX.h>
#include <Adafruit_SSD1306.h>
#define OLED_RESET 4
Adafruit_SSD1306 display(OLED_RESET);
#define NUMFLAKES 10
#define XPOS 0
#define YPOS 1
#define DELTAY 2
#define LOGO16_GLCD_HEIGHT 16 // do not change this. Error in video
#define LOGO16_GLCD_WIDTH 16 // do not change this. Error in video
static const unsigned char PROGMEM logo16_glcd_bmp[] =
{ B00000000, B11000000,
B00000001, B11000000,
B00000001, B11000000,
B00000011, B11100000,
B11110011, B11100000,
B11111110, B11111000,
B01111110, B11111111,
B00110011, B10011111,
B00011111, B11111100,
B00001101, B01110000,
B00011011, B10100000,
B00111111, B11100000,
B00111111, B11110000,
B01111100, B11110000,
B01110000, B01110000,
B00000000, B00110000 };
// look at line 27 to 30 of Adafruit_SSD1306.h inside the library to select the dimensions
#if (SSD1306_LCDHEIGHT != 64)
#error("Height incorrect, please fix Adafruit_SSD1306.h!");
#endif
void setup() {
Serial.begin(9600);
// by default, we'll generate the high voltage from the 3.3v line internally! (neat!)
display.begin(SSD1306_SWITCHCAPVCC, 0x3C); // initialize with the I2C addr 0x3D (for the 128x64)
// init done
}
void loop() {
display.clearDisplay();
display.setTextSize(2);
display.setTextColor(WHITE);
display.setCursor(2,1);// set the cursor at x=2, y=1 which is top left corner of display
display.println("Robojax");// the actual text
display.setCursor(2,18);
display.println("YouTube");// set the cursor at x=2, y=18 which is top left under the first text line
display.drawLine(0,16, display.width()-1, 16, WHITE); // drawing from the point x=0, y=16 to x=64-1 y=16
display.display();
display.startscrollright(0x00, 0x0F);
delay(2000);
display.stopscroll();
delay(1000);
display.startscrollleft(0x00, 0x0F);
delay(2000);
display.stopscroll();
delay(1000);
display.startscrolldiagright(0x00, 0x07);
delay(2000);
display.startscrolldiagleft(0x00, 0x07);
delay(2000);
display.stopscroll();
delay(10000);
}/*********************************************************************
Original source: http://playground.arduino.cc/Main/I2cScanner
This program will find the I2C address on the I2C device. Just upload the code into your Arduino
and open the serial monitor and wait. It will display the I2C address as 0x3C or similar.
* Please view other RoboJax codes and videos at http://robojax.com/learn/arduino
* If you are sharing this code, you must keep this copyright note.
*
*********************************************************************/
#include <Wire.h>
void setup()
{
Wire.begin();
Serial.begin(9600);
while (!Serial); // Leonardo: wait for serial monitor
Serial.println("\nI2C Scanner");
}
void loop()
{
byte error, address;
int nDevices;
Serial.println("Scanning...");
nDevices = 0;
for(address = 1; address < 127; address++ )
{
// The i2c_scanner uses the return value of
// the Wire.endTransmission to see if
// a device did acknowledge the address.
Wire.beginTransmission(address);
error = Wire.endTransmission();
if (error == 0)
{
Serial.print("I2C device found at address 0x");
if (address<16)
Serial.print("0");
Serial.print(address,HEX);
Serial.println(" !");
nDevices++;
}
else if (error==4)
{
Serial.print("Unknown error at address 0x");
if (address<16)
Serial.print("0");
Serial.println(address,HEX);
}
}
if (nDevices == 0)
Serial.println("No I2C devices found\n");
else
Serial.println("done\n");
delay(5000); // wait 5 seconds for next scan
}Tài nguyên & tài liệu tham khảo
Tập tin📁
Bảng dữ liệu (pdf)
-
SSD1306 display datasheetSSD1306 is a single-chip CMOS OLED/PLED driver with controller for organic / polymer light emitting diode dot-matrix graphic display system. It consists of 128 segments and 64commons. This IC is designed for Common Cathode type OLED panel. The SSD1306 embeds with contrast control, display RAM and oscillator, which reduces the number of external components and power consumption. It has 256-step brightness control. Data/Commands are sent from general MCU through the hardware selectable 6800/8000 series compatible Parallel Interface, I2C interface or Serial Peripheral Interface. It is suitable for many compact portable applications, such as mobile phone sub-display, MP3 player and calculator, etc.
SSD1306_display_datasheet.pdf1.79 MB