รหัส Arduino และวิดีโอสำหรับจอแสดงผล SSD1306 OLED 128 x 64
ในบทช่วยสอนนี้ เราจะสำรวจวิธีการใช้จอแสดงผล SSD1306 OLED 128 x 64 ร่วมกับ Arduino SSD1306 เป็นจอแสดงผลที่ใช้งานได้หลากหลาย ช่วยให้คุณแสดงข้อความ กราฟิก และรูปทรงต่างๆ ได้อย่างง่ายดาย เมื่ออ่านบทความนี้จบ คุณจะสามารถตั้งค่าจอแสดงผลและรันโค้ดที่สาธิตความสามารถของมันได้
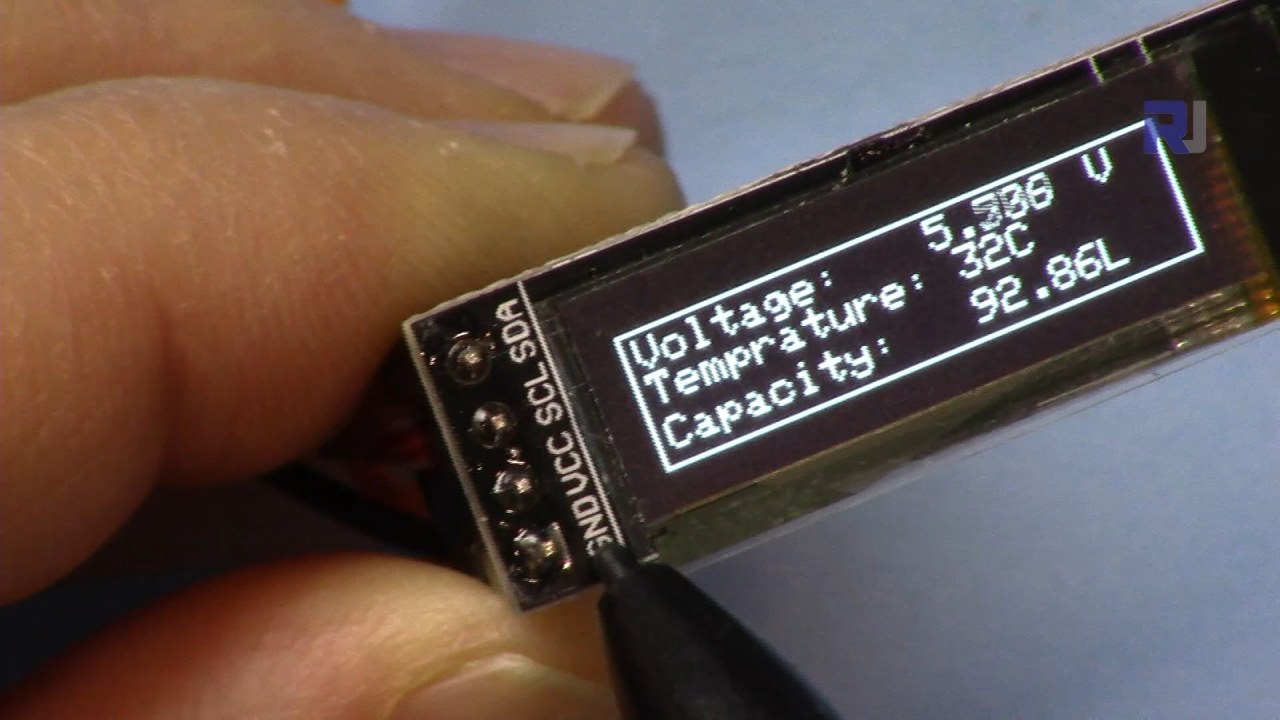
เราจะแนะนำคุณเกี่ยวกับการเชื่อมต่อฮาร์ดแวร์ที่จำเป็น และให้ตัวอย่างโค้ดเพื่อช่วยให้คุณเข้าใจตัวระบุหลักที่ใช้ในโปรแกรม สำหรับคำอธิบายที่เห็นภาพมากขึ้น โปรดดูวิดีโอที่เกี่ยวข้อง (ในวิดีโอที่ 00:00)
อธิบายฮาร์ดแวร์
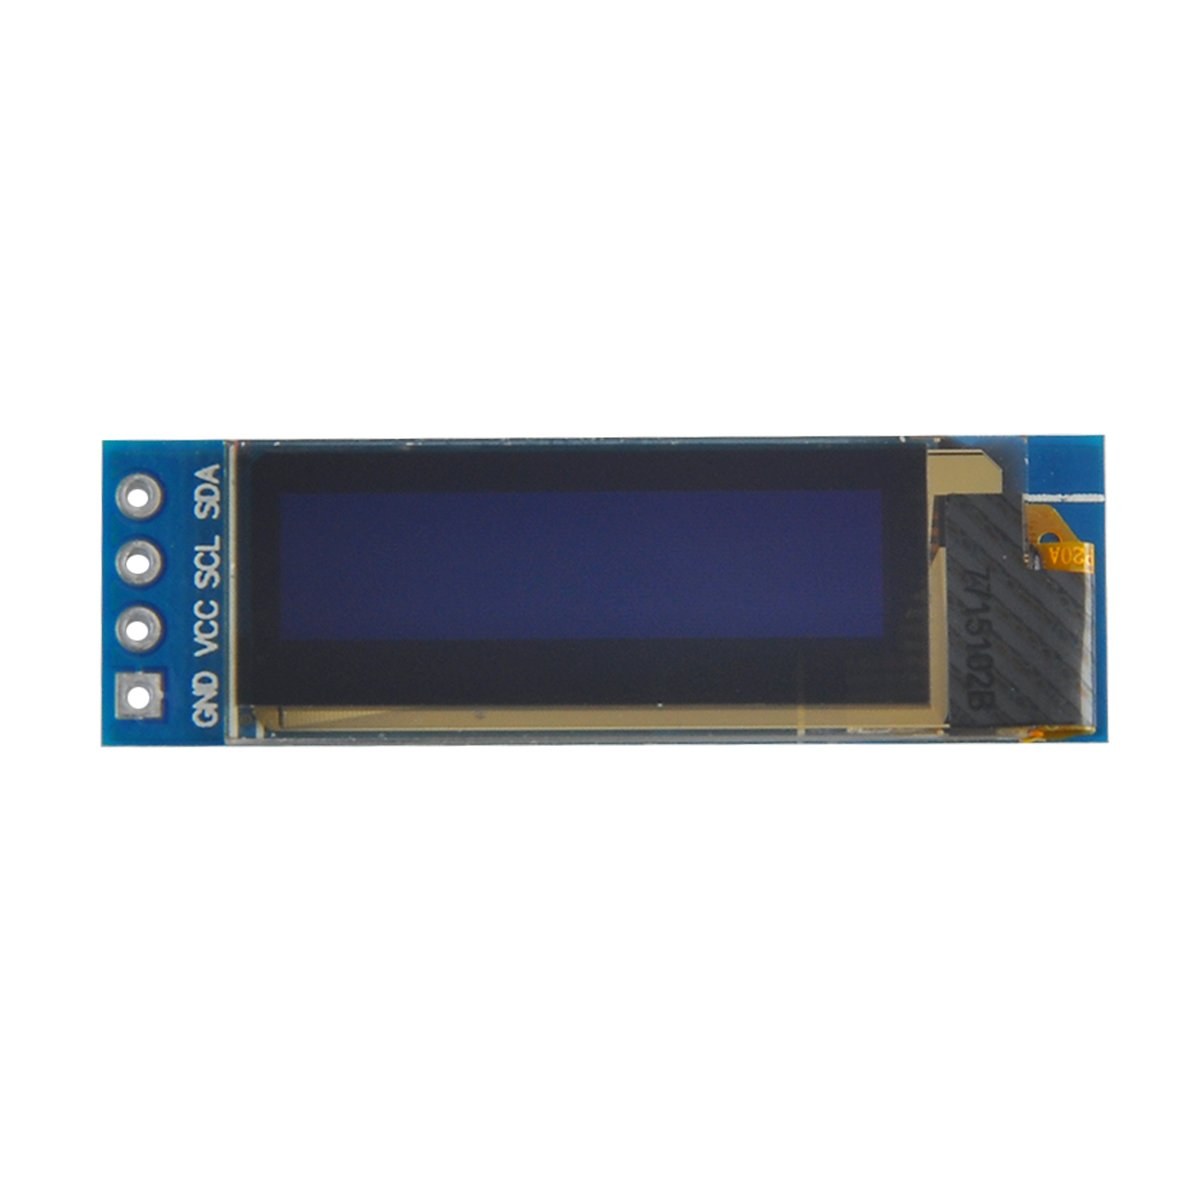
ส่วนประกอบหลักของโปรเจกต์นี้ประกอบด้วยบอร์ด Arduino และโมดูลจอแสดงผล SSD1306 OLED จอแสดงผล SSD1306 ใช้โปรโตคอลการสื่อสาร I2C ซึ่งช่วยลดความซับซ้อนของการเดินสายไฟโดยต้องใช้สายข้อมูลเพียงสองเส้น: SDA สำหรับข้อมูลและ SCL สำหรับสัญญาณนาฬิกา จอแสดงผลทำงานที่แรงดันไฟฟ้าระหว่าง 3.3V ถึง 5V ทำให้เข้ากันได้กับบอร์ด Arduino ส่วนใหญ่
นอกเหนือจากจอแสดงผลแล้ว คุณจะต้องใช้สายจัมเปอร์เพื่อเชื่อมต่อโมดูลเข้ากับ Arduino ของคุณ การเชื่อมต่อประกอบด้วย VCC ไปยังไฟเลี้ยง, GND ไปยังกราวด์, SDA ไปยังพินข้อมูลของ Arduino และ SCL ไปยังพินนาฬิกา การตั้งค่านี้ช่วยให้การสื่อสารระหว่าง Arduino และจอแสดงผล OLED เป็นเรื่องง่าย
รายละเอียดจาก Datasheet
| ผู้ผลิต | Adafruit |
|---|---|
| หมายเลขชิ้นส่วน | SSD1306 |
| แรงดันไฟฟ้าลอจิก/IO | 3.3 V - 5 V |
| แรงดันไฟฟ้าจ่าย | 3.3 V - 5 V |
| ความละเอียดจอแสดงผล | 128 x 64 พิกเซล |
| ที่อยู่ I2C | 0x3C |
| อินเทอร์เฟซ | I2C |
| แพ็คเกจ | โมดูล |
- ตรวจสอบการเดินสายไฟให้ถูกต้อง: VCC ไปยัง 3.3V หรือ 5V, GND ไปยังกราวด์, SDA ไปยัง A4, SCL ไปยัง A5 (สำหรับ Arduino Uno)
- จอแสดงผลต้องใช้ตัวต้านทาน pull-up บนสาย SDA และ SCL หากไม่ได้รวมไว้แล้ว
- ตรวจสอบว่าที่อยู่ I2C ตั้งค่าอย่างถูกต้องในโค้ด โดยทั่วไปคือ 0x3C สำหรับจอแสดงผลนี้
- ใช้ไลบรารีที่เหมาะสม เช่น Adafruit_SSD1306 เพื่อการผสานรวมที่ง่ายดาย
- ล้างจอแสดงผลก่อนวาดกราฟิกใหม่เพื่อหลีกเลี่ยงสิ่งตกค้างที่ทับซ้อนกัน
คำแนะนำการเดินสายไฟ
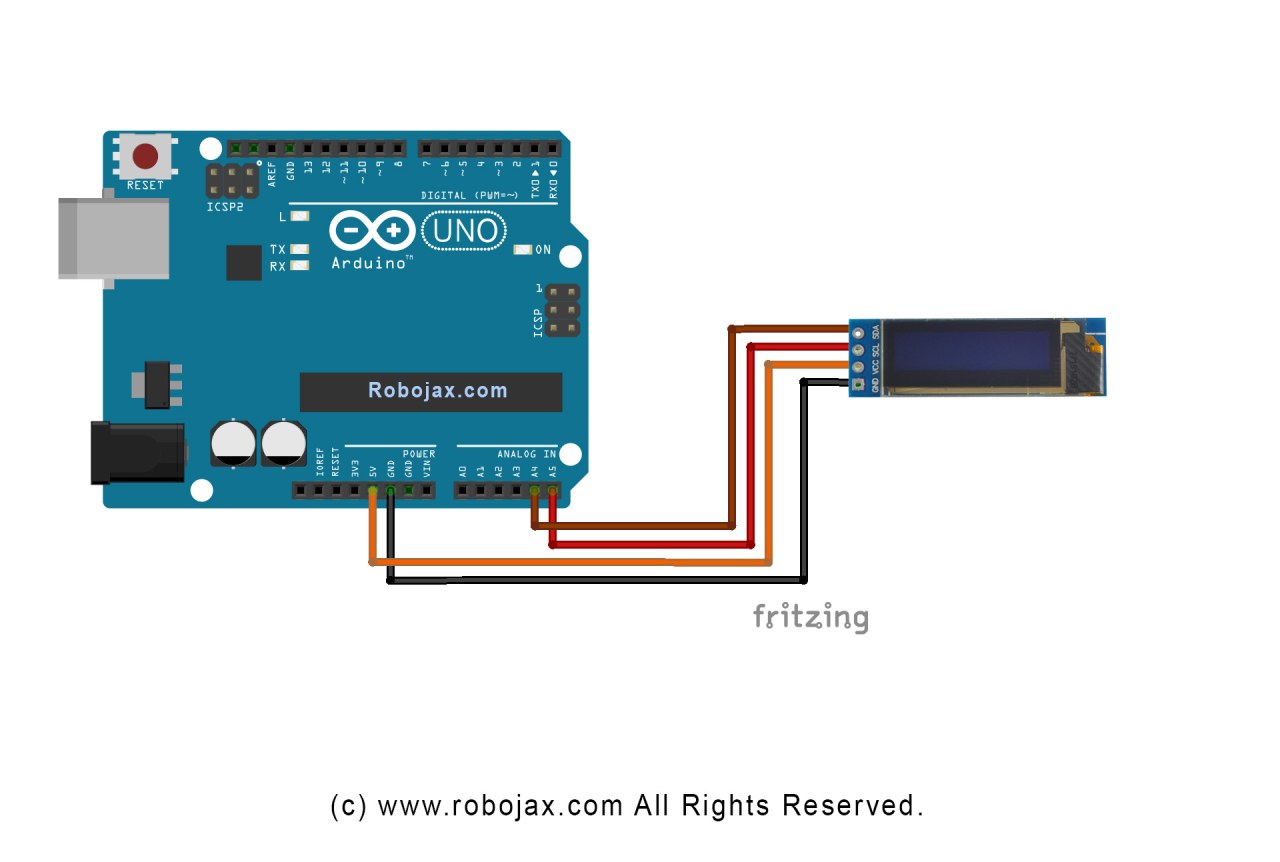
ในการเดินสายไฟจอแสดงผล SSD1306 OLED เข้ากับ Arduino ของคุณ ให้ทำตามขั้นตอนเหล่านี้:
เชื่อมต่อพิน VCC ของจอแสดงผล OLED เข้ากับพิน 5V (หรือ 3.3V) บน Arduino จากนั้นเชื่อมต่อพิน GND ของจอแสดงผลเข้ากับพินกราวด์บน Arduino สำหรับการสื่อสาร I2C ให้เชื่อมต่อพิน SDA ของจอแสดงผลเข้ากับพิน A4 บน Arduino และพิน SCL เข้ากับพิน A5 การตั้งค่านี้จะช่วยให้ Arduino สื่อสารกับจอแสดงผล OLED โดยใช้โปรโตคอล I2C
ตรวจสอบให้แน่ใจว่าการเชื่อมต่อทั้งหมดแน่นหนา และตรวจสอบอีกครั้งว่าคุณใช้แรงดันไฟฟ้าที่ถูกต้องสำหรับรุ่นจอแสดงผลเฉพาะของคุณ หากคุณใช้บอร์ด Arduino รุ่นอื่น พิน SDA และ SCL อาจแตกต่างกัน (เช่น สำหรับ Arduino Mega, SDA อยู่ที่พิน 20 และ SCL อยู่ที่พิน 21)
ตัวอย่างโค้ดและคำอธิบาย
ในโค้ด เราเริ่มต้นจอแสดงผลและตั้งค่าพารามิเตอร์ เช่น ที่อยู่ I2C และขนาด ตัวระบุหลักตัวหนึ่งคือ display ซึ่งแสดงถึงอินสแตนซ์ของจอแสดงผล SSD1306 นี่คือตัวอย่างโค้ดจากฟังก์ชัน setup:
void setup() {
  Serial.begin(9600);
  display.begin(SSD1306_SWITCHCAPVCC, 0x3C);  // initialize with the I2C addr 0x3C
}
ในตัวอย่างนี้ ฟังก์ชัน display.begin เริ่มต้นจอแสดงผลด้วยที่อยู่ I2C ที่ระบุ การจับคู่ที่อยู่กับจอแสดงผลของคุณเป็นสิ่งสำคัญเพื่อให้การสื่อสารทำงานได้อย่างถูกต้อง
ถัดไป ในฟังก์ชัน loop เราใช้เมธอด display.clearDisplay() เพื่อล้างหน้าจอก่อนวาดเนื้อหาใหม่ เราสามารถตั้งค่าขนาดข้อความและตำแหน่งได้โดยใช้เมธอด setTextSize และ setCursor:
void loop() {
  display.clearDisplay();
  display.setTextSize(2);
  display.setCursor(2,1); // set cursor at top left corner
  display.println("Robojax"); // display text
}
ที่นี่ ข้อความ "Robojax" จะแสดงที่พิกัด (2,1) บนหน้าจอ ซึ่งช่วยให้วางตำแหน่งข้อความบนจอแสดงผล OLED ได้อย่างแม่นยำ
สุดท้าย เพื่อแสดงการเปลี่ยนแปลงบนจอแสดงผล เราเรียกใช้ display.display() ฟังก์ชันนี้จะส่งคำสั่งที่บัฟเฟอร์ไว้ทั้งหมดไปยังจอแสดงผลเพื่ออัปเดตเนื้อหา:
display.display();บรรทัดนี้ควรเป็นบรรทัดสุดท้ายในฟังก์ชัน loop ของคุณเพื่อให้แน่ใจว่าคำสั่งการวาดทั้งหมดถูกดำเนินการ หากคุณลืมขั้นตอนนี้ จะไม่มีอะไรปรากฏบนจอแสดงผล
โปรดจำไว้ว่า โค้ดเต็มจะโหลดอยู่ด้านล่างบทความเพื่อการอ้างอิงของคุณ
การสาธิต / สิ่งที่คาดหวัง
หลังจากอัปโหลดโค้ดไปยัง Arduino ของคุณ คุณควรเห็นข้อความ "Robojax" แสดงบนหน้าจอ OLED โค้ดยังสาธิตการเลื่อนข้อความและการวาดเส้น รูปทรง และกราฟิกอื่นๆ บนจอแสดงผล ระวังข้อผิดพลาดทั่วไป เช่น การเดินสายไฟที่ไม่ถูกต้องหรือที่อยู่ I2C ที่ไม่ตรงกัน ซึ่งอาจทำให้จอแสดงผลทำงานไม่ถูกต้อง (ในวิดีโอที่ 10:00)
ไทม์สแตมป์ในวิดีโอ
- 00:00 - แนะนำจอแสดงผล SSD1306 OLED
- 02:30 - การเดินสายไฟจอแสดงผล
- 05:00 - คำอธิบายโค้ด
- 08:00 - การสาธิตคุณสมบัติของจอแสดงผล
- 10:00 - ปัญหาทั่วไปและการแก้ไขปัญหา
ภาพ

/*
 * Original source: https://github.com/adafruit/Adafruit_SSD1306
 * This is the Arduino code for the SSD1306 OLED 128 x 64 Display.
 * Watch the video for details and demo: http://youtu.be/UmYiHTOz-5k
 * This code has been modified to print specific elements such as text, lines, circles, rectangles, etc.
 * I have added a custom method to make printing text easy.

 If you get the error: Adafruit_GFX.h not found, download the Adafruit-GFX Library from:
 https://github.com/adafruit/Adafruit-GFX-Library

 Purchase this OLED module from Amazon: https://amzn.to/36zFvTb

 *  *
 * Written by Ahmad Shamshiri for Robojax Video channel, www.Robojax.com
 * Date: December 17, 2017, in Ajax, Ontario, Canada
 * Permission granted to share this code, provided that this
 * note is kept with the code.
 * Disclaimer: This code is "AS IS" and for educational purposes only.
 * This code has been downloaded from https://robojax.com
 *
 */

/*********************************************************************
This is an example for our monochrome OLEDs based on SSD1306 drivers.

  Pick one up today in the Adafruit shop!
  ------> http://www.adafruit.com/category/63_98

This example is for a 128x64 size display using I2C to communicate.
3 pins are required to interface (2 I2C and one reset).

Adafruit invests time and resources providing this open source code,
please support Adafruit and open-source hardware by purchasing
products from Adafruit!

Written by Limor Fried/Ladyada for Adafruit Industries.
BSD license, check license.txt for more information.
All text above, and the splash screen must be included in any redistribution.
*********************************************************************/

#include <SPI.h>
#include <Wire.h>
#include <Adafruit_GFX.h>
#include <Adafruit_SSD1306.h>

#define OLED_RESET 4
Adafruit_SSD1306 display(OLED_RESET);

#define NUMFLAKES 10
#define XPOS 0
#define YPOS 1
#define DELTAY 2


#define LOGO16_GLCD_HEIGHT 16 // do not change this. Error in video
#define LOGO16_GLCD_WIDTH  16 // do not change this. Error in video
static const unsigned char PROGMEM logo16_glcd_bmp[] =
{ B00000000, B11000000,
  B00000001, B11000000,
  B00000001, B11000000,
  B00000011, B11100000,
  B11110011, B11100000,
  B11111110, B11111000,
  B01111110, B11111111,
  B00110011, B10011111,
  B00011111, B11111100,
  B00001101, B01110000,
  B00011011, B10100000,
  B00111111, B11100000,
  B00111111, B11110000,
  B01111100, B11110000,
  B01110000, B01110000,
  B00000000, B00110000 };

    // look at line 27 to 30 of Adafruit_SSD1306.h inside the library to select the dimensions
#if (SSD1306_LCDHEIGHT != 64)
#error("Height incorrect, please fix Adafruit_SSD1306.h!");
#endif

void setup()   {
  Serial.begin(9600);

  // by default, we'll generate the high voltage from the 3.3v line internally! (neat!)
  display.begin(SSD1306_SWITCHCAPVCC, 0x3C);  // initialize with the I2C addr 0x3D (for the 128x64)
  // init done

}


void loop() {
 display.clearDisplay();
  robojaxText("Values", 3, 0, 2, false);
  robojaxText("V: 41v", 3, 22, 2, false);
  robojaxText("Temperature: 32C", 4, 45, 1, true);
  display.drawLine(1, 37, 100, 37, WHITE);
  display.drawRect(1, 20, 100,40, WHITE);
  //display.drawCircle(63,31, 31, WHITE);
   //display.startscrollright(0x00, 0x0F);
  display.display();
   delay(20000);
}

/*
 * robojaxText(String text, int x, int y, int size, boolean d)
 * text is the text string to be printed.
 * x is the integer x position of the text.
 * y is the integer y position of the text.
 * size is the text size (1, 2, 3, etc.).
 * d is a boolean value (true or false).  Its purpose is unclear, use true.
 */
void robojaxText(String text, int x, int y,int size, boolean d) {

  display.setTextSize(size);
  display.setTextColor(WHITE);
  display.setCursor(x,y);
  display.println(text);
  if(d){
    display.display();
  }

  delay(100);
}/*
* Original source: https://github.com/adafruit/Adafruit_SSD1306
* This is the Arduino code for the SSD1306 OLED 128 x 64 Display
* watch the video for details and demo http://youtu.be/UmYiHTOz-5k
* This code has been modified to print specific elements such as text, lines, circles, rectangles, etc.
* *
* *
* Written by Ahmad Shamshiri for Robojax Video channel www.Robojax.com
* Date: December 15, 2017, in Ajax, Ontario, Canada
* Permission granted to share this code given that this
* note is kept with the code.
* Disclaimer: this code is "AS IS" and for educational purposes only.
* This code has been downloaded from https://robojax.com
*
*/
/*********************************************************************
This is an example for our Monochrome OLEDs based on SSD1306 drivers
Pick one up today in the Adafruit shop!
------> http://www.adafruit.com/category/63_98
This example is for a 128x64 size display using I2C to communicate.
3 pins are required to interface (2 I2C and one reset).
Adafruit invests time and resources providing this open source code,
please support Adafruit and open-source hardware by purchasing
products from Adafruit!
Written by Limor Fried/Ladyada for Adafruit Industries.
BSD license, check license.txt for more information
All text above, and the splash screen must be included in any redistribution
*********************************************************************/
#include <SPI.h>
#include <Wire.h>
#include <Adafruit_GFX.h>
#include <Adafruit_SSD1306.h>
#define OLED_RESET 4
Adafruit_SSD1306 display(OLED_RESET);
#define NUMFLAKES 10
#define XPOS 0
#define YPOS 1
#define DELTAY 2
#define LOGO16_GLCD_HEIGHT 16 // do not change this. Error in video
#define LOGO16_GLCD_WIDTH 16 // do not change this. Error in video
static const unsigned char PROGMEM logo16_glcd_bmp[] =
{ B00000000, B11000000,
B00000001, B11000000,
B00000001, B11000000,
B00000011, B11100000,
B11110011, B11100000,
B11111110, B11111000,
B01111110, B11111111,
B00110011, B10011111,
B00011111, B11111100,
B00001101, B01110000,
B00011011, B10100000,
B00111111, B11100000,
B00111111, B11110000,
B01111100, B11110000,
B01110000, B01110000,
B00000000, B00110000 };
// look at line 27 to 30 of Adafruit_SSD1306.h inside the library to select the dimensions
#if (SSD1306_LCDHEIGHT != 64)
#error("Height incorrect, please fix Adafruit_SSD1306.h!");
#endif
void setup() {
Serial.begin(9600);
// by default, we'll generate the high voltage from the 3.3v line internally! (neat!)
display.begin(SSD1306_SWITCHCAPVCC, 0x3C); // initialize with the I2C addr 0x3D (for the 128x64)
// init done
}
void loop() {
display.clearDisplay();
display.setTextSize(2);
display.setTextColor(WHITE);
display.setCursor(2,1);// set the cursor at x=2, y=1 which is top left corner of display
display.println("Robojax");// the actual text
display.setCursor(2,18);
display.println("YouTube");// set the cursor at x=2, y=18 which is top left under the first text line
display.drawLine(0,16, display.width()-1, 16, WHITE); // drawing from the point x=0, y=16 to x=64-1 y=16
display.display();
display.startscrollright(0x00, 0x0F);
delay(2000);
display.stopscroll();
delay(1000);
display.startscrollleft(0x00, 0x0F);
delay(2000);
display.stopscroll();
delay(1000);
display.startscrolldiagright(0x00, 0x07);
delay(2000);
display.startscrolldiagleft(0x00, 0x07);
delay(2000);
display.stopscroll();
delay(10000);
}/*********************************************************************
Original source: http://playground.arduino.cc/Main/I2cScanner
This program will find the I2C address on the I2C device. Just upload the code into your Arduino
and open the serial monitor and wait. It will display the I2C address as 0x3C or similar.
* Please view other RoboJax codes and videos at http://robojax.com/learn/arduino
* If you are sharing this code, you must keep this copyright note.
*
*********************************************************************/
#include <Wire.h>
void setup()
{
Wire.begin();
Serial.begin(9600);
while (!Serial); // Leonardo: wait for serial monitor
Serial.println("\nI2C Scanner");
}
void loop()
{
byte error, address;
int nDevices;
Serial.println("Scanning...");
nDevices = 0;
for(address = 1; address < 127; address++ )
{
// The i2c_scanner uses the return value of
// the Wire.endTransmission to see if
// a device did acknowledge the address.
Wire.beginTransmission(address);
error = Wire.endTransmission();
if (error == 0)
{
Serial.print("I2C device found at address 0x");
if (address<16)
Serial.print("0");
Serial.print(address,HEX);
Serial.println(" !");
nDevices++;
}
else if (error==4)
{
Serial.print("Unknown error at address 0x");
if (address<16)
Serial.print("0");
Serial.println(address,HEX);
}
}
if (nDevices == 0)
Serial.println("No I2C devices found\n");
else
Serial.println("done\n");
delay(5000); // wait 5 seconds for next scan
}แหล่งข้อมูลและเอกสารอ้างอิง
ไฟล์📁
แผ่นข้อมูล (pdf)
-
SSD1306 display datasheetSSD1306 is a single-chip CMOS OLED/PLED driver with controller for organic / polymer light emitting diode dot-matrix graphic display system. It consists of 128 segments and 64commons. This IC is designed for Common Cathode type OLED panel. The SSD1306 embeds with contrast control, display RAM and oscillator, which reduces the number of external components and power consumption. It has 256-step brightness control. Data/Commands are sent from general MCU through the hardware selectable 6800/8000 series compatible Parallel Interface, I2C interface or Serial Peripheral Interface. It is suitable for many compact portable applications, such as mobile phone sub-display, MP3 player and calculator, etc.
SSD1306_display_datasheet.pdf1.79 MB