Ардуино коды және SSD1306 OLED 128 x 64 дисплейіне арналған бейне
Бұл оқулықта біз Arduino-мен SSD1306 OLED 128 x 64 дисплейін қалай пайдалану керектігін қарастырамыз. SSD1306 - бұл мәтін, графика және әртүрлі пішіндерді оңай көрсетуге мүмкіндік беретін әмбебап дисплей. Осы мақаланың соңында сіз дисплейді орнатып, оның мүмкіндіктерін көрсететін кодты іске қоса аласыз.
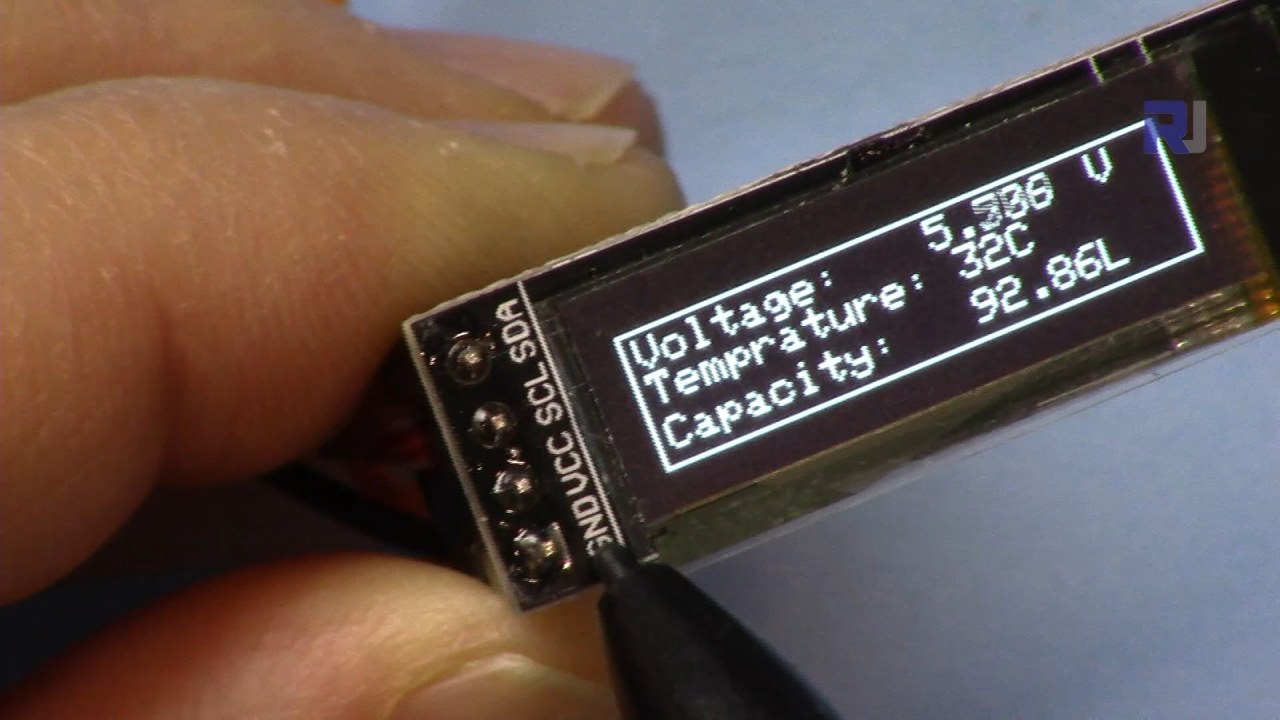
Біз сізге қажетті аппараттық қосылымдар арқылы жетекшілік етеміз және бағдарламада қолданылатын негізгі идентификаторларды түсінуге көмектесетін код үзінділерін ұсынамыз. Көрнекі түсіндіру үшін байланысты бейнені міндетті түрде қараңыз (бейнеде 00:00).
Аппараттық құралдар түсіндірмесі
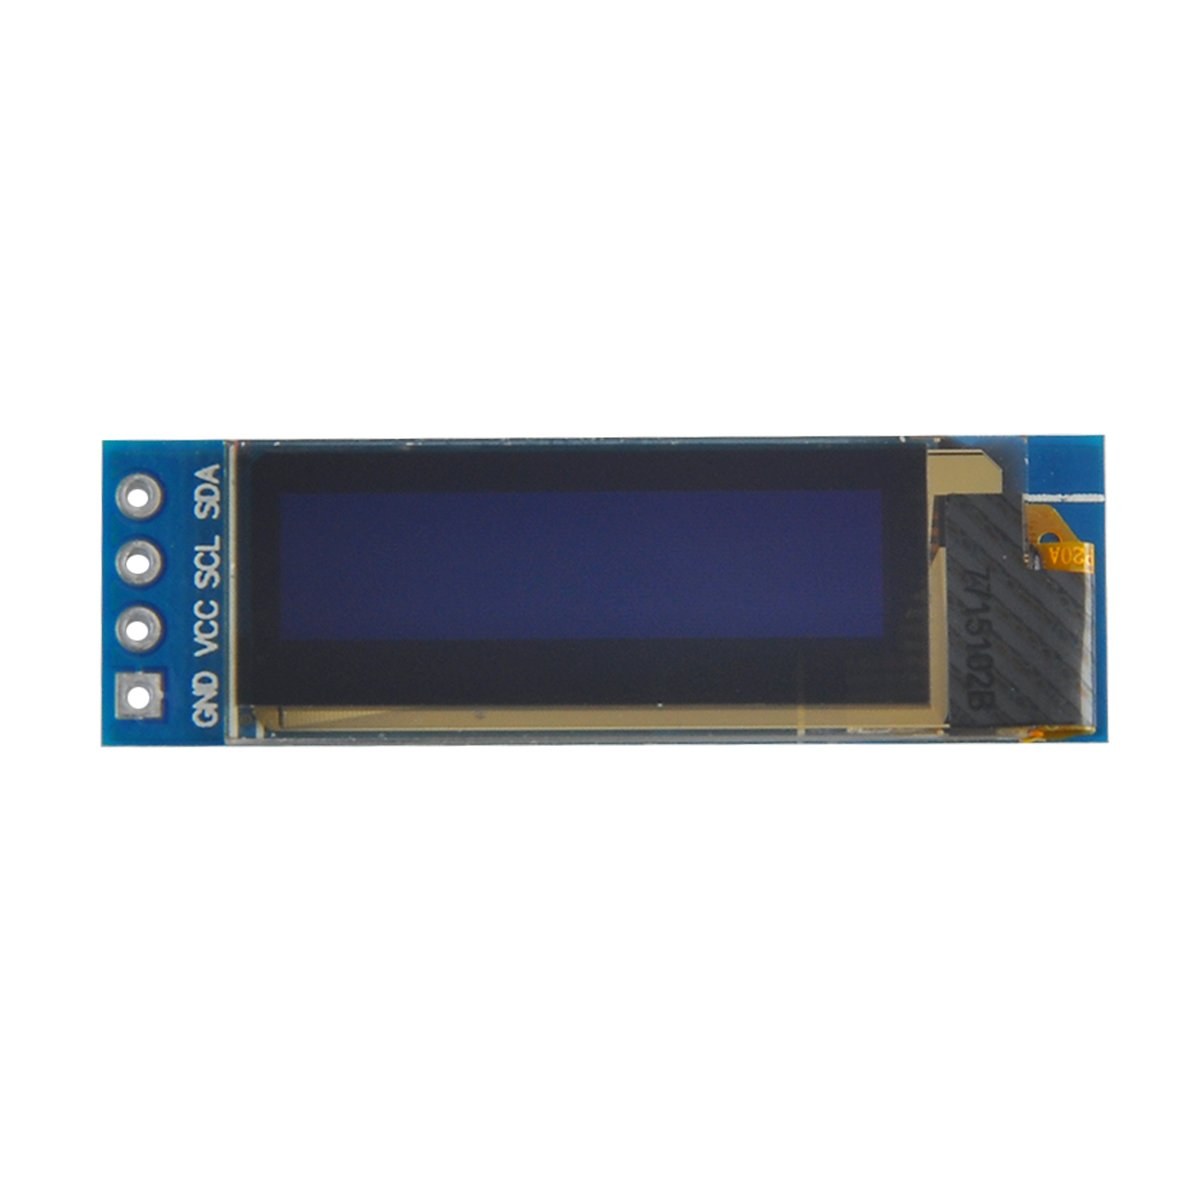
Бұл жобаның негізгі компоненттеріне Arduino тақтасы және SSD1306 OLED дисплей модулі кіреді. SSD1306 дисплейі I2C байланыс протоколын пайдаланады, бұл тек екі деректер желісін қажет ету арқылы сымдарды жеңілдетеді: деректер үшін SDA және сағат сигналы үшін SCL. Дисплей 3.3V пен 5V арасындағы кернеуде жұмыс істейді, бұл оны көптеген Arduino тақталарымен үйлесімді етеді.
Дисплейден басқа, модульді Arduino-ға қосу үшін сізге секіргіш сымдар қажет болады. Қосылымдарға VCC қуатқа, GND жерге, SDA Arduino-ның деректер түйреуішіне және SCL сағат түйреуішіне кіреді. Бұл орнату Arduino мен OLED дисплей арасында оңай байланысқа мүмкіндік береді.
Деректер парағының мәліметтері
| Өндіруші | Adafruit |
|---|---|
| Бөлшек нөмірі | SSD1306 |
| Логика/IO кернеуі | 3.3 В - 5 В |
| Қоректендіру кернеуі | 3.3 В - 5 В |
| Дисплей ажыратымдылығы | 128 x 64 пиксель |
| I2C мекенжайы | 0x3C |
| Интерфейс | I2C |
| Қаптама | Модуль |
- Дұрыс сымдарды қамтамасыз етіңіз: VCC 3.3V немесе 5V, GND жерге, SDA A4, SCL A5 (Arduino Uno үшін).
- Дисплей SDA және SCL желілерінде тарту резисторларын қажет етеді, егер олар қосылмаған болса.
- Кодта I2C мекенжайының дұрыс орнатылғанын тексеріңіз, әдетте бұл дисплей үшін 0x3C.
- Оңай интеграция үшін Adafruit_SSD1306 сияқты қолайлы кітапхананы пайдаланыңыз.
- Қабаттасу артефактілерін болдырмау үшін жаңа графиканы салмас бұрын дисплейді тазалаңыз.
Сымдарды қосу нұсқаулары
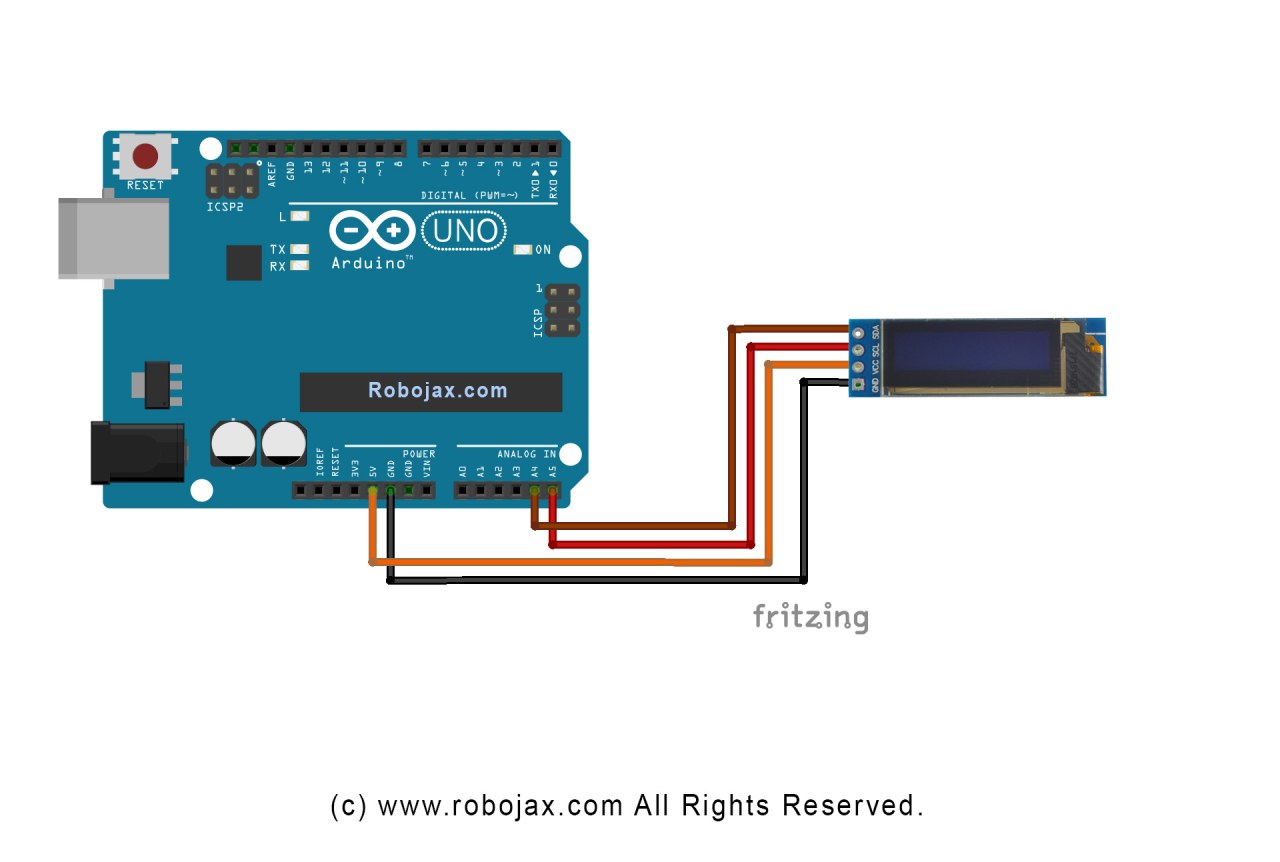
SSD1306 OLED дисплейін Arduino-ға қосу үшін мына қадамдарды орындаңыз:
OLED дисплейінің VCC түйреуішін Arduino-дағы 5V (немесе 3.3V) түйреуішіне қосыңыз. Әрі қарай, дисплейдің GND түйреуішін Arduino-дағы жер түйреуішіне қосыңыз. I2C байланысы үшін дисплейдің SDA түйреуішін Arduino-дағы A4 түйреуішіне және SCL түйреуішін A5 түйреуішіне қосыңыз. Бұл орнату Arduino-ға OLED дисплейімен I2C протоколы арқылы байланысуға мүмкіндік береді.
Барлық қосылымдардың сенімді екеніне көз жеткізіңіз және нақты дисплей моделіңіз үшін дұрыс кернеуді қолданып жатқаныңызды екі рет тексеріңіз. Егер сіз басқа Arduino моделін қолдансаңыз, SDA және SCL түйреуіштері әртүрлі болуы мүмкін (мысалы, Arduino Mega үшін SDA 20-түйреуіште, ал SCL 21-түйреуіште).
Код мысалдары және түсіндірме
Кодта біз дисплейді инициализациялаймыз және I2C мекенжайы мен өлшемдер сияқты параметрлерді орнатамыз. Негізгі идентификаторлардың бірі - display, ол SSD1306 дисплейінің данасын білдіреді. Міне, орнату функциясынан үзінді:
void setup() {
  Serial.begin(9600);
  display.begin(SSD1306_SWITCHCAPVCC, 0x3C);  // I2C мекенжайы 0x3C-мен инициализациялау
}
Бұл үзіндіде display.begin функциясы дисплейді көрсетілген I2C мекенжайымен инициализациялайды. Дұрыс байланысты қамтамасыз ету үшін мекенжайды дисплейіңізбен сәйкестендіру маңызды.
Әрі қарай, цикл функциясында біз жаңа мазмұнды салмас бұрын экранды тазалау үшін display.clearDisplay() әдісін қолданамыз. Мәтін өлшемі мен орнын setTextSize және setCursor әдістері арқылы орната аламыз:
void loop() {
  display.clearDisplay();
  display.setTextSize(2);
  display.setCursor(2,1); // курсорды жоғарғы сол жақ бұрышқа орнату
  display.println("Robojax"); // мәтінді көрсету
}
Мұнда "Robojax" мәтіні экранда (2,1) координаттарында көрсетіледі. Бұл OLED дисплейінде мәтінді дәл орналастыруға мүмкіндік береді.
Соңында, дисплейдегі өзгерістерді көрсету үшін display.display() шақырамыз. Бұл функция барлық буферленген командаларды дисплейге жіберіп, оның мазмұнын жаңартады:
display.display();Бұл цикл функцияңыздағы соңғы жол болуы керек, барлық сурет салу командаларының орындалуын қамтамасыз ету үшін. Егер бұл қадамды ұмытып қалсаңыз, дисплейде ештеңе көрінбейді.
Есіңізде болсын, толық код сілтеме үшін мақаланың астында жүктеледі.
Демонстрация / Не күтуге болады
Кодты Arduino-ға жүктегеннен кейін OLED экранында "Robojax" мәтінін көруіңіз керек. Код сонымен қатар мәтінді айналдыруды және дисплейде сызықтар, пішіндер және басқа графиканы салуды көрсетеді. Дұрыс емес сымдар немесе сәйкес келмейтін I2C мекенжайлары сияқты жалпы қателіктерге назар аударыңыз, олар дисплейдің дұрыс жұмыс істеуіне кедергі келтіруі мүмкін (бейнеде 10:00).
Бейне уақыт белгілері
- 00:00 - SSD1306 OLED дисплейіне кіріспе
- 02:30 - Дисплейді қосу
- 05:00 - Кодты түсіндіру
- 08:00 - Дисплей мүмкіндіктерін демонстрациялау
- 10:00 - Жалпы мәселелер және ақауларды жою
Суреттер

/*
 * Original source: https://github.com/adafruit/Adafruit_SSD1306
 * This is the Arduino code for the SSD1306 OLED 128 x 64 Display.
 * Watch the video for details and demo: http://youtu.be/UmYiHTOz-5k
 * This code has been modified to print specific elements such as text, lines, circles, rectangles, etc.
 * I have added a custom method to make printing text easy.

 If you get the error: Adafruit_GFX.h not found, download the Adafruit-GFX Library from:
 https://github.com/adafruit/Adafruit-GFX-Library

 Purchase this OLED module from Amazon: https://amzn.to/36zFvTb

 *  *
 * Written by Ahmad Shamshiri for Robojax Video channel, www.Robojax.com
 * Date: December 17, 2017, in Ajax, Ontario, Canada
 * Permission granted to share this code, provided that this
 * note is kept with the code.
 * Disclaimer: This code is "AS IS" and for educational purposes only.
 * This code has been downloaded from https://robojax.com
 *
 */

/*********************************************************************
This is an example for our monochrome OLEDs based on SSD1306 drivers.

  Pick one up today in the Adafruit shop!
  ------> http://www.adafruit.com/category/63_98

This example is for a 128x64 size display using I2C to communicate.
3 pins are required to interface (2 I2C and one reset).

Adafruit invests time and resources providing this open source code,
please support Adafruit and open-source hardware by purchasing
products from Adafruit!

Written by Limor Fried/Ladyada for Adafruit Industries.
BSD license, check license.txt for more information.
All text above, and the splash screen must be included in any redistribution.
*********************************************************************/

#include <SPI.h>
#include <Wire.h>
#include <Adafruit_GFX.h>
#include <Adafruit_SSD1306.h>

#define OLED_RESET 4
Adafruit_SSD1306 display(OLED_RESET);

#define NUMFLAKES 10
#define XPOS 0
#define YPOS 1
#define DELTAY 2


#define LOGO16_GLCD_HEIGHT 16 // do not change this. Error in video
#define LOGO16_GLCD_WIDTH  16 // do not change this. Error in video
static const unsigned char PROGMEM logo16_glcd_bmp[] =
{ B00000000, B11000000,
  B00000001, B11000000,
  B00000001, B11000000,
  B00000011, B11100000,
  B11110011, B11100000,
  B11111110, B11111000,
  B01111110, B11111111,
  B00110011, B10011111,
  B00011111, B11111100,
  B00001101, B01110000,
  B00011011, B10100000,
  B00111111, B11100000,
  B00111111, B11110000,
  B01111100, B11110000,
  B01110000, B01110000,
  B00000000, B00110000 };

    // look at line 27 to 30 of Adafruit_SSD1306.h inside the library to select the dimensions
#if (SSD1306_LCDHEIGHT != 64)
#error("Height incorrect, please fix Adafruit_SSD1306.h!");
#endif

void setup()   {
  Serial.begin(9600);

  // by default, we'll generate the high voltage from the 3.3v line internally! (neat!)
  display.begin(SSD1306_SWITCHCAPVCC, 0x3C);  // initialize with the I2C addr 0x3D (for the 128x64)
  // init done

}


void loop() {
 display.clearDisplay();
  robojaxText("Values", 3, 0, 2, false);
  robojaxText("V: 41v", 3, 22, 2, false);
  robojaxText("Temperature: 32C", 4, 45, 1, true);
  display.drawLine(1, 37, 100, 37, WHITE);
  display.drawRect(1, 20, 100,40, WHITE);
  //display.drawCircle(63,31, 31, WHITE);
   //display.startscrollright(0x00, 0x0F);
  display.display();
   delay(20000);
}

/*
 * robojaxText(String text, int x, int y, int size, boolean d)
 * text is the text string to be printed.
 * x is the integer x position of the text.
 * y is the integer y position of the text.
 * size is the text size (1, 2, 3, etc.).
 * d is a boolean value (true or false).  Its purpose is unclear, use true.
 */
void robojaxText(String text, int x, int y,int size, boolean d) {

  display.setTextSize(size);
  display.setTextColor(WHITE);
  display.setCursor(x,y);
  display.println(text);
  if(d){
    display.display();
  }

  delay(100);
}/*
* Original source: https://github.com/adafruit/Adafruit_SSD1306
* This is the Arduino code for the SSD1306 OLED 128 x 64 Display
* watch the video for details and demo http://youtu.be/UmYiHTOz-5k
* This code has been modified to print specific elements such as text, lines, circles, rectangles, etc.
* *
* *
* Written by Ahmad Shamshiri for Robojax Video channel www.Robojax.com
* Date: December 15, 2017, in Ajax, Ontario, Canada
* Permission granted to share this code given that this
* note is kept with the code.
* Disclaimer: this code is "AS IS" and for educational purposes only.
* This code has been downloaded from https://robojax.com
*
*/
/*********************************************************************
This is an example for our Monochrome OLEDs based on SSD1306 drivers
Pick one up today in the Adafruit shop!
------> http://www.adafruit.com/category/63_98
This example is for a 128x64 size display using I2C to communicate.
3 pins are required to interface (2 I2C and one reset).
Adafruit invests time and resources providing this open source code,
please support Adafruit and open-source hardware by purchasing
products from Adafruit!
Written by Limor Fried/Ladyada for Adafruit Industries.
BSD license, check license.txt for more information
All text above, and the splash screen must be included in any redistribution
*********************************************************************/
#include <SPI.h>
#include <Wire.h>
#include <Adafruit_GFX.h>
#include <Adafruit_SSD1306.h>
#define OLED_RESET 4
Adafruit_SSD1306 display(OLED_RESET);
#define NUMFLAKES 10
#define XPOS 0
#define YPOS 1
#define DELTAY 2
#define LOGO16_GLCD_HEIGHT 16 // do not change this. Error in video
#define LOGO16_GLCD_WIDTH 16 // do not change this. Error in video
static const unsigned char PROGMEM logo16_glcd_bmp[] =
{ B00000000, B11000000,
B00000001, B11000000,
B00000001, B11000000,
B00000011, B11100000,
B11110011, B11100000,
B11111110, B11111000,
B01111110, B11111111,
B00110011, B10011111,
B00011111, B11111100,
B00001101, B01110000,
B00011011, B10100000,
B00111111, B11100000,
B00111111, B11110000,
B01111100, B11110000,
B01110000, B01110000,
B00000000, B00110000 };
// look at line 27 to 30 of Adafruit_SSD1306.h inside the library to select the dimensions
#if (SSD1306_LCDHEIGHT != 64)
#error("Height incorrect, please fix Adafruit_SSD1306.h!");
#endif
void setup() {
Serial.begin(9600);
// by default, we'll generate the high voltage from the 3.3v line internally! (neat!)
display.begin(SSD1306_SWITCHCAPVCC, 0x3C); // initialize with the I2C addr 0x3D (for the 128x64)
// init done
}
void loop() {
display.clearDisplay();
display.setTextSize(2);
display.setTextColor(WHITE);
display.setCursor(2,1);// set the cursor at x=2, y=1 which is top left corner of display
display.println("Robojax");// the actual text
display.setCursor(2,18);
display.println("YouTube");// set the cursor at x=2, y=18 which is top left under the first text line
display.drawLine(0,16, display.width()-1, 16, WHITE); // drawing from the point x=0, y=16 to x=64-1 y=16
display.display();
display.startscrollright(0x00, 0x0F);
delay(2000);
display.stopscroll();
delay(1000);
display.startscrollleft(0x00, 0x0F);
delay(2000);
display.stopscroll();
delay(1000);
display.startscrolldiagright(0x00, 0x07);
delay(2000);
display.startscrolldiagleft(0x00, 0x07);
delay(2000);
display.stopscroll();
delay(10000);
}/*********************************************************************
Original source: http://playground.arduino.cc/Main/I2cScanner
This program will find the I2C address on the I2C device. Just upload the code into your Arduino
and open the serial monitor and wait. It will display the I2C address as 0x3C or similar.
* Please view other RoboJax codes and videos at http://robojax.com/learn/arduino
* If you are sharing this code, you must keep this copyright note.
*
*********************************************************************/
#include <Wire.h>
void setup()
{
Wire.begin();
Serial.begin(9600);
while (!Serial); // Leonardo: wait for serial monitor
Serial.println("\nI2C Scanner");
}
void loop()
{
byte error, address;
int nDevices;
Serial.println("Scanning...");
nDevices = 0;
for(address = 1; address < 127; address++ )
{
// The i2c_scanner uses the return value of
// the Wire.endTransmission to see if
// a device did acknowledge the address.
Wire.beginTransmission(address);
error = Wire.endTransmission();
if (error == 0)
{
Serial.print("I2C device found at address 0x");
if (address<16)
Serial.print("0");
Serial.print(address,HEX);
Serial.println(" !");
nDevices++;
}
else if (error==4)
{
Serial.print("Unknown error at address 0x");
if (address<16)
Serial.print("0");
Serial.println(address,HEX);
}
}
if (nDevices == 0)
Serial.println("No I2C devices found\n");
else
Serial.println("done\n");
delay(5000); // wait 5 seconds for next scan
}Ресурстар мен сілтемелер
Файлдар📁
Техникалық сипаттама (pdf)
-
SSD1306 дисплейінің деректер парағыSSD1306 - органикалық / полимер жарық диодты нүктелік матрицалық графикалық дисплей жүйесіне арналған контроллері бар бір чипті CMOS OLED/PLED драйвері. Ол 128 сегменттен және 64 жалпыдан тұрады. Бұл ИК жалпы катодты OLED панеліне арналған. SSD1306 контрастты басқаруды, дисплей жадын және осцилляторды қамтиды, бұл сыртқы компоненттердің санын және қуат тұтынуды азайтады. Ол 256 қадамдық жарықтықты басқаруға ие. Деректер/пәрмендер жалпы MCU-дан аппараттық таңдалатын 6800/8000 сериялы үйлесімді параллель интерфейсі, I2C интерфейсі немесе сериялық перифериялық интерфейс арқылы жіберіледі. Ол мобильді телефонның қосымша дисплейі, MP3 плеер және калькулятор сияқты көптеген ықшам портативті қолданбаларға жарамды.
SSD1306_display_datasheet.pdf1.79 MB