SSD1306 OLED 128 x 64 ディスプレイ用のArduinoコードと動画
このチュートリアルでは、ArduinoでSSD1306 OLED 128 x 64ディスプレイを使う方法を解説します。SSD1306は多用途のディスプレイで、テキストやグラフィック、さまざまな図形を簡単に表示できます。この記事の終わりには、ディスプレイをセットアップして、その機能を実演するコードを実行できるようになります。

必要なハードウェア接続についてご案内し、プログラムで使用される主要な識別子を理解するのに役立つコードスニペットを提供します。より視覚的な説明については、関連ビデオ(00:00)を必ずご覧ください。
ハードウェアの解説
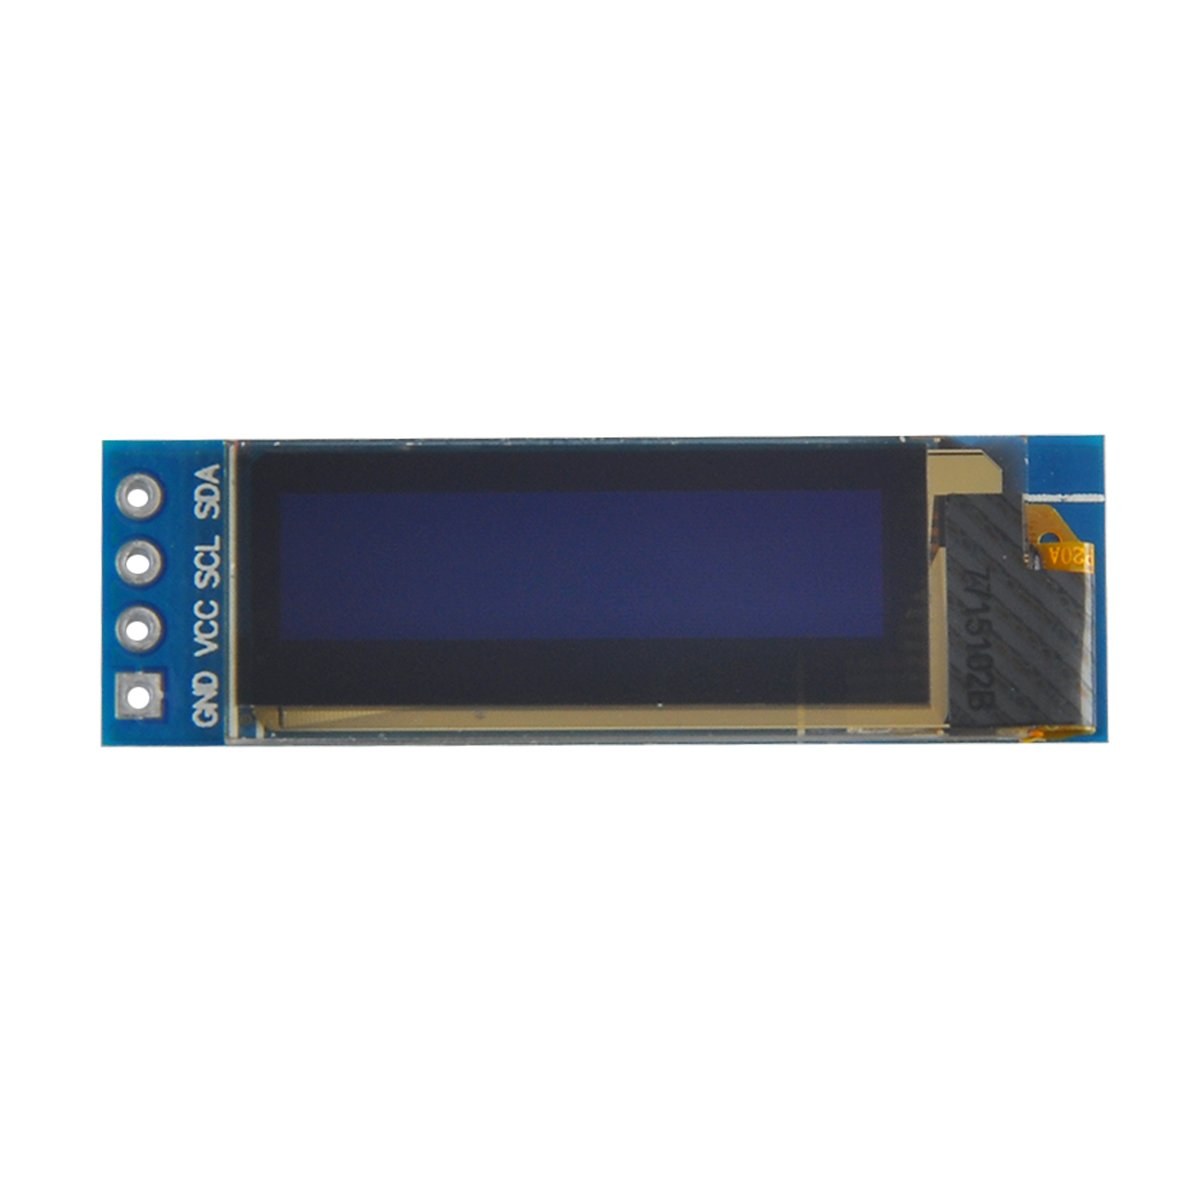
このプロジェクトの主な構成要素はArduinoボードとSSD1306 OLEDディスプレイモジュールです。SSD1306ディスプレイはI2C通信プロトコルを利用しており、データ用のSDAとクロック信号用のSCLという2本のラインだけで配線が簡素化されます。ディスプレイは3.3V〜5Vの電圧で動作するため、ほとんどのArduinoボードと互換性があります。
ディスプレイに加えて、モジュールをArduinoに接続するためのジャンパーワイヤーが必要です。接続はVCCを電源へ、GNDをグランドへ、SDAをArduinoのデータピンへ、SCLをクロックピンへつなぎます。この構成により、ArduinoとOLEDディスプレイ間で簡単に通信できます。
データシートの詳細
| 製造元 | エイダフルーツ |
|---|---|
| 部品番号 | SSD1306 |
| ロジック/入出力電圧 | 3.3 V〜5 V |
| 電源電圧 | 3.3V〜5V |
| 表示解像度 | 128 x 64 ピクセル |
| I2Cアドレス | 0x3C |
| インターフェース | I2C |
| パッケージ | モジュール |
- 配線を正しく接続してください:VCC を 3.3V または 5V に、GND をグラウンドに、SDA を A4 に、SCL を A5 に(Arduino Uno の場合)。
- ディスプレイは、SDAおよびSCLラインにプルアップ抵抗が必要です(既に含まれていない場合)。
- コード内でI2Cアドレスが正しく設定されていることを確認してください。通常、このディスプレイは0x3Cです。
- 簡単に統合できるように、Adafruit_SSD1306のような適切なライブラリを使用してください。
- 重なりによるアーティファクトを避けるため、新しいグラフィックを描画する前にディスプレイをクリアしてください。
配線手順

SSD1306 OLEDディスプレイをArduinoに配線するには、次の手順に従ってください:
OLEDディスプレイのVCCピンをArduinoの5V(または3.3V)ピンに接続します。次に、ディスプレイのGNDピンをArduinoのグランドピンに接続します。I2C通信のために、ディスプレイのSDAピンをArduinoのA4ピンに、SCLピンをA5ピンに接続します。この接続により、ArduinoはI2Cプロトコルを使ってOLEDディスプレイと通信できるようになります。
すべての接続が確実であることを確認し、特定のディスプレイモデルに対して正しい電圧を使用しているかを再度確認してください。別のArduinoモデルを使用している場合、SDAおよびSCLのピン位置は異なることがあります(例:Arduino MegaではSDAがピン20、SCLがピン21です)。
コード例と解説
コード内では、ディスプレイを初期化し、I2Cアドレスや表示サイズなどのパラメータを設定します。重要な識別子の一つはdisplay, これはSSD1306ディスプレイのインスタンスを表します。以下はsetup関数からのスニペットです:
void setup() {
  Serial.begin(9600);
  display.begin(SSD1306_SWITCHCAPVCC, 0x3C);  // initialize with the I2C addr 0x3C
}このスニペットでは、display.beginこの関数は指定されたI2Cアドレスでディスプレイを初期化します。適切な通信を確保するために、アドレスをディスプレイと一致させることが不可欠です。
次に、loop 関数では、それを使用しますdisplay.clearDisplay()新しいコンテンツを描画する前に画面をクリアするためのメソッドです。テキストのサイズと位置は、次の方法を使って設定できますsetTextSizeそしてsetCursor方法:
void loop() {
  display.clearDisplay();
  display.setTextSize(2);
  display.setCursor(2,1); // set cursor at top left corner
  display.println("Robojax"); // display text
}
ここでは、テキスト「Robojax」が画面上の座標(2,1)に表示されています。これにより、OLEDディスプレイ上でテキストを正確に配置できます。
最後に、変更をディスプレイに反映するために呼び出します。display.display(). この関数は、バッファ内のすべてのコマンドをディスプレイに送信して内容を更新します:
display.display();これは、すべての描画コマンドが実行されるように、ループ関数の最後の行にする必要があります。これを忘れると、ディスプレイには何も表示されません。
参考のため、完全なコードは記事の下にあります。
デモンストレーション/期待できること
コードをArduinoにアップロードした後、OLED画面に「Robojax」という文字が表示されるはずです。コードはまた、スクロールするテキストや線、図形、その他のグラフィックをディスプレイに描画する方法も示しています。配線の誤りやI2Cアドレスの不一致など、ディスプレイが正しく動作しない一般的な落とし穴に注意してください(ビデオでは10:00)。
動画のタイムスタンプ
- 00:00- SSD1306 OLEDディスプレイ入門
- 午前02:30- ディスプレイの配線
- 05:00- コードウォークスルー
- 午前08:00- ディスプレイ機能のデモ
- 10:00- よくある問題とトラブルシューティング
画像

/*
 * Original source: https://github.com/adafruit/Adafruit_SSD1306
 * This is the Arduino code for the SSD1306 OLED 128 x 64 Display.
 * Watch the video for details and demo: http://youtu.be/UmYiHTOz-5k
 * This code has been modified to print specific elements such as text, lines, circles, rectangles, etc.
 * I have added a custom method to make printing text easy.

 If you get the error: Adafruit_GFX.h not found, download the Adafruit-GFX Library from:
 https://github.com/adafruit/Adafruit-GFX-Library

 Purchase this OLED module from Amazon: https://amzn.to/36zFvTb

 *  *
 * Written by Ahmad Shamshiri for Robojax Video channel, www.Robojax.com
 * Date: December 17, 2017, in Ajax, Ontario, Canada
 * Permission granted to share this code, provided that this
 * note is kept with the code.
 * Disclaimer: This code is "AS IS" and for educational purposes only.
 * This code has been downloaded from https://robojax.com
 *
 */

/*********************************************************************
This is an example for our monochrome OLEDs based on SSD1306 drivers.

  Pick one up today in the Adafruit shop!
  ------> http://www.adafruit.com/category/63_98

This example is for a 128x64 size display using I2C to communicate.
3 pins are required to interface (2 I2C and one reset).

Adafruit invests time and resources providing this open source code,
please support Adafruit and open-source hardware by purchasing
products from Adafruit!

Written by Limor Fried/Ladyada for Adafruit Industries.
BSD license, check license.txt for more information.
All text above, and the splash screen must be included in any redistribution.
*********************************************************************/

#include <SPI.h>
#include <Wire.h>
#include <Adafruit_GFX.h>
#include <Adafruit_SSD1306.h>

#define OLED_RESET 4
Adafruit_SSD1306 display(OLED_RESET);

#define NUMFLAKES 10
#define XPOS 0
#define YPOS 1
#define DELTAY 2


#define LOGO16_GLCD_HEIGHT 16 // do not change this. Error in video
#define LOGO16_GLCD_WIDTH  16 // do not change this. Error in video
static const unsigned char PROGMEM logo16_glcd_bmp[] =
{ B00000000, B11000000,
  B00000001, B11000000,
  B00000001, B11000000,
  B00000011, B11100000,
  B11110011, B11100000,
  B11111110, B11111000,
  B01111110, B11111111,
  B00110011, B10011111,
  B00011111, B11111100,
  B00001101, B01110000,
  B00011011, B10100000,
  B00111111, B11100000,
  B00111111, B11110000,
  B01111100, B11110000,
  B01110000, B01110000,
  B00000000, B00110000 };

    // look at line 27 to 30 of Adafruit_SSD1306.h inside the library to select the dimensions
#if (SSD1306_LCDHEIGHT != 64)
#error("Height incorrect, please fix Adafruit_SSD1306.h!");
#endif

void setup()   {
  Serial.begin(9600);

  // by default, we'll generate the high voltage from the 3.3v line internally! (neat!)
  display.begin(SSD1306_SWITCHCAPVCC, 0x3C);  // initialize with the I2C addr 0x3D (for the 128x64)
  // init done

}


void loop() {
 display.clearDisplay();
  robojaxText("Values", 3, 0, 2, false);
  robojaxText("V: 41v", 3, 22, 2, false);
  robojaxText("Temperature: 32C", 4, 45, 1, true);
  display.drawLine(1, 37, 100, 37, WHITE);
  display.drawRect(1, 20, 100,40, WHITE);
  //display.drawCircle(63,31, 31, WHITE);
   //display.startscrollright(0x00, 0x0F);
  display.display();
   delay(20000);
}

/*
 * robojaxText(String text, int x, int y, int size, boolean d)
 * text is the text string to be printed.
 * x is the integer x position of the text.
 * y is the integer y position of the text.
 * size is the text size (1, 2, 3, etc.).
 * d is a boolean value (true or false).  Its purpose is unclear, use true.
 */
void robojaxText(String text, int x, int y,int size, boolean d) {

  display.setTextSize(size);
  display.setTextColor(WHITE);
  display.setCursor(x,y);
  display.println(text);
  if(d){
    display.display();
  }

  delay(100);
}/*
* Original source: https://github.com/adafruit/Adafruit_SSD1306
* This is the Arduino code for the SSD1306 OLED 128 x 64 Display
* watch the video for details and demo http://youtu.be/UmYiHTOz-5k
* This code has been modified to print specific elements such as text, lines, circles, rectangles, etc.
* *
* *
* Written by Ahmad Shamshiri for Robojax Video channel www.Robojax.com
* Date: December 15, 2017, in Ajax, Ontario, Canada
* Permission granted to share this code given that this
* note is kept with the code.
* Disclaimer: this code is "AS IS" and for educational purposes only.
* This code has been downloaded from https://robojax.com
*
*/
/*********************************************************************
This is an example for our Monochrome OLEDs based on SSD1306 drivers
Pick one up today in the Adafruit shop!
------> http://www.adafruit.com/category/63_98
This example is for a 128x64 size display using I2C to communicate.
3 pins are required to interface (2 I2C and one reset).
Adafruit invests time and resources providing this open source code,
please support Adafruit and open-source hardware by purchasing
products from Adafruit!
Written by Limor Fried/Ladyada for Adafruit Industries.
BSD license, check license.txt for more information
All text above, and the splash screen must be included in any redistribution
*********************************************************************/
#include <SPI.h>
#include <Wire.h>
#include <Adafruit_GFX.h>
#include <Adafruit_SSD1306.h>
#define OLED_RESET 4
Adafruit_SSD1306 display(OLED_RESET);
#define NUMFLAKES 10
#define XPOS 0
#define YPOS 1
#define DELTAY 2
#define LOGO16_GLCD_HEIGHT 16 // do not change this. Error in video
#define LOGO16_GLCD_WIDTH 16 // do not change this. Error in video
static const unsigned char PROGMEM logo16_glcd_bmp[] =
{ B00000000, B11000000,
B00000001, B11000000,
B00000001, B11000000,
B00000011, B11100000,
B11110011, B11100000,
B11111110, B11111000,
B01111110, B11111111,
B00110011, B10011111,
B00011111, B11111100,
B00001101, B01110000,
B00011011, B10100000,
B00111111, B11100000,
B00111111, B11110000,
B01111100, B11110000,
B01110000, B01110000,
B00000000, B00110000 };
// look at line 27 to 30 of Adafruit_SSD1306.h inside the library to select the dimensions
#if (SSD1306_LCDHEIGHT != 64)
#error("Height incorrect, please fix Adafruit_SSD1306.h!");
#endif
void setup() {
Serial.begin(9600);
// by default, we'll generate the high voltage from the 3.3v line internally! (neat!)
display.begin(SSD1306_SWITCHCAPVCC, 0x3C); // initialize with the I2C addr 0x3D (for the 128x64)
// init done
}
void loop() {
display.clearDisplay();
display.setTextSize(2);
display.setTextColor(WHITE);
display.setCursor(2,1);// set the cursor at x=2, y=1 which is top left corner of display
display.println("Robojax");// the actual text
display.setCursor(2,18);
display.println("YouTube");// set the cursor at x=2, y=18 which is top left under the first text line
display.drawLine(0,16, display.width()-1, 16, WHITE); // drawing from the point x=0, y=16 to x=64-1 y=16
display.display();
display.startscrollright(0x00, 0x0F);
delay(2000);
display.stopscroll();
delay(1000);
display.startscrollleft(0x00, 0x0F);
delay(2000);
display.stopscroll();
delay(1000);
display.startscrolldiagright(0x00, 0x07);
delay(2000);
display.startscrolldiagleft(0x00, 0x07);
delay(2000);
display.stopscroll();
delay(10000);
}/*********************************************************************
Original source: http://playground.arduino.cc/Main/I2cScanner
This program will find the I2C address on the I2C device. Just upload the code into your Arduino
and open the serial monitor and wait. It will display the I2C address as 0x3C or similar.
* Please view other RoboJax codes and videos at http://robojax.com/learn/arduino
* If you are sharing this code, you must keep this copyright note.
*
*********************************************************************/
#include <Wire.h>
void setup()
{
Wire.begin();
Serial.begin(9600);
while (!Serial); // Leonardo: wait for serial monitor
Serial.println("\nI2C Scanner");
}
void loop()
{
byte error, address;
int nDevices;
Serial.println("Scanning...");
nDevices = 0;
for(address = 1; address < 127; address++ )
{
// The i2c_scanner uses the return value of
// the Wire.endTransmission to see if
// a device did acknowledge the address.
Wire.beginTransmission(address);
error = Wire.endTransmission();
if (error == 0)
{
Serial.print("I2C device found at address 0x");
if (address<16)
Serial.print("0");
Serial.print(address,HEX);
Serial.println(" !");
nDevices++;
}
else if (error==4)
{
Serial.print("Unknown error at address 0x");
if (address<16)
Serial.print("0");
Serial.println(address,HEX);
}
}
if (nDevices == 0)
Serial.println("No I2C devices found\n");
else
Serial.println("done\n");
delay(5000); // wait 5 seconds for next scan
}リソースと参考文献
ファイル📁
ファイルは利用できません。