كود Arduino وفيديو لشاشة OLED SSD1306 128 x 64
في هذا الدرس سنستعرض كيفية استخدام شاشة OLED من نوع SSD1306 بحجم 128 × 64 مع لوحة أردوينو. شاشة SSD1306 هي شاشة متعددة الاستخدامات تتيح لك عرض النصوص والرسومات والأشكال المختلفة بسهولة. بنهاية هذا المقال ستكون قادراً على إعداد الشاشة وتشغيل الكود الذي يوضح إمكانياتها.
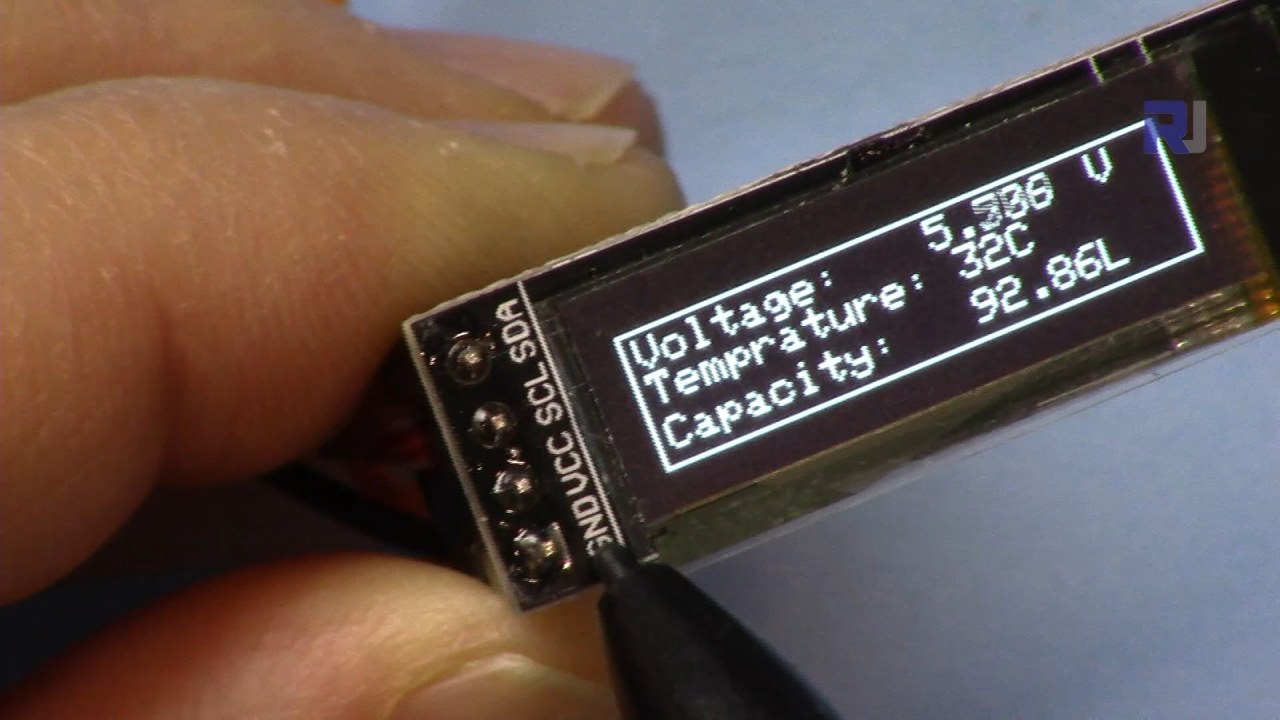
سنرشدك خلال توصيلات الأجهزة اللازمة ونقدّم مقتطفات من الشيفرة لمساعدتك على فهم المعرّفات الأساسية المستخدمة في البرنامج. لمزيد من الشرح البصري، تأكد من مشاهدة الفيديو المرتبط (في الفيديو عند 00:00).
شرح الأجهزة
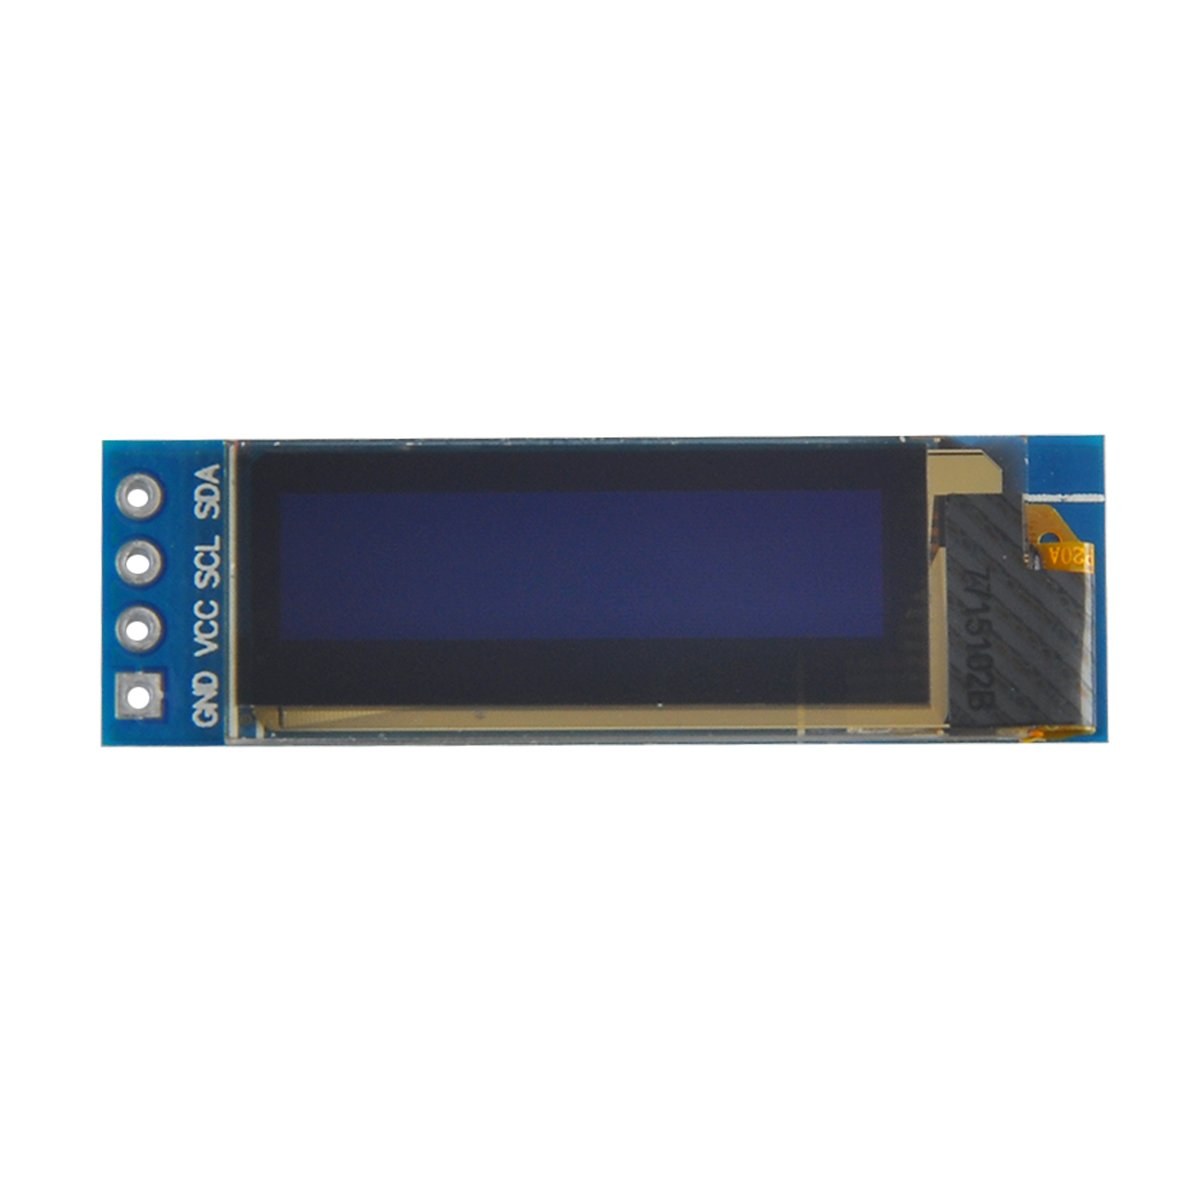
المكونات الرئيسية لهذا المشروع تشمل لوحة أردوينو ووحدة عرض OLED من طراز SSD1306. تستخدم شاشة SSD1306 بروتوكول الاتصال I2C، الذي يبسط التوصيل بطلبه خطين فقط للبيانات: SDA للبيانات وSCL لإشارة الساعة. تعمل الشاشة عند جهود بين 3.3 فولت و5 فولت، مما يجعلها متوافقة مع معظم لوحات أردوينو.
بالإضافة إلى الشاشة، ستحتاج إلى أسلاك توصيل لتوصيل الوحدة بلوحة Arduino الخاصة بك. تشمل الوصلات VCC للطاقة، GND للأرض، SDA إلى دبوس البيانات في لوحة Arduino، وSCL إلى دبوس الساعة. يتيح هذا الإعداد تواصلاً سهلاً بين لوحة Arduino وشاشة OLED.
تفاصيل ورقة البيانات
| المصنّع | أدافروت |
|---|---|
| رقم القطعة | SSD1306 |
| جهد المنطق/الإدخال والإخراج | 3.3 فولت - 5 فولت |
| جهد التغذية | 3.3 فولت - 5 فولت |
| دقة العرض | 128 × 64 بكسل |
| عنوان I2C | 0x3C |
| واجهة | I2C |
| حزمة | وحدة |
- تأكد من توصيل الأسلاك بشكل صحيح: VCC إلى 3.3V أو 5V، GND إلى الأرضي، SDA إلى A4، SCL إلى A5 (لـ Arduino Uno).
- تتطلب الشاشة وجود مقاومات سحب لأعلى على خطوط SDA وSCL إذا لم تكن مُضمّنة بالفعل.
- تحقق من ضبط عنوان I2C بشكل صحيح في الشيفرة، عادةً 0x3C لهذه الشاشة.
- استخدم مكتبة مناسبة مثل Adafruit_SSD1306 للتكامل بسهولة.
- امسح الشاشة قبل رسم رسومات جديدة لتجنب آثار التراكب.
تعليمات التوصيل الكهربائي
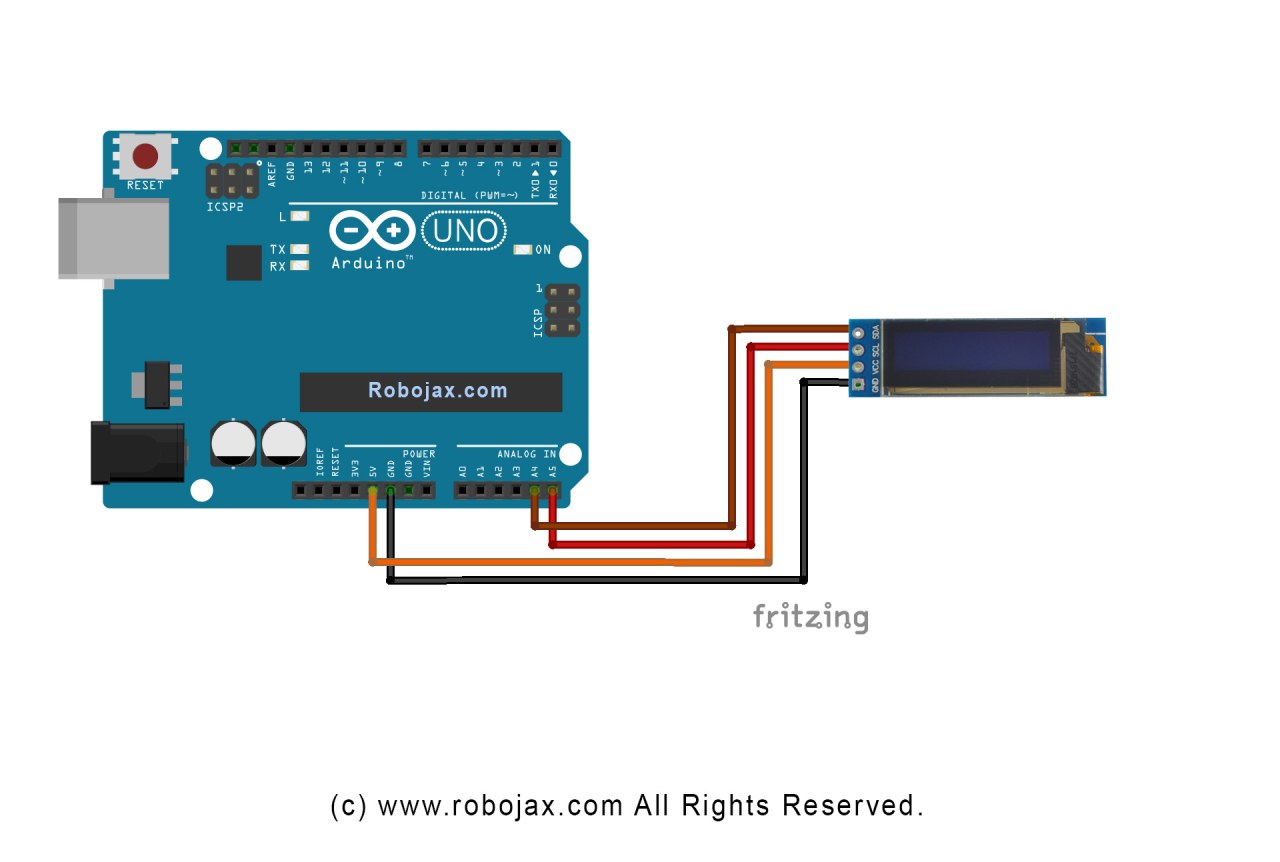
لتوصيل شاشة OLED طراز SSD1306 بلوحة أردوينو الخاصة بك، اتبع الخطوات التالية:
قم بتوصيل دبوس VCC في شاشة OLED إلى دبوس 5V (أو 3.3V) في الأردوينو. بعد ذلك، قم بتوصيل دبوس GND الخاص بالشاشة إلى دبوس الأرضي في الأردوينو. لاتصال I2C، قم بتوصيل دبوس SDA الخاص بالشاشة إلى دبوس A4 في الأردوينو ودبوس SCL إلى دبوس A5. ستمكن هذه الإعدادات الأردوينو من التواصل مع شاشة OLED باستخدام بروتوكول I2C.
تأكد من أن جميع الوصلات مُحكمة، وافحص مرتين أنك تستخدم الجهد الكهربائي الصحيح لطراز الشاشة الخاص بك. إذا كنت تستخدم طراز Arduino مختلفًا، فقد تختلف دبابيس SDA وSCL (على سبيل المثال، في Arduino Mega يكون SDA على الدبوس 20 وSCL على الدبوس 21).
أمثلة على الكود وشرح تفصيلي
في الشيفرة، نهيئ شاشة العرض ونضبط المعلمات مثل عنوان I2C والأبعاد. أحد المعرّفات الرئيسية هوdisplay, الذي يمثل مثيل شاشة SSD1306. إليك مقطع من دالة الإعداد:
void setup() {
  Serial.begin(9600);
  display.begin(SSD1306_SWITCHCAPVCC, 0x3C);  // initialize with the I2C addr 0x3C
}
في هذا المقتطف، الـdisplay.beginتقوم الدالة بتهيئة الشاشة بعنوان I2C المحدد. من الضروري أن يتطابق العنوان مع شاشتك لضمان التواصل الصحيح.
بعد ذلك، في دالة الحلقة، نستخدم الـdisplay.clearDisplay()طريقة لمسح الشاشة قبل رسم محتوى جديد. يمكننا ضبط حجم النص وموقعه باستخدامsetTextSizeوsetCursorطرق:
void loop() {
  display.clearDisplay();
  display.setTextSize(2);
  display.setCursor(2,1); // set cursor at top left corner
  display.println("Robojax"); // display text
}
هنا يُعرض النص «Robojax» عند الإحداثيات (2,1) على الشاشة. هذا يتيح وضع النص بدقة على شاشة OLED.
أخيرًا، لعرض التغييرات على الشاشة، نستدعيdisplay.display(). تُرسل هذه الدالة جميع الأوامر المخزنة مؤقتًا إلى الشاشة لتحديث محتواها:
display.display();يجب أن يكون هذا آخر سطر في دالة loop الخاصة بك لضمان تنفيذ جميع أوامر الرسم. إذا نسيت هذه الخطوة، فلن يظهر أي شيء على شاشة العرض.
تذكّر، يتم تحميل الكود الكامل أسفل المقال للرجوع إليه.
عرض توضيحي / ما يمكن توقعه
بعد رفع الكود إلى أردوينو الخاص بك، ينبغي أن ترى النص "Robojax" معروضًا على شاشة OLED. كما يوضح الكود أيضًا تمرير النص ورسم خطوط وأشكال ورسومات أخرى على الشاشة. انتبه لأي أخطاء شائعة، مثل التوصيل الخاطئ أو عناوين I2C غير المطابقة، والتي قد تمنع الشاشة من العمل بشكل صحيح (في الفيديو عند 10:00).
طوابع زمنية للفيديو
- 00:00- مقدمة إلى شاشة OLED SSD1306
- 02:30- توصيل أسلاك الشاشة
- 05:00- استعراض الكود
- 08:00- عرض ميزات الشاشة
- 10:00- المشكلات الشائعة واستكشاف الأخطاء وإصلاحها
الصور

/*
 * Original source: https://github.com/adafruit/Adafruit_SSD1306
 * This is the Arduino code for the SSD1306 OLED 128 x 64 Display.
 * Watch the video for details and demo: http://youtu.be/UmYiHTOz-5k
 * This code has been modified to print specific elements such as text, lines, circles, rectangles, etc.
 * I have added a custom method to make printing text easy.

 If you get the error: Adafruit_GFX.h not found, download the Adafruit-GFX Library from:
 https://github.com/adafruit/Adafruit-GFX-Library

 Purchase this OLED module from Amazon: https://amzn.to/36zFvTb

 *  *
 * Written by Ahmad Shamshiri for Robojax Video channel, www.Robojax.com
 * Date: December 17, 2017, in Ajax, Ontario, Canada
 * Permission granted to share this code, provided that this
 * note is kept with the code.
 * Disclaimer: This code is "AS IS" and for educational purposes only.
 * This code has been downloaded from https://robojax.com
 *
 */

/*********************************************************************
This is an example for our monochrome OLEDs based on SSD1306 drivers.

  Pick one up today in the Adafruit shop!
  ------> http://www.adafruit.com/category/63_98

This example is for a 128x64 size display using I2C to communicate.
3 pins are required to interface (2 I2C and one reset).

Adafruit invests time and resources providing this open source code,
please support Adafruit and open-source hardware by purchasing
products from Adafruit!

Written by Limor Fried/Ladyada for Adafruit Industries.
BSD license, check license.txt for more information.
All text above, and the splash screen must be included in any redistribution.
*********************************************************************/

#include <SPI.h>
#include <Wire.h>
#include <Adafruit_GFX.h>
#include <Adafruit_SSD1306.h>

#define OLED_RESET 4
Adafruit_SSD1306 display(OLED_RESET);

#define NUMFLAKES 10
#define XPOS 0
#define YPOS 1
#define DELTAY 2


#define LOGO16_GLCD_HEIGHT 16 // do not change this. Error in video
#define LOGO16_GLCD_WIDTH  16 // do not change this. Error in video
static const unsigned char PROGMEM logo16_glcd_bmp[] =
{ B00000000, B11000000,
  B00000001, B11000000,
  B00000001, B11000000,
  B00000011, B11100000,
  B11110011, B11100000,
  B11111110, B11111000,
  B01111110, B11111111,
  B00110011, B10011111,
  B00011111, B11111100,
  B00001101, B01110000,
  B00011011, B10100000,
  B00111111, B11100000,
  B00111111, B11110000,
  B01111100, B11110000,
  B01110000, B01110000,
  B00000000, B00110000 };

    // look at line 27 to 30 of Adafruit_SSD1306.h inside the library to select the dimensions
#if (SSD1306_LCDHEIGHT != 64)
#error("Height incorrect, please fix Adafruit_SSD1306.h!");
#endif

void setup()   {
  Serial.begin(9600);

  // by default, we'll generate the high voltage from the 3.3v line internally! (neat!)
  display.begin(SSD1306_SWITCHCAPVCC, 0x3C);  // initialize with the I2C addr 0x3D (for the 128x64)
  // init done

}


void loop() {
 display.clearDisplay();
  robojaxText("Values", 3, 0, 2, false);
  robojaxText("V: 41v", 3, 22, 2, false);
  robojaxText("Temperature: 32C", 4, 45, 1, true);
  display.drawLine(1, 37, 100, 37, WHITE);
  display.drawRect(1, 20, 100,40, WHITE);
  //display.drawCircle(63,31, 31, WHITE);
   //display.startscrollright(0x00, 0x0F);
  display.display();
   delay(20000);
}

/*
 * robojaxText(String text, int x, int y, int size, boolean d)
 * text is the text string to be printed.
 * x is the integer x position of the text.
 * y is the integer y position of the text.
 * size is the text size (1, 2, 3, etc.).
 * d is a boolean value (true or false).  Its purpose is unclear, use true.
 */
void robojaxText(String text, int x, int y,int size, boolean d) {

  display.setTextSize(size);
  display.setTextColor(WHITE);
  display.setCursor(x,y);
  display.println(text);
  if(d){
    display.display();
  }

  delay(100);
}/*
* Original source: https://github.com/adafruit/Adafruit_SSD1306
* This is the Arduino code for the SSD1306 OLED 128 x 64 Display
* watch the video for details and demo http://youtu.be/UmYiHTOz-5k
* This code has been modified to print specific elements such as text, lines, circles, rectangles, etc.
* *
* *
* Written by Ahmad Shamshiri for Robojax Video channel www.Robojax.com
* Date: December 15, 2017, in Ajax, Ontario, Canada
* Permission granted to share this code given that this
* note is kept with the code.
* Disclaimer: this code is "AS IS" and for educational purposes only.
* This code has been downloaded from https://robojax.com
*
*/
/*********************************************************************
This is an example for our Monochrome OLEDs based on SSD1306 drivers
Pick one up today in the Adafruit shop!
------> http://www.adafruit.com/category/63_98
This example is for a 128x64 size display using I2C to communicate.
3 pins are required to interface (2 I2C and one reset).
Adafruit invests time and resources providing this open source code,
please support Adafruit and open-source hardware by purchasing
products from Adafruit!
Written by Limor Fried/Ladyada for Adafruit Industries.
BSD license, check license.txt for more information
All text above, and the splash screen must be included in any redistribution
*********************************************************************/
#include <SPI.h>
#include <Wire.h>
#include <Adafruit_GFX.h>
#include <Adafruit_SSD1306.h>
#define OLED_RESET 4
Adafruit_SSD1306 display(OLED_RESET);
#define NUMFLAKES 10
#define XPOS 0
#define YPOS 1
#define DELTAY 2
#define LOGO16_GLCD_HEIGHT 16 // do not change this. Error in video
#define LOGO16_GLCD_WIDTH 16 // do not change this. Error in video
static const unsigned char PROGMEM logo16_glcd_bmp[] =
{ B00000000, B11000000,
B00000001, B11000000,
B00000001, B11000000,
B00000011, B11100000,
B11110011, B11100000,
B11111110, B11111000,
B01111110, B11111111,
B00110011, B10011111,
B00011111, B11111100,
B00001101, B01110000,
B00011011, B10100000,
B00111111, B11100000,
B00111111, B11110000,
B01111100, B11110000,
B01110000, B01110000,
B00000000, B00110000 };
// look at line 27 to 30 of Adafruit_SSD1306.h inside the library to select the dimensions
#if (SSD1306_LCDHEIGHT != 64)
#error("Height incorrect, please fix Adafruit_SSD1306.h!");
#endif
void setup() {
Serial.begin(9600);
// by default, we'll generate the high voltage from the 3.3v line internally! (neat!)
display.begin(SSD1306_SWITCHCAPVCC, 0x3C); // initialize with the I2C addr 0x3D (for the 128x64)
// init done
}
void loop() {
display.clearDisplay();
display.setTextSize(2);
display.setTextColor(WHITE);
display.setCursor(2,1);// set the cursor at x=2, y=1 which is top left corner of display
display.println("Robojax");// the actual text
display.setCursor(2,18);
display.println("YouTube");// set the cursor at x=2, y=18 which is top left under the first text line
display.drawLine(0,16, display.width()-1, 16, WHITE); // drawing from the point x=0, y=16 to x=64-1 y=16
display.display();
display.startscrollright(0x00, 0x0F);
delay(2000);
display.stopscroll();
delay(1000);
display.startscrollleft(0x00, 0x0F);
delay(2000);
display.stopscroll();
delay(1000);
display.startscrolldiagright(0x00, 0x07);
delay(2000);
display.startscrolldiagleft(0x00, 0x07);
delay(2000);
display.stopscroll();
delay(10000);
}/*********************************************************************
Original source: http://playground.arduino.cc/Main/I2cScanner
This program will find the I2C address on the I2C device. Just upload the code into your Arduino
and open the serial monitor and wait. It will display the I2C address as 0x3C or similar.
* Please view other RoboJax codes and videos at http://robojax.com/learn/arduino
* If you are sharing this code, you must keep this copyright note.
*
*********************************************************************/
#include <Wire.h>
void setup()
{
Wire.begin();
Serial.begin(9600);
while (!Serial); // Leonardo: wait for serial monitor
Serial.println("\nI2C Scanner");
}
void loop()
{
byte error, address;
int nDevices;
Serial.println("Scanning...");
nDevices = 0;
for(address = 1; address < 127; address++ )
{
// The i2c_scanner uses the return value of
// the Wire.endTransmission to see if
// a device did acknowledge the address.
Wire.beginTransmission(address);
error = Wire.endTransmission();
if (error == 0)
{
Serial.print("I2C device found at address 0x");
if (address<16)
Serial.print("0");
Serial.print(address,HEX);
Serial.println(" !");
nDevices++;
}
else if (error==4)
{
Serial.print("Unknown error at address 0x");
if (address<16)
Serial.print("0");
Serial.println(address,HEX);
}
}
if (nDevices == 0)
Serial.println("No I2C devices found\n");
else
Serial.println("done\n");
delay(5000); // wait 5 seconds for next scan
}الموارد والمراجع
ملفات📁
ورقة البيانات (pdf)
-
SSD1306 display datasheetSSD1306 is a single-chip CMOS OLED/PLED driver with controller for organic / polymer light emitting diode dot-matrix graphic display system. It consists of 128 segments and 64commons. This IC is designed for Common Cathode type OLED panel. The SSD1306 embeds with contrast control, display RAM and oscillator, which reduces the number of external components and power consumption. It has 256-step brightness control. Data/Commands are sent from general MCU through the hardware selectable 6800/8000 series compatible Parallel Interface, I2C interface or Serial Peripheral Interface. It is suitable for many compact portable applications, such as mobile phone sub-display, MP3 player and calculator, etc.
SSD1306_display_datasheet.pdf1.79 MB