本教程是的一部分: ESP32 继电器项目
本教程涵盖了所有涉及 ESP32 和继电器的项目。其他视频的链接位于本文下方。

How to Control an AC Bulb or Load Using an ESP32 over Wi-Fi with a Relay
This tutorial explains how to control a relay module using an ESP32 board over Wi-Fi. It enables you to switch ON or OFF devices like lamps or fans from any device—desktop, tablet, or smartphone—through a simple web interface. You’ll learn how to wire the circuit, configure the Arduino IDE for ESP32, and deploy the code to run a local web server hosted by the ESP32.
📥 The full source code is provided below this article.
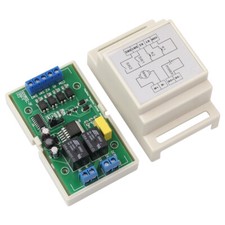
🔌 Wiring Setup
Relay IN pin → GPIO 12 of ESP32
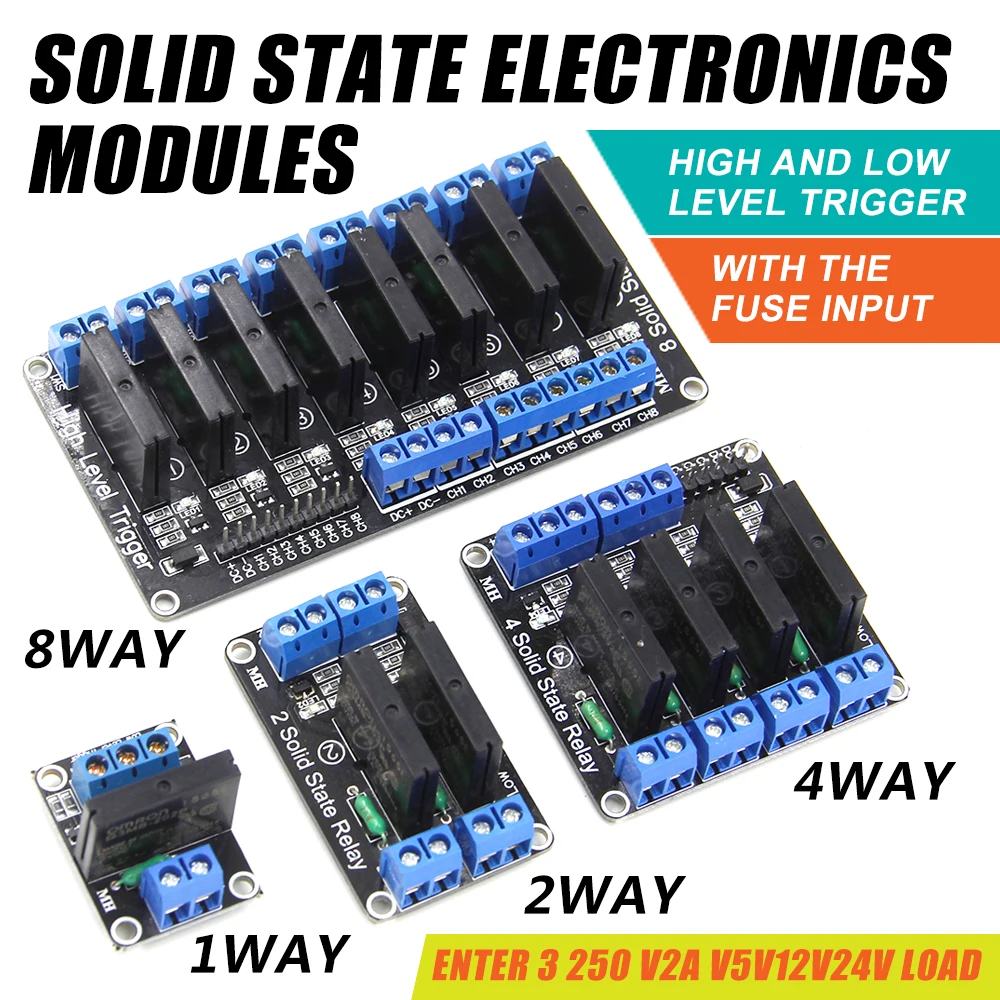
Relay VCC → 3.3V or 5V (depending on module)
Relay GND → GND of ESP32
LED (status) → GPIO 13
The relay controls an AC or DC load (like a bulb), and its switching is triggered via ESP32’s GPIO12.
ðŸ› ï¸ Arduino IDE Setup for ESP32
To program the ESP32:
Open Arduino IDE
Go to File > Preferences
Add the following board URL to the “Additional Boards Manager URLsâ€:
arduinoCopyEdithttps://dl.espressif.com/dl/package_esp32_index.jsonGo to Tools > Board > Board Manager, search for “ESP32â€, and install it.
Then select your specific ESP32 board from Tools > Board before uploading the code.
💻 Code Explanation
Here’s a breakdown of the important elements in the code:
1. Pin Setup and Global Variables
cppCopyEditint relayPin = 12; // Pin for relay
String buttonTitle1 = "Light ON";
String buttonTitle2 = "Light OFF";
int relayStat = 1; // Relay starts ON
const int led = 13; // LED indicator
relayPin: Controls the relay.
relayStat: Stores relay state (1 = ON, 0 = OFF).
buttonTitle1/2: Labels for the toggle button on the webpage.
2. Wi-Fi and Web Server Setup
cppCopyEditconst char *ssid = "YOUR_WIFI_SSID";
const char *password = "YOUR_WIFI_PASSWORD";
WebServer server(80);
Connects to your Wi-Fi and starts a server on port 80.
3. Web Page HTML Generation
cppCopyEditvoid handleRoot() {
  ...
  if(relayStat){
    HTML += "<a href='/relay?do=off'>";
  } else {
    HTML += "<a href='/relay?do=on'>";
  }
  ...
}
This function builds and serves the HTML page.
Depending on the state, the button sends
/relay?do=offor/relay?do=onto toggle the relay.
4. Relay Control Handler
cppCopyEditvoid relayControl() {
  if(server.arg("do") == "on") {
    relayStat = 1;
  } else {
    relayStat = 0;
  }
  handleRoot(); // Refresh the page
}
Updates
relayStatbased on the URL parameter, and reloads the page with the updated state.
5. Main Loop
cppCopyEditvoid loop(void) {
  server.handleClient();
  if(relayStat) {
    digitalWrite(relayPin, LOW); // Relay ON (active low)
  } else {
    digitalWrite(relayPin, HIGH); // Relay OFF
  }
}
Continuously handles HTTP requests.
Updates the relay state based on
relayStat.
📱 Demonstration
You can access the relay control page using your browser by entering the ESP32's local IP address, which is printed to the Serial Monitor after connecting. The same control interface works on desktop and mobile devices. You can even power the ESP32 from an external 5V USB adapter for standalone use.
📥 Download Section
The complete Arduino code and wiring diagram are available below. Use this project to remotely control household devices, automate lights, or integrate Wi-Fi relay control into larger smart systems.
本教程是……的一部分: ESP32 继电器项目
/*
 * Webserver code taken from File->Examples->(under ESP32) WebServer->AdvancedWebServer
 * This sketch is part of the Arduino IDE (get it from Arduino.cc) and heavily modified
 *
 * Control a relay over WiFi using an ESP32 Microcontroller to
 * turn ON or OFF an AC bulb or fan or other load
 *
 * Watch Video instruction for this code: https://youtu.be/QjbxWnBdcbQ
 *
 * Full explanation of this code and wiring diagram is available at
 * my Arduino Course at Udemy.com here: http://robojax.com/L/?id=62

 * Written by Ahmad Shamshiri on Feb 21, 2020 at 19:45
 * in Ajax, Ontario, Canada. www.robojax.com
 *

 * Get this code and other Arduino codes from Robojax.com
Learn Arduino step by step in a structured course with all material, wiring diagrams, and libraries
all in one place. Purchase My course on Udemy.com http://robojax.com/L/?id=62

If you found this tutorial helpful, please support me so I can continue creating
content like this.

or make a donation using PayPal http://robojax.com/L/?id=64

 *  * This code is "AS IS" without warranty or liability. Free to be used as long as you keep this note intact.*
 * This code has been downloaded from Robojax.com
    This program is free software: you can redistribute it and/or modify
    it under the terms of the GNU General Public License as published by
    the Free Software Foundation, either version 3 of the License, or
    (at your option) any later version.

    This program is distributed in the hope that it will be useful,
    but WITHOUT ANY WARRANTY; without even the implied warranty of
    MERCHANTABILITY or FITNESS FOR A PARTICULAR PURPOSE.  See the
    GNU General Public License for more details.

    You should have received a copy of the GNU General Public License
    along with this program.  If not, see <https://www.gnu.org/licenses/>.

   Copyright (c) 2015, Majenko Technologies
   All rights reserved.

   Redistribution and use in source and binary forms, with or without modification,
   are permitted provided that the following conditions are met:

 * * Redistributions of source code must retain the above copyright notice, this
     list of conditions and the following disclaimer.

 * * Redistributions in binary form must reproduce the above copyright notice, this
     list of conditions and the following disclaimer in the documentation and/or
     other materials provided with the distribution.

 * * Neither the name of Majenko Technologies nor the names of its
     contributors may be used to endorse or promote products derived from
     this software without specific prior written permission.

   THIS SOFTWARE IS PROVIDED BY THE COPYRIGHT HOLDERS AND CONTRIBUTORS "AS IS" AND
   ANY EXPRESS OR IMPLIED WARRANTIES, INCLUDING, BUT NOT LIMITED TO, THE IMPLIED
   WARRANTIES OF MERCHANTABILITY AND FITNESS FOR A PARTICULAR PURPOSE ARE
   DISCLAIMED. IN NO EVENT SHALL THE COPYRIGHT HOLDER OR CONTRIBUTORS BE LIABLE FOR
   ANY DIRECT, INDIRECT, INCIDENTAL, SPECIAL, EXEMPLARY, OR CONSEQUENTIAL DAMAGES
   (INCLUDING, BUT NOT LIMITED TO, PROCUREMENT OF SUBSTITUTE GOODS OR SERVICES;
   LOSS OF USE, DATA, OR PROFITS; OR BUSINESS INTERRUPTION) HOWEVER CAUSED AND ON
   ANY THEORY OF LIABILITY, WHETHER IN CONTRACT, STRICT LIABILITY, OR TORT
   (INCLUDING NEGLIGENCE OR OTHERWISE) ARISING IN ANY WAY OUT OF THE USE OF THIS
   SOFTWARE, EVEN IF ADVISED OF THE POSSIBILITY OF SUCH DAMAGE.
*/


int relayPin = 12;//define a pin for relay
String buttonTitle1 ="Light ON";
String buttonTitle2 ="Light OFF";

int relayStat = 1;//initial state . 1 ON, 0 OFF

#include <WiFi.h>
#include <WiFiClient.h>
#include <WebServer.h>
#include <ESPmDNS.h>

const char *ssid = "YOUR_WIFI_SSID";
const char *password = "YOUR_WIFI_PASSWORD";

WebServer server(80);
const int led = 13;

void handleRoot() {
  //Robojax.com ESP32 Relay Control
  digitalWrite(led, 1);
 String HTML ="<!DOCTYPE html>\
  <html>\
  <head>\
  \t\n<title>Robojax ESP32 Relay Control</title>\
  \t\n<meta name=\"viewport\" content=\"width=device-width, initial-scale=1\">\
  \n<style>\
 \nhtml,body{\t\nwidth:100%\;\nheight:100%\;\nmargin:0}\n*{box-sizing:border-box}\n.colorAll{\n\tbackground-color:#90ee90}\n.colorBtn{\n\tbackground-color:#add8e6}\n.angleButtdon,a{\n\tfont-size:30px\;\nborder:1px solid #ccc\;\ndisplay:table-caption\;\npadding:7px 10px\;\ntext-decoration:none\;\ncursor:pointer\;\npadding:5px 6px 7px 10px}a{\n\tdisplay:block}\n.btn{\n\tmargin:5px\;\nborder:none\;\ndisplay:inline-block\;\nvertical-align:middle\;\ntext-align:center\;\nwhite-space:nowrap}\n";

  HTML +="</style>\n\n</head>\n\n<body>\n<h1>Robojax ESP32 Relay Control </h1>\n";

  if(relayStat){
    HTML +="\t<div class=\"btn\">\n\t\t<a class=\"angleButton\" style=\"background-color:#90ee90\"  href=\"/relay?do=off\">";
    HTML +=buttonTitle1; //Light ON title
  }else{
    HTML +="\t<div class=\"btn\">\n\t\t<a class=\"angleButton \" style=\"background-color:#f56464\"  href=\"/relay?do=on\">";
    HTML +=buttonTitle2;//Light OFF title
  }
  HTML +="</a>\t\n\t</div>\n</body>\n</html>\n";
  server.send(200, "text/html", HTML);
  digitalWrite(led, 0);
  //Robojax.com ESP32 Relay Control
}//handleRoot()

void handleNotFound() {
  //Robojax.com ESP32 Relay Control
  digitalWrite(led, 1);
  String message = "File Not Found\n\n";
  message += "URI: ";
  message += server.uri();
  message += "\nMethod: ";
  message += (server.method() == HTTP_GET) ? "GET" : "POST";
  message += "\nArguments: ";
  message += server.args();
  message += "\n";

  for (uint8_t i = 0; i < server.args(); i++) {
    message += " " + server.argName(i) + ": " + server.arg(i) + "\n";
  }

  server.send(404, "text/plain", message);
  digitalWrite(led, 0);
  //Robojax.com ESP32 Relay Control
}

void setup(void) {
  //Robojax.com ESP32 Relay Control
  pinMode(led, OUTPUT);
  digitalWrite(led, 0);
  pinMode(relayPin, OUTPUT);// define a pin as output for relay
  digitalWrite(relayPin, relayStat);//initial state either ON or OFF
  Serial.begin(115200);//initialize the serial monitor
  Serial.println("Robojax ESP32 Relay");

  //Robojax.com ESP32 Relay Control

  WiFi.mode(WIFI_STA);
  WiFi.begin(ssid, password);
  Serial.println("");
 // Wait for connection
  while (WiFi.status() != WL_CONNECTED) {
    delay(500);
    Serial.print(".");
  }

  Serial.println("");
  Serial.print("Connected to ");
  Serial.println(ssid);
  Serial.print("IP address: ");
  Serial.println(WiFi.localIP());

  //multicast DNS //Robojax.com ESP32 Relay Control
  if (MDNS.begin("robojaxEsp32")) {
    Serial.println("MDNS responder started");
  }
  server.on("/", handleRoot);
  server.on("/relay", HTTP_GET, relayControl);  //  relayControl() is at the end of this code
  server.onNotFound(handleNotFound);
  server.begin();
  Serial.println("HTTP server started");

}

void loop(void) {
  //Robojax ESP32 Relay Control .
  server.handleClient();

  if(relayStat)
  {
    digitalWrite(relayPin, LOW);
  }else{
    digitalWrite(relayPin, HIGH);
  }

  //Robojax ESP32 Relay Control
  delay(100);
}

/*
 * relayControl()
 * updates the value of the "relayStat" variable to 1 or 0
 * returns nothing
 * written by Ahmad Shamshiri
 * on Wednesday, February 19, 2020 at 20:34 in Ajax, Ontario, Canada
 * www.robojax.com
 */
void relayControl() {
  if(server.arg("do") == "on")
  {
    relayStat =1;


  }else{
    relayStat =0;

  }

  handleRoot();
}//relayControl() end
资源与参考
尚无可用资源。
文件📁
没有可用的文件。