このチュートリアルはの一部です: PCA9685で16または32個のサーボモーターを制御する
これらのビデオ付きチュートリアル集は、Arduino UNO、Nano、Mini、またはESP32を使用して32個以上のサーボモーターを制御するのに役立ちます。すべてのコードは提供されています。

PCA9685モジュールとArduino V2スケッチを使用して16個のサーボモーターを制御する #1: 一つずつ
このチュートリアルでは、PCA9685モジュールとArduinoを使用して最大16台のサーボモーターを制御する方法を学びます。PCA9685は、サーボモーターの精密制御を可能にする16チャネル、12ビットのPWMコントローラーです。このガイドに従うことで、各サーボモーターを個別に制御し、特定の角度に設定することができ、さまざまなロボットの動きを実現します。
このプロジェクトに必要なハードウェアコンポーネントについて議論することから始め、その後詳細な配線手順に進みます。その後、コードをステップバイステップで説明し、サーボモーターを制御する上での重要な識別子とその役割を強調します。より明確に理解するために、添付のビデオ(ビデオは:00にあります)を参照することをお勧めします。
ハードウェアの解説
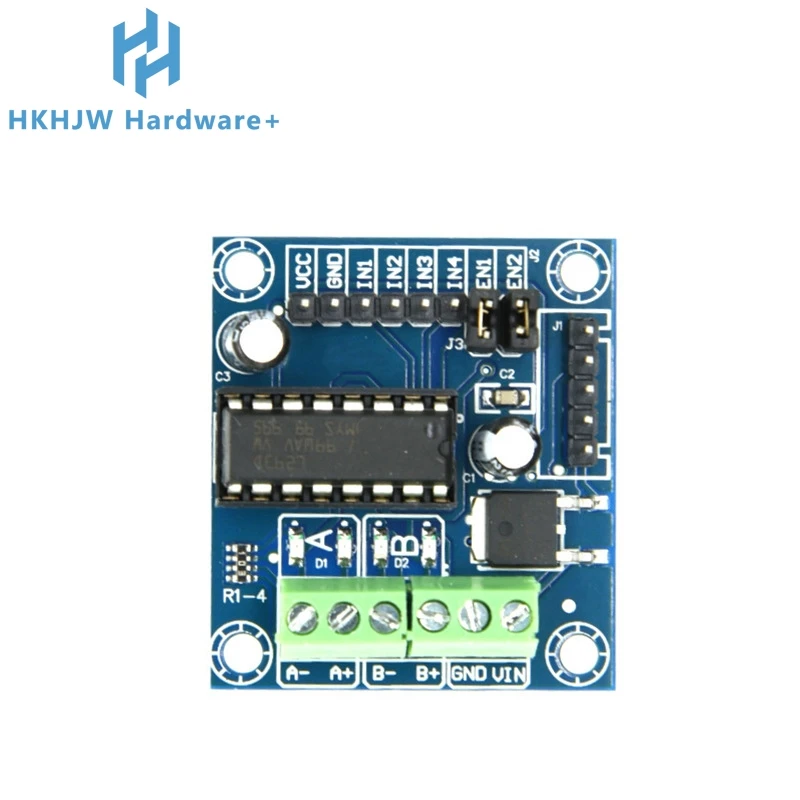
このプロジェクトの主要なコンポーネントはPCA9685モジュールであり、サーボを制御するためのPWM信号を生成する役割を担っています。各サーボはPCA9685の16チャンネルのうちの1つに接続されており、独立した制御が可能です。このモジュールはI2Cプロトコルを使用してArduinoと通信し、SDAとSCLの2本のワイヤーのみを必要とします。
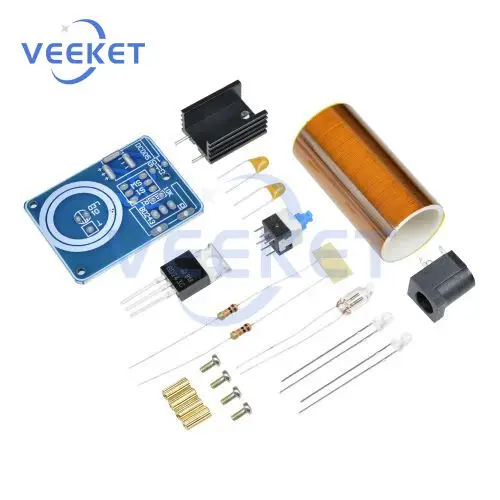
PCA9685に加えて、Arduinoボード、16個のサーボモーター、および外部電源が必要です。外部電源は重要です。なぜなら、Arduino単体ではすべてのサーボを同時に動作させるための十分な電流を供給できない場合があるからです。各サーボは通常5Vで動作するため、電源がこの要件に合致していることを確認してください。
データシートの詳細
| 製造業者 | NXPセミコンダクターズ |
|---|---|
| パート番号 | PCA9685 |
| ロジック/IO電圧 | 2.3 - 5.5 V |
| 供給電圧 | 5 V |
| 出力電流(チャネルごと) | 25 mA |
| PWM周波数ガイダンス | 60 Hz |
| 入力ロジック閾値 | 0.3VCC(低)/ 0.7VCC(高) |
| 電圧降下 / RDS(on)/ 飽和 | - |
| 熱的制限 | - |
| パッケージ | TSSOP-28 / VQFN-28 |
| ノート / バリアント | - |
- サーボ用に外部5V電源を接続してください。
- 通信にはI2Cを使用し、SDAをA4に、SCLをA5に接続します。
- ArduinoとPCA9685の間で全てのグラウンドが共通であることを確認してください。
- 使用される特定のサーボに応じてパルス幅を調整してください。
- 同時に多くのサーボを駆動する場合は、PCA9685の適切な冷却を維持してください。
配線指示
PCA9685モジュールをArduinoとサーボモーターに接続するには、まず外部5V電源をPCA9685のV+端子に接続します。電源のグラウンドをPCA9685のグラウンド端子およびArduinoのグラウンドに接続します。
次に、PCA9685のSDAピンとSCLピンをArduinoの対応するピンに接続します(SDAはA4、SCLはA5)。各サーボモーターには、3本のワイヤーがあります:グラウンド(通常は黒または茶色)、VCC(通常は赤)、および信号(一般的に黄色または白)。各サーボのグラウンドワイヤーをPCA9685のグラウンド端子に、VCCワイヤーをV+端子に、信号ワイヤーをPCA9685のそれぞれのチャネル(0-15)に接続します。各サーボに対して信号ワイヤーを正しい順序で接続してください。
コード例とウォークスルー
サーボモーターを制御するコードを一つずつ見ていきましょう。コードはI2C通信とPCA9685モジュールに必要なライブラリをインポートすることから始まります。以下の抜粋はPCA9685オブジェクトを初期化します:
#include
#include

Adafruit_PWMServoDriver pwm = Adafruit_PWMServoDriver(); // Initialize PCA9685
セットアップ関数では、シリアルモニターを初期化し、サーボ用のPWM周波数を設定します。
void setup() {
  Serial.begin(9600); // Start serial communication
  pwm.begin(); // Initialize PCA9685
  pwm.setPWMFreq(60); // Set frequency to 60 Hz for servos
}
メインループには2つの入れ子になったループが含まれています:外側のループは16のサーボのそれぞれを反復処理し、内側のループは角度を0から180度まで徐々に変えます。
void loop() {
  for(int i=0; i<16; i++) {
    for(int angle = 0; angle<181; angle += 10) {
      delay(50); // Wait for servo to move
      pwm.setPWM(i, 0, angleToPulse(angle)); // Set servo position
    }
  }
  delay(1000); // Wait before repeating
}この構造により、各サーボは10度の増分で指定された角度に移動でき、スムーズな遷移を提供します。機能angleToPulse(int ang)角度の値をサーボに適したパルス幅に変換します:
int angleToPulse(int ang) {
   int pulse = map(ang, 0, 180, SERVOMIN, SERVOMAX); // Map angle to pulse width
   return pulse; // Return pulse width
}
この機能は、希望する角度をPCA9685が理解しサーボに送信できるPWM信号に変換するために不可欠です。詳細については、記事の下にフルコードが読み込まれることを忘れないでください。
デモンストレーション / 期待すること
すべてが正しく配線され、コードがアップロードされると、各サーボがそれぞれの角度に順番に動くのが見えるはずです。問題が発生した場合は、接続を再確認し、サーボに安定した電源が供給されていることを確認してください。サーボが期待通りに反応しない場合は、PCA9685を通じて送信されているPWM信号を確認してください。
ビデオのタイムスタンプ
- 00:00 PCA9685チップを搭載したモジュールの詳細
- 06:14 PCA9685に必要なライブラリを追加しています
- 07:14 サンプルコードを読み込んでいます
- 07:35 コードの説明
- 11:31 PCA9685のための簡略化されたArduinoコード
- 12:00 サーボの最小値と最大値を見つける
- 18:27 パルス角をパルス幅にマッピング
- 20:05 マッピングのための別のメソッドを作成しています
- 20:55 マッピングのためにすべての角度をテストするためのforループを使用しています
このチュートリアルはの一部です: PCA9685で16または32個のサーボモーターを制御する
- PCA9685 16チャンネル 12ビット サーボコントローラ V1 用の Arduino コードとビデオ
- PCA9685モジュールとArduino V2スケッチを使用した16個のサーボモーターの制御:個別サーボ制御
- Controlling 16 Servo Motors Using a PCA9685 Module and Arduino V2 Sketch #3: All Servos Together
- PCA9685モジュールとArduino V3スケッチを使用して32個のサーボモーターを制御する #1:すべてのサーボを一緒に
- PCA9685モジュールとESP32 V4を使用して32サーボモーターを制御する
- Wi-Fiを介してESP32とPCA9685を使用し、デスクトップまたはモバイルフォンから32サーボを制御する V5
/*
 * Original source: https://github.com/adafruit/Adafruit-PWM-Servo-Driver-Library
 * PCA9685 Video V2, Arduino Code-1
 * This is the Arduino code PAC6985 16 channel servo controller
 * watch the video for details (V1) and demo http://youtu.be/y8X9X10Tn1k
 *  This code is #1 for V2 Video Watch the video :https://youtu.be/bal2STaoQ1M
get this code and wiring from https://robojax.com/RTJ243
 *  I have got 3 codes as follow:
   #1-Arduino Code to run one by one all servos from 0 to 180°
   #2-Arduino Code to control specific servos with specific angle
   #3-Arduino Code to run 2 or all servos at together

 * Written/updated by Ahmad Shamshiri for Robojax Video channel www.Robojax.com
 * Date: Dec 16, 2017, in Ajax, Ontario, Canada

 * Watch video for this code:
 *
 * Related Videos
V5 video of PCA9685 32 Servo with ESP32 with WiFi https://youtu.be/bvqfv-FrrLM
V4 video of PCA9685 32 Servo with ESP32 (no WiFi): https://youtu.be/JFdXB8Za5Os
V3 video of PCA9685 how to control 32 Servo motors https://youtu.be/6P21wG7N6t4
V2 Video of PCA9685 3 different ways to control Servo motors: https://youtu.be/bal2STaoQ1M
V1 Video introduction to PCA9685 to control 16 Servo  https://youtu.be/y8X9X10Tn1k

 * Disclaimer: this code is "AS IS" and for educational purpose only.
 * this code has been downloaded from https://robojax.com


or make donation using PayPal http://robojax.com/L/?id=64

 *  * This code is "AS IS" without warranty or liability. Free to be used as long as you keep this note intact.*
 * This code has been download from Robojax.com
    This program is free software: you can redistribute it and/or modify
    it under the terms of the GNU General Public License as published by
    the Free Software Foundation, either version 3 of the License, or
    (at your option) any later version.

    This program is distributed in the hope that it will be useful,
    but WITHOUT ANY WARRANTY; without even the implied warranty of
    MERCHANTABILITY or FITNESS FOR A PARTICULAR PURPOSE.  See the
    GNU General Public License for more details.

    You should have received a copy of the GNU General Public License
    along with this program.  If not, see <https://www.gnu.org/licenses/>.
 */

/***************************************************
  This is an example for our Adafruit 16-channel PWM & Servo driver
  Servo test - this will drive 16 servos, one after the other

  Pick one up today in the adafruit shop!
  ------> http://www.adafruit.com/products/815

  These displays use I2C to communicate, 2 pins are required to
  interface. For Arduino UNOs, thats SCL -> Analog 5, SDA -> Analog 4

  Adafruit invests time and resources providing this open source code,
  please support Adafruit and open-source hardware by purchasing
  products from Adafruit!

  Written by Limor Fried/Ladyada for Adafruit Industries.
  BSD license, all text above must be included in any redistribution
 ****************************************************/

#include <Wire.h>
#include <Adafruit_PWMServoDriver.h>

// called this way, it uses the default address 0x40
Adafruit_PWMServoDriver pwm = Adafruit_PWMServoDriver();
// you can also call it with a different address you want
//Adafruit_PWMServoDriver pwm = Adafruit_PWMServoDriver(0x41);

// Depending on your servo make, the pulse width min and max may vary, you
// want these to be as small/large as possible without hitting the hard stop
// for max range. You'll have to tweak them as necessary to match the servos you
// have!
// Watch video V1 to understand the two lines below: http://youtu.be/y8X9X10Tn1k
#define SERVOMIN  125 // this is the 'minimum' pulse length count (out of 4096)
#define SERVOMAX  575 // this is the 'maximum' pulse length count (out of 4096)

// our servo # counter
uint8_t servonum = 0;

void setup() {
  Serial.begin(9600);
  Serial.println("16 channel Servo test!");

  pwm.begin();

  pwm.setPWMFreq(60);  // Analog servos run at ~60 Hz updates

  //yield();
}

// the code inside loop() has been updated by Robojax
void loop() {

//watch video for details: https://youtu.be/bal2STaoQ1M
for(int i=0; i<16; i++)
  {
    for( int angle =0; angle<181; angle +=10){
      delay(50);
        pwm.setPWM(i, 0, angleToPulse(angle) );
        // see YouTube video for details (robojax)

    }

  }

  // robojax PCA9865 16 channel Servo control
  delay(1000);// wait for 1 second

}

/*
/* angleToPulse(int ang)
 * @brief gets angle in degree and returns the pulse width
 * @param "ang" is integer representing angle from 0 to 180
 * @return returns integer pulse width
 * Usage to use 65 degree: angleToPulse(65);
 * Written by Ahmad Shamshiri on Sep 17, 2019.
 * in Ajax, Ontario, Canada
 * www.Robojax.com
 */

int angleToPulse(int ang){
   int pulse = map(ang,0, 180, SERVOMIN,SERVOMAX);// map angle of 0 to 180 to Servo min and Servo max
   Serial.print("Angle: ");Serial.print(ang);
   Serial.print(" pulse: ");Serial.println(pulse);
   return pulse;
}/*
* Original sourse: https://github.com/adafruit/Adafruit-PWM-Servo-Driver-Library
* PCA9685 Video V2, Arduino Code-2
* This is the Arduino code PAC6985 16 channel servo controller
* watch the video for details (V1) and demo http://youtu.be/y8X9X10Tn1k
* This code is #2 for V2 Video Watch the video :https://youtu.be/bal2STaoQ1M
get codes and wring from https://robojax.com/RTJ243
* I have got 3 codes as follow:
#1-Arduino Code to run one by one all servos from 0 to 180°
#2-Arduino Code to control specific servos with specific angle
#3-Arduino Code to run 2 or all servos at together
*
* Written/updated by Ahmad Shamshiri for Robojax Video channel www.Robojax.com
* Date: Dec 16, 2017, in Ajax, Ontario, Canada
* Permission granted to share this code given that this
* note is kept with the code.
* Disclaimer: this code is "AS IS" and for educational purpose only.
* this code has been downloaded from https://robojax.com
* Watch video for this code:
*
* Related Videos
V5 video of PCA9685 32 Servo with ESP32 with WiFi https://youtu.be/bvqfv-FrrLM
V4 video of PCA9685 32 Servo with ESP32 (no WiFi): https://youtu.be/JFdXB8Za5Os
V3 video of PCA9685 how to control 32 Servo motors https://youtu.be/6P21wG7N6t4
V2 Video of PCA9685 3 different ways to control Servo motors: https://youtu.be/bal2STaoQ1M
V1 Video introduction to PCA9685 to control 16 Servo https://youtu.be/y8X9X10Tn1k
* Get this code and other Arduino codes from Robojax.com
Learn Arduino step by step in structured course with all material, wiring diagram and library
all in once place. Purchase My course on Udemy.com http://robojax.com/L/?id=62
****************************
Get early access to my videos via Patreon and have your name mentioned at end of very
videos I publish on YouTube here: http://robojax.com/L/?id=63 (watch until end of this video to list of my Patrons)
****************************
or make donation using PayPal http://robojax.com/L/?id=64
* * This code is "AS IS" without warranty or liability. Free to be used as long as you keep this note intact.*
* This code has been download from Robojax.com
This program is free software: you can redistribute it and/or modify
it under the terms of the GNU General Public License as published by
the Free Software Foundation, either version 3 of the License, or
(at your option) any later version.
This program is distributed in the hope that it will be useful,
but WITHOUT ANY WARRANTY; without even the implied warranty of
MERCHANTABILITY or FITNESS FOR A PARTICULAR PURPOSE. See the
GNU General Public License for more details.
You should have received a copy of the GNU General Public License
along with this program. If not, see <https://www.gnu.org/licenses/>.
*/
#include <Wire.h>
#include <Adafruit_PWMServoDriver.h>
// called this way, it uses the default address 0x40
Adafruit_PWMServoDriver pwm = Adafruit_PWMServoDriver();
// you can also call it with a different address you want
//Adafruit_PWMServoDriver pwm = Adafruit_PWMServoDriver(0x41);
// Depending on your servo make, the pulse width min and max may vary, you
// want these to be as small/large as possible without hitting the hard stop
// for max range. You'll have to tweak them as necessary to match the servos you
// have!
// Watch video V1 to understand the two lines below: http://youtu.be/y8X9X10Tn1k
#define SERVOMIN 125 // this is the 'minimum' pulse length count (out of 4096)
#define SERVOMAX 575 // this is the 'maximum' pulse length count (out of 4096)
// our servo # counter
uint8_t servonum = 0;
void setup() {
Serial.begin(9600);
Serial.println("16 channel Servo test!");
pwm.begin();
pwm.setPWMFreq(60); // Analog servos run at ~60 Hz updates
//yield();
}
// the code inside loop() has been updated by Robojax
void loop() {
//watch video for details: https://youtu.be/bal2STaoQ1M
for(int i=0; i<16; i++)
{
for( int angle =0; angle<181; angle +=10){
delay(50);
pwm.setPWM(5, 0, angleToPulse(angle) );
pwm.setPWM(8, 0, angleToPulse(angle) );
pwm.setPWM(15, 0, angleToPulse(angle) );
}
}
// robojax PCA9865 16 channel Servo control
delay(1000);
}
/*
* angleToPulse(int ang)
* gets angle in degree and returns the pulse width
* also prints the value on seial monitor
* written by Ahmad Shamshiri for Robojax, Robojax.com
*/
int angleToPulse(int ang){
int pulse = map(ang,0, 180, SERVOMIN,SERVOMAX);// map angle of 0 to 180 to Servo min and Servo max
Serial.print("Angle: ");Serial.print(ang);
Serial.print(" pulse: ");Serial.println(pulse);
return pulse;
}リソースと参考文献
まだリソースはありません。
ファイル📁
ファイルは利用できません。