Ten poradnik jest częścią: Sterowanie przekaźnikiem za pomocą Arduino
To są filmy grupowe związane ze sztafetą. Linki do innych filmów znajdują się poniżej tego artykułu.
Użycie termopary typu K MAX6675 z przekaźnikiem i wyświetlaczem
Ten projekt pokazuje, jak podłączyć termoparę typu K MAX6675 do Arduino, z wykorzystaniem przekaźnika do sterowania i wyświetlacza do odczytu temperatury. Taka konfiguracja jest nieoceniona w różnych zastosowaniach, gdzie potrzebne jest precyzyjne monitorowanie temperatury i automatyczne reakcje. Oto kilka pomysłów na projekty:

- Ochrona przed przegrzaniem wrażliwej elektroniki
- Inkubator z kontrolą temperatury do eksperymentów biologicznych
- Automatyczny system warzenia kawy lub piwa
- Monitorowanie i sterowanie procesami przemysłowymi
- Monitorowanie środowiska w szklarni lub innym kontrolowanym otoczeniu
Sprzęt/Komponenty
Do zbudowania tego projektu potrzebne będą następujące komponenty:
- Arduino Uno (lub kompatybilna płyta)
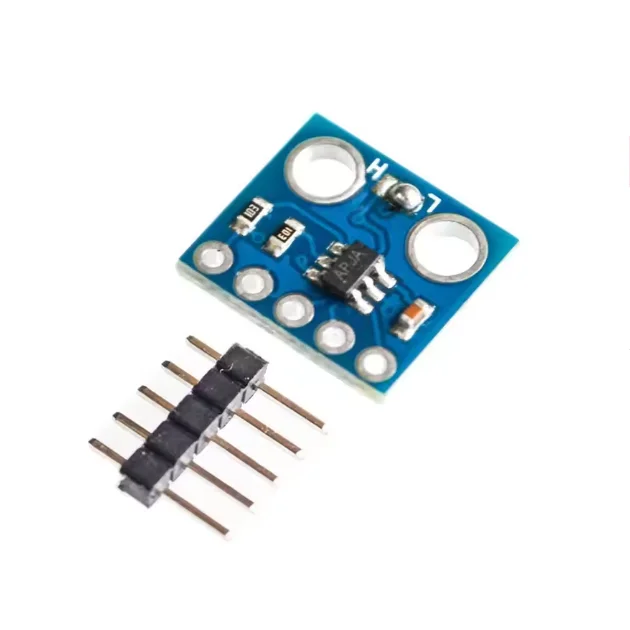
- Moduł termopary K-type MAX6675 (na filmie o 00:58)
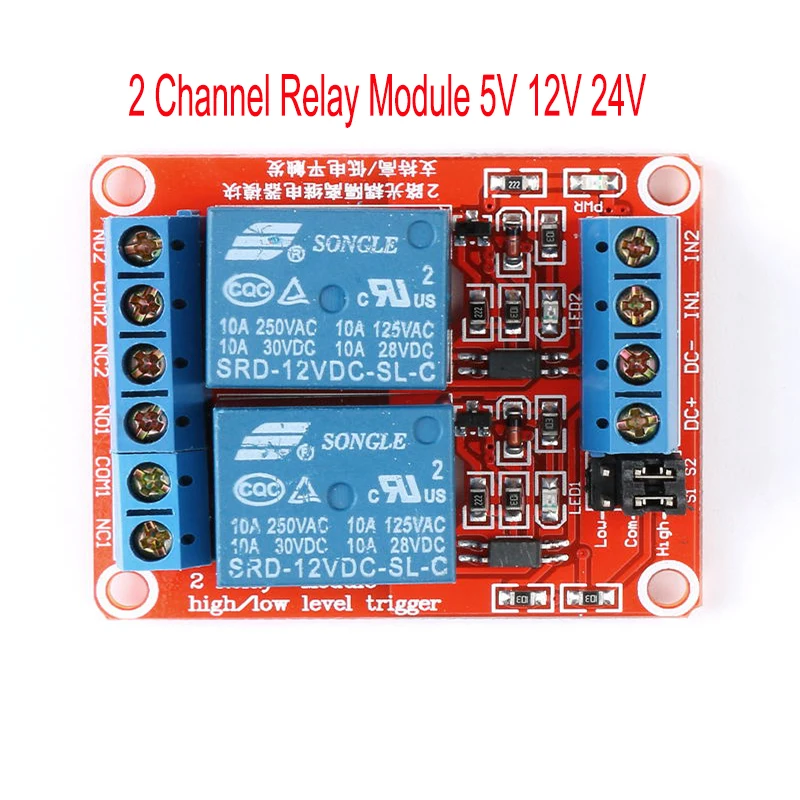
- Moduł przekaźnika
- Moduł wyświetlacza LED 4-cyfrowego TM1637
- Przewody połączeniowe (jumper wires)
- Przewody łączące
Schemat podłączeń
Podłączenia są wyjaśnione na filmie (na filmie o 05:36). Konkretne połączenia zależą od tego, czy używasz układu montowanego powierzchniowo, czy modułu PCB. Szczegółowy schemat podłączeń znajdziesz na filmie.

Wyjaśnienie kodu
Kod Arduino używa biblioteki MAX6675 do odczytu wartości temperatury z termopary. Kluczowe konfigurowalne części kodu to:
- Definicje pinów termopary:
thermoDO,thermoCSithermoCLK(na filmie o [03:53]). Te piny należy dostosować do swojego schematu podłączeń. - Pin sterowania przekaźnikiem: Pin 10 jest używany do sterowania przekaźnikiem (na filmie o [05:36]). Zmień to, jeśli to konieczne.
- Konfiguracja wyświetlacza (jeśli używany): Kod zawiera sekcje do konfiguracji wyświetlacza TM1637. Dostosuj piny CLK i DIO, jeśli to konieczne (na filmie o [03:53]).
Kod zawiera funkcje do odczytu temperatury w stopniach Celsjusza i Fahrenheita. Kluczową częścią kodu jest instrukcja warunkowa, która sprawdza, czy temperatura przekracza próg (80,0°C w tym przykładzie). Jeśli tak, przekaźnik jest aktywowany (pin 10 przechodzi w stan LOW).
// Jeśli temperatura wzrośnie powyżej 80,0°C, włącz przekaźnik
if(thermocouple.readCelsius() > 80.00){
  digitalWrite(10, LOW);// Ustaw pin 10 w stan LOW
} else {
  digitalWrite(10, HIGH);// Ustaw pin 10 w stan HIGH
}
Projekt na żywo/Demonstracja
Film pokazuje projekt w działaniu (na filmie o 06:59). Czujnik dokładnie odczytuje temperaturę otoczenia i wzrasta po podgrzaniu. Funkcjonalność przekaźnika również jest zaprezentowana.
Rozdziały
- [00:00] Wprowadzenie
- [00:39] Przegląd czujnika
- [01:40] Podłączenia pinów
- [02:22] Instalacja biblioteki
- [03:53] Wyjaśnienie kodu (Konfiguracja)
- [04:06] Wyjaśnienie kodu (Pętla)
- [05:36] Podłączenia
- [06:59] Demonstracja na żywo
Obrazy


Ten poradnik jest częścią: Sterowanie przekaźnikiem za pomocą Arduino
- Kod Arduino i wideo dla dwukanałowego przekaźnika 5V
- Sterowanie przekaźnikiem 5V za pomocą Arduino do sterowania obciążeniem AC lub DC, takim jak żarówka lub silnik
- TTP224 4-kanałowy czujnik dotykowy do włączania obciążeń AC/DC za pomocą przekaźnika
- Używanie modułu przekaźnika 5V (niskiego wyzwolenia) z Arduino
- Użycie kontaktronu do sterowania przekaźnikiem oraz obciążeniami AC/DC z Arduino
- Użycie modułu dotykowego TTP223B i przekaźnika do sterowania obciążeniami AC/DC za pomocą Arduino
- Użycie przycisku Arduino do przełączania przekaźnika i żarówki AC
/*
 * This is the Arduino code for MAX6675 Thermocouple K-Type with Relay and Display.
 * This code has been explained in our video at https://youtu.be/cD5oOu4N_AE.

 *
 * Written by Ahmad Shamshiri for Robojax Video
 * Date: December 9, 2017, in Ajax, Ontario, Canada
 * Permission granted to share this code given that this
 * note is kept with the code.
 * Disclaimer: This code is "AS IS" and for educational purposes only.
 *
 */

 // This example is public domain. Enjoy!
// www.ladyada.net/learn/sensors/thermocouple

#include "max6675.h"


int thermoDO = 4;
int thermoCS = 5;
int thermoCLK = 6;


MAX6675 thermocouple(thermoCLK, thermoCS, thermoDO);
int vccPin = 3;
int gndPin = 2;

void setup() {
  Serial.begin(9600);
  // Use Arduino pins
  pinMode(vccPin, OUTPUT); digitalWrite(vccPin, HIGH);
  pinMode(gndPin, OUTPUT); digitalWrite(gndPin, LOW);

  Serial.println("Robojax: MAX6675 test");
  // Wait for MAX chip to stabilize
  delay(500);
}

void loop() {
  // Basic readout test, just print the current temperature


   Serial.print("C = ");
   Serial.println(thermocouple.readCelsius());
   Serial.print("F = ");
   Serial.println(thermocouple.readFahrenheit());

   // If temperature goes above 80.0C, turn the relay ON
   if(thermocouple.readCelsius() > 80.00){
    digitalWrite(10, LOW);// Set pin 10 LOW
   }else{
    digitalWrite(10, HIGH);// Set pin 10 HIGH
   }


   delay(1000);
}/*
* This is the Arduino code for MAX6675 Thermocouple K-Type with Relay and Display
* The output pin 10 is connected to the relay.
* When the temperature reaches the desired value, pin 10 turns the
* relay ON.
* This code has been explained in our video at https://youtu.be/cD5oOu4N_AE
*
* Written by Ahmad Nejrabi for Robojax Video
* Date: December 9, 2017, in Ajax, Ontario, Canada
* Permission granted to share this code given that this
* note is kept with the code.
* Disclaimer: This code is "AS IS" and for educational purposes only.
*
*/
// This example is public domain. Enjoy!
// www.ladyada.net/learn/sensors/thermocouple
#include "max6675.h"
int thermoDO = 4;
int thermoCS = 5;
int thermoCLK = 6;
MAX6675 thermocouple(thermoCLK, thermoCS, thermoDO);
int vccPin = 3;
int gndPin = 2;
void setup() {
Serial.begin(9600);
// Use Arduino pins
pinMode(vccPin, OUTPUT); digitalWrite(vccPin, HIGH);
pinMode(gndPin, OUTPUT); digitalWrite(gndPin, LOW);
pinMode(10, OUTPUT);// set pin 10 as output
Serial.println("Robojax: MAX6675 test");
// wait for MAX chip to stabilize
delay(500);
}
void loop() {
// basic readout test, just print the current temp
Serial.print("C = ");
Serial.println(thermocouple.readCelsius());
Serial.print("F = ");
Serial.println(thermocouple.readFahrenheit());
// If temperature goes above 80.0C, turn the relay ON
if(thermocouple.readCelsius() > 80.00){
digitalWrite(10, LOW);// set pin 10 LOW
}else{
digitalWrite(10, HIGH);// set pin 10 HIGH
}
delay(1000);
}/*
* This is the Arduino code for MAX6675 Thermocouple K-Type with Relay and Display
* The output pin 10 is connected to the relay.
* When the temperature reaches the desired value, pin 10 turns the
* relay ON.
* The temperature is also displayed on the display.
* You must include the TM1637 library to make the display work.
* You can download the TM1637 from http://robojax.com/learn/library
* This code has been explained in our video at https://youtu.be/cD5oOu4N_AE
*
* Written by Ahmad Nejrabi for Robojax Video
* Date: December 9, 2017, in Ajax, Ontario, Canada
* Permission granted to share this code given that this
* note is kept with the code.
* Disclaimer: This code is "AS IS" and for educational purposes only.
*
*/
// This example is public domain. Enjoy!
// www.ladyada.net/learn/sensors/thermocouple
#include "max6675.h"
#include <Arduino.h>
#include <TM1637Display.h>
int thermoDO = 4;
int thermoCS = 5;
int thermoCLK = 6;
// Code for display
#define CLK 2
#define DIO 3
#define TEST_DELAY 2000
TM1637Display display(CLK, DIO);
// Code for display end
MAX6675 thermocouple(thermoCLK, thermoCS, thermoDO);
int vccPin = 3;
int gndPin = 2;
void setup() {
Serial.begin(9600);
// Use Arduino pins
pinMode(vccPin, OUTPUT); digitalWrite(vccPin, HIGH);
pinMode(gndPin, OUTPUT); digitalWrite(gndPin, LOW);
pinMode(10, OUTPUT);// set pin 10 as output
Serial.println("Robojax: MAX6675 test");
// wait for MAX chip to stabilize
delay(500);
}
void loop() {
// Basic readout test, just print the current temp
// Code for display
display.setBrightness(0x0f);
// All segments on
uint8_t data[] = { 0x0, 0x0, 0x0, 0x0 };
display.setSegments(data);
delay(1);
int temp = (int) thermocouple.readCelsius();
display.showNumberDec(temp, true, 3, 0);
// Code for display end
Serial.print("C = ");
Serial.println(thermocouple.readCelsius());
Serial.print("F = ");
Serial.println(thermocouple.readFahrenheit());
// If temperature goes above 80.0C, turn the relay ON
if(thermocouple.readCelsius() > 80.00){
digitalWrite(10, LOW);// set pin 10 LOW
}else{
digitalWrite(10, HIGH);// set pin 10 HIGH
}
delay(1000);
}/*
* This is the Arduino code for MAX6675 Thermocouple K-Type with Relay and Display
* The output pin 10 is connected to the relay.
* When the temperature reaches the desired value, pin 10 turns the
* relay ON.
* This code has been explained in our video at https://youtu.be/cD5oOu4N_AE
*
* Written by Ahmad Shamshiri for Robojax Video
* Date: June 02, 2018, in Ajax, Ontario, Canada
* Permission granted to share this code given that this
* note is kept with the code.
* Disclaimer: This code is "AS IS" and for educational purposes only.
*
*/
// This example is public domain. Enjoy!
// www.ladyada.net/learn/sensors/thermocouple
#include "max6675.h"
int thermoDO1 = 4;
int thermoCS1 = 5;
int thermoCLK1 = 6;
int thermoDO2 = 7;
int thermoCS2 = 8;
int thermoCLK3 = 9;
MAX6675 thermocouple1(thermoCLK1, thermoCS1, thermoDO1);// first thermocouple
MAX6675 thermocouple2(thermoCLK2, thermoCS2, thermoDO2);// 2nd thermocouple
int vccPin1 = 3;
int gndPin1 = 2;
int relayPin1 =10;
int vccPin2 = 11;
int gndPin2 = 12;
int relayPin2 =13;
void setup() {
Serial.begin(9600);
// use Arduino pins
pinMode(vccPin1, OUTPUT); digitalWrite(vccPin, HIGH);
pinMode(gndPin1, OUTPUT); digitalWrite(gndPin, LOW);
pinMode(relayPin1, OUTPUT);// set pin 10 as output for thermocouple1
pinMode(vccPin2, OUTPUT); digitalWrite(vccPin, HIGH);
pinMode(gndPin2, OUTPUT); digitalWrite(gndPin, LOW);
pinMode(relayPin2, OUTPUT);// // set pin 13 as output for thermocouple2
Serial.println("Robojax: MAX6675 test");
// wait for MAX chip to stabilize
delay(500);
}
void loop() {
// basic readout test, just print the current temp
// for thermocouple 1
Serial.print("C = ");
Serial.println(thermocouple.readCelsius());
Serial.print("F = ");
Serial.println(thermocouple.readFahrenheit());
// if temperature goes above 80.0C, turn the relay ON
if(thermocouple1.readCelsius() > 80.00){
digitalWrite(relayPin1, LOW);// set pin relayPin1 LOW
}else{
digitalWrite(relayPin1, HIGH);// set pin relayPin1 HIGH
}
// thermocouple1 end
// for thermocouple 2
Serial.print("C2 = ");
Serial.println(thermocouple2.readCelsius());
Serial.print("F2 = ");
Serial.println(thermocouple2.readFahrenheit());
// if temperature goes above 80.0C, turn the relay ON
if(thermocouple2.readCelsius() > 80.00){
digitalWrite(relayPin2, LOW);// set pin relayPin2 LOW
}else{
digitalWrite(relayPin2, HIGH);// set pin relayPin2 HIGH
}
// thermocouple2 end
delay(1000);
}Zasoby i odniesienia
Pliki📁
Inne pliki
-
biblioteka MAX6675
robojax-max6675-thermo.zip0.01 MB