هذا الدليل جزء من: مستشعر رقمي للرطوبة النسبية ودرجة الحرارة HTU21D
مقاطع فيديو متعلقة بمستشعر الرطوبة النسبية ودرجة الحرارة الرقمي HTU21D. روابط لمقاطع فيديو أخرى موجودة أسفل هذه المقالة.

عرض درجة الحرارة من HTU21D على شاشة LCD
في هذا الدرس، سنتعلم كيف نعرض قراءات درجة الحرارة من حساس الحرارة والرطوبة HTU21D على شاشة LCD. ستكون النتيجة إعدادًا وظيفيًا حيث يمكن عرض درجة الحرارة بالدرجات المئوية والفهرنهايت والكلفن، بالإضافة إلى الرطوبة النسبية المعروضة على نفس الشاشة. سيعطيك هذا المشروع تجربة عملية في التواصل عبر I2C والتعامل الأساسي مع بيانات الحساس. للحصول على دليل بصري مفصل، تأكد من مشاهدة الفيديو (في الفيديو في 00:00).

شرح الأجهزة
المكونات الرئيسية لهذا المشروع تشمل مستشعر HTU21D وشاشة LCD. مستشعر HTU21D هو مستشعر رقمي للرطوبة ودرجة الحرارة يقوم بالتواصل عبر بروتوكول I2C. يوفر قياسات دقيقة لدرجة الحرارة بالدرجات المئوية أو الفهرنهايت ورطوبة نسبية كنسبة مئوية. يعمل المستشعر عادةً عند جهد 3.3 فولت ولكنه يمكن أيضًا أن يعمل مع أنظمة 5 فولت. شاشة LCD التي سنستخدمها هي شاشة LCD بحجم 16x2 مع واجهة I2C. هذا النوع من الشاشات يتطلب فقط سلكين لتواصل البيانات، مما يسهل الاتصال بوحدات التحكم الدقيقة مثل أردوينو. تتيح واجهة I2C توصيل عدة أجهزة على نفس الناقل، مما يبسط الأسلاك ويقلل من عدد الدبابيس المستخدمة.
تفاصيل ورقة البيانات
| الصانع | أدافruits |
|---|---|
| رقم الجزء | HTU21D-F |
| جهد المنطق/المدخلات والمخرجات | 3.3 فولت (تقريباً) |
| جهد الإمداد | 1.5 فولت إلى 3.6 فولت |
| التيار الكهربائي | 0.5 مللي أمبير (تقريباً) |
| التيار الذروي | 1.5 مللي أمبير (كحد أقصى) |
| نطاق درجات الحرارة | -40 إلى 125 °م |
| نطاق الرطوبة | 0 إلى 100 %رطوبة نسبية |
| حزمة | DFN-6 |
| ملاحظات / تغييرات | None |
- تأكد من صحة مستويات الجهد لتجنب تلف المستشعر.
- استخدم مقاومات السحب في خطوط SDA و SCL إذا لزم الأمر.
- تحقق من عنوان I2C باستخدام الماسح الضوئي للتأكد من التكوين الصحيح.
- تعامل مع مخرجات المستشعر بعناية لتجنب أخطاء القراءة.
- ابقِ المستشعر بعيدًا عن مصادر الحرارة عند أخذ القياسات.
تعليمات التوصيل

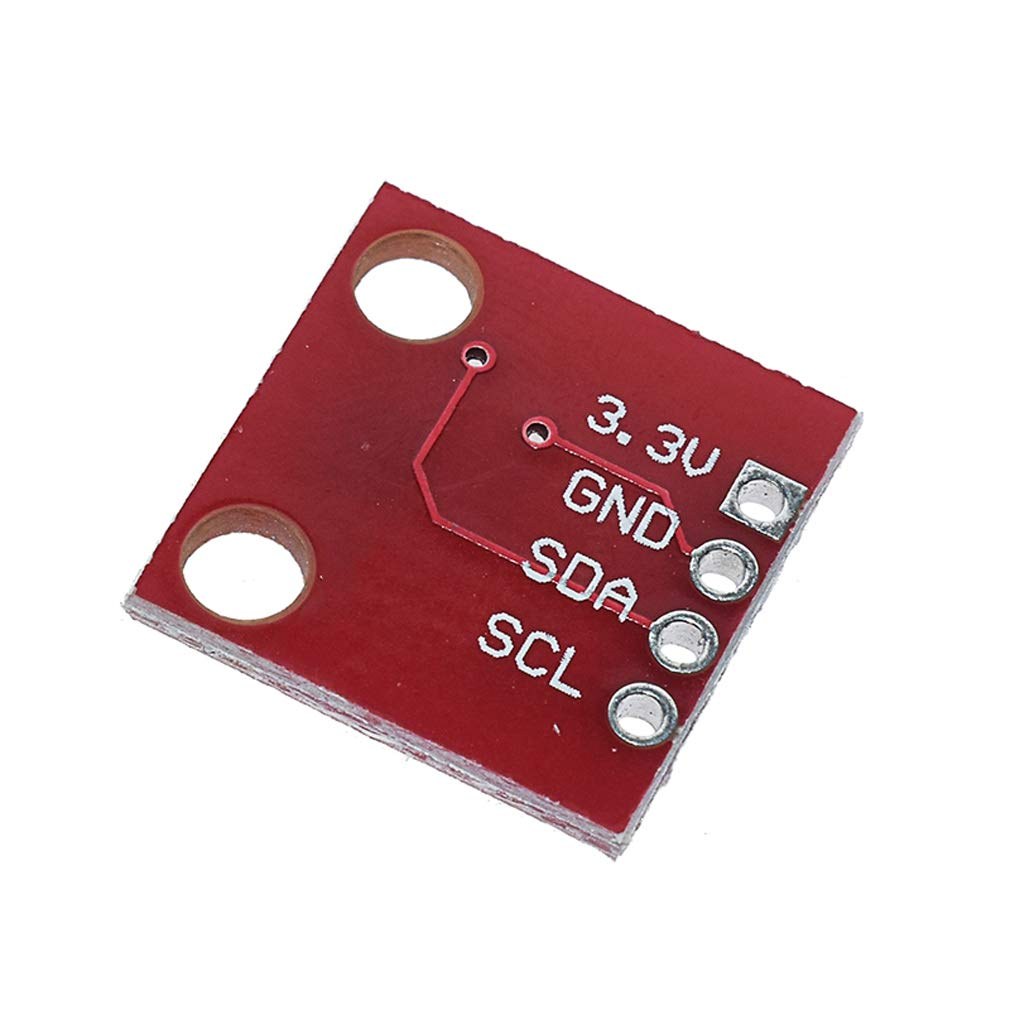
لتوصيل مستشعر HTU21D بلوحة أردوينو، قم بتوصيل الدبوس VCC للمستشعر بمخرج 3.3 فولت على الأردوينو. بعد ذلك، قم بتوصيل دبوس GND للمستشعر بالأرضي (GND) للأردوينو. ينبغي توصيل دبوس SDA، الذي يُستخدم لنقل البيانات، بدبوس A4 على الأردوينو. بالمثل، قم بتوصيل دبوس SCL، الذي يُستخدم لإشارة الساعة، بدبوس A5 على الأردوينو. تأكد أيضًا من توصيل شاشة LCD بشكل صحيح؛ عنوان I2C لشاشة LCD في هذا الإعداد عادةً هو 0x3F. إذا كنت تستخدم نوعًا مختلفًا من شاشة LCD أو عنوان I2C مختلف، تأكد من تعديل الكود وفقًا لذلك. بعد التوصيل، تأكد من التحقق من أي اتصالات مفكوكة قبل تشغيل الأردوينو.
أمثلة الكود والدليل العملي
في الكود، نبدأ بإدراج المكتبات الضرورية لمستشعر HTU21D و LCD:
#include
#include "Adafruit_HTU21DF.h"
#include
هذا يهيئ البيئة لاستخدام كل من المستشعر والعرض. مكتبة `Adafruit_HTU21DF` تدير وظيفة المستشعر، بينما مكتبة `LiquidCrystal_I2C` تدير شاشة LCD. ثم نقوم بإنشاء مثيل لكل من المستشعر وشاشة LCD:
Adafruit_HTU21DF htu = Adafruit_HTU21DF();
LiquidCrystal_I2C lcd(0x3F, 16, 2);
هنا،htuهو الهدف من مستشعر HTU21D، وlcdهو الجسم الخاص بشاشة LCD. عنوان I2C لشاشة LCD مضبوط على 0x3F، والذي قد تحتاج إلى التحقق منه بناءً على إعدادك.setup()نقوم بتهيئة شاشة LCD ونتحقق مما إذا كان المستشعر يعمل:
void setup() {
  lcd.begin();
  lcd.backlight();
  if (!htu.begin()) {
      lcd.print("Sensor missing");
      while (1);
  }
  lcd.print("HTU21D Ready");
}
هذا الكود يقوم بتهيئة شاشة LCD ويتحقق من وجود الحساس. إذا لم يتم اكتشاف الحساس، سيعرض "الحساس مفقود" ويتوقف البرنامج.loop()نقوم باستمرار بقراءة قيم درجة الحرارة والرطوبة وعرضها:
void loop() {
   lcd.clear();
   lcdDisplay(0, 0, "Celsius: ", 10, 0, getHTU('C'), 'd');
   lcdDisplay(0, 1, "Humidity: ", 10, 1, getHTU('H'), '%');
   delay(5000);
}
في هذا المقتطف، نقوم بمسح شاشة LCD، ثم نستدعي الـlcdDisplay()وظيفة لعرض درجة الحرارة بالدرجة المئوية والرطوبة.getHTU()تقوم الدالة باسترجاع درجة الحرارة أو الرطوبة بناءً على الحرف المُمرر.
عرض / ماذا تتوقع
عند اكتمال الإعداد وتحميل الكود إلى الأردوينو، يجب أن تعرض شاشة LCD درجة الحرارة الحالية بالدرجات المئوية ورطوبة الهواء النسبية. إذا كانت جميع الوصلات متصلة بشكل صحيح، سترى القيم تتحدث كل بضع ثوانٍ. احذر من الأخطاء الشائعة، مثل الوصلات المعكوسة أو عناوين I2C غير الصحيحة، والتي يمكن أن تؤدي إلى فشل في التواصل مع المستشعرات (في الفيديو عند 05:00).
توقيتات الفيديو
- 00:00- المقدمة
- 01:30- تعليمات الأسلاك
- 03:15- شرح الكود
- ٠٤:٥٠- عرض
- 05:٤٠- استنتاج
الصور

هذا الدليل هو جزء من: مستشعر رقمي للرطوبة النسبية ودرجة الحرارة HTU21D
- Lesson 35-1: Using the HTU21D Temperature Sensor
- الدرس 35-2: استخدام مستشعر درجة الحرارة HTU21D - كود مخصص
- الدرس 35: استخدام مستشعر درجة الحرارة HTU21D مع أردوينو
- الدرس 36: استخدام مستشعر الحرارة HTU21D مع شاشة LCD دورة خطوة بخطوة لأردوينو
- استخدام حساسين إضافيين لقياس الرطوبة ودرجة الحرارة HTU21DF مع أردوينو
- عرض درجة الحرارة من HTU21D كرسوم بيانية على شاشة LCD
- كيفية استخدام مستشعر الرطوبة ودرجة الحرارة HTU21DF مع أردوينو (الكود الأساسي)
- كيفية استخدام مستشعر الرطوبة ودرجة الحرارة HTU21DF مع Arduino (شفرة مخصصة)
This code has not been parsed yet. Please return to the admin panel to parse it.الأشياء التي قد تحتاجها
-
أمازوناشترِ وحدة HTU21D من أمازونamzn.to
-
إي بايشراء HTU21D من eBayebay.us
-
علي إكسبريساشترِ HTU21D أو SHT21 من علي إكسبريسs.click.aliexpress.com
الموارد والمراجع
-
خارجيمكتبة Adafruit HTU21D (جيت هاب)github.com
ملفات📁
ورقة البيانات (pdf)
-
ورقة بيانات HTU21D لدرجة الحرارة والرطوبة
HTU21D_temerature_humidity_datasheet.pdf0.96 MB