搜索代码

使用Arduino控制BTS7960直流电机驱动模块

使用Arduino控制BTS7960直流电机驱动模块

在本教程中,我们将学习如何使用Arduino控制BTS7960直流电机驱动模块。该设置允许您使用脉宽调制(PWM)控制直流电机的方向和速度。在本教程结束时,您将拥有一个可以轻松修改以满足您自己项目的工作电机控制系统。有关详细的视觉指导,请确保查看视频(在视频中于00:00)。

BTS7960模块-1

硬件解析

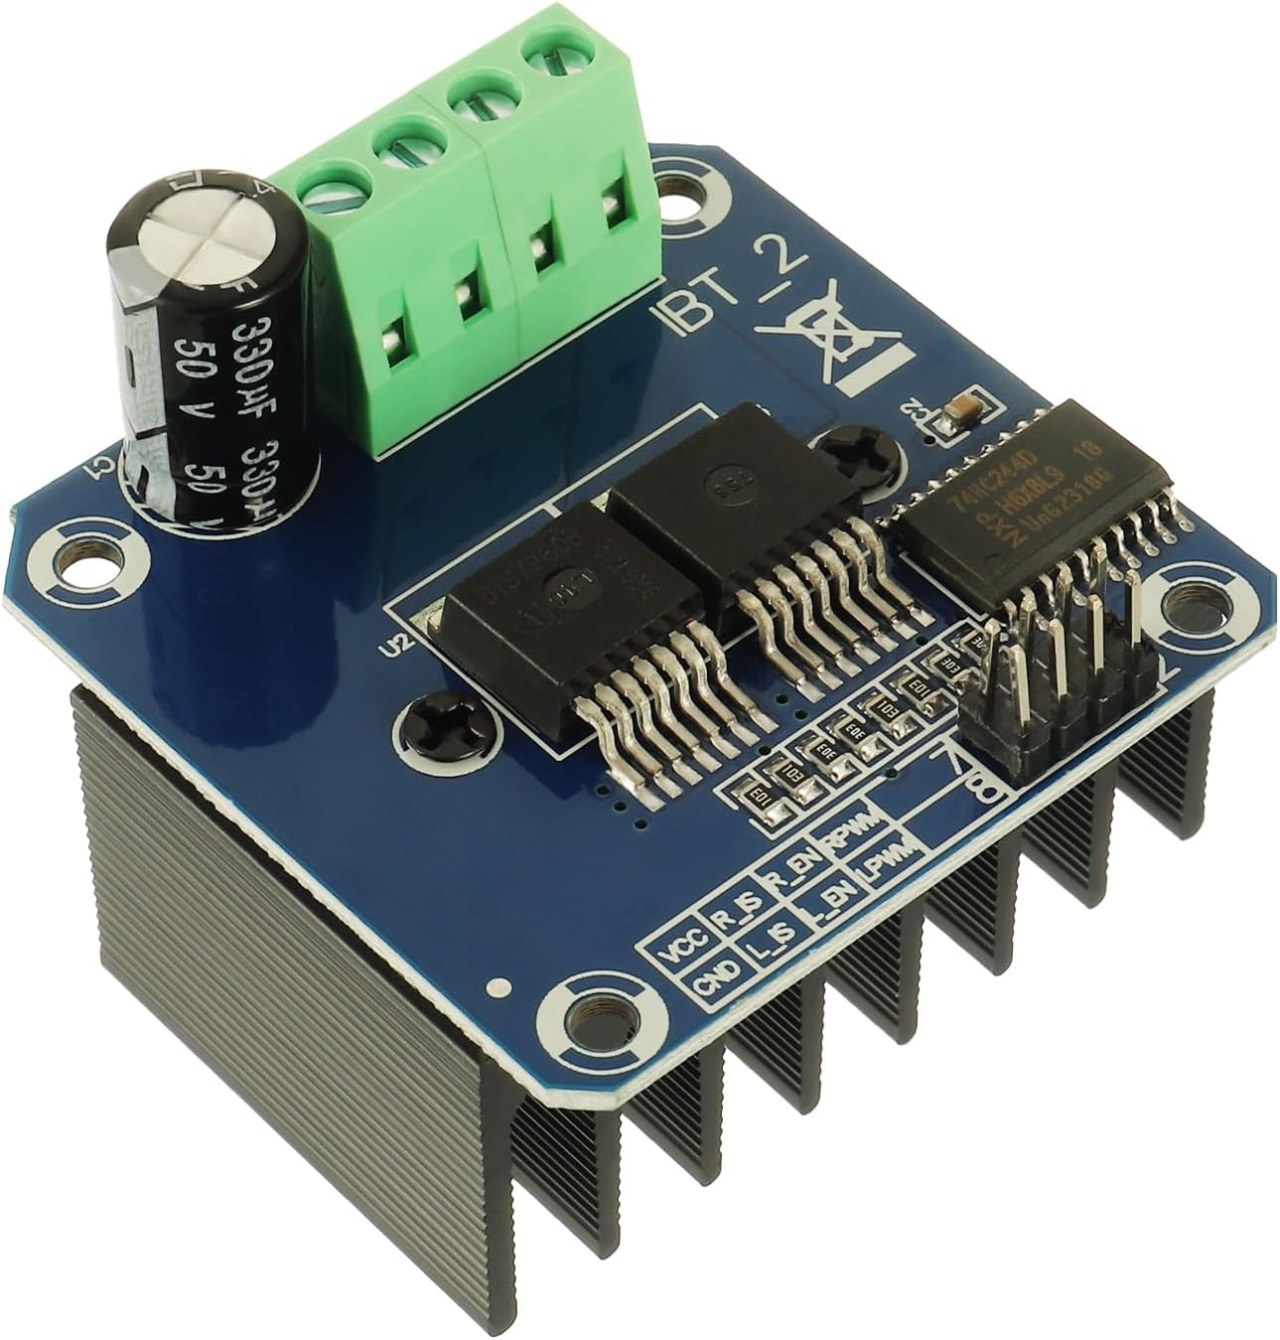
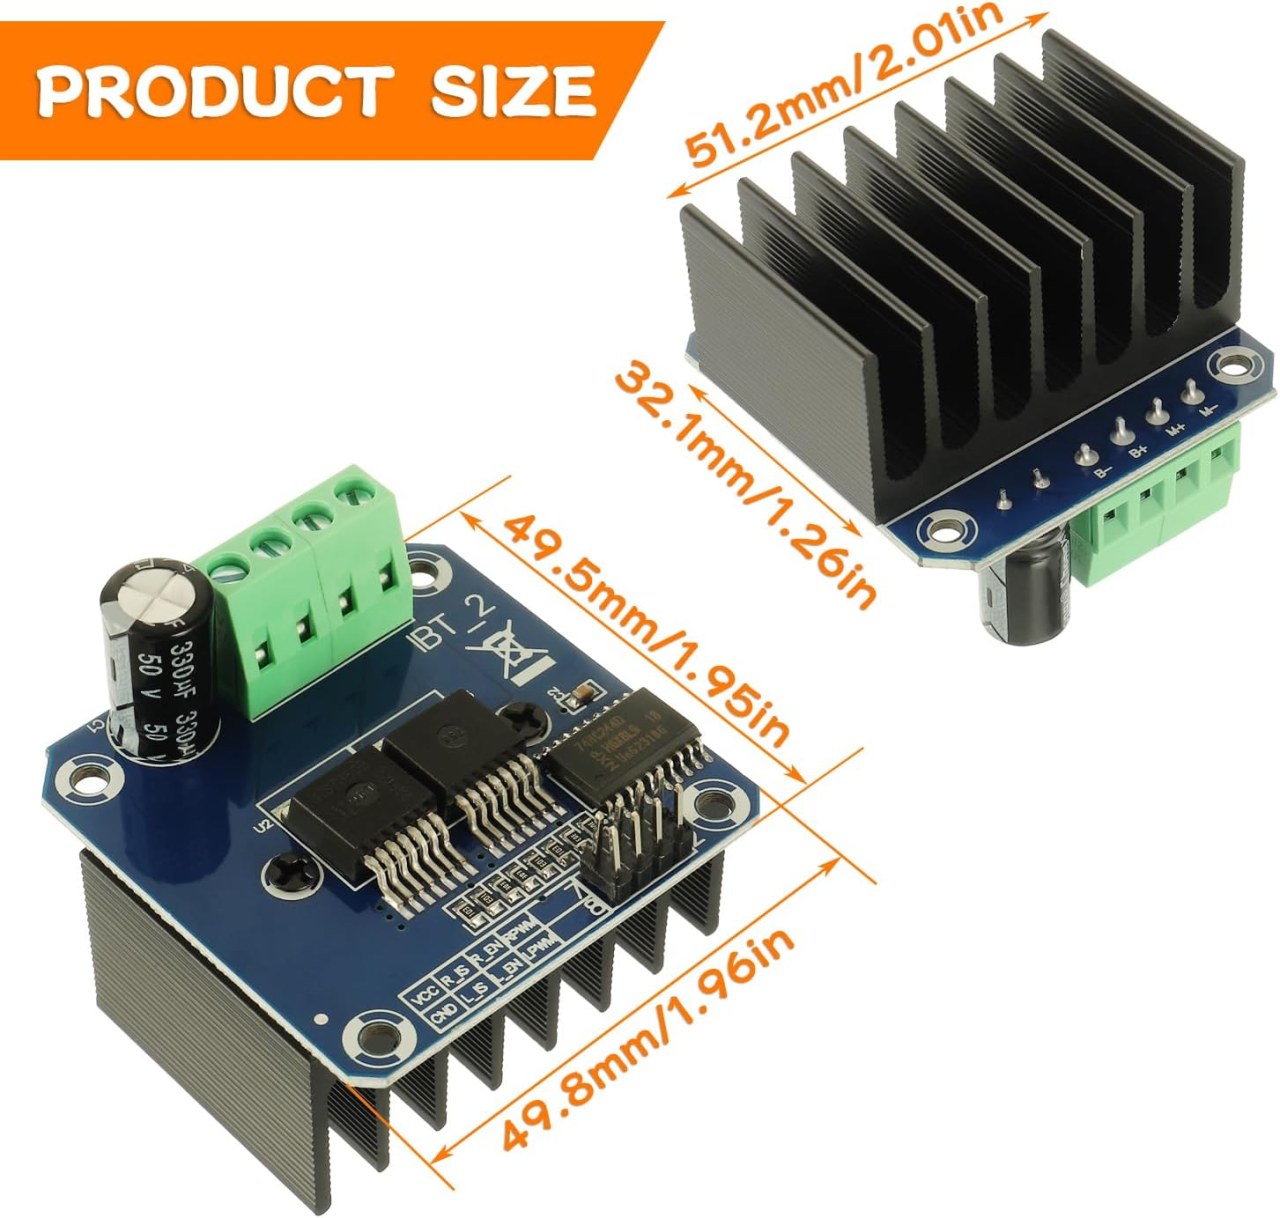
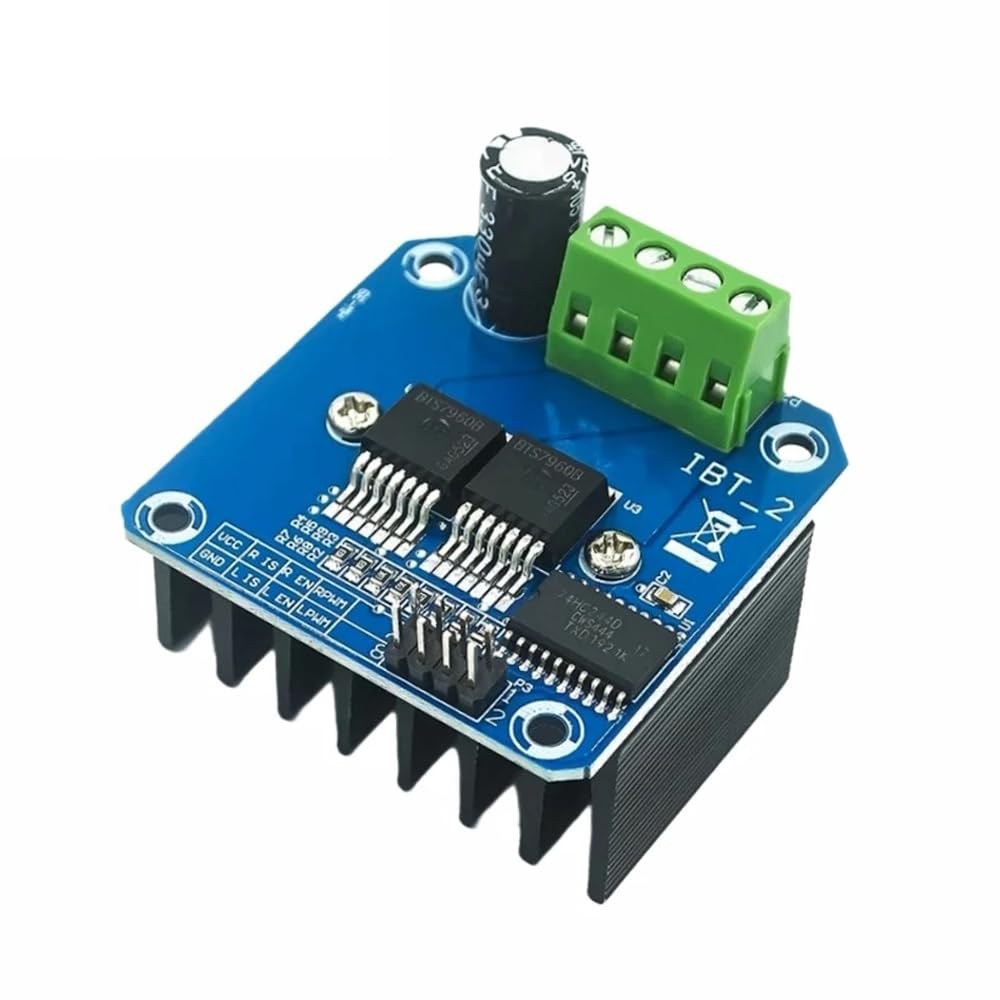
BTS7960是一款高电流直流电机驱动器,能够处理最高达43安培的电流。它由两个集成电路(IC)组成,允许电机在顺时针(CW)和逆时针(CCW)方向上控制。该驱动器使用PWM信号来改变电机的速度,这对需要精确控制的应用至关重要。

该模块的另一个重要方面是其内置的电流感应和过温保护功能。这有助于防止在操作过程中对电动机和驱动器造成损坏。该模块由外部电源供电,并且还需要一个单独的5V电源供其逻辑电路使用。

数据表详细信息

制造商 英飞凌科技
零件号 BTS7960
逻辑/IO 电压 5 V
供应电压 6-27 V
输出电流(每通道) 43 A 最大
每个通道的峰值电流 60 A
PWM频率指导 25 kHz
输入逻辑阈值 0.8 伏 (高),0.3 伏 (低)
电压降 / RDS(开启)/ 饱和度 16 毫欧
热限制 最大125°C
包裹 PTO-263-7
注释 / 变体 双H桥配置

  • 确保高电流应用的适当散热。
  • 使用适当的电线标准来承载最大电流。
  • 保持PWM频率在规定范围内,以实现最佳性能。
  • 在电源引脚附近实施解耦电容,以稳定电压。
  • 在操作过程中监测温度,以防止过热。

接线说明

BTS7960-_motor_wiring

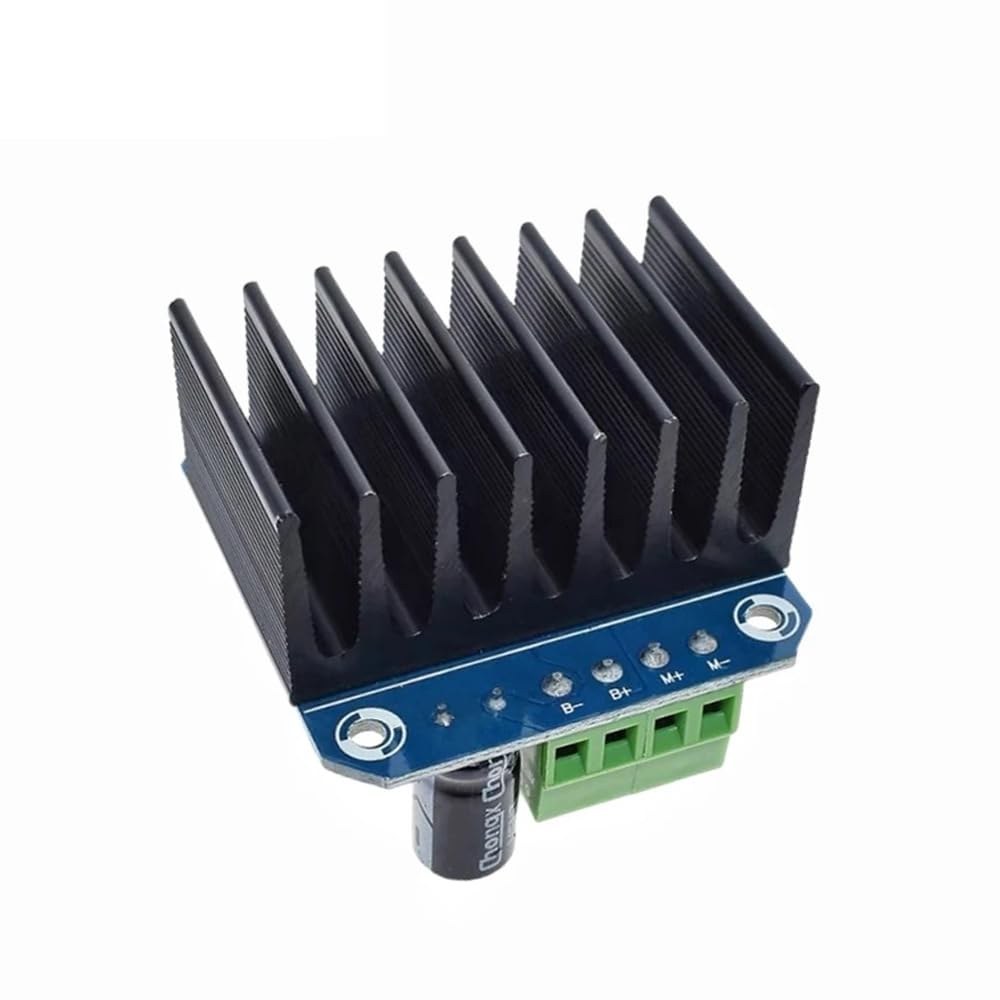
要将BTS7960电机驱动模块连接到您的Arduino,您需要正确连接电源、接地、控制和电机端子。首先,将电源连接到模块的B+B-终端,确保极性正确。该B+终端是正电源连接的地方,而B-接地。

接下来,将电动机连接到M+M-模块上的端子。这些将控制电机的方向。对于控制引脚,将Arduino引脚连接到模块,如下所示:RPWM接在 3 号针上,R_EN到引脚 4,R_IS连接到5号引脚,LPWM连接到引脚 6,L_EN到引脚7,和L_IS连接到引脚8。确保将Arduino的接地连接到模块的接地。

BTS7960模块-2

安装所需库

安装使得robojax_BTS7960_motor_driver_library在Arduino IDE中,首先从提供的链接下载库的ZIP文件。保存文件后,打开你的Arduino IDE并导航到草图 > 包含库 > 添加 .ZIP 库...在文件选择对话框中,浏览到下载的ZIP文件,选择它,然后点击“打开”。IDE将安装该库。您可以通过检查来确认安装成功。文件 > 示例菜单,应该会出现一个名为“Robojax BTS7960 电机驱动库”的新类别。您现在可以在代码中包含库头文件。#include <RobojaxBTS7960.h>.

代码示例和演示

Arduino控制BTS7960电机驱动程序的代码首先定义了必要的引脚。例如,右侧PWM信号的引脚定义为RPWM并设置为引脚 3。此外,右侧的使能引脚被定义为R_EN并设置为引脚 4。

#define RPWM 3 // define pin 3 for RPWM pin (output)
#define R_EN 4 // define pin 4 for R_EN pin (input)

此设置确保电机的控制能够准确。setup()功能,电机初始化为motor.begin(), 这为司机准备了操作。

void setup() {
  Serial.begin(9600);// setup Serial Monitor to display information
  motor.begin(); // Initialize motor
}

loop()电机的方向和速度是通过使用函数来控制的。motor.rotate(speed, direction)方法。例如,要以顺时针方向以全速运行电动机,您将使用motor.rotate(100, CW);.

void loop() {
    motor.rotate(100,CW); // run motor with 100% speed in CW direction
    delay(5000); // run for 5 seconds
}

有关更多详细示例和变体,请务必查看文章下面加载的完整代码。

演示 / 期待什么

当一切连接和编程正确时,您应该期望电机根据代码在两个方向上旋转。最初,电机会以全速运行五秒钟,停止三秒钟,然后以相同的时间反向旋转。这个循环会重复,让您看到电机对PWM信号的响应。

常见的陷阱包括连接电机或电源时极性反转,这可能会损坏组件。此外,请确保代码中PWM引脚正确分配(视频中的 12:34)。

视频时间戳

  • 00:00 开始
  • 00:48 硬件解析
  • 04:06 数据表已查看
  • 07:07 电线连接说明
  • 09:00 代码解释
  • 14:33 示范
  • 16:47 最大电流测试
  • 19:25 热成像
  • 19:27 不同的代码测试

图像

BTS7960-_motor_wiring
BTS7960_module-1
BTS7960_module-1
BTS7960_module-2
BTS7960_module-2
BTS7960_module-3
BTS7960_module-3
BTS7960_module-4-heat-sink
202-Arduino Code to control BTS7960 Motor Driver
语言: C++
/*
* This is the Arduino code for the BTS7960 DC motor driver.
Using this code, you can control a motor to rotate in both directions: clockwise (CW) 
and counter-clockwise (CCW).
Watch the video instructions: https://youtu.be/PUL5DZ9TA2o
📚⬇️ Download and resource page for this video https://robojax.com/RJT169
📚⬇️ Download and resource page https://robojax.com/RJT170
 
// Written by Ahmad Shamshiri for Robojax.com on 
// June 22, 2019 at 14:08 in Ajax, Ontario, Canada.
Get this code and other Arduino codes from Robojax.com.


* BTS7960B
 * Code is available at http://robojax.com/learn/arduino

 * This code is "AS IS" without warranty or liability. Free to be used as long as you keep this note intact.
 * This code has been downloaded from Robojax.com
    This program is free software: you can redistribute it and/or modify
    it under the terms of the GNU General Public License as published by
    the Free Software Foundation, either version 3 of the License, or
    (at your option) any later version.

    This program is distributed in the hope that it will be useful,
    but WITHOUT ANY WARRANTY; without even the implied warranty of
    MERCHANTABILITY or FITNESS FOR A PARTICULAR PURPOSE.  See the
    GNU General Public License for more details.

    You should have received a copy of the GNU General Public License
    along with this program.  If not, see <https://www.gnu.org/licenses/>. 

*/

// 
#define RPWM 3 // define pin 3 for RPWM pin (output)
#define R_EN 4 // define pin 2 for R_EN pin (input)
#define R_IS 5 // define pin 5 for R_IS pin (output)

#define LPWM 6 // define pin 6 for LPWM pin (output)
#define L_EN 7 // define pin 7 for L_EN pin (input)
#define L_IS 8 // define pin 8 for L_IS pin (output)
#define CW 1 //do not change
#define CCW 0 //do not change
#define debug 1 //change to 0 to hide serial monitor debugging information or set to 1 to view

#include <RobojaxBTS7960.h>
RobojaxBTS7960 motor(R_EN,RPWM,R_IS, L_EN,LPWM,L_IS,debug);

void setup() {
  // BTS7960 Motor Control Code by Robojax.com 20190622
  Serial.begin(9600);// setup Serial Monitor to display information

   motor.begin();
   //watch video for details: https://youtu.be/PUL5DZ9TA2o
   
    // BTS7960 Motor Control Code by Robojax.com 20190622 
}

void loop() {
   // BTS7960 Motor Control Code by Robojax.com 20190622 
      //watch video for details: https://youtu.be/PUL5DZ9TA2o
    motor.rotate(100,CW);// run motor with 100% speed in CW direction
    delay(5000);//run for 5 seconds
    motor.stop();// stop the motor
    delay(3000);// stop for 3 seconds
    motor.rotate(100,CCW);// run motor at 100% speed in CCW direction
    delay(5000);// run for 5 seconds
    motor.stop();// stop the motor
    delay(3000);  // stop for 3 seconds
	// slowly speed up the motor from 0 to 100% speed
    for(int i=0; i<=100; i++){ 
        motor.rotate(i,CCW);
        delay(50);
    } 
	
   // slow down the motor from 100% to 0 with 
    for(int i=100; i>0; i--){ 
        motor.rotate(i,CCW);
        delay(50);
    } 
	
   //watch video for details: https://youtu.be/PUL5DZ9TA2o	
    motor.stop();// stop motor
    delay(3000); // stop for 3 seconds        
 // BTS7960 Motor Control Code by Robojax.com 20190622  
}// loop ends
203-Arduino Code to control two or more DC motors using BTS7960 motor driver
语言: C++
++
/*
* This is the Arduino code for the BTS7960 DC motor driver.
Using this code, you can control more than one motor to rotate in both directions: clockwise (CW) 
and counter-clockwise (CCW).
📚⬇️ Download and resource page for this video https://robojax.com/RJT169
📚⬇️ Download and resource page https://robojax.com/RJT170


Written by Ahmad Shamshiri for Robojax.com on
July 16, 2020 in Ajax, Ontario, Canada.

Watch video instructions for this code:  https://youtu.be/PUL5DZ9TA2o


BTS7960B
If you found this tutorial helpful, please support me so I can continue creating 
content like this. You can support me on Patreon: http://robojax.com/L/?id=63

or make a donation using PayPal: http://robojax.com/L/?id=64

 * This code has been downloaded from Robojax.com
    This program is free software: you can redistribute it and/or modify
    it under the terms of the GNU General Public License as published by
    the Free Software Foundation, either version 3 of the License, or
    (at your option) any later version.

    This program is distributed in the hope that it will be useful,
    but WITHOUT ANY WARRANTY; without even the implied warranty of
    MERCHANTABILITY or FITNESS FOR A PARTICULAR PURPOSE.  See the
    GNU General Public License for more details.

    You should have received a copy of the GNU General Public License
    along with this program.  If not, see <https://www.gnu.org/licenses/>.

*/

// pins for motor 1
#define RPWM_1 3 // define pin 3 for RPWM pin (output)
#define R_EN_1 4 // define pin 2 for R_EN pin (input)
#define R_IS_1 5 // define pin 5 for R_IS pin (output)

#define LPWM_1 6 // define pin 6 for LPWM pin (output)
#define L_EN_1 7 // define pin 7 for L_EN pin (input)
#define L_IS_1 8 // define pin 8 for L_IS pin (output)
// motor 1 pins end here

// pins for motor 2
#define RPWM_2 9 // define pin 9 for RPWM pin (output)
#define R_EN_2 10 // define pin 10 for R_EN pin (input)
#define R_IS_2 12 // define pin 12 for R_IS pin (output)

#define LPWM_2 11 // define pin 11 for LPWM pin (output)
#define L_EN_2 A0 // define pin 7 for L_EN pin (input)
#define L_IS_2 A1 // define pin 8 for L_IS pin (output)
// motor 2 pins end here


#define CW 1 //
#define CCW 0 //
#define debug 1 //

#include <RobojaxBTS7960.h>
RobojaxBTS7960 motor1(R_EN_1,RPWM_1,R_IS_1, L_EN_1,LPWM_1,L_IS_1,debug);//define motor 1 object
RobojaxBTS7960 motor2(R_EN_2,RPWM_2,R_IS_2, L_EN_2,LPWM_2,L_IS_2,debug);//define motor 2 object and the same way for other motors

void setup() {
  // BTS7960 Motor Control Code by Robojax.com 20190622
  Serial.begin(9600);// setup Serial Monitor to display information

   motor1.begin();
   motor2.begin();   
   
    // BTS7960 Motor Control Code by Robojax.com 20190622 
}

void loop() {
   // BTS7960 Motor Control Code by Robojax.com 20190622 
    motor1.rotate(100,CW);// run motor 1 with 100% speed in CW direction
    delay(5000);//run for 5 seconds
    motor1.stop();// stop the motor 1
    delay(3000);// stop for 3 seconds
    motor1.rotate(100,CCW);// run motor 1 at 100% speed in CCW direction
    delay(5000);// run for 5 seconds
    motor1.stop();// stop the motor 1
    delay(3000);  // stop for 3 seconds

    motor2.rotate(100,CW);// run motor 2 with 100% speed in CW direction
    delay(5000);//run for 5 seconds
    motor2.stop();// stop the motor 2
    delay(3000);// stop for 3 seconds
    motor2.rotate(100,CCW);// run motor 2 at 100% speed in CCW direction
    delay(5000);// run for 5 seconds
    motor2.stop();// stop the motor 2
    delay(3000);  // stop for 3 seconds

    
  // slowly speed up the motor 1 from 0 to 100% speed
    for(int i=0; i<=100; i++){ 
        motor1.rotate(i,CCW);
        delay(50);
    } 
  
   // slow down the motor 2 from 100% to 0
    for(int i=100; i>0; i--){ 
        motor2.rotate(i,CCW);
        delay(50);
    } 
    motor2.stop();// stop motor 2
    delay(3000); // stop for 3 seconds        
 // BTS7960 more than 1 Motor Control Code by Robojax.com 20190622  
}// loop ends

文件📁

Arduino 库(zip 格式)

数据手册 (pdf)

Fritzing 文件