ArduinoでBTS7960 DCモータードライバーモジュールを制御する
このチュートリアルでは、Arduinoを使用してBTS7960 DCモータードライバーモジュールを制御する方法を学びます。このセットアップにより、パルス幅変調(PWM)を使用してDCモーターの方向と速度を制御できます。このチュートリアルの終わりには、自分のプロジェクトに簡単に修正できる動作するモーター制御システムを持つことになります。視覚的なガイドが必要な場合は、(ビデオは00:00にあります)ビデオをチェックしてください。
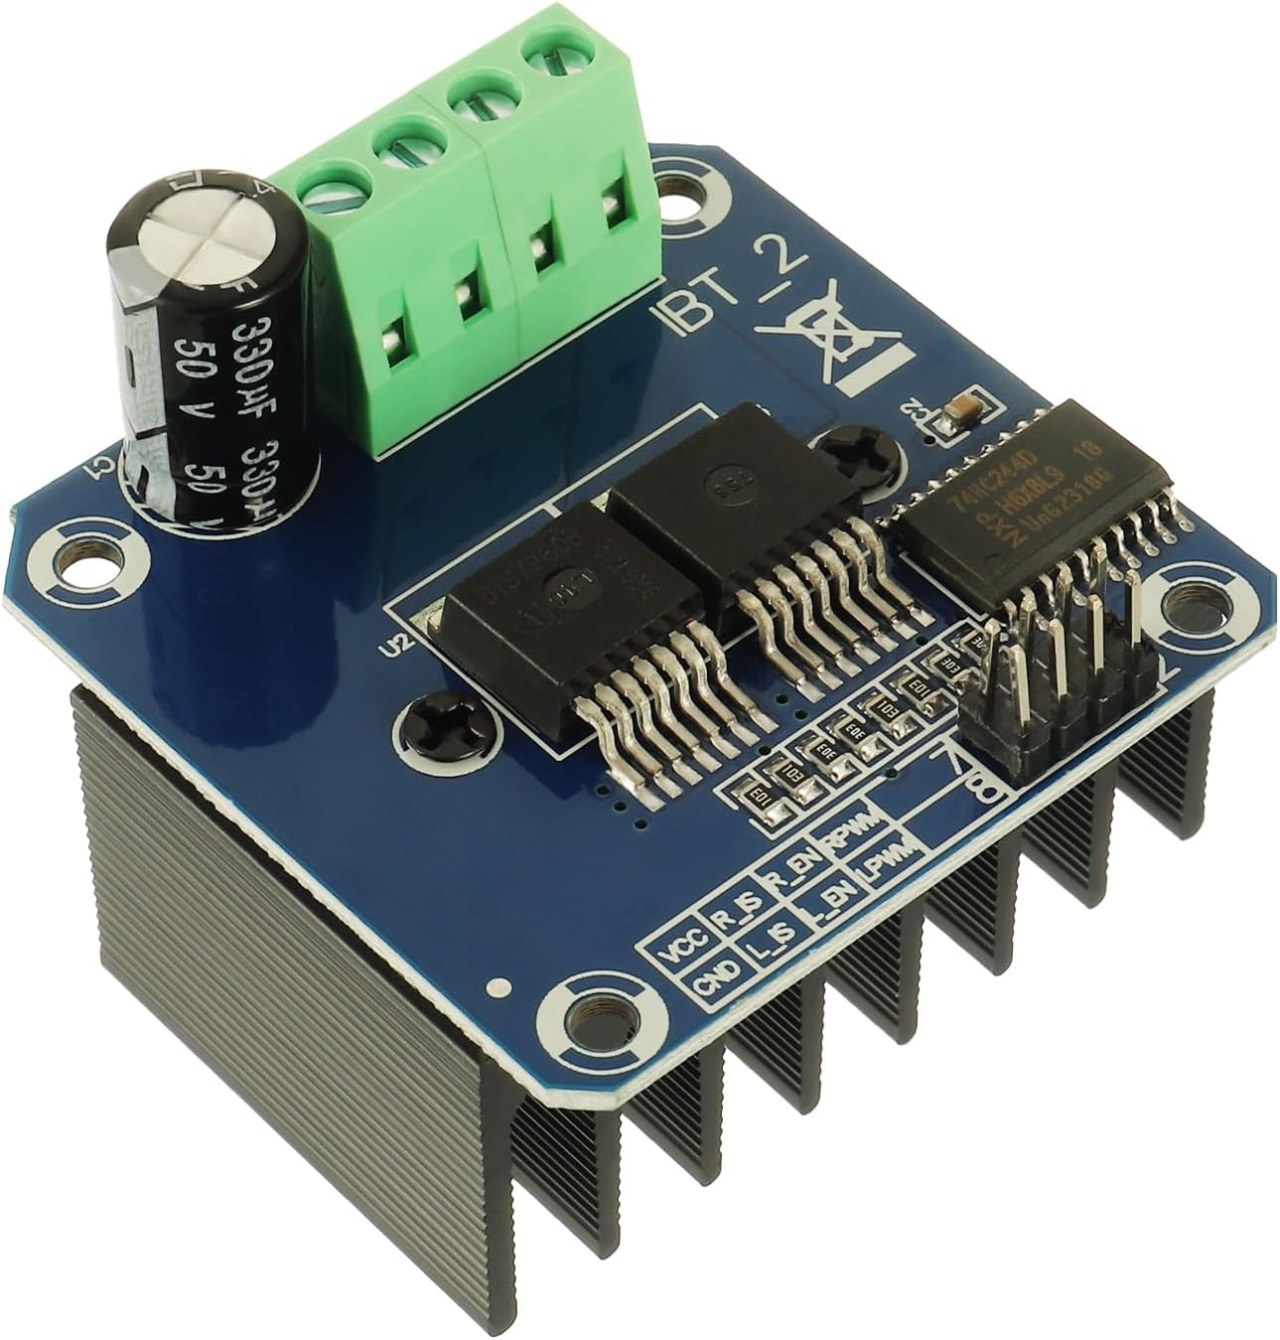
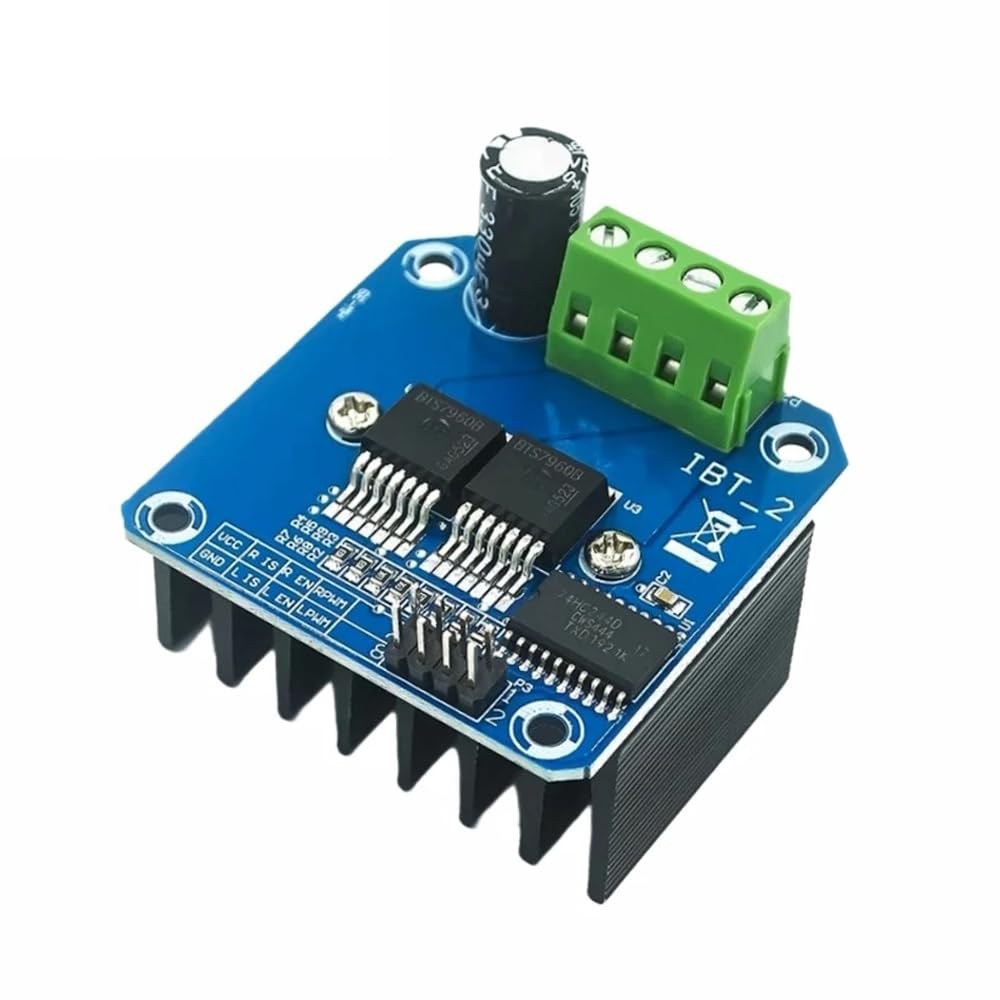
ハードウェアの解説
BTS7960は、最大43アンペアまで対応可能な高電流DCモータードライバーです。これは、時計回り(CW)および反時計回り(CCW)方向の両方でモーターを制御できる2つの集積回路(IC)で構成されています。このドライバーはPWM信号を使用してモーターの速度を変化させ、精密な制御が必要なアプリケーションにとって重要です。
このモジュールのもう一つの重要な側面は、内蔵の電流検出および過温度保護機能です。これにより、動作中にモーターやドライバーが損傷するのを防ぎます。このモジュールは外部ソースから電源が供給され、ロジック回路には別途5Vの電源が必要です。
データシートの詳細
| 製造業者 | インフィニオンテクノロジーズ |
|---|---|
| 部品番号 | BTS7960 |
| 論理/IO電圧 | 5 V |
| 供給電圧 | 6-27 V |
| 出力電流(チャンネルごと) | 43 A最大 |
| ピーク電流(チャネルごと) | 60 A |
| PWM周波数ガイダンス | 25 kHz |
| 入力論理閾値 | 0.8 V(高)、0.3 V(低) |
| 電圧降下 / RDS(on)/ 飽和度 | 16 mΩ |
| 熱的制限 | 最大125°C |
| パッケージ | PTO-263-7 |
| ノート / バリアント | デュアルHブリッジ構成 |
- 高電流アプリケーションに対して適切なヒートシンクを確保してください。
- 最大電流を扱うために適切なワイヤーゲージを使用してください。
- 最適な性能を得るためにPWM周波数を指定された範囲内に保ってください。
- 電源ピンの近くにデカップリングコンデンサを実装して、電圧を安定させます。
- 動作中に温度を監視し、過熱を防ぎます。
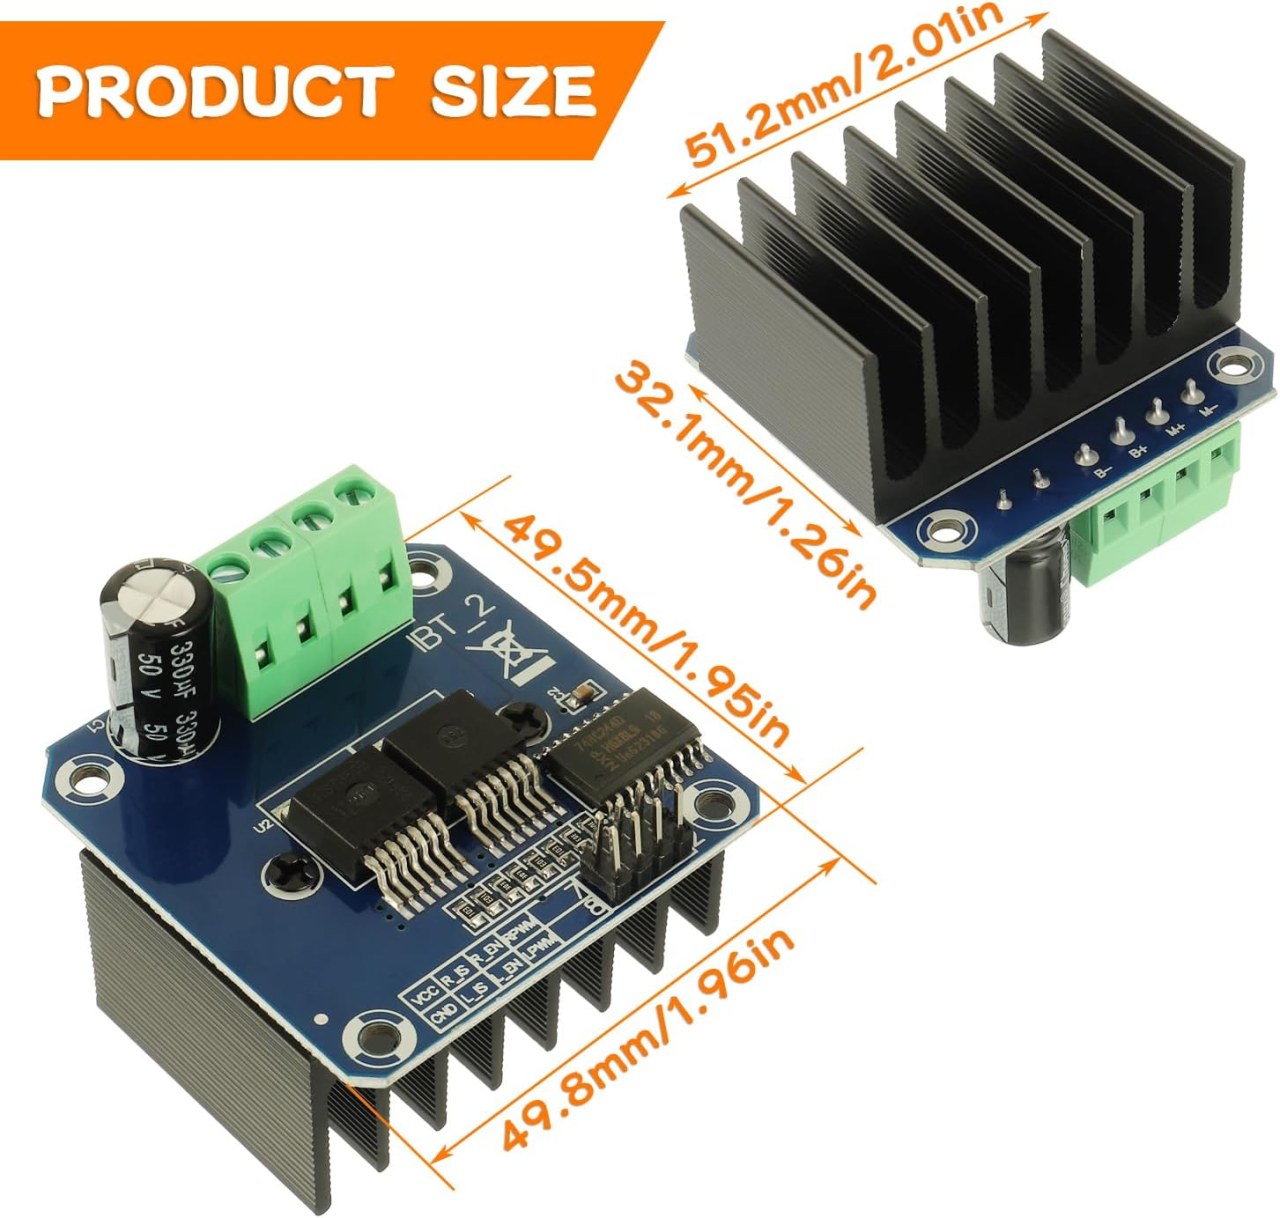
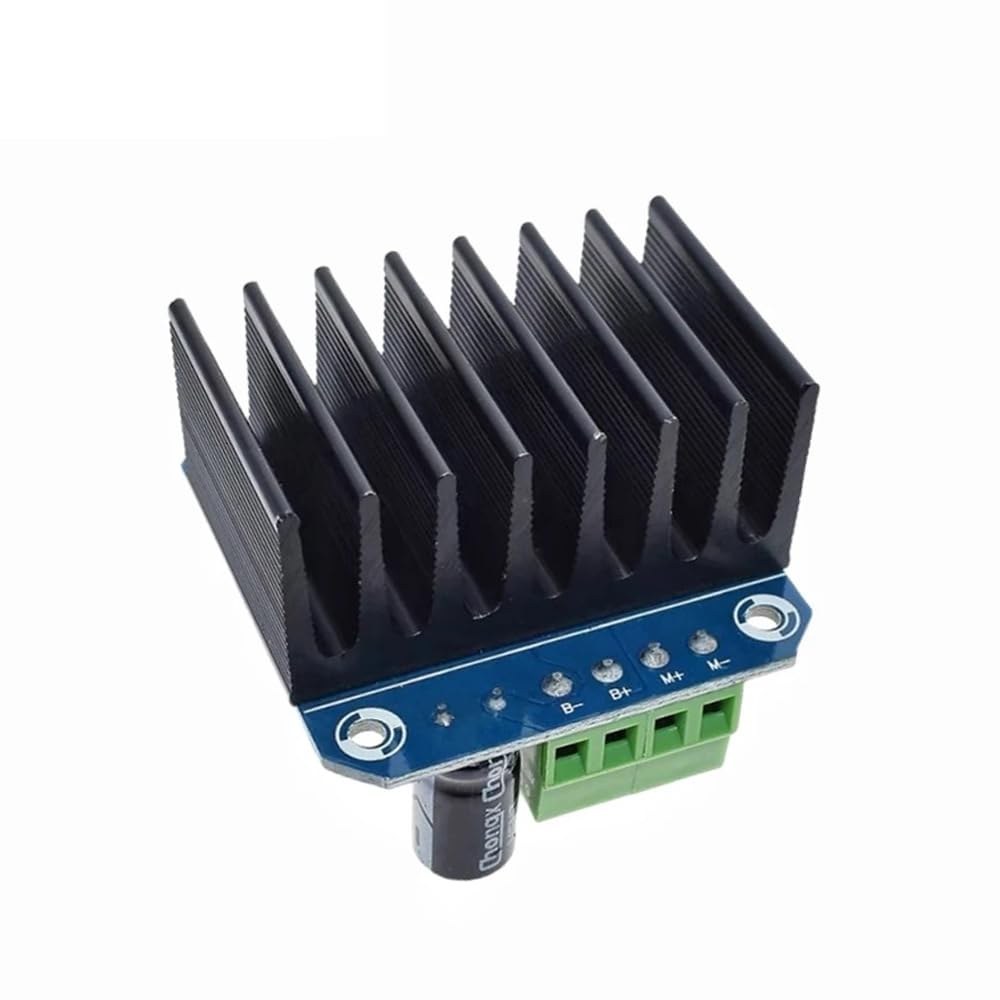
配線指示

BTS7960モータードライバーモジュールをArduinoに配線するには、電源、グラウンド、制御、モーター端子を正しく接続する必要があります。まず、電源をモジュールに接続します。B+そしてB-端子が極性が正しいことを確認します。B+端子は正の供給が接続される場所です、一方B-接地します。
次に、モーターを接続します。M+とM-モジュール上的端子。これらはモーターの方向を制御します。制御ピンについては、次のようにArduinoのピンをモジュールに接続してください。RPWM3にピンを刺す、R_EN4にピンを。R_ISピン5に、LPWMピン6に、L_ENピン7に、そしてL_ISピン8に接続します。また、Arduinoのグラウンドをモジュールのグラウンドにも接続することを確認してください。
必要なライブラリをインストールする
インストールするにはrobojax_BTS7960_motor_driver_libraryArduino IDEで、まず提供されたリンクからライブラリのZIPファイルをダウンロードします。ファイルを保存したら、Arduino IDEを開き、移動します。スケッチ > ライブラリを含める > .ZIPライブラリを追加...ファイル選択ダイアログで、ダウンロードしたZIPファイルを参照し、選択して「開く」をクリックします。IDEはライブラリをインストールします。インストールが成功したかどうかは、確認することができます。ファイル > サンプルメニューに「Robojax BTS7960 モータードライバーライブラリ」という新しいカテゴリが表示されるはずです。これで、コードにライブラリヘッダーを含めることができます。#include <RobojaxBTS7960.h>.
コード例とウォークスルー
BTS7960モータードライバを制御するためのArduinoコードは、必要なピンを定義することから始まります。例えば、右のPWM信号用のピンは次のように定義されます。RPWMおよびピン3に設定されます。さらに、右側のイネーブルピンは次のように定義されています。R_ENピン4に設定します。
#define RPWM 3 // define pin 3 for RPWM pin (output)
#define R_EN 4 // define pin 4 for R_EN pin (input)このセットアップは、モーターを正確に制御できるようにします。setup()機能、モーターは初期化されますmotor.begin()運転手を作業に備えさせる。
void setup() {
  Serial.begin(9600);// setup Serial Monitor to display information
  motor.begin(); // Initialize motor
}
In theloop()機能、モーターの方向と速度は使用して制御されますmotor.rotate(speed, direction)メソッド。例えば、モーターを全速で時計回りに回すには、次のようにします。motor.rotate(100, CW);.
void loop() {
    motor.rotate(100,CW); // run motor with 100% speed in CW direction
    delay(5000); // run for 5 seconds
}
記事の下にロードされた完全なコードをチェックして、より詳細な例やバリエーションを確認してください。
デモンストレーション / 期待すること
すべてが正しく配線され、プログラムされている場合、モーターはコードに基づいて両方向に回転することを期待できます。最初に、モーターは5秒間全速で回転し、3秒間停止し、その後同じ期間反対方向に回転します。このサイクルは繰り返され、モーターのPWM信号への応答性を見ることができます。
一般的な落とし穴には、モーターや電源を接続する際の極性の逆転が含まれ、これがコンポーネントを損傷させる可能性があります。さらに、コード内でPWMピンが正しく割り当てられていることを確認してください(動画の12:34で)。
ビデオのタイムスタンプ
- 00:00 スタート
- 00:48 ハードウェアの解説
- 04:06 データシートが表示されました
- 07:07 配線の説明
- 09:00 コードの説明
- 14:33 デモンストレーション
- 16:47 最大電流テスト
- 19:25 サーマルイメージ
- 19:27 異なるコードテスト
画像
/*
* This is the Arduino code for the BTS7960 DC motor driver.
Using this code, you can control a motor to rotate in both directions: clockwise (CW)
and counter-clockwise (CCW).
Watch the video instructions: https://youtu.be/PUL5DZ9TA2o
📚⬇️ Download and resource page for this video https://robojax.com/RJT169
📚⬇️ Download and resource page https://robojax.com/RJT170

// Written by Ahmad Shamshiri for Robojax.com on
// June 22, 2019 at 14:08 in Ajax, Ontario, Canada.
Get this code and other Arduino codes from Robojax.com.


* BTS7960B
 * Code is available at http://robojax.com/learn/arduino

 * This code is "AS IS" without warranty or liability. Free to be used as long as you keep this note intact.
 * This code has been downloaded from Robojax.com
    This program is free software: you can redistribute it and/or modify
    it under the terms of the GNU General Public License as published by
    the Free Software Foundation, either version 3 of the License, or
    (at your option) any later version.

    This program is distributed in the hope that it will be useful,
    but WITHOUT ANY WARRANTY; without even the implied warranty of
    MERCHANTABILITY or FITNESS FOR A PARTICULAR PURPOSE.  See the
    GNU General Public License for more details.

    You should have received a copy of the GNU General Public License
    along with this program.  If not, see <https://www.gnu.org/licenses/>.

*/

//
#define RPWM 3 // define pin 3 for RPWM pin (output)
#define R_EN 4 // define pin 2 for R_EN pin (input)
#define R_IS 5 // define pin 5 for R_IS pin (output)

#define LPWM 6 // define pin 6 for LPWM pin (output)
#define L_EN 7 // define pin 7 for L_EN pin (input)
#define L_IS 8 // define pin 8 for L_IS pin (output)
#define CW 1 //do not change
#define CCW 0 //do not change
#define debug 1 //change to 0 to hide serial monitor debugging information or set to 1 to view

#include <RobojaxBTS7960.h>
RobojaxBTS7960 motor(R_EN,RPWM,R_IS, L_EN,LPWM,L_IS,debug);

void setup() {
  // BTS7960 Motor Control Code by Robojax.com 20190622
  Serial.begin(9600);// setup Serial Monitor to display information

   motor.begin();
   //watch video for details: https://youtu.be/PUL5DZ9TA2o

    // BTS7960 Motor Control Code by Robojax.com 20190622
}

void loop() {
   // BTS7960 Motor Control Code by Robojax.com 20190622
      //watch video for details: https://youtu.be/PUL5DZ9TA2o
    motor.rotate(100,CW);// run motor with 100% speed in CW direction
    delay(5000);//run for 5 seconds
    motor.stop();// stop the motor
    delay(3000);// stop for 3 seconds
    motor.rotate(100,CCW);// run motor at 100% speed in CCW direction
    delay(5000);// run for 5 seconds
    motor.stop();// stop the motor
    delay(3000);  // stop for 3 seconds
	// slowly speed up the motor from 0 to 100% speed
    for(int i=0; i<=100; i++){
        motor.rotate(i,CCW);
        delay(50);
    }

   // slow down the motor from 100% to 0 with
    for(int i=100; i>0; i--){
        motor.rotate(i,CCW);
        delay(50);
    }

   //watch video for details: https://youtu.be/PUL5DZ9TA2o
    motor.stop();// stop motor
    delay(3000); // stop for 3 seconds
 // BTS7960 Motor Control Code by Robojax.com 20190622
}// loop ends++
/*
* This is the Arduino code for the BTS7960 DC motor driver.
Using this code, you can control more than one motor to rotate in both directions: clockwise (CW)
and counter-clockwise (CCW).
📚⬇️ Download and resource page for this video https://robojax.com/RJT169
📚⬇️ Download and resource page https://robojax.com/RJT170
Written by Ahmad Shamshiri for Robojax.com on
July 16, 2020 in Ajax, Ontario, Canada.
Watch video instructions for this code: https://youtu.be/PUL5DZ9TA2o
BTS7960B
If you found this tutorial helpful, please support me so I can continue creating
content like this. You can support me on Patreon: http://robojax.com/L/?id=63
or make a donation using PayPal: http://robojax.com/L/?id=64
* This code has been downloaded from Robojax.com
This program is free software: you can redistribute it and/or modify
it under the terms of the GNU General Public License as published by
the Free Software Foundation, either version 3 of the License, or
(at your option) any later version.
This program is distributed in the hope that it will be useful,
but WITHOUT ANY WARRANTY; without even the implied warranty of
MERCHANTABILITY or FITNESS FOR A PARTICULAR PURPOSE. See the
GNU General Public License for more details.
You should have received a copy of the GNU General Public License
along with this program. If not, see <https://www.gnu.org/licenses/>.
*/
// pins for motor 1
#define RPWM_1 3 // define pin 3 for RPWM pin (output)
#define R_EN_1 4 // define pin 2 for R_EN pin (input)
#define R_IS_1 5 // define pin 5 for R_IS pin (output)
#define LPWM_1 6 // define pin 6 for LPWM pin (output)
#define L_EN_1 7 // define pin 7 for L_EN pin (input)
#define L_IS_1 8 // define pin 8 for L_IS pin (output)
// motor 1 pins end here
// pins for motor 2
#define RPWM_2 9 // define pin 9 for RPWM pin (output)
#define R_EN_2 10 // define pin 10 for R_EN pin (input)
#define R_IS_2 12 // define pin 12 for R_IS pin (output)
#define LPWM_2 11 // define pin 11 for LPWM pin (output)
#define L_EN_2 A0 // define pin 7 for L_EN pin (input)
#define L_IS_2 A1 // define pin 8 for L_IS pin (output)
// motor 2 pins end here
#define CW 1 //
#define CCW 0 //
#define debug 1 //
#include <RobojaxBTS7960.h>
RobojaxBTS7960 motor1(R_EN_1,RPWM_1,R_IS_1, L_EN_1,LPWM_1,L_IS_1,debug);//define motor 1 object
RobojaxBTS7960 motor2(R_EN_2,RPWM_2,R_IS_2, L_EN_2,LPWM_2,L_IS_2,debug);//define motor 2 object and the same way for other motors
void setup() {
// BTS7960 Motor Control Code by Robojax.com 20190622
Serial.begin(9600);// setup Serial Monitor to display information
motor1.begin();
motor2.begin();
// BTS7960 Motor Control Code by Robojax.com 20190622
}
void loop() {
// BTS7960 Motor Control Code by Robojax.com 20190622
motor1.rotate(100,CW);// run motor 1 with 100% speed in CW direction
delay(5000);//run for 5 seconds
motor1.stop();// stop the motor 1
delay(3000);// stop for 3 seconds
motor1.rotate(100,CCW);// run motor 1 at 100% speed in CCW direction
delay(5000);// run for 5 seconds
motor1.stop();// stop the motor 1
delay(3000); // stop for 3 seconds
motor2.rotate(100,CW);// run motor 2 with 100% speed in CW direction
delay(5000);//run for 5 seconds
motor2.stop();// stop the motor 2
delay(3000);// stop for 3 seconds
motor2.rotate(100,CCW);// run motor 2 at 100% speed in CCW direction
delay(5000);// run for 5 seconds
motor2.stop();// stop the motor 2
delay(3000); // stop for 3 seconds
// slowly speed up the motor 1 from 0 to 100% speed
for(int i=0; i<=100; i++){
motor1.rotate(i,CCW);
delay(50);
}
// slow down the motor 2 from 100% to 0
for(int i=100; i>0; i--){
motor2.rotate(i,CCW);
delay(50);
}
motor2.stop();// stop motor 2
delay(3000); // stop for 3 seconds
// BTS7960 more than 1 Motor Control Code by Robojax.com 20190622
}// loop endsリソースと参考文献
-
外部AmazonでBTS7960を購入するamzn.to
-
外部AmazonカナダでBTS7960を購入するamzn.to
-
外部AmazonフランスのBTS7960amzn.to
-
外部BTS7960 アマゾンジャパンamzn.to
-
外部BTS7960、アマゾン・ドイツamzn.to
-
外部BTS7960はアマゾンスペインにあります。amzn.to
-
外部BTS7960をアマゾンイタリアでamzn.to
-
外部BTS7960を購入、Amazon UKamzn.to
ファイル📁
Arduinoライブラリ(zip)
-
robojax_BTS7960モータードライバーライブラリ
robojax_BTS7960_motor_driver_library.zip0.10 MB
データシート(pdf)
-
BTS7960データシート
BTS7960_datasheet.pdf0.45 MB
フリッツィングファイル
-
BTS7960ドライバー
BTS7960_driver.fzpz0.01 MB