Controllare un modulo driver di motore DC BTS7960 con un Arduino
In questo tutorial, impareremo come controllare un modulo driver per motori DC BTS7960 utilizzando un Arduino. Questa configurazione ti consente di controllare la direzione e la velocità di un motore DC utilizzando la Modulazione di Larghezza di Impulso (PWM). Alla fine di questo tutorial, avrai un sistema di controllo motore funzionante che puoi facilmente modificare per i tuoi progetti. Per una guida visiva dettagliata, assicurati di controllare il video a (in video a 00:00).
Hardware spiegato
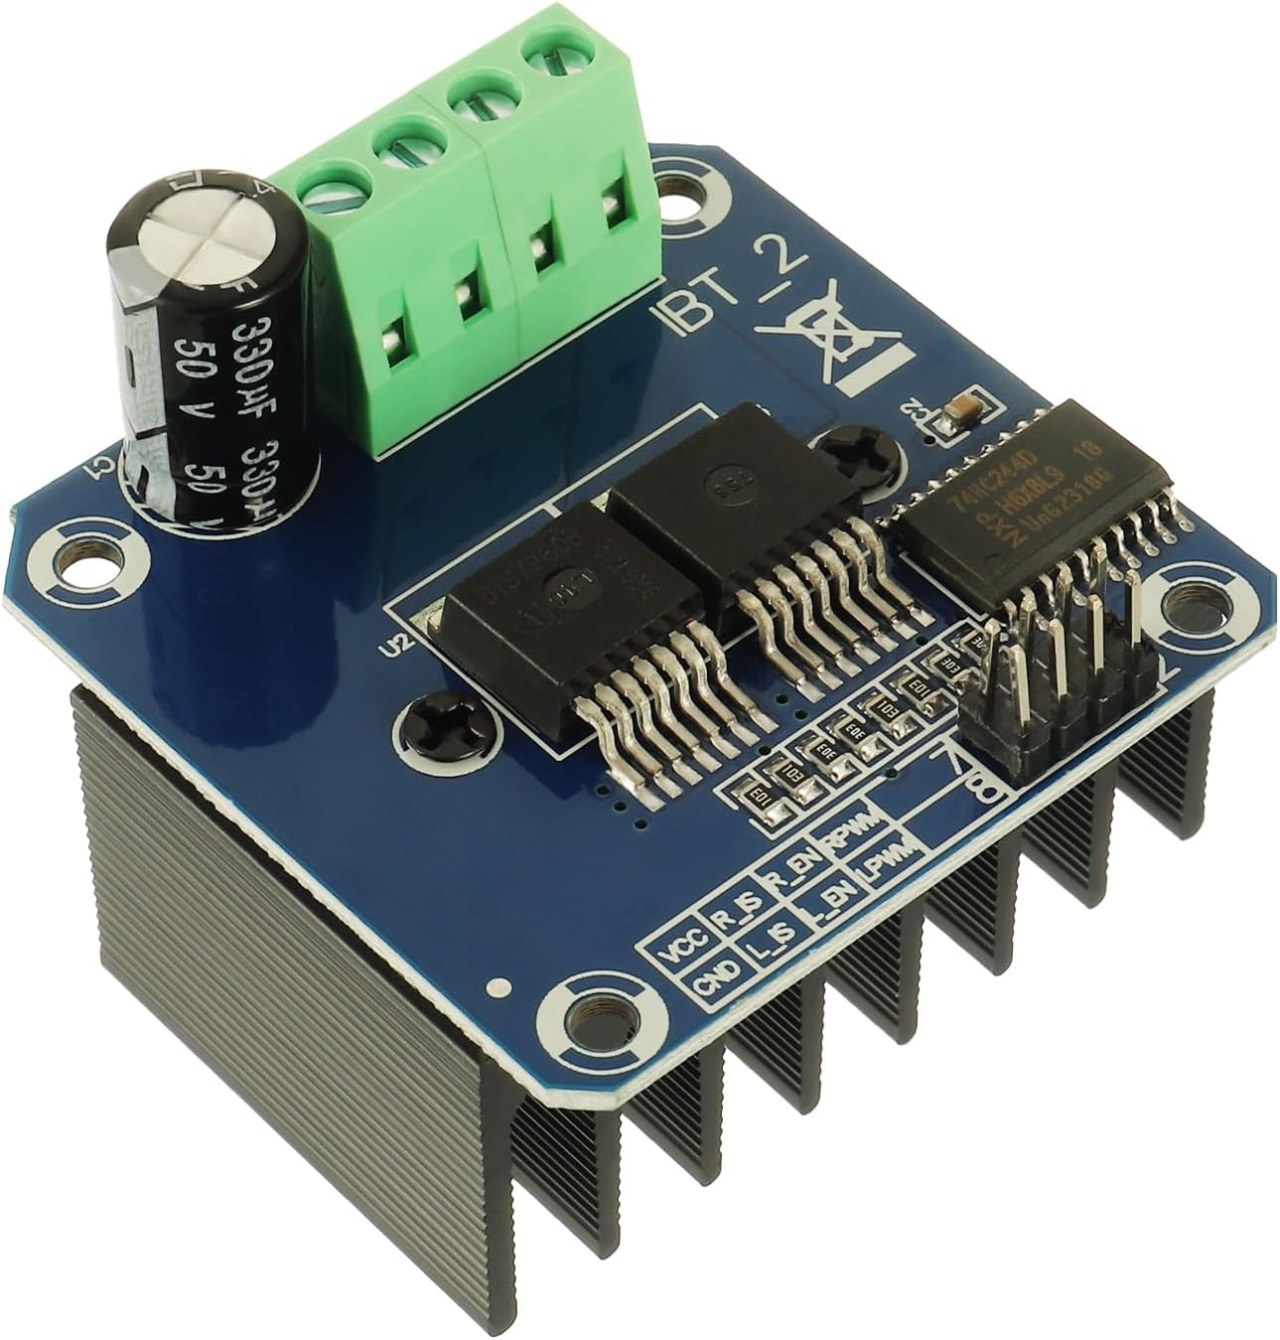
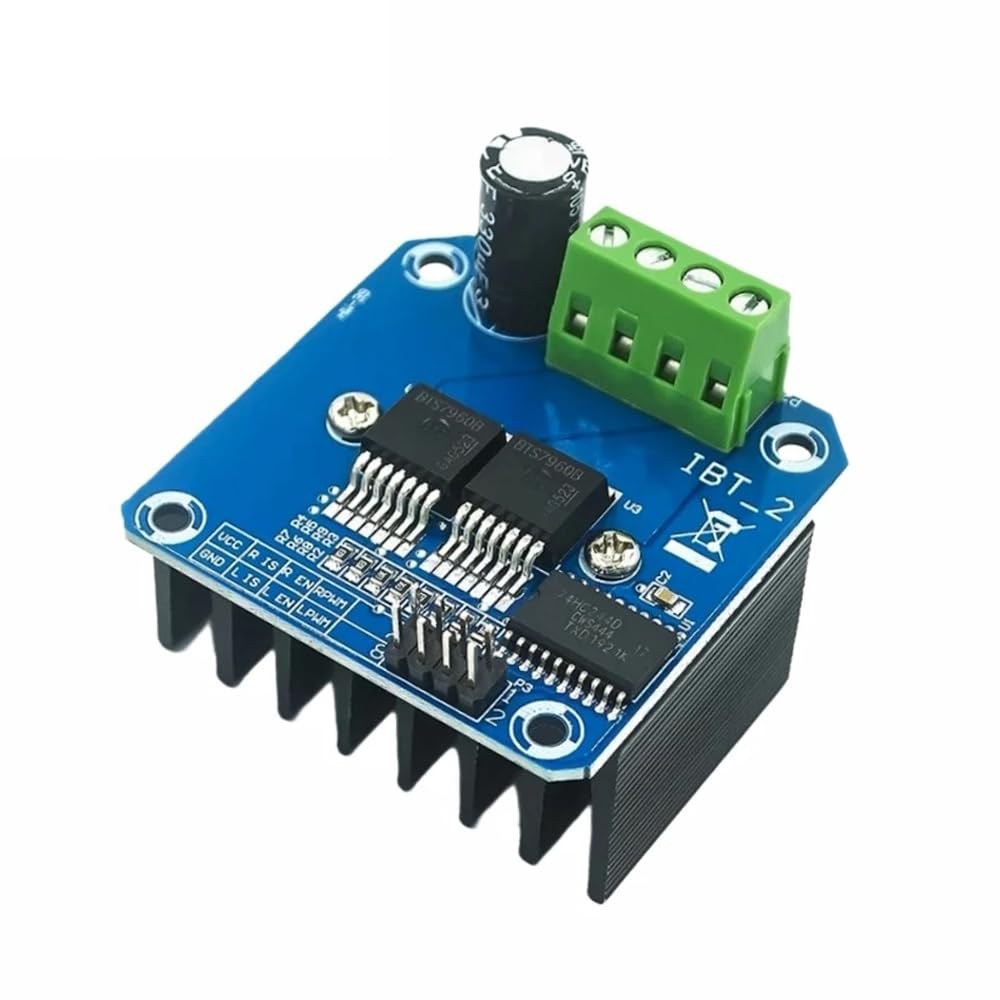
Il BTS7960 è un driver per motori CC ad alta corrente in grado di gestire fino a 43 Ampere. È composto da due circuiti integrati (IC) che consentono il controllo di un motore sia in direzione oraria (CW) che antioraria (CCW). Il driver utilizza segnali PWM per variare la velocità del motore, fondamentale per applicazioni che richiedono un controllo preciso.
Un altro aspetto importante di questo modulo è le sue funzionalità di rilevamento della corrente integrate e di protezione da sovratemperatura. Questo aiuta a prevenire danni al motore e al driver durante il funzionamento. Il modulo è alimentato da una fonte esterna e richiede anche un'alimentazione separata da 5V per i suoi circuiti logici.
Dettagli della scheda tecnica
| Produttore | Infineon Technologies |
|---|---|
| Numero di parte | BTS7960 |
| Tensione logica/IO | 5 V |
| Tensione di alimentazione | 6-27 V |
| Corrente di uscita (per canale) | 43 A max |
| Corrente di picco (per canale) | 60 A |
| Indicazioni sulla frequenza PWM | 25 kHz |
| Soglie di logica di ingresso | 0,8 V (alto), 0,3 V (basso) |
| Caduta di tensione / RDS(on)/ saturazione | 16 mΩ |
| Limiti termici | 125 °C max |
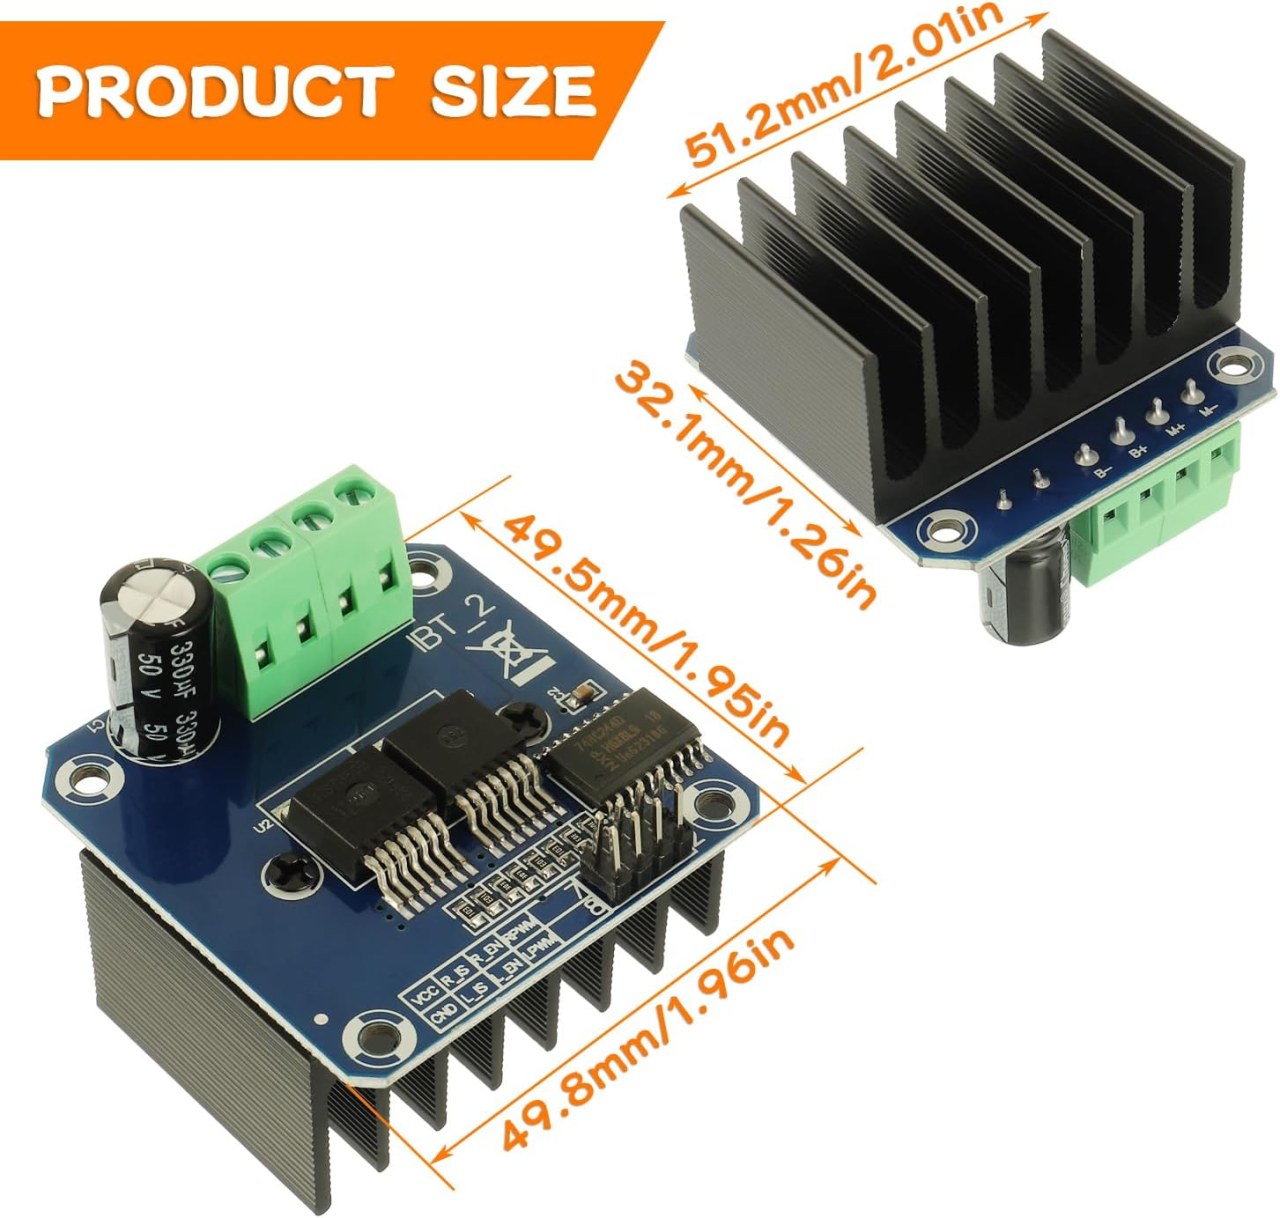
| Pacchetto | PTO-263-7 |
| Note / varianti | Configurazione dual H-Bridge |
- Assicurati di avere un adeguato dissipatore di calore per applicazioni ad alta corrente.
- Utilizzare un filo di adeguato calibro per gestire la massima corrente.
- Mantenere la frequenza PWM entro limiti specificati per prestazioni ottimali.
- Implementare condensatori di disaccoppiamento vicino ai pin di alimentazione per stabilizzare la tensione.
- Monitora la temperatura durante il funzionamento per prevenire il surriscaldamento.
Istruzioni di cablaggio

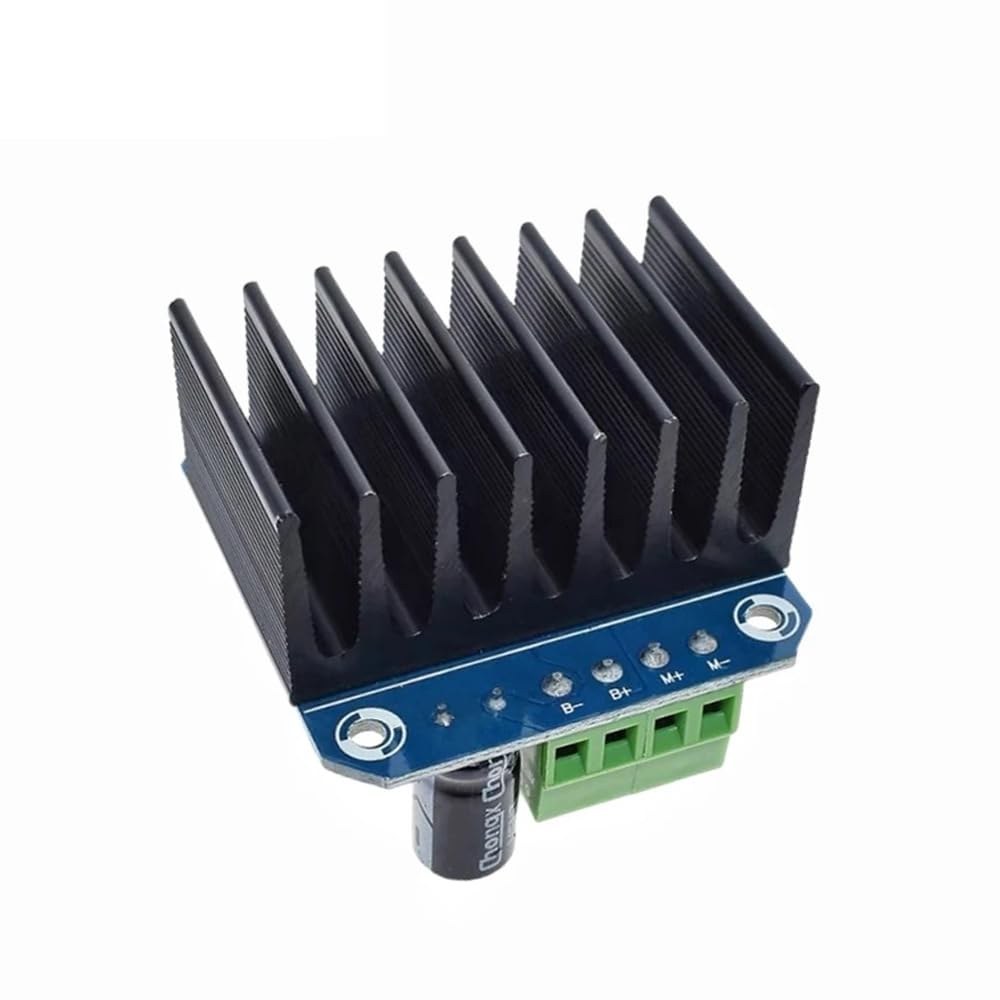
Per collegare il modulo di driver per motore BTS7960 al tuo Arduino, dovrai collegare correttamente i terminali di alimentazione, massa, controllo e motore. Inizia collegando l'alimentazione al modulo.B+eB-terminali, assicurando che la polarità sia corretta. LaB+il terminale è dove si collega l'alimentazione positiva, mentreB-si collega a terra.
Successivamente, collega il motore aM+eM-terminali sul modulo. Questi controlleranno la direzione del motore. Per i pin di controllo, collegare i pin dell'Arduino al modulo come segue:RPWMper fissare 3,R_ENa pin 4,R_ISper fissare 5,LPWMa pin 6,L_ENa pin 7, eL_ISal pin 8. Assicurati di collegare il ground dell'Arduino al ground del modulo.
Installa la libreria necessaria
Per installare ilrobojax_BTS7960_motor_driver_librarynell'IDE di Arduino, prima scarica il file ZIP della libreria dal link fornito. Con il file salvato, apri il tuo IDE di Arduino e vai aSchizzo > Includi libreria > Aggiungi libreria .ZIP.... Nella finestra di selezione del file, naviga fino al file ZIP scaricato, selezionalo e fai clic su "Apri". L'IDE installerà quindi la libreria. Puoi confermare un'installazione riuscita controllando ilFile > Esempimenu, dove dovrebbe apparire una nuova categoria chiamata "Robojax BTS7960 Motor Driver Library". Ora puoi includere l'intestazione della libreria nel tuo codice con#include <RobojaxBTS7960.h>.
Esempi di codice e guida passo passo
Il codice Arduino per controllare il driver del motore BTS7960 inizia con la definizione dei pin necessari. Ad esempio, il pin per il segnale PWM destro è definito comeRPWMe impostato sul pin 3. Inoltre, il pin di abilitazione per il lato destro è definito comeR_ENe impostato su pin 4.
#define RPWM 3 // define pin 3 for RPWM pin (output)
#define R_EN 4 // define pin 4 for R_EN pin (input)
Questa configurazione assicura che il motore possa essere controllato con precisione. Nelsetup()funzione, il motore viene inizializzato conmotor.begin(), che prepara il conducente all'operazione.
void setup() {
  Serial.begin(9600);// setup Serial Monitor to display information
  motor.begin(); // Initialize motor
}Nellaloop()funzione, la direzione e la velocità del motore sono controllate utilizzando ilmotor.rotate(speed, direction)metodo. Ad esempio, per far girare il motore a piena velocità in senso orario, si dovrebbe usaremotor.rotate(100, CW);.
void loop() {
    motor.rotate(100,CW); // run motor with 100% speed in CW direction
    delay(5000); // run for 5 seconds
}
Per esempi e variazioni più dettagliate, assicurati di controllare il codice completo caricato sotto l'articolo.
Dimostrazione / Cosa Aspettarsi
Quando tutto è cablato e programmato correttamente, dovresti aspettarti che il motore ruoti in entrambe le direzioni in base al codice. Inizialmente, il motore funzionerà alla massima velocità per cinque secondi, si fermerà per tre secondi e poi ruoterà nella direzione opposta per la stessa durata. Questo ciclo si ripeterà, consentendoti di vedere la reattività del motore ai segnali PWM.
I comuni errori includono la polarità invertita quando si collegano il motore o l'alimentazione, che possono danneggiare i componenti. Inoltre, assicurati che i pin PWM siano assegnati correttamente nel codice (nel video alle 12:34).
Timestamp video
- 00:00 Inizio
- 00:48 Spiegazione dell'hardware
- 04:06 Scheda tecnica visualizzata
- 07:07 Spiegazione del cablaggio
- 09:00 Codice spiegato
- 14:33 Dimostrazione
- 16:47 Test di corrente massima
- 19:25 Immagine termica
- 19:27 Test di codice diverso
Immagini
/*
* This is the Arduino code for the BTS7960 DC motor driver.
Using this code, you can control a motor to rotate in both directions: clockwise (CW)
and counter-clockwise (CCW).
Watch the video instructions: https://youtu.be/PUL5DZ9TA2o
📚⬇️ Download and resource page for this video https://robojax.com/RJT169
📚⬇️ Download and resource page https://robojax.com/RJT170

// Written by Ahmad Shamshiri for Robojax.com on
// June 22, 2019 at 14:08 in Ajax, Ontario, Canada.
Get this code and other Arduino codes from Robojax.com.


* BTS7960B
 * Code is available at http://robojax.com/learn/arduino

 * This code is "AS IS" without warranty or liability. Free to be used as long as you keep this note intact.
 * This code has been downloaded from Robojax.com
    This program is free software: you can redistribute it and/or modify
    it under the terms of the GNU General Public License as published by
    the Free Software Foundation, either version 3 of the License, or
    (at your option) any later version.

    This program is distributed in the hope that it will be useful,
    but WITHOUT ANY WARRANTY; without even the implied warranty of
    MERCHANTABILITY or FITNESS FOR A PARTICULAR PURPOSE.  See the
    GNU General Public License for more details.

    You should have received a copy of the GNU General Public License
    along with this program.  If not, see <https://www.gnu.org/licenses/>.

*/

//
#define RPWM 3 // define pin 3 for RPWM pin (output)
#define R_EN 4 // define pin 2 for R_EN pin (input)
#define R_IS 5 // define pin 5 for R_IS pin (output)

#define LPWM 6 // define pin 6 for LPWM pin (output)
#define L_EN 7 // define pin 7 for L_EN pin (input)
#define L_IS 8 // define pin 8 for L_IS pin (output)
#define CW 1 //do not change
#define CCW 0 //do not change
#define debug 1 //change to 0 to hide serial monitor debugging information or set to 1 to view

#include <RobojaxBTS7960.h>
RobojaxBTS7960 motor(R_EN,RPWM,R_IS, L_EN,LPWM,L_IS,debug);

void setup() {
  // BTS7960 Motor Control Code by Robojax.com 20190622
  Serial.begin(9600);// setup Serial Monitor to display information

   motor.begin();
   //watch video for details: https://youtu.be/PUL5DZ9TA2o

    // BTS7960 Motor Control Code by Robojax.com 20190622
}

void loop() {
   // BTS7960 Motor Control Code by Robojax.com 20190622
      //watch video for details: https://youtu.be/PUL5DZ9TA2o
    motor.rotate(100,CW);// run motor with 100% speed in CW direction
    delay(5000);//run for 5 seconds
    motor.stop();// stop the motor
    delay(3000);// stop for 3 seconds
    motor.rotate(100,CCW);// run motor at 100% speed in CCW direction
    delay(5000);// run for 5 seconds
    motor.stop();// stop the motor
    delay(3000);  // stop for 3 seconds
	// slowly speed up the motor from 0 to 100% speed
    for(int i=0; i<=100; i++){
        motor.rotate(i,CCW);
        delay(50);
    }

   // slow down the motor from 100% to 0 with
    for(int i=100; i>0; i--){
        motor.rotate(i,CCW);
        delay(50);
    }

   //watch video for details: https://youtu.be/PUL5DZ9TA2o
    motor.stop();// stop motor
    delay(3000); // stop for 3 seconds
 // BTS7960 Motor Control Code by Robojax.com 20190622
}// loop ends++
/*
* This is the Arduino code for the BTS7960 DC motor driver.
Using this code, you can control more than one motor to rotate in both directions: clockwise (CW)
and counter-clockwise (CCW).
📚⬇️ Download and resource page for this video https://robojax.com/RJT169
📚⬇️ Download and resource page https://robojax.com/RJT170
Written by Ahmad Shamshiri for Robojax.com on
July 16, 2020 in Ajax, Ontario, Canada.
Watch video instructions for this code: https://youtu.be/PUL5DZ9TA2o
BTS7960B
If you found this tutorial helpful, please support me so I can continue creating
content like this. You can support me on Patreon: http://robojax.com/L/?id=63
or make a donation using PayPal: http://robojax.com/L/?id=64
* This code has been downloaded from Robojax.com
This program is free software: you can redistribute it and/or modify
it under the terms of the GNU General Public License as published by
the Free Software Foundation, either version 3 of the License, or
(at your option) any later version.
This program is distributed in the hope that it will be useful,
but WITHOUT ANY WARRANTY; without even the implied warranty of
MERCHANTABILITY or FITNESS FOR A PARTICULAR PURPOSE. See the
GNU General Public License for more details.
You should have received a copy of the GNU General Public License
along with this program. If not, see <https://www.gnu.org/licenses/>.
*/
// pins for motor 1
#define RPWM_1 3 // define pin 3 for RPWM pin (output)
#define R_EN_1 4 // define pin 2 for R_EN pin (input)
#define R_IS_1 5 // define pin 5 for R_IS pin (output)
#define LPWM_1 6 // define pin 6 for LPWM pin (output)
#define L_EN_1 7 // define pin 7 for L_EN pin (input)
#define L_IS_1 8 // define pin 8 for L_IS pin (output)
// motor 1 pins end here
// pins for motor 2
#define RPWM_2 9 // define pin 9 for RPWM pin (output)
#define R_EN_2 10 // define pin 10 for R_EN pin (input)
#define R_IS_2 12 // define pin 12 for R_IS pin (output)
#define LPWM_2 11 // define pin 11 for LPWM pin (output)
#define L_EN_2 A0 // define pin 7 for L_EN pin (input)
#define L_IS_2 A1 // define pin 8 for L_IS pin (output)
// motor 2 pins end here
#define CW 1 //
#define CCW 0 //
#define debug 1 //
#include <RobojaxBTS7960.h>
RobojaxBTS7960 motor1(R_EN_1,RPWM_1,R_IS_1, L_EN_1,LPWM_1,L_IS_1,debug);//define motor 1 object
RobojaxBTS7960 motor2(R_EN_2,RPWM_2,R_IS_2, L_EN_2,LPWM_2,L_IS_2,debug);//define motor 2 object and the same way for other motors
void setup() {
// BTS7960 Motor Control Code by Robojax.com 20190622
Serial.begin(9600);// setup Serial Monitor to display information
motor1.begin();
motor2.begin();
// BTS7960 Motor Control Code by Robojax.com 20190622
}
void loop() {
// BTS7960 Motor Control Code by Robojax.com 20190622
motor1.rotate(100,CW);// run motor 1 with 100% speed in CW direction
delay(5000);//run for 5 seconds
motor1.stop();// stop the motor 1
delay(3000);// stop for 3 seconds
motor1.rotate(100,CCW);// run motor 1 at 100% speed in CCW direction
delay(5000);// run for 5 seconds
motor1.stop();// stop the motor 1
delay(3000); // stop for 3 seconds
motor2.rotate(100,CW);// run motor 2 with 100% speed in CW direction
delay(5000);//run for 5 seconds
motor2.stop();// stop the motor 2
delay(3000);// stop for 3 seconds
motor2.rotate(100,CCW);// run motor 2 at 100% speed in CCW direction
delay(5000);// run for 5 seconds
motor2.stop();// stop the motor 2
delay(3000); // stop for 3 seconds
// slowly speed up the motor 1 from 0 to 100% speed
for(int i=0; i<=100; i++){
motor1.rotate(i,CCW);
delay(50);
}
// slow down the motor 2 from 100% to 0
for(int i=100; i>0; i--){
motor2.rotate(i,CCW);
delay(50);
}
motor2.stop();// stop motor 2
delay(3000); // stop for 3 seconds
// BTS7960 more than 1 Motor Control Code by Robojax.com 20190622
}// loop endsRisorse e riferimenti
-
EsternoAcquista BTS7960 su Amazonamzn.to
-
Esterno
-
Esterno
-
EsternoBTS7960 Amazon Giapponeamzn.to
-
EsternoBTS7960 su Amazon Franciaamzn.to
-
EsternoBTS7960 su Amazon Italiaamzn.to
-
EsternoBTS7960 su Amazon Spagnaamzn.to
-
EsternoBTS7960, Amazon Germaniaamzn.to
File📁
Librerie Arduino (zip)
-
robojax_BTS7960_libreria_driver_motore
robojax_BTS7960_motor_driver_library.zip0.10 MB
Scheda tecnica (pdf)
-
BTS7960_datasheet
BTS7960_datasheet.pdf0.45 MB
File Fritzing
-
BTS7960_driver
BTS7960_driver.fzpz0.01 MB