Controlando un módulo de controlador de motor DC BTS7960 con un Arduino
En este tutorial, aprenderemos a controlar un módulo de controlador de motor DC BTS7960 utilizando un Arduino. Esta configuración te permite controlar la dirección y la velocidad de un motor DC usando Modulación por Ancho de Pulso (PWM). Al final de este tutorial, tendrás un sistema de control de motor en funcionamiento que puedes modificar fácilmente para tus propios proyectos. Para una guía visual detallada, asegúrate de ver el video en (en el video en 00:00).
Hardware Explicado
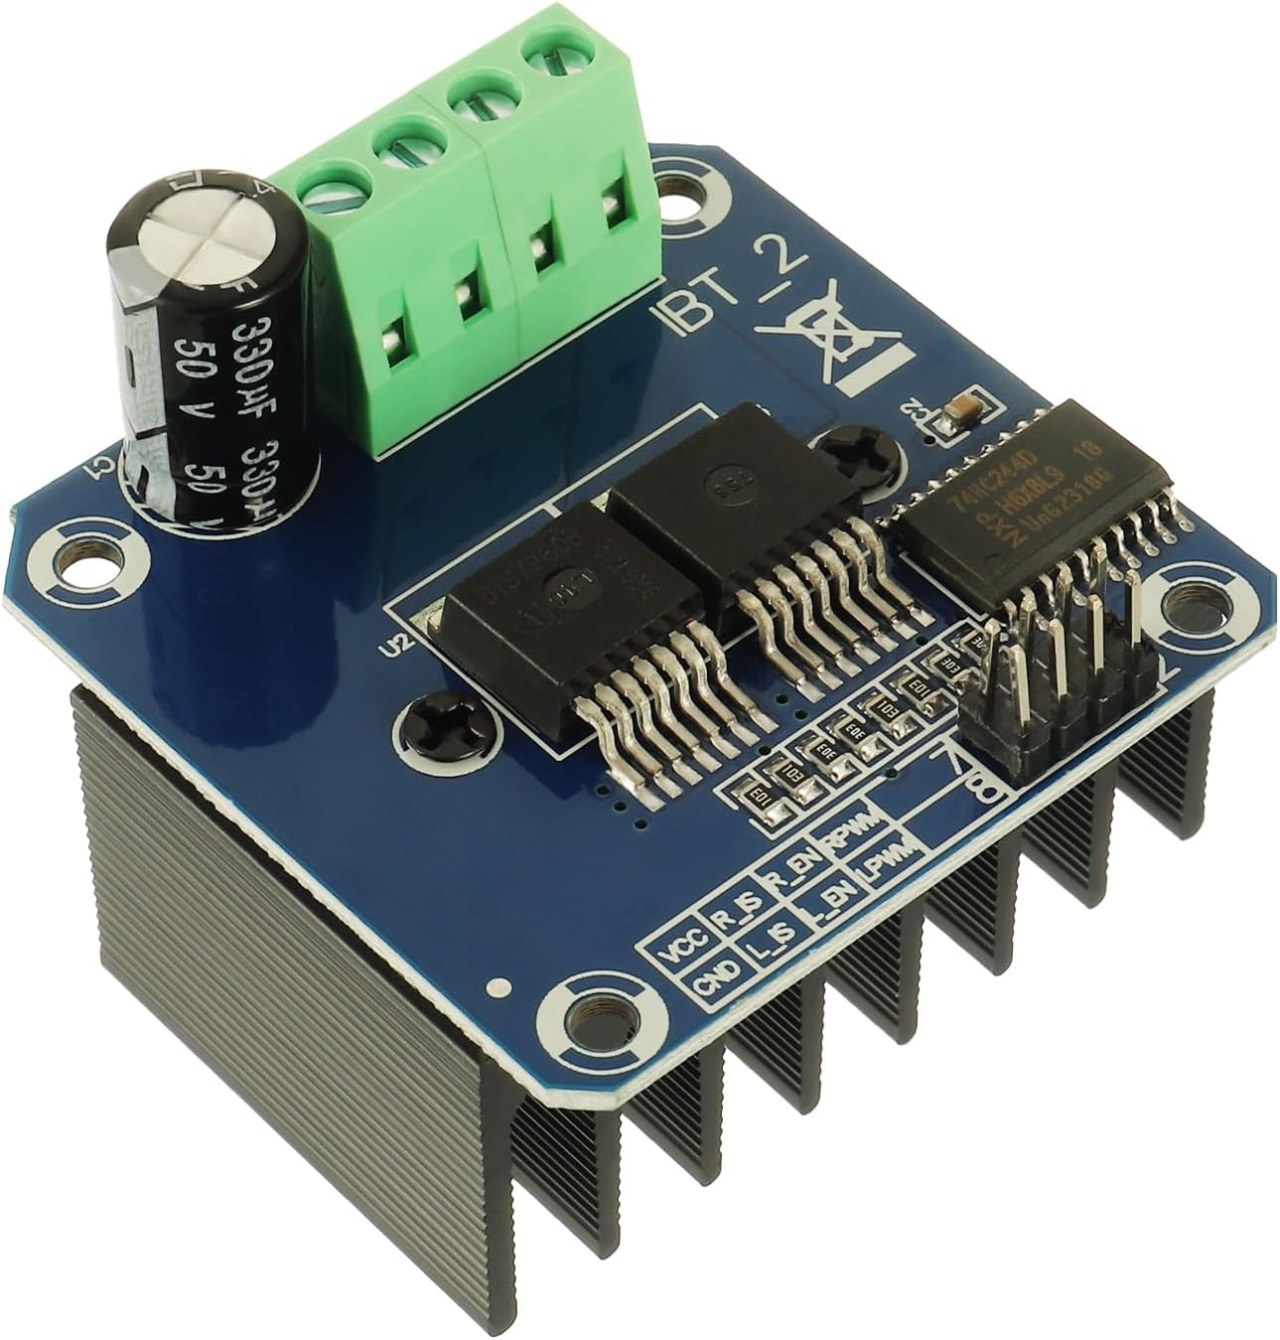
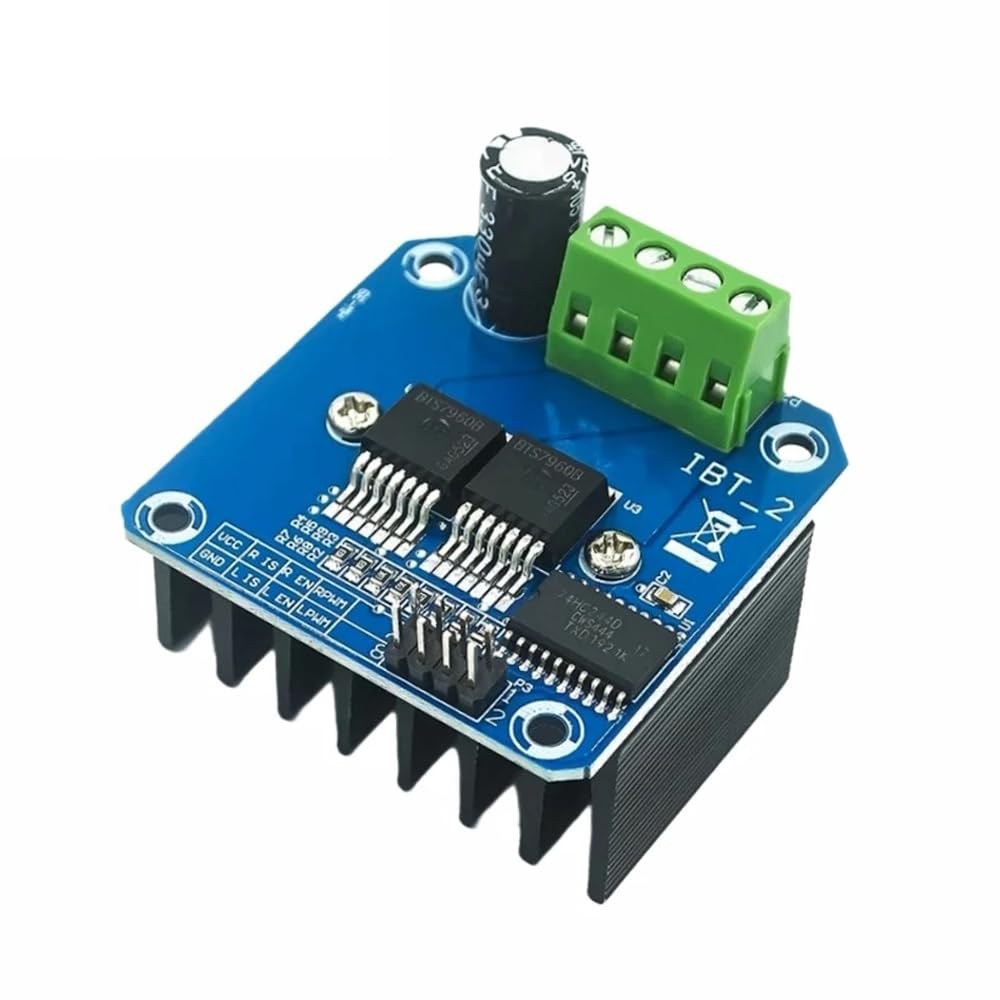
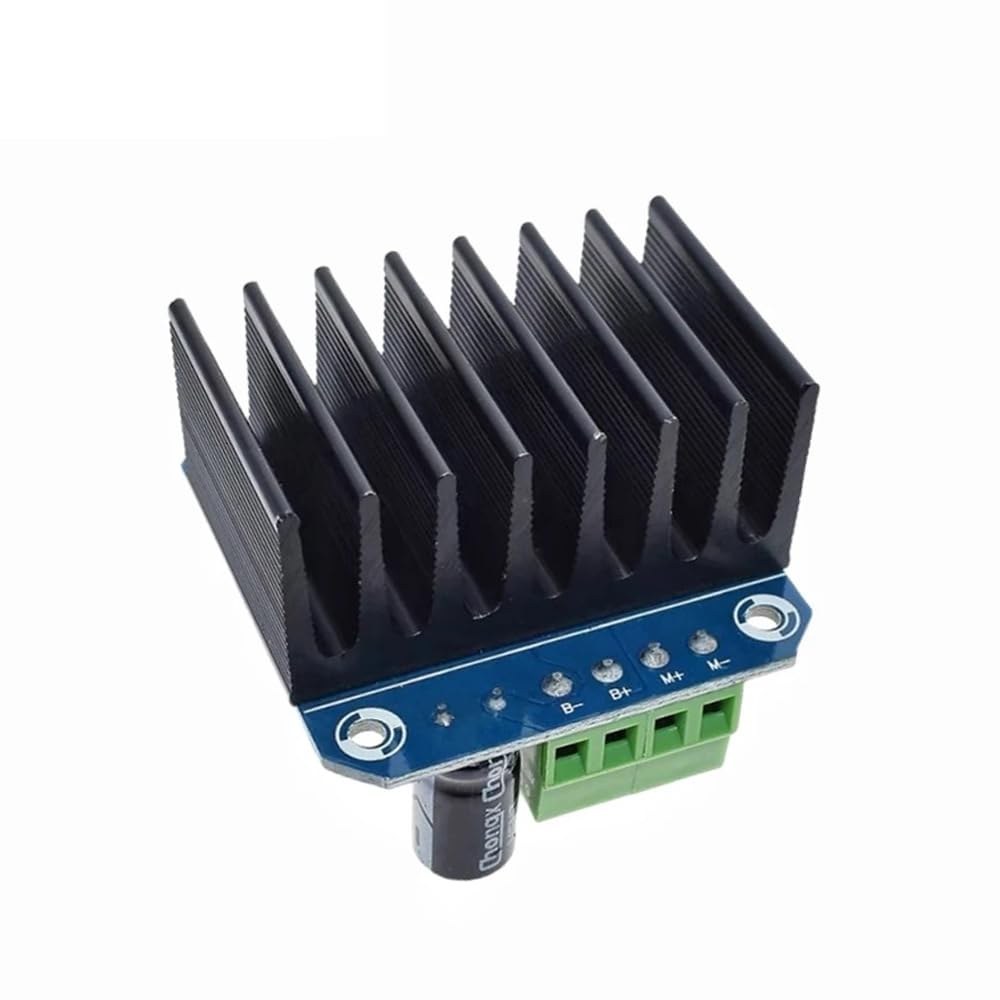
El BTS7960 es un controlador de motor de corriente alta capaz de manejar hasta 43 Amperios. Consta de dos circuitos integrados (CI) que permiten el control de un motor en ambas direcciones: en sentido horario (CW) y en sentido antihorario (CCW). El controlador utiliza señales PWM para variar la velocidad del motor, lo cual es esencial para aplicaciones que requieren un control preciso.
Otro aspecto importante de este módulo son sus funciones integradas de detección de corriente y protección contra sobretemperatura. Esto ayuda a prevenir daños al motor y al controlador durante el funcionamiento. El módulo se alimenta de una fuente externa y también requiere una fuente de 5V separada para sus circuitos lógicos.
Detalles de la hoja de datos
| Fabricante | Infineon Technologies |
|---|---|
| Número de parte | BTS7960 |
| Voltaje de lógica/IO | 5 V |
| Tensión de alimentación | 6-27 V |
| Corriente de salida (por canal) | 43 A máx |
| Corriente pico (por canal) | 60 A |
| Guía de frecuencia PWM | 25 kHz |
| Umbrales de lógica de entrada | 0.8 V (alto), 0.3 V (bajo) |
| Caída de voltaje / RDS(on)/ saturación | 16 mΩ |
| Límites térmicos | 125 °C máx |
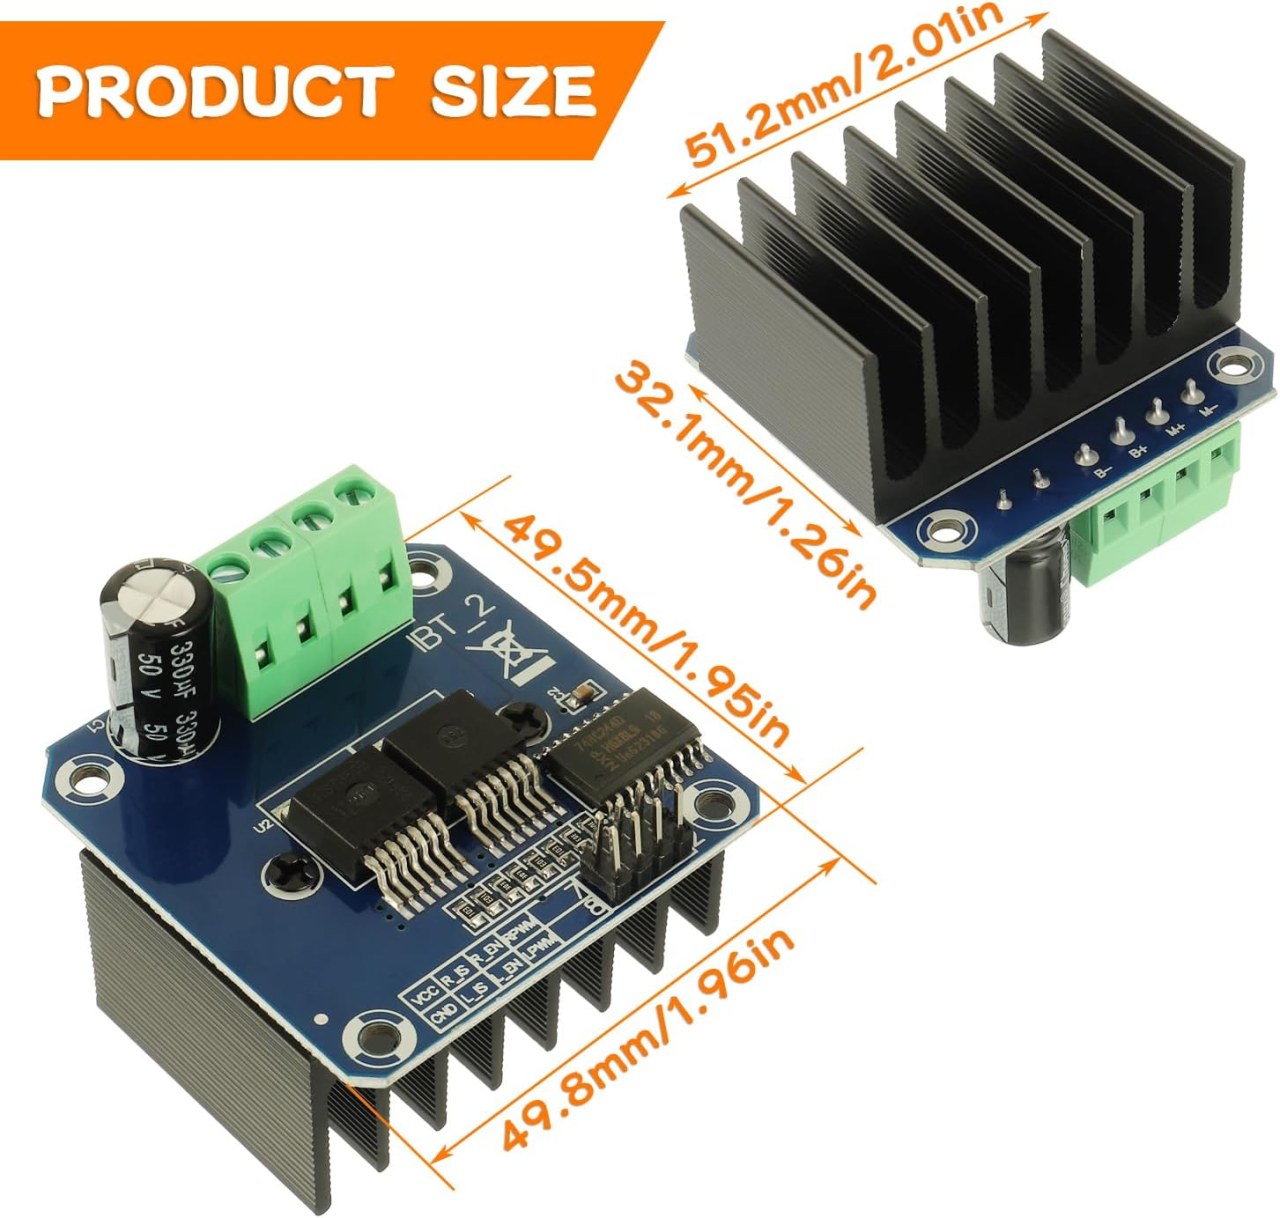
| Paquete | PTO-263-7 |
| Notas / variantes | Configuración de puente H dual |
- Asegúrese de un adecuado enfriamiento para aplicaciones de alta corriente.
- Utilice el calibre de cable adecuado para manejar la corriente máxima.
- Mantenga la frecuencia PWM dentro de los límites especificados para un rendimiento óptimo.
- Implementar capacitores de desacoplamiento cerca de los pines de alimentación para estabilizar el voltaje.
- Monitore la temperatura durante el funcionamiento para prevenir el sobrecalentamiento.
Instrucciones de cableado

Para conectar el módulo de controlador de motor BTS7960 a tu Arduino, necesitarás conectar correctamente los terminales de alimentación, tierra, control y motor. Comienza conectando la fuente de alimentación al módulo.B+yB-terminales, asegurando que la polaridad sea correcta. ElB+el terminal es donde se conecta la alimentación positiva, mientras queB-se conecta a tierra.
A continuación, conecta el motor alM+yM-terminales en el módulo. Estos controlarán la dirección del motor. Para los pines de control, conecta los pines de Arduino al módulo de la siguiente manera:RPWMa pin 3,R_ENa pin 4,R_ISa pin 5,LPWMa pin 6,L_ENa pin 7, yL_ISa pin 8. Asegúrate de conectar el terreno del Arduino al terreno del módulo también.
Instalar la biblioteca requerida
Para instalar elrobojax_BTS7960_motor_driver_libraryen el IDE de Arduino, primero descarga el archivo ZIP de la biblioteca desde el enlace proporcionado. Con el archivo guardado, abre tu IDE de Arduino y navega aBoceto > Incluir biblioteca > Agregar biblioteca .ZIP...En el diálogo de selección de archivos, navegue hasta el archivo ZIP descargado, selecciónelo y haga clic en "Abrir". Luego, el IDE instalará la biblioteca. Puede confirmar una instalación exitosa verificando elArchivo > Ejemplosmenú, donde debería aparecer una nueva categoría llamada "Biblioteca de Controladores de Motor Robojax BTS7960". Ahora puedes incluir el encabezado de la biblioteca en tu código con#include <RobojaxBTS7960.h>.
Ejemplos de código y guía paso a paso
El código de Arduino para controlar el controlador de motor BTS7960 comienza definiendo los pines necesarios. Por ejemplo, el pin para la señal PWM derecha se define comoRPWMy configurado en el pin 3. Además, el pin de habilitación para el lado derecho se define comoR_ENy configurado en el pin 4.
#define RPWM 3 // define pin 3 for RPWM pin (output)
#define R_EN 4 // define pin 4 for R_EN pin (input)
Este sistema garantiza que el motor se pueda controlar con precisión. En elsetup()función, el motor se inicializa conmotor.begin(), que prepara al conductor para la operación.
void setup() {
  Serial.begin(9600);// setup Serial Monitor to display information
  motor.begin(); // Initialize motor
}
En elloop()función, la dirección y velocidad del motor se controlan utilizando elmotor.rotate(speed, direction)método. Por ejemplo, para hacer funcionar el motor a toda velocidad en sentido horario, usaríasmotor.rotate(100, CW);.
void loop() {
    motor.rotate(100,CW); // run motor with 100% speed in CW direction
    delay(5000); // run for 5 seconds
}
Para ejemplos y variaciones más detallados, asegúrate de revisar el código completo cargado debajo del artículo.
Demostración / Qué Esperar
Cuando todo está cableado y programado correctamente, deberías esperar que el motor gire en ambas direcciones según el código. Inicialmente, el motor funcionará a toda velocidad durante cinco segundos, se detendrá durante tres segundos y luego girará en la dirección opuesta durante la misma duración. Este ciclo se repetirá, permitiéndote ver la capacidad de respuesta del motor a las señales PWM.
Los errores comunes incluyen la polaridad invertida al conectar el motor o la fuente de alimentación, lo que puede dañar los componentes. Además, asegúrese de que los pines PWM estén correctamente asignados en el código (en el video a las 12:34).
Marcas de tiempo del video
- 00:00 Comenzar
- 00:48 Hardware Explicado
- 04:06 Hoja de datos vista
- 07:07 Explicación del cableado
- 09:00 Código explicado
- 14:33 Demostración
- 16:47 Prueba de corriente máxima
- 19:25 Imagen térmica
- 19:27 Prueba de código diferente
Imágenes
/*
* This is the Arduino code for the BTS7960 DC motor driver.
Using this code, you can control a motor to rotate in both directions: clockwise (CW)
and counter-clockwise (CCW).
Watch the video instructions: https://youtu.be/PUL5DZ9TA2o
📚⬇️ Download and resource page for this video https://robojax.com/RJT169
📚⬇️ Download and resource page https://robojax.com/RJT170

// Written by Ahmad Shamshiri for Robojax.com on
// June 22, 2019 at 14:08 in Ajax, Ontario, Canada.
Get this code and other Arduino codes from Robojax.com.


* BTS7960B
 * Code is available at http://robojax.com/learn/arduino

 * This code is "AS IS" without warranty or liability. Free to be used as long as you keep this note intact.
 * This code has been downloaded from Robojax.com
    This program is free software: you can redistribute it and/or modify
    it under the terms of the GNU General Public License as published by
    the Free Software Foundation, either version 3 of the License, or
    (at your option) any later version.

    This program is distributed in the hope that it will be useful,
    but WITHOUT ANY WARRANTY; without even the implied warranty of
    MERCHANTABILITY or FITNESS FOR A PARTICULAR PURPOSE.  See the
    GNU General Public License for more details.

    You should have received a copy of the GNU General Public License
    along with this program.  If not, see <https://www.gnu.org/licenses/>.

*/

//
#define RPWM 3 // define pin 3 for RPWM pin (output)
#define R_EN 4 // define pin 2 for R_EN pin (input)
#define R_IS 5 // define pin 5 for R_IS pin (output)

#define LPWM 6 // define pin 6 for LPWM pin (output)
#define L_EN 7 // define pin 7 for L_EN pin (input)
#define L_IS 8 // define pin 8 for L_IS pin (output)
#define CW 1 //do not change
#define CCW 0 //do not change
#define debug 1 //change to 0 to hide serial monitor debugging information or set to 1 to view

#include <RobojaxBTS7960.h>
RobojaxBTS7960 motor(R_EN,RPWM,R_IS, L_EN,LPWM,L_IS,debug);

void setup() {
  // BTS7960 Motor Control Code by Robojax.com 20190622
  Serial.begin(9600);// setup Serial Monitor to display information

   motor.begin();
   //watch video for details: https://youtu.be/PUL5DZ9TA2o

    // BTS7960 Motor Control Code by Robojax.com 20190622
}

void loop() {
   // BTS7960 Motor Control Code by Robojax.com 20190622
      //watch video for details: https://youtu.be/PUL5DZ9TA2o
    motor.rotate(100,CW);// run motor with 100% speed in CW direction
    delay(5000);//run for 5 seconds
    motor.stop();// stop the motor
    delay(3000);// stop for 3 seconds
    motor.rotate(100,CCW);// run motor at 100% speed in CCW direction
    delay(5000);// run for 5 seconds
    motor.stop();// stop the motor
    delay(3000);  // stop for 3 seconds
	// slowly speed up the motor from 0 to 100% speed
    for(int i=0; i<=100; i++){
        motor.rotate(i,CCW);
        delay(50);
    }

   // slow down the motor from 100% to 0 with
    for(int i=100; i>0; i--){
        motor.rotate(i,CCW);
        delay(50);
    }

   //watch video for details: https://youtu.be/PUL5DZ9TA2o
    motor.stop();// stop motor
    delay(3000); // stop for 3 seconds
 // BTS7960 Motor Control Code by Robojax.com 20190622
}// loop ends++
/*
* This is the Arduino code for the BTS7960 DC motor driver.
Using this code, you can control more than one motor to rotate in both directions: clockwise (CW)
and counter-clockwise (CCW).
📚⬇️ Download and resource page for this video https://robojax.com/RJT169
📚⬇️ Download and resource page https://robojax.com/RJT170
Written by Ahmad Shamshiri for Robojax.com on
July 16, 2020 in Ajax, Ontario, Canada.
Watch video instructions for this code: https://youtu.be/PUL5DZ9TA2o
BTS7960B
If you found this tutorial helpful, please support me so I can continue creating
content like this. You can support me on Patreon: http://robojax.com/L/?id=63
or make a donation using PayPal: http://robojax.com/L/?id=64
* This code has been downloaded from Robojax.com
This program is free software: you can redistribute it and/or modify
it under the terms of the GNU General Public License as published by
the Free Software Foundation, either version 3 of the License, or
(at your option) any later version.
This program is distributed in the hope that it will be useful,
but WITHOUT ANY WARRANTY; without even the implied warranty of
MERCHANTABILITY or FITNESS FOR A PARTICULAR PURPOSE. See the
GNU General Public License for more details.
You should have received a copy of the GNU General Public License
along with this program. If not, see <https://www.gnu.org/licenses/>.
*/
// pins for motor 1
#define RPWM_1 3 // define pin 3 for RPWM pin (output)
#define R_EN_1 4 // define pin 2 for R_EN pin (input)
#define R_IS_1 5 // define pin 5 for R_IS pin (output)
#define LPWM_1 6 // define pin 6 for LPWM pin (output)
#define L_EN_1 7 // define pin 7 for L_EN pin (input)
#define L_IS_1 8 // define pin 8 for L_IS pin (output)
// motor 1 pins end here
// pins for motor 2
#define RPWM_2 9 // define pin 9 for RPWM pin (output)
#define R_EN_2 10 // define pin 10 for R_EN pin (input)
#define R_IS_2 12 // define pin 12 for R_IS pin (output)
#define LPWM_2 11 // define pin 11 for LPWM pin (output)
#define L_EN_2 A0 // define pin 7 for L_EN pin (input)
#define L_IS_2 A1 // define pin 8 for L_IS pin (output)
// motor 2 pins end here
#define CW 1 //
#define CCW 0 //
#define debug 1 //
#include <RobojaxBTS7960.h>
RobojaxBTS7960 motor1(R_EN_1,RPWM_1,R_IS_1, L_EN_1,LPWM_1,L_IS_1,debug);//define motor 1 object
RobojaxBTS7960 motor2(R_EN_2,RPWM_2,R_IS_2, L_EN_2,LPWM_2,L_IS_2,debug);//define motor 2 object and the same way for other motors
void setup() {
// BTS7960 Motor Control Code by Robojax.com 20190622
Serial.begin(9600);// setup Serial Monitor to display information
motor1.begin();
motor2.begin();
// BTS7960 Motor Control Code by Robojax.com 20190622
}
void loop() {
// BTS7960 Motor Control Code by Robojax.com 20190622
motor1.rotate(100,CW);// run motor 1 with 100% speed in CW direction
delay(5000);//run for 5 seconds
motor1.stop();// stop the motor 1
delay(3000);// stop for 3 seconds
motor1.rotate(100,CCW);// run motor 1 at 100% speed in CCW direction
delay(5000);// run for 5 seconds
motor1.stop();// stop the motor 1
delay(3000); // stop for 3 seconds
motor2.rotate(100,CW);// run motor 2 with 100% speed in CW direction
delay(5000);//run for 5 seconds
motor2.stop();// stop the motor 2
delay(3000);// stop for 3 seconds
motor2.rotate(100,CCW);// run motor 2 at 100% speed in CCW direction
delay(5000);// run for 5 seconds
motor2.stop();// stop the motor 2
delay(3000); // stop for 3 seconds
// slowly speed up the motor 1 from 0 to 100% speed
for(int i=0; i<=100; i++){
motor1.rotate(i,CCW);
delay(50);
}
// slow down the motor 2 from 100% to 0
for(int i=100; i>0; i--){
motor2.rotate(i,CCW);
delay(50);
}
motor2.stop();// stop motor 2
delay(3000); // stop for 3 seconds
// BTS7960 more than 1 Motor Control Code by Robojax.com 20190622
}// loop endsRecursos y referencias
-
ExternoBTS7960 Amazon Japónamzn.to
-
ExternoBTS7960 en Amazon Españaamzn.to
-
ExternoBTS7960 en Amazon Franciaamzn.to
-
ExternoBTS7960 en Amazon Italiaamzn.to
-
ExternoBTS7960, Amazon Alemaniaamzn.to
-
ExternoCompra BTS7960 en Amazonamzn.to
-
ExternoCompra BTS7960 en Amazon Canadá.amzn.to
-
Externo
Archivos📁
Bibliotecas de Arduino (zip)
-
robojax_BTS7960_biblioteca_de_controlador_de_motor
robojax_BTS7960_motor_driver_library.zip0.10 MB
Hoja de datos (pdf)
-
BTS7960_datasheet
BTS7960_datasheet.pdf0.45 MB
Archivo de Fritzing
-
BTS7960_controlador
BTS7960_driver.fzpz0.01 MB