التحكم في وحدة محرك التيار المستمر BTS7960 باستخدام أردوينو
في هذا الدرس، سنتعلم كيفية التحكم في وحدة قيادة المحرك DC BTS7960 باستخدام أردوينو. يتيح لك هذا الإعداد التحكم في اتجاه وسرعة المحرك DC باستخدام تعديل عرض النبضة (PWM). بنهاية هذا الدرس، سيكون لديك نظام تحكم في المحرك يعمل يمكنك تعديله بسهولة لمشاريعك الخاصة. للحصول على إرشادات بصرية مفصلة، تأكد من الاطلاع على الفيديو في (في الفيديو في 00:00).
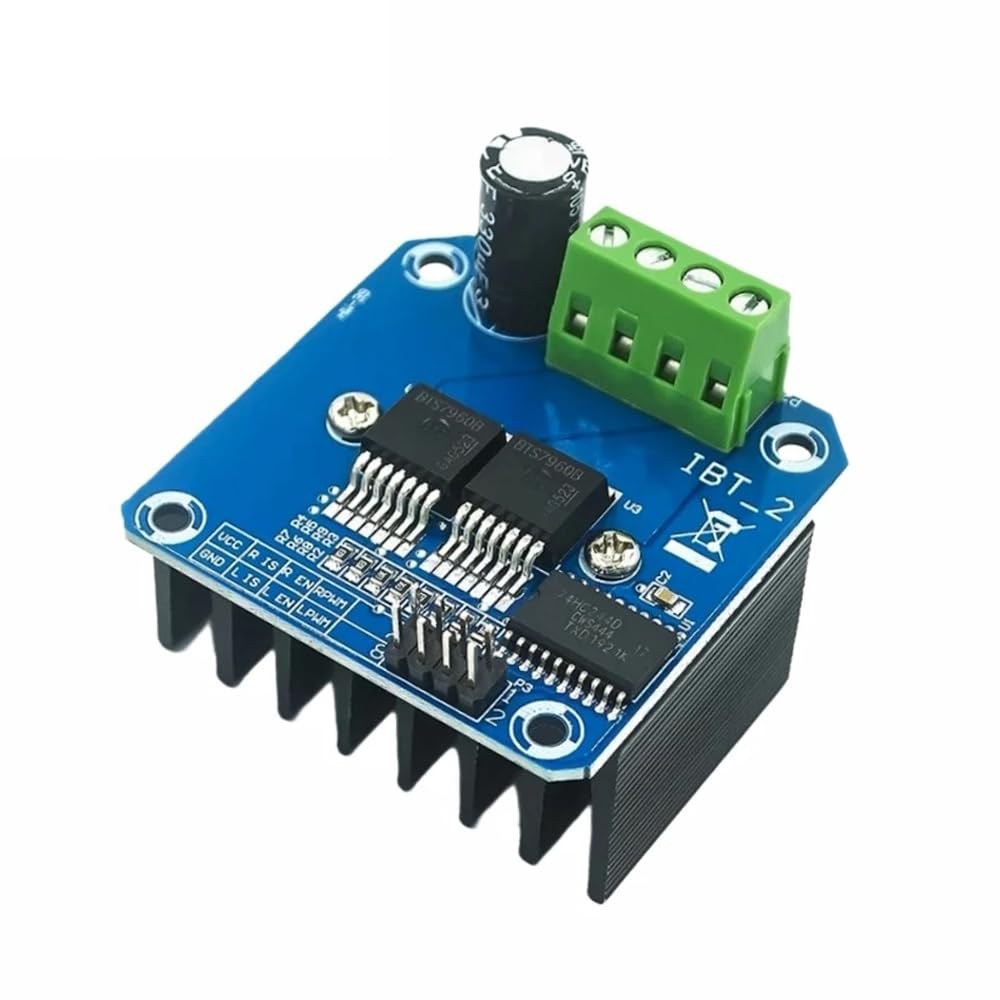
شرح الأجهزة
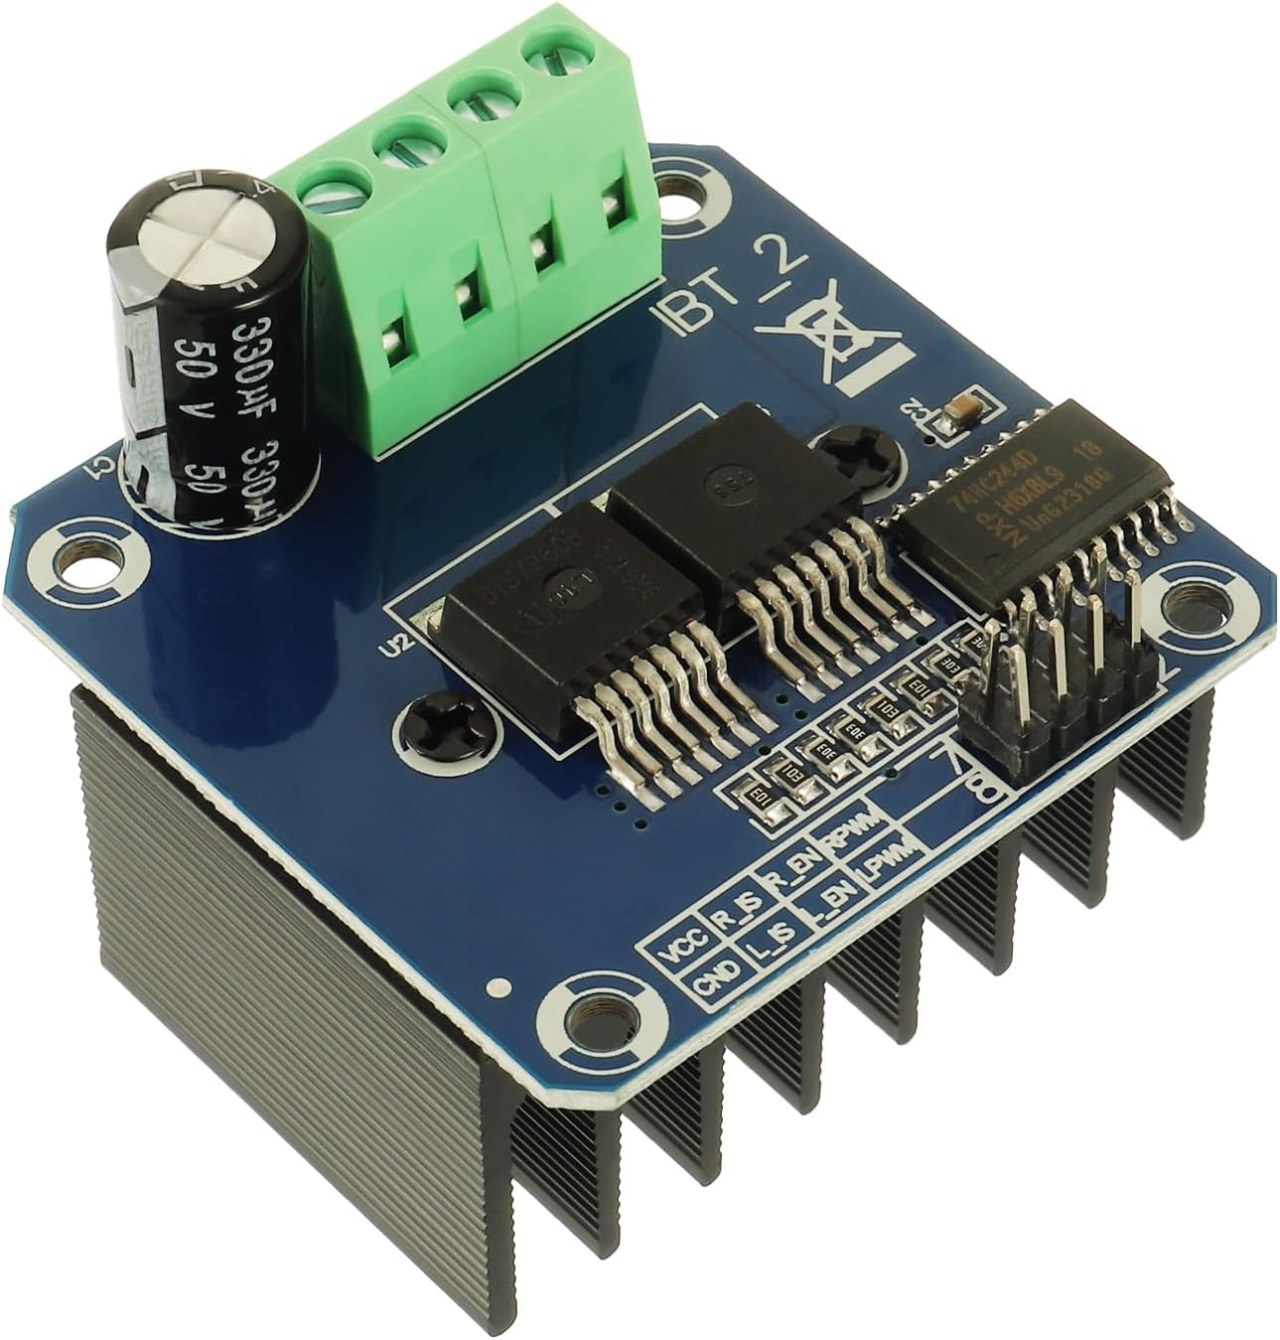
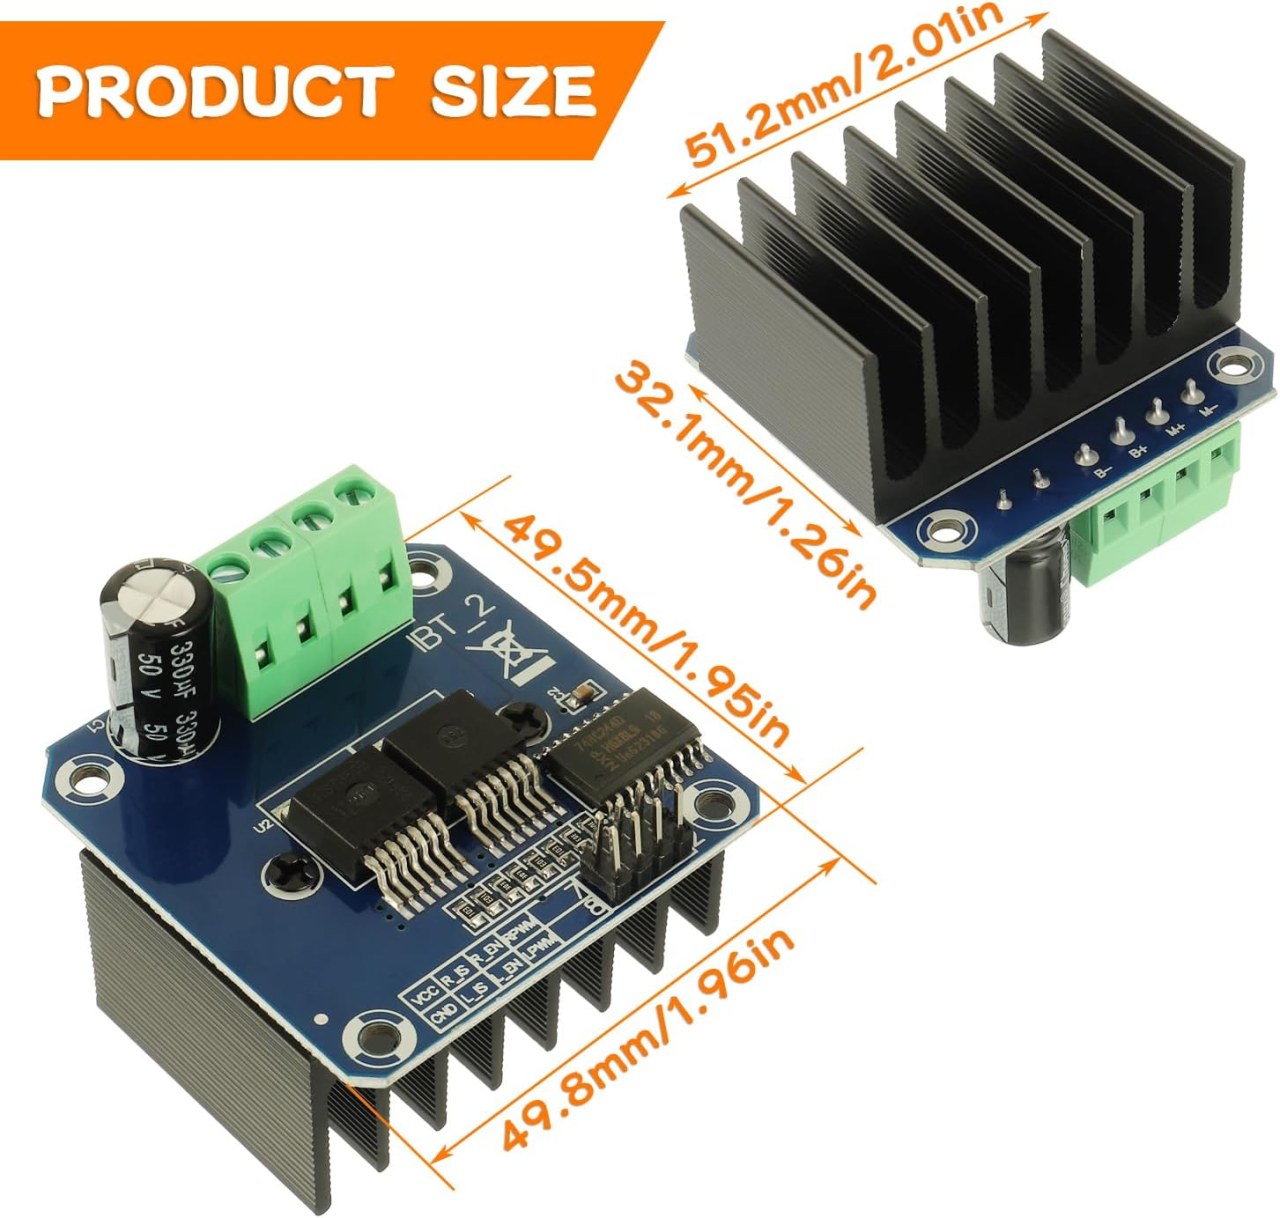
BTS7960 هو سائق موتور تيار مستمر عالي التيار قادر على التعامل مع ما يصل إلى 43 أمبير. يتكون من دائرتين متكاملتين (ICs) تسمحان بالتحكم في المحرك في كلا الاتجاهين، مع عقارب الساعة (CW) والعكس (CCW). يستخدم السائق إشارات PWM لتغيير سرعة المحرك، وهو أمر ضروري للتطبيقات التي تتطلب تحكمًا دقيقًا.
جانب آخر مهم من هذه الوحدة هو ميزات استشعار التيار المدمجة وحماية من زيادة الحرارة. يساعد ذلك في منع التلف للمحرك والسائق أثناء التشغيل. يتم تزويد الوحدة بالطاقة من مصدر خارجي، كما أنها تتطلب أيضًا إمدادًا منفصلًا بجهد 5 فولت لدائرتها المنطقية.
تفاصيل ورقة البيانات
| الصانع | إنفينيون تكنولوجيز |
|---|---|
| رقم الجزء | BTS7960 |
| جهد المنطق/المدخلات والمخرجات | 5 ف |
| جهد الإمداد | ٦-٢٧ ف |
| تيار الخرج (لكل قناة) | ٤٣ أ ماكس |
| ذروة التيار (لكل قناة) | 60 أ |
| إرشادات تردد PWM | ٢٥ كيلو هرتز |
| إدخال عتبات المنطق | 0.8 فولت (مرتفع)، 0.3 فولت (منخفض) |
| انخفاض الجهد / ردي إس (على)ساعات التغطية | ١٦ مΩ |
| الحدود الحرارية | 125 درجة مئوية كحد أقصى |
| حزمة | PTO-263-7 |
| ملاحظات / متغيرات | تكوين جسر H مزدوج |
- تأكد من وجود تبديد حراري مناسب لتطبيقات التيار العالي.
- استخدم سلكًا مناسبًا من حيث العيار لتحمل الحد الأقصى من التيار.
- احتفظ بتردد PWM ضمن الحدود المحددة لأفضل أداء.
- قم بتطبيق مكثفات الفصل بالقرب من دبابيس الطاقة لتثبيت الجهد.
- راقب درجة الحرارة أثناء التشغيل لمنع overheating.
تعليمات التوصيل

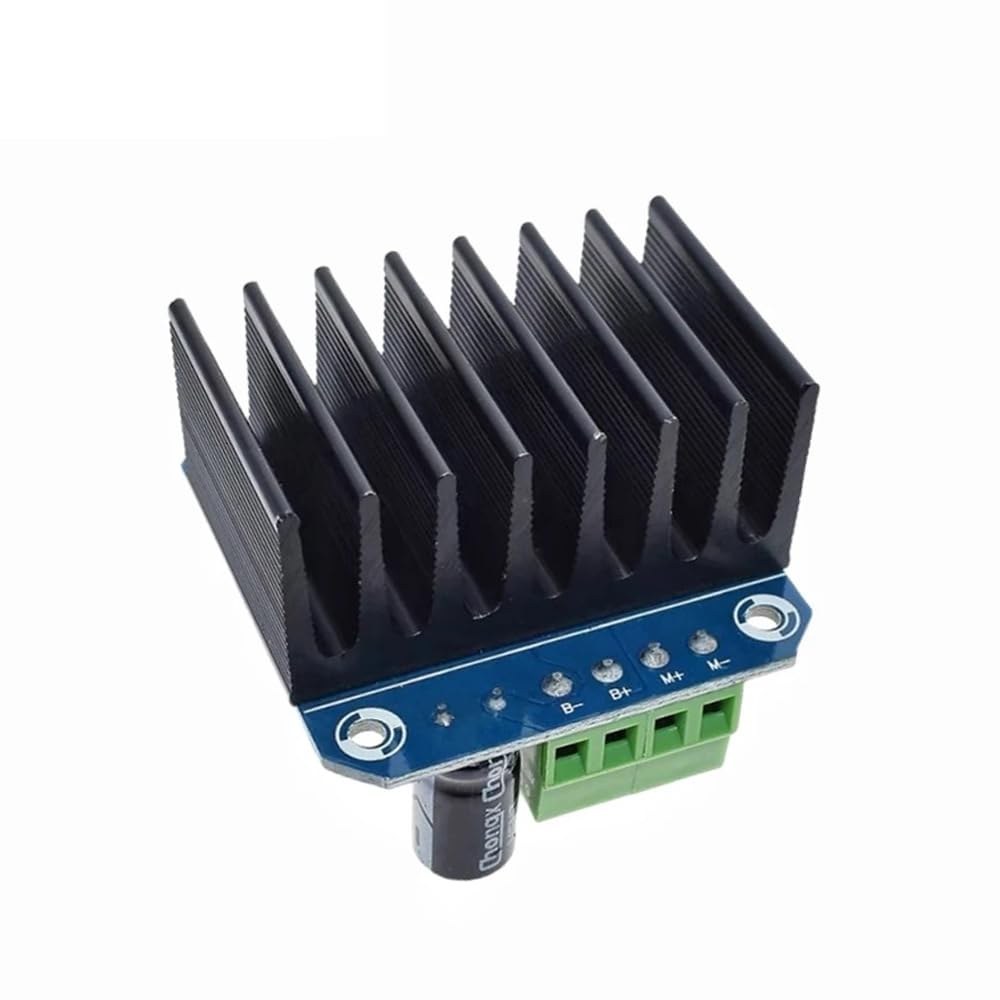
لتوصيل وحدة محرك BTS7960 بلوحة أردوينو، ستحتاج إلى توصيل الشقوق الخاصة بالطاقة والأرض والتحكم والمحرك بشكل صحيح. ابدأ بتوصيل مزود الطاقة بوحدة الموديل.B+وB-المحطات، مع التأكد من أن القطبية صحيحة. الـB+المحطة هي المكان الذي يتصل فيه المصدر الموجب، بينماB-يصل إلى الأرض.
بعد ذلك، قم بتوصيل الموتور بـM+وM-محطات على الوحدة. ستتحكم هذه في اتجاه المحرك. بالنسبة لدبوس التحكم، قم بتوصيل دبابيس الأردوينو إلى الوحدة كما يلي:RPWMإلى الدبوس 3،R_ENإلى الدبوس 4،R_ISإلى الدبوس 5،LPWMإلى الدبوس 6،L_ENإلى دبوس 7، وL_ISإلى الدبوس 8. تأكد من توصيل الأرضية الخاصة بـ Arduino إلى الأرضية الخاصة بالوحدة أيضًا.
قم بتثبيت المكتبة المطلوبة
لتثبيت الrobojax_BTS7960_motor_driver_libraryفي بيئة تطوير أوردوينو، قم أولاً بتنزيل ملف ZIP الخاص بالمكتبة من الرابط المقدم. بعد حفظ الملف، افتح بيئة تطوير أوردوينو الخاصة بك وانتقل إلىرسم > تضمين المكتبة > إضافة مكتبة .ZIP.... في حوار اختيار الملف، تصفح إلى ملف ZIP الذي تم تنزيله، اختاره، واضغط على "فتح". بعد ذلك، ستقوم بيئة التطوير المتكاملة (IDE) بتثبيت المكتبة. يمكنك تأكيد التثبيت الناجح من خلال التحقق منملف > أمثلةقائمة، حيث يجب أن تظهر فئة جديدة باسم "مكتبة محرك Robojax BTS7960". يمكنك الآن تضمين رأس المكتبة في كودك بـ#include <RobojaxBTS7960.h>.
أمثلة الشيفرة وإرشادات التنفيذ
يبدأ كود الأردوينو للتحكم في وحدة قيادة المحرك BTS7960 بتعريف الدبابيس اللازمة. على سبيل المثال، يتم تعريف الدبوس لإشارة PWM اليمنى كـRPWMوتم تعيينه على الدبوس 3. بالإضافة إلى ذلك، يتم تعريف دبوس التفعيل للجانب الأيمن كـR_ENوتعيينها إلى دبوس 4.
#define RPWM 3 // define pin 3 for RPWM pin (output)
#define R_EN 4 // define pin 4 for R_EN pin (input)
هذا الإعداد يضمن أن يمكن التحكم في المحرك بدقة. في الـsetup()يتم تهيئة المحرك مع الدالةmotor.begin()، والذي يهيئ السائق للتشغيل.
void setup() {
  Serial.begin(9600);// setup Serial Monitor to display information
  motor.begin(); // Initialize motor
}
في الـloop()الدالة، يتم التحكم في اتجاه السرعة والمحرك باستخدام الـmotor.rotate(speed, direction)طريقة. على سبيل المثال، لتشغيل المحرك بسرعة كاملة في اتجاه عقارب الساعة، ستستخدمmotor.rotate(100, CW);.
void loop() {
    motor.rotate(100,CW); // run motor with 100% speed in CW direction
    delay(5000); // run for 5 seconds
}
للحصول على أمثلة وتVariations أكثر تفصيلاً، تأكد من التحقق من الشيفرة الكاملة المحملة أسفل المقال.
عرض / ما يمكن توقعه
عندما يتم توصيل كل شيء وبرمجته بشكل صحيح، يجب أن تتوقع أن يدور المحرك في كلا الاتجاهين استنادًا إلى الكود. في البداية، سيعمل المحرك بسرعة كاملة لمدة خمس ثواني، ثم سيتوقف لمدة ثلاث ثوانٍ، ثم يدور في الاتجاه المعاكس لنفس المدة. ستتكرر هذه الدورة، مما يتيح لك رؤية استجابة المحرك لإشارات PWM.
تشمل الأخطاء الشائعة عكس القطبية عند توصيل المحرك أو مصدر الطاقة، مما قد يتسبب في تلف المكونات. بالإضافة إلى ذلك، تأكد من أن دبابيس PWM مُعينة بشكل صحيح في الكود (في الفيديو عند 12:34).
توقيتات الفيديو
- 00:00 بداية
- :48 شرح الأجهزة
- تم عرض ورقة البيانات 04:06
- :07 شرح الأسلاك
- 09:00 شرح الشفرة
- 14:33 عرض
- 16:47 اختبار الحد الأقصى للتيار
- 19:25 صورة حرارية
- 19:27 اختبار كود مختلف
الصور
/*
* This is the Arduino code for the BTS7960 DC motor driver.
Using this code, you can control a motor to rotate in both directions: clockwise (CW)
and counter-clockwise (CCW).
Watch the video instructions: https://youtu.be/PUL5DZ9TA2o
📚⬇️ Download and resource page for this video https://robojax.com/RJT169
📚⬇️ Download and resource page https://robojax.com/RJT170

// Written by Ahmad Shamshiri for Robojax.com on
// June 22, 2019 at 14:08 in Ajax, Ontario, Canada.
Get this code and other Arduino codes from Robojax.com.


* BTS7960B
 * Code is available at http://robojax.com/learn/arduino

 * This code is "AS IS" without warranty or liability. Free to be used as long as you keep this note intact.
 * This code has been downloaded from Robojax.com
    This program is free software: you can redistribute it and/or modify
    it under the terms of the GNU General Public License as published by
    the Free Software Foundation, either version 3 of the License, or
    (at your option) any later version.

    This program is distributed in the hope that it will be useful,
    but WITHOUT ANY WARRANTY; without even the implied warranty of
    MERCHANTABILITY or FITNESS FOR A PARTICULAR PURPOSE.  See the
    GNU General Public License for more details.

    You should have received a copy of the GNU General Public License
    along with this program.  If not, see <https://www.gnu.org/licenses/>.

*/

//
#define RPWM 3 // define pin 3 for RPWM pin (output)
#define R_EN 4 // define pin 2 for R_EN pin (input)
#define R_IS 5 // define pin 5 for R_IS pin (output)

#define LPWM 6 // define pin 6 for LPWM pin (output)
#define L_EN 7 // define pin 7 for L_EN pin (input)
#define L_IS 8 // define pin 8 for L_IS pin (output)
#define CW 1 //do not change
#define CCW 0 //do not change
#define debug 1 //change to 0 to hide serial monitor debugging information or set to 1 to view

#include <RobojaxBTS7960.h>
RobojaxBTS7960 motor(R_EN,RPWM,R_IS, L_EN,LPWM,L_IS,debug);

void setup() {
  // BTS7960 Motor Control Code by Robojax.com 20190622
  Serial.begin(9600);// setup Serial Monitor to display information

   motor.begin();
   //watch video for details: https://youtu.be/PUL5DZ9TA2o

    // BTS7960 Motor Control Code by Robojax.com 20190622
}

void loop() {
   // BTS7960 Motor Control Code by Robojax.com 20190622
      //watch video for details: https://youtu.be/PUL5DZ9TA2o
    motor.rotate(100,CW);// run motor with 100% speed in CW direction
    delay(5000);//run for 5 seconds
    motor.stop();// stop the motor
    delay(3000);// stop for 3 seconds
    motor.rotate(100,CCW);// run motor at 100% speed in CCW direction
    delay(5000);// run for 5 seconds
    motor.stop();// stop the motor
    delay(3000);  // stop for 3 seconds
	// slowly speed up the motor from 0 to 100% speed
    for(int i=0; i<=100; i++){
        motor.rotate(i,CCW);
        delay(50);
    }

   // slow down the motor from 100% to 0 with
    for(int i=100; i>0; i--){
        motor.rotate(i,CCW);
        delay(50);
    }

   //watch video for details: https://youtu.be/PUL5DZ9TA2o
    motor.stop();// stop motor
    delay(3000); // stop for 3 seconds
 // BTS7960 Motor Control Code by Robojax.com 20190622
}// loop ends++
/*
* This is the Arduino code for the BTS7960 DC motor driver.
Using this code, you can control more than one motor to rotate in both directions: clockwise (CW)
and counter-clockwise (CCW).
📚⬇️ Download and resource page for this video https://robojax.com/RJT169
📚⬇️ Download and resource page https://robojax.com/RJT170
Written by Ahmad Shamshiri for Robojax.com on
July 16, 2020 in Ajax, Ontario, Canada.
Watch video instructions for this code: https://youtu.be/PUL5DZ9TA2o
BTS7960B
If you found this tutorial helpful, please support me so I can continue creating
content like this. You can support me on Patreon: http://robojax.com/L/?id=63
or make a donation using PayPal: http://robojax.com/L/?id=64
* This code has been downloaded from Robojax.com
This program is free software: you can redistribute it and/or modify
it under the terms of the GNU General Public License as published by
the Free Software Foundation, either version 3 of the License, or
(at your option) any later version.
This program is distributed in the hope that it will be useful,
but WITHOUT ANY WARRANTY; without even the implied warranty of
MERCHANTABILITY or FITNESS FOR A PARTICULAR PURPOSE. See the
GNU General Public License for more details.
You should have received a copy of the GNU General Public License
along with this program. If not, see <https://www.gnu.org/licenses/>.
*/
// pins for motor 1
#define RPWM_1 3 // define pin 3 for RPWM pin (output)
#define R_EN_1 4 // define pin 2 for R_EN pin (input)
#define R_IS_1 5 // define pin 5 for R_IS pin (output)
#define LPWM_1 6 // define pin 6 for LPWM pin (output)
#define L_EN_1 7 // define pin 7 for L_EN pin (input)
#define L_IS_1 8 // define pin 8 for L_IS pin (output)
// motor 1 pins end here
// pins for motor 2
#define RPWM_2 9 // define pin 9 for RPWM pin (output)
#define R_EN_2 10 // define pin 10 for R_EN pin (input)
#define R_IS_2 12 // define pin 12 for R_IS pin (output)
#define LPWM_2 11 // define pin 11 for LPWM pin (output)
#define L_EN_2 A0 // define pin 7 for L_EN pin (input)
#define L_IS_2 A1 // define pin 8 for L_IS pin (output)
// motor 2 pins end here
#define CW 1 //
#define CCW 0 //
#define debug 1 //
#include <RobojaxBTS7960.h>
RobojaxBTS7960 motor1(R_EN_1,RPWM_1,R_IS_1, L_EN_1,LPWM_1,L_IS_1,debug);//define motor 1 object
RobojaxBTS7960 motor2(R_EN_2,RPWM_2,R_IS_2, L_EN_2,LPWM_2,L_IS_2,debug);//define motor 2 object and the same way for other motors
void setup() {
// BTS7960 Motor Control Code by Robojax.com 20190622
Serial.begin(9600);// setup Serial Monitor to display information
motor1.begin();
motor2.begin();
// BTS7960 Motor Control Code by Robojax.com 20190622
}
void loop() {
// BTS7960 Motor Control Code by Robojax.com 20190622
motor1.rotate(100,CW);// run motor 1 with 100% speed in CW direction
delay(5000);//run for 5 seconds
motor1.stop();// stop the motor 1
delay(3000);// stop for 3 seconds
motor1.rotate(100,CCW);// run motor 1 at 100% speed in CCW direction
delay(5000);// run for 5 seconds
motor1.stop();// stop the motor 1
delay(3000); // stop for 3 seconds
motor2.rotate(100,CW);// run motor 2 with 100% speed in CW direction
delay(5000);//run for 5 seconds
motor2.stop();// stop the motor 2
delay(3000);// stop for 3 seconds
motor2.rotate(100,CCW);// run motor 2 at 100% speed in CCW direction
delay(5000);// run for 5 seconds
motor2.stop();// stop the motor 2
delay(3000); // stop for 3 seconds
// slowly speed up the motor 1 from 0 to 100% speed
for(int i=0; i<=100; i++){
motor1.rotate(i,CCW);
delay(50);
}
// slow down the motor 2 from 100% to 0
for(int i=100; i>0; i--){
motor2.rotate(i,CCW);
delay(50);
}
motor2.stop();// stop motor 2
delay(3000); // stop for 3 seconds
// BTS7960 more than 1 Motor Control Code by Robojax.com 20190622
}// loop endsالموارد والمراجع
-
خارجيBTS7960 أمازون اليابانamzn.to
-
خارجيBTS7960 على أمازون إيطالياamzn.to
-
خارجيBTS7960 على أمازون فرنساamzn.to
-
خارجيBTS7960 في Amazon إسبانياamzn.to
-
خارجيBTS7960، أمازون ألمانياamzn.to
-
خارجياشترِ BTS7960 من أمازونamzn.to
-
خارجياشترِ BTS7960 من أمازون كنداamzn.to
-
خارجي
ملفات📁
مكتبات أردوينو (ملف مضغوط)
-
روبو جاكس_BTS7960_مكتبة محرك السائق
robojax_BTS7960_motor_driver_library.zip0.10 MB
ورقة البيانات (pdf)
-
BTS7960_datasheet
BTS7960_datasheet.pdf0.45 MB
Fritzing File
-
بروزرسان BTS7960
BTS7960_driver.fzpz0.01 MB