Display VL53L0X Distance as Bar Graph on LCD
This project demonstrates how to build a visual distance display using the VL53L0X laser ranging sensor and an I2C LCD screen. Instead of just showing a number, the distance is rendered as a proportional bar graph, which allows you to gauge the measurement at a glance from across the room. This is particularly useful in applications where quick, intuitive feedback is more important than reading exact figures. The bar graph scale is set by a maximum distance value, so the full bar always represents that maximum, making it easy to see at a glance if an object is near, far, or at the limit of the sensor's range.
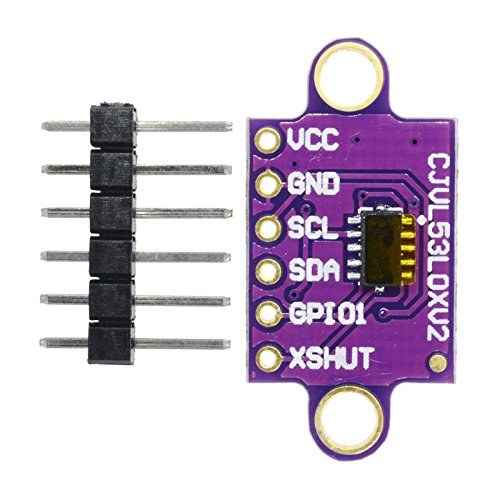
This type of display is ideal for a variety of practical projects, such as:
- Creating a simple parking assistant that shows the distance to a wall or obstacle.
- Building a liquid level monitor for a tank, where the bar graph represents the fill level.
- Developing a robotic obstacle avoidance system with a visual indicator.
- Making a fun and interactive "laser tape measure" for quick, comparative measurements.
Hardware Required
- Arduino board (Uno, Nano, etc.)
- VL53L0X laser distance sensor
- LCD1602 or LCD2004 with I2C interface
- Jumper wires
Wiring Guide
The wiring for this project is straightforward, as both the sensor and the LCD use the I2C protocol, which only requires two data lines. A unique aspect of this setup is the use of an Arduino pin to provide a second 5V supply for the sensor, as many boards only have a single 5V pin that is already used by the LCD.

Here is the connection diagram:
- LCD I2C Module: Connect the VCC pin to the Arduino's 5V pin, GND to GND, SDA to A4, and SCL to A5.
- VL53L0X Sensor: Connect the VCC pin to Arduino pin 2 (defined as
VCC2in the code), GND to GND, SDA to A4, and SCL to A5.
The code sets pin 13 as a digital output and writes it HIGH to provide a steady 5V to the sensor. This is a clever workaround when you need an extra power rail. (in video at 01:25)
Code Explanation
The code is designed to be easily configurable. The key parameters you need to set are the LCD's I2C address and the maximum distance for the bar graph scale.
#define maxDistance 200

int VCC2= 2;// 2nd VCC for laser sensor

byte lcdNumCols = 16; // -- number of columns in the LCD
byte lcdLine = 2; // -- number of line in the LCD
// Set the LCD address to 0x26/0x3F for a 16 chars and 2 line display
LiquidCrystal_I2C lcd(0x3f, lcdNumCols, lcdLine);// use I2C Scanner to find the address: 0x27 or something like that

#include <LcdBarGraphRobojax.h>
LcdBarGraphRobojax rjx(&lcd, 16, 0, 0);  // -- creating 16 character long bargraph starting at char 0 of line 0 (see video)
maxDistance: This constant defines the full-scale value for the bar graph. For example, if set to200, a distance of 200mm will fill the entire bar. A reading of 100mm will fill half the bar. You can change this to suit your application, for example, setting it to150for a 15cm range. (in video at 04:16)VCC2: This variable defines the Arduino pin used to provide a second 5V supply for the sensor. You can change this if you prefer to use a different pin. (in video at 04:38)lcdNumColsandlcdLine: These set the dimensions of your LCD. For a standard 16x2 display, keep them at16and2. If you are using a 20x4 display, you would change these to20and4.LiquidCrystal_I2C lcd(0x3f, ...): The first parameter here is the I2C address of your LCD module. This address can vary between modules (common addresses are0x27and0x3F). You must use an I2C scanner sketch to find the correct address for your specific module and update this value. (in video at 05:21)LcdBarGraphRobojax rjx(&lcd, 16, 0, 0): This line creates the bar graph object. The parameters are the LCD object, the number of columns (characters) the bar graph will use, and the starting column and row position. The example uses all 16 columns starting at column 0, row 0. (in video at 08:57)
In the main loop, the sensor reads the distance in millimeters. If the measured distance exceeds the maxDistance, it is set to zero. The bar graph line is cleared, and the new value is drawn. Finally, the numeric distance is printed alongside the graph. (in video at 10:50)
Live Project Demonstration
The video demonstrates the project in action. You can see the bar graph responding in real-time as the sensor is pointed at different objects and moved closer or farther away. When the object is moved beyond the set maxDistance, the display correctly shows a reading of zero. The demonstration also shows how to change the maximum distance by modifying a single line of code, making the scale adaptable to different use cases. (in video at 13:41)
Chapters
- [00:00] Introduction and Project Overview
- [01:25] Wiring the LCD and VL53L0X Sensor
- [02:40] Required Libraries and Installation
- [03:49] Code Explanation: Configuration and Setup
- [05:21] Finding the I2C Address
- [08:57] Code Explanation: Bar Graph Class and Setup
- [10:50] Code Explanation: Main Loop and Display Logic
- [13:41] Live Demonstration and Adjusting Max Distance
Imagini
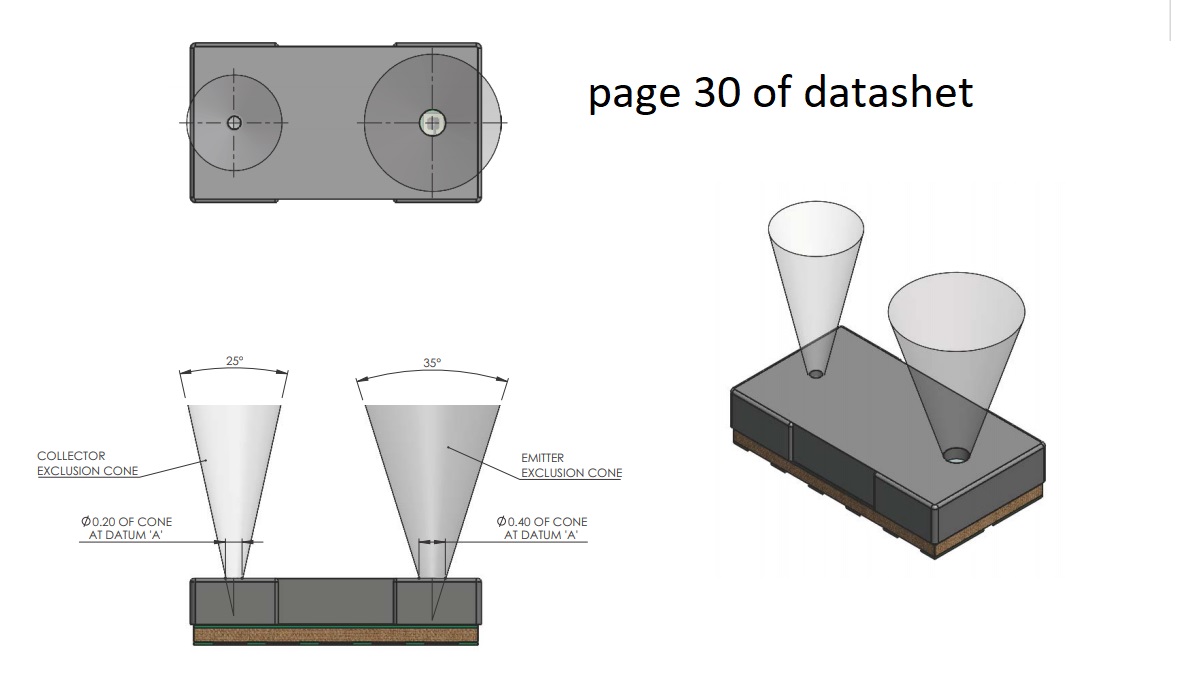
/*
 *
 * This Arduino sketch displays the distance measured
 * using a VL53L0X laser sensor as a bar graph on an LCD1602-I2C.
 * (Simple project)
 * Advanced code at http://bit.ly/rj-udemy
 *
 * Original library was taken from https://playground.arduino.cc/Code/LcdBarGraph/
 * Modified by Ahmad Shamshiri on May 31, 2019 at 03:43 in Ajax, Ontario, Canada
 * Visit http://robojax.com/learn/arduino for other Arduino codes
 * Watch YouTube video instructions for this code: https://youtu.be/vJStXiSS23Q
 *
 * Robojax Arduino Course on Udemy where you get a schematic diagram of this sketch
 * and many other robotics-related lectures and codes. Purchase the course here: http://bit.ly/rj-udemy
 *

 * This code is "AS IS" without warranty or liability. Free to be used as long as you keep this note intact.
 * This code has been downloaded from Robojax.com
    This program is free software: you can redistribute it and/or modify
    it under the terms of the GNU General Public License as published by
    the Free Software Foundation, either version 3 of the License, or
    (at your option) any later version.

    This program is distributed in the hope that it will be useful,
    but WITHOUT ANY WARRANTY; without even the implied warranty of
    MERCHANTABILITY or FITNESS FOR A PARTICULAR PURPOSE.  See the
    GNU General Public License for more details.

    You should have received a copy of the GNU General Public License
    along with this program.  If not, see <https://www.gnu.org/licenses/>.
 */
/*
 *

This is Arduino code to measure distance with a VL53L0X and display it on an LCD1602 with an I2C module.
Distance is displayed in mm (millimeter) or cm (centimeter).

Original Laser Sensor source: https://github.com/adafruit/Adafruit_VL53L0X
Modified by Ahmad Shamshiri for Robojax.com
Date Modified: June 28, 2018 at 19:06 in Ajax, Ontario, Canada


Pin connection

VL53L0X Pin  Arduino Pin
VCC         5V
GND         GND
SDA         A4 or SDA if available
SCL         A5 or SCL if available
GPIO1       leave it unconnected
XSHUT       unconnected


*/


#include <Wire.h>
#include <VL53L0X.h>
VL53L0X sensor;
#define maxDistance 200

int VCC2= 2;// 2nd VCC for laser sensor

#include <LiquidCrystal_I2C.h>
byte lcdNumCols = 16; // -- number of columns in the LCD
byte lcdLine = 2; // -- number of line in the LCD
// Set the LCD address to 0x26/0x3F for a 16 chars and 2 line display
LiquidCrystal_I2C lcd(0x3f, lcdNumCols, lcdLine);// use I2C Scanner to find the address: 0x27 or something like that

#include <LcdBarGraphRobojax.h>
LcdBarGraphRobojax rjx(&lcd, 16, 0, 0);  // -- creating 16 character long bargraph starting at char 0 of line 0 (see video)


void setup()
{

  Serial.begin(9600);
  pinMode(VCC2, OUTPUT);// set pin 13 HIGH for extra 5V
  digitalWrite(VCC2, HIGH);// make pin 13 HIGH so we have extra 5V

  Wire.begin();

  sensor.init();
  sensor.setTimeout(500);

  // Start continuous back-to-back mode (take readings as
  // fast as possible).  To use continuous timed mode
  // instead, provide a desired inter-measurement period in
  // ms (e.g. sensor.startContinuous(100)).
  sensor.startContinuous();

  // initialize the LCD,
    lcd.begin();
  lcd.clear();
  lcd.print("Robojax");
  lcd.setCursor (0,1); //
  lcd.print("Bargraph VL53L0X");
    // Turn on the blacklight and print a message.
  //lcd.backlight();
  // -- do some delay: some time I've got broken visualization

  delay(2000);
 lcd.clear();// clear the screen from previous value

}

void loop()
{
  int distance =sensor.readRangeContinuousMillimeters();
  if(maxDistance<distance){
    distance=0;
  }
  //int distance =sensor.startContinuous(100);
  rjx.clearLine(1);// clear line 1 to display fresh voltage value

  // -- draw bar graph from the analog value read
  rjx.drawValue( distance, maxDistance);
  // -- do some delay: frequent draw may cause broken visualization


  lcd.setCursor (0,1); // go to start of 2nd line
  lcd.print("Dist.:");
  lcd.setCursor (7,1); // go to start of 2nd line
  lcd.print(distance);
  lcd.print("mm");


  if (sensor.timeoutOccurred()) { Serial.print(" TIMEOUT"); }

  Serial.println();
  delay(500);
}
Lucruri de care ai putea avea nevoie
-
AmazonPurchase VL53L0X from Amazonamzn.to
-
eBayPurchase VL53l0x from eBayebay.us
-
AliExpressPurchase 1 to 10 pcs of VL53L0X from AliExpresss.click.aliexpress.com
-
BanggoodPurchase 1 to 10 pcs of VL53L0X from Banggoodbanggood.com
Resurse și referințe
-
ExternPurchase 1 to 10 pcs of VL53L0X from AliExpresss.click.aliexpress.com
-
ExternPurchase 1 to 10 pcs of VL53L0X from Banggoodbanggood.com
-
ExternPurchase VL53L0X from Amazonamzn.to
-
ExternPurchase VL53l0x from eBayebay.us
-
ExternVL53L0X datasheet (PDF)st.com
Fișiere📁
Biblioteci Arduino (zip)
-
Robojax LCD Bargraph Library (ZIP file)
robojax-LCD-bargraph-Library.zip0.10 MB
Fișier Fritzing
-
VL53L0X_Distance_sensor_Squares
VL53L0X_Distance_sensor_Squares.fzpz0.02 MB -
Adafruit VL6180X Time of Flight Distance SensorFritzing part for the Adafruit VL6180X Time of Flight distance sensor. This sensor measures absolute distance up to 100mm and ambient light, communicating via I2C. Includes the sensor breakout board and pin connections for use in Fritzing projects.
Adafruit VL6180X Time of Flight Distance Sensor-1.fzpz0.02 MB
Alte fișiere
-
Foaie de date VL53L1X
robojax-VL53L0X_datasheet.pdf0.90 MB -
Robojax LCD Bargraph Library (ZIP file)
robojax-LCD-bargraph-Library.zip -
VL53L0X_Distance_sensor_purple
VL53L0X_Distance_sensor_purple.fzpz0.01 MB