用Arduino控制16通道繼電器模組
```html
用Arduino控制16通道繼電器模組
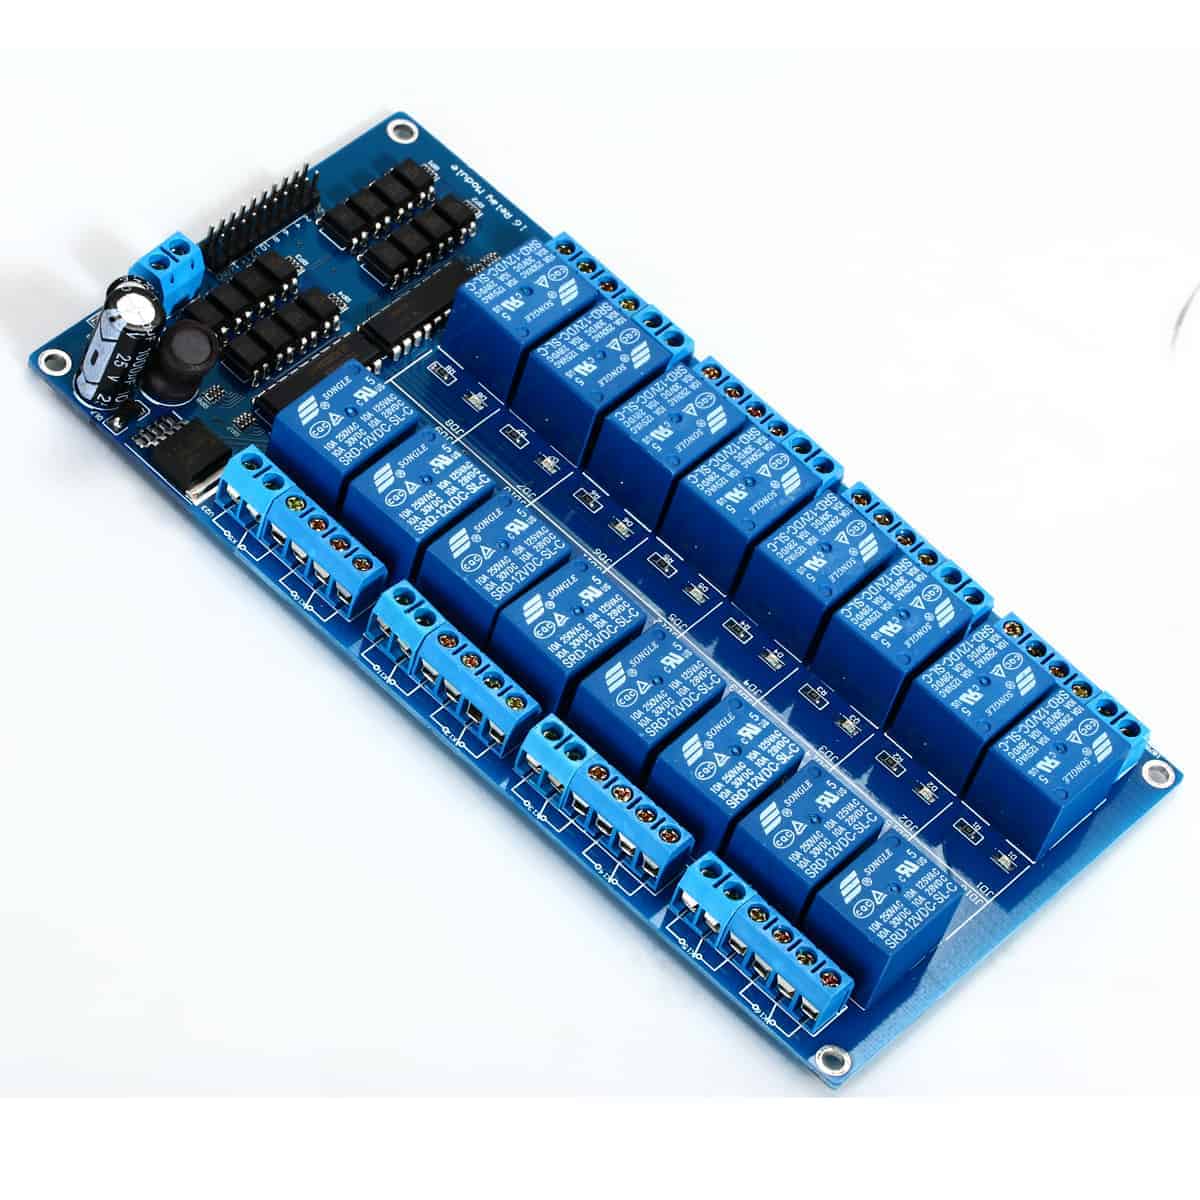
呢個項目示範點樣用Arduino Uno獨立控制16通道繼電器模組上面嘅每個繼電器。呢個設定可以俾你管理各種交流或直流負載,適合用嚟控制燈、風扇、暖爐或其他電器。呢個指南會詳細講解硬件、接線同代碼,幫你成功運行呢個項目。
硬件/零件
- Arduino Uno(Mega都兼容,Nano同Mini因為針腳有限,除非用另一條片示範嘅改良方法,否則唔建議使用。)(片入面08:53)
- 16通道繼電器模組(片入面00:04)
- 外部電源(至少要支援1.5A)(片入面02:12)
- 連接線
- 負載(例如燈、風扇等)
接線指南
16通道繼電器模組需要外部電源嚟驅動繼電器。將外部電源嘅正極同負極分別連接到繼電器模組嘅VCC同GND針腳(片入面12:55)。模組嘅接地針腳亦都要連接到Arduino嘅GND。模組上面每個繼電器通道對應一個針腳,編號由1到16。呢啲針腳應該連接到代碼入面定義嘅Arduino數碼針腳(針腳2到12同A0到A4)。(片入面09:03)如果你想用同一個外部電源供電俾Arduino,就將正極連接到Arduino嘅VIN針腳。(片入面13:24)
代碼解釋
提供嘅Arduino代碼控制16通道繼電器模組。佢定義咗連接到繼電器通道嘅針腳、繼電器嘅觸發類型(呢度係LOW)同埋循環延遲。核心功能在於channelControl()函數,佢可以俾你喺指定時間內將某個繼電器開或關。
const int controlPin[16] = {2,3,4,5,6,7,8,9,10,11,12,A0,A1,A2,A3,A4}; // 定義針腳

const int triggerType = LOW;// 你嘅繼電器類型
如果你嘅繼電器係高電平觸發,就將triggerType改做HIGH。(片入面09:48)
void channelControl(int relayChannel, int action, int t)
{
  // ...(代碼省略)
  digitalWrite(controlPin[relayChannel], state);
  // ...
}
要控制特定繼電器,就呼叫channelControl()函數,傳入繼電器通道(0-15)、想要嘅動作(1代表開,0代表關)同埋持續時間(毫秒)。例如,要將繼電器6開2秒(片入面11:53):
channelControl(6, 1, 2000); // 將繼電器7開2秒
要同時控制多個繼電器,可以用loop()函數入面嘅獨立`digitalWrite`指令,如下所示(片入面09:03):
digitalWrite(controlPin[5], LOW); // 繼電器6開
digitalWrite(controlPin[2], LOW); // 繼電器3開
digitalWrite(controlPin[12], LOW); // 繼電器13開
實際項目/示範
示範(片入面14:17)顯示每個繼電器順序啟動。串口監視器會顯示每個繼電器嘅狀態同啟動時間。你可以根據項目需求修改代碼嚟控制特定繼電器,例如當溫度超過某個閾值時開暖爐(片入面16:24)。
影片章節
- 簡介:00:00
- 硬件講解:01:20
- 可以連接幾多負載?:05:37
- 繼電器電壓講解:06:46
- 代碼講解:08:45
- 接線講解:12:53
- 示範:14:17
```
圖片
16 Channel Relay module
160-Code to control a 16-channel relay module using Arduino
語言: C++
/*
 * Arduino code to control 16 channel relay with Arduino UNO
 *
 * Written by Ahmad Shamshiri for Robojax.com on Sunday, October 8, 2018
 * at 10:35 in Ajax, Ontario, Canada
 * Watch video instructions for this code: https://youtu.be/Q9aBI4ELKC4
 *
 * This code is "AS IS" without warranty or liability. Free to be used as long as you keep this note intact.
 * This code has been downloaded from Robojax.com
    This program is free software: you can redistribute it and/or modify
    it under the terms of the GNU General Public License as published by
    the Free Software Foundation, either version 3 of the License, or
    (at your option) any later version.

    This program is distributed in the hope that it will be useful,
    but WITHOUT ANY WARRANTY; without even the implied warranty of
    MERCHANTABILITY or FITNESS FOR A PARTICULAR PURPOSE.  See the
    GNU General Public License for more details.

    You should have received a copy of the GNU General Public License
    along with this program.  If not, see <https://www.gnu.org/licenses/>.
 */


const int controlPin[16] = {2,3,4,5,6,7,8,9,10,11,12,A0,A1,A2,A3,A4}; // define pins

const int triggerType = LOW;// your relay type
int loopDelay = 1000;// delay in loop
int tmpStat =1;


void setup() {
  for(int i=0; i<16; i++)
  {
    pinMode(controlPin[i], OUTPUT);// set pin as output
    if(triggerType ==LOW){
      digitalWrite(controlPin[i], HIGH); // set initial state OFF for low trigger relay
    }else{
       digitalWrite(controlPin[i], LOW); // set initial state OFF for high trigger relay
    }
  }

  Serial.begin(9600);// initialize serial monitor with 9600 baud
}

void loop() {

  for(int i=0; i<16; i++)
  {

   channelControl(i,tmpStat,200);// turn each relay ON for 200ms


  }
  if(tmpStat)
  {
    tmpStat=0;
  }else{
    tmpStat=1;
  }
 Serial.println("===============");
 //channelControl(6,1, 2000); // turn relay 7 ON for 2 seconds
 //channelControl(6,0, 5000); // turn relay 7 OFF for 5 seconds
 //channelControl(9,1, 3000); // turn relay 10 OFF for ever

 delay(loopDelay);// wait for loopDelay ms

}

/*
 * funciton: channelControl
 * turns ON or OFF specific relay channel
 * @param relayChannel is integer value channel from 0 to 15
 * @param action is 1 for ON or 0 for OFF
 * @param t is time in milliseconds
 */
void channelControl(int relayChannel, int action, int t)
{
  int state =LOW;
  String statTXT =" ON";
  if(triggerType == LOW)
  {
    if (action ==0)// if OFF requested
    {
      state = HIGH;
      statTXT = " OFF";
    }
    digitalWrite(controlPin[relayChannel], state);
    if(t >0 )
    {
      delay(t);
    }
       Serial.print ("Channel: ");
       Serial.print(relayChannel);
       Serial.print(statTXT);
       Serial.print(" - ");
       Serial.println(t);
  }else{
    if (action ==1)// if ON requested
    {
      state = HIGH;
    }else{
      statTXT = " OFF";
    }
    digitalWrite(controlPin[relayChannel], state);
    if(t >0 )
    {
      delay(t);
    }
       Serial.print ("Channel: ");
       Serial.print(relayChannel);
       Serial.print(statTXT);
       Serial.print(" - ");
       Serial.println(t);
  }

}161-Control more than one relay at a time in the 16-channel relay module
語言: C++
/*
 * Arduino code to control 16 channel relay with Arduino UNO
 * Control more than 1 relay
 * Written by Ahmad Shamshiri for Robojax.com on Sunday, October 8, 2018
 * at 10:35 in Ajax, Ontario, Canada
 * Watch video instructions for this code: https://youtu.be/Q9aBI4ELKC4
 *
 * This code is "AS IS" without warranty or liability. Free to be used as long as you keep this note intact.
 * This code has been downloaded from Robojax.com
    This program is free software: you can redistribute it and/or modify
    it under the terms of the GNU General Public License as published by
    the Free Software Foundation, either version 3 of the License, or
    (at your option) any later version.

    This program is distributed in the hope that it will be useful,
    but WITHOUT ANY WARRANTY; without even the implied warranty of
    MERCHANTABILITY or FITNESS FOR A PARTICULAR PURPOSE.  See the
    GNU General Public License for more details.

    You should have received a copy of the GNU General Public License
    along with this program.  If not, see <https://www.gnu.org/licenses/>.
 */


const int controlPin[16] = {2,3,4,5,6,7,8,9,10,11,12,A0,A1,A2,A3,A4}; // define pins

const int triggerType = LOW;// your relay type
int loopDelay = 1000;// delay in loop
int tmpStat =1;


void setup() {
  for(int i=0; i<16; i++)
  {
    pinMode(controlPin[i], OUTPUT);// set pin as output
    if(triggerType ==LOW){
      digitalWrite(controlPin[i], HIGH); // set initial state OFF for low trigger relay
    }else{
       digitalWrite(controlPin[i], LOW); // set initial state OFF for high trigger relay
    }
  }

  Serial.begin(9600);// initialize serial monitor with 9600 baud
}

void loop() {

 digitalWrite(controlPin[5], LOW); // relay 6 ON
 digitalWrite(controlPin[2], LOW); // relay 3 ON
 digitalWrite(controlPin[12], LOW); // relay 13 ON

  digitalWrite(controlPin[5], HIGH); // relay 6 OFF

}
你可能需要嘅嘢
-
易贝
-
易贝
-
阿里巴巴速卖通Purchase 16 Channel 5V, 12V or 24V relay module from AliExpresss.click.aliexpress.com
-
邦购Purchase 16 Channel relay module from Banggoodbanggood.com
資源與參考資料
-
外部DIP 4-pin photocouplerwebpagefx.com
-
外部
-
外部Purchase 16 Channel 5V, 12V or 24V relay module from AliExpresss.click.aliexpress.com
-
外部Purchase 16 Channel relay module from Banggoodbanggood.com
-
外部
-
外部
-
外部
文件📁
示意圖
-
robojax_16ch_relay module schematic
robojax_16ch_relay_schematic.pdf0.37 MB