16 சேனல் ரிலே தொகுதியை Arduino பயன்படுத்தி கட்டுப்படுத்துதல்
```htmlArduino மூலம் 16-சேனல் ரிலே தொகுதியை கட்டுப்படுத்துதல்
இந்த திட்டம் Arduino Uno ஐப் பயன்படுத்தி 16-சேனல் ரிலே தொகுதியில் உள்ள ஒவ்வொரு ரிலேவையும் தனித்தனியாக கட்டுப்படுத்துவதை நிரூபிக்கிறது. இந்த அமைப்பு பல்வேறு AC அல்லது DC சுமைகளை நிர்வகிக்க உங்களை அனுமதிக்கிறது, இது விளக்குகள், மின்விசிறிகள், ஹீட்டர்கள் அல்லது பிற மின் சாதனங்களை கட்டுப்படுத்துவது போன்ற பயன்பாடுகளுக்கு ஏற்றதாக அமைகிறது. இந்த வழிகாட்டி உங்கள் திட்டத்தை இயக்குவதற்கு தேவையான வன்பொருள், வயரிங் மற்றும் குறியீடு பற்றிய விரிவான விளக்கத்தை வழங்குகிறது.
வன்பொருள்/கூறுகள்
- Arduino Uno (Mega பொருந்தக்கூடியது, Nano மற்றும் Mini குறைந்த பின்கள் காரணமாக பரிந்துரைக்கப்படவில்லை, தனி வீடியோவில் காட்டப்பட்டுள்ள மாற்றியமைக்கப்பட்ட அணுகுமுறையைப் பயன்படுத்தாவிட்டால்.) (வீடியோவில் 08:53)
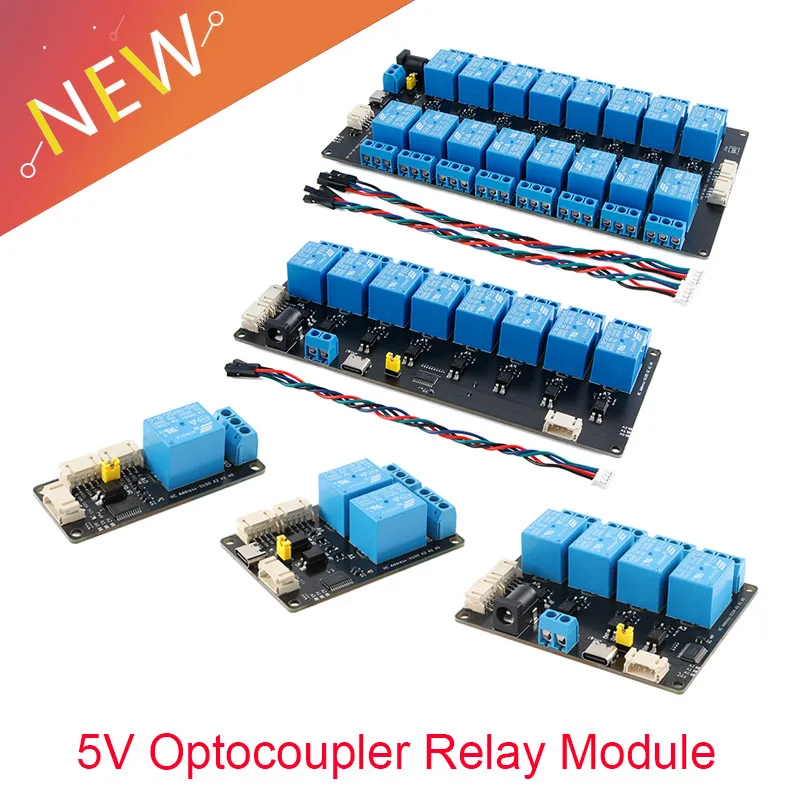
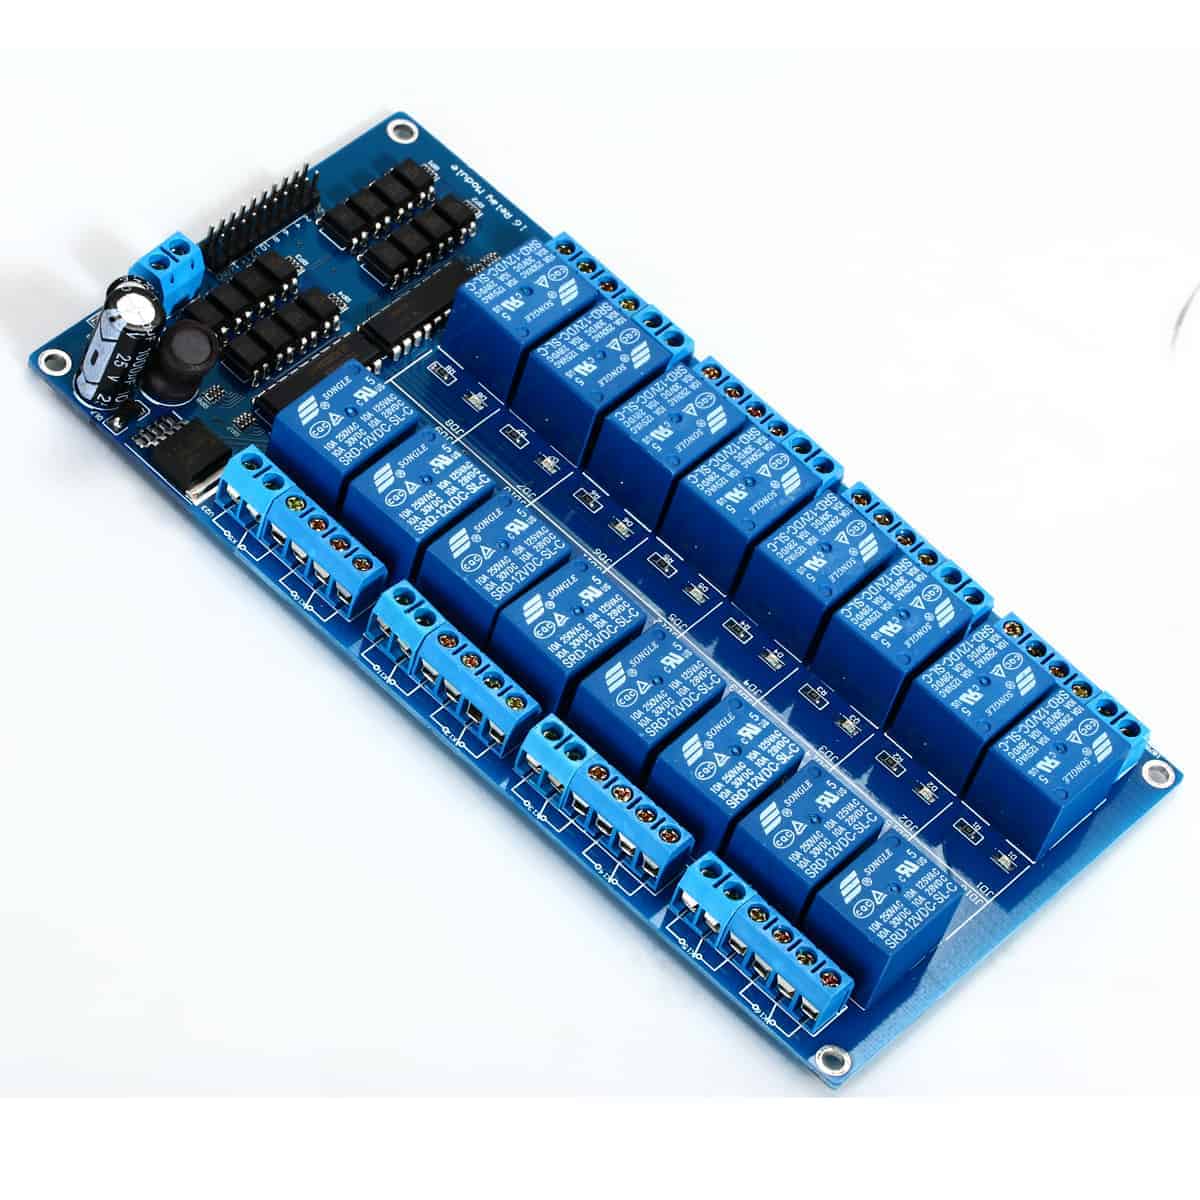
- 16-சேனல் ரிலே தொகுதி (வீடியோவில் 00:04)
- வெளிப்புற மின்சாரம் (குறைந்தது 1.5A கையாளக்கூடியது) (வீடியோவில் 02:12)
- இணைப்பு கம்பிகள்
- சுமைகள் (எ.கா., விளக்குகள், மின்விசிறிகள் போன்றவை)
வயரிங் வழிகாட்டி
16-சேனல் ரிலே தொகுதிக்கு ரிலேக்களை இயக்க வெளிப்புற மின்சாரம் தேவைப்படுகிறது. வெளிப்புற மின்சாரத்தின் நேர்மறை மற்றும் தரையை முறையே ரிலே தொகுதியின் VCC மற்றும் GND பின்களுடன் இணைக்கவும் (வீடியோவில் 12:55). தொகுதியின் தரை பின் Arduino இன் GND உடன் இணைக்கப்பட வேண்டும். தொகுதியில் உள்ள ஒவ்வொரு ரிலே சேனலும் 1 முதல் 16 வரை எண்ணப்பட்ட ஒரு பின்னுக்கு ஒத்துள்ளது. இந்த பின்கள் குறியீட்டில் வரையறுக்கப்பட்டுள்ள Arduino இன் டிஜிட்டல் பின்களுடன் (2 முதல் 12 மற்றும் A0 முதல் A4 வரை) இணைக்கப்பட வேண்டும். (வீடியோவில் 09:03) அதே வெளிப்புற மின்சாரத்திலிருந்து Arduino க்கு மின்சாரம் வழங்க விரும்பினால், நேர்மறை முனையத்தை Arduino இன் VIN பின்னுடன் இணைக்கவும். (வீடியோவில் 13:24)
குறியீடு விளக்கம்
வழங்கப்பட்ட Arduino குறியீடு 16-சேனல் ரிலே தொகுதியை கட்டுப்படுத்துகிறது. இது ரிலே சேனல்களுடன் இணைக்கப்பட்ட பின்கள், ரிலேவின் தூண்டுதல் வகை (இந்த வழக்கில் LOW) மற்றும் லூப் தாமதத்தை வரையறுக்கிறது. முக்கிய செயல்பாடு channelControl() செயல்பாட்டில் உள்ளது, இது ஒரு குறிப்பிட்ட ரிலேவை வரையறுக்கப்பட்ட காலத்திற்கு ON அல்லது OFF செய்ய உங்களை அனுமதிக்கிறது.
const int controlPin[16] = {2,3,4,5,6,7,8,9,10,11,12,A0,A1,A2,A3,A4}; // பின்களை வரையறுக்கவும்

const int triggerType = LOW;// உங்கள் ரிலே வகை
உங்கள் ரிலே உயர்-தூண்டுதலாக இருந்தால் triggerType ஐ HIGH ஆக மாற்றவும். (வீடியோவில் 09:48)
void channelControl(int relayChannel, int action, int t)
{
  // ... (சுருக்கத்திற்காக குறியீடு தவிர்க்கப்பட்டது)
  digitalWrite(controlPin[relayChannel], state);
  // ...
}
ஒரு குறிப்பிட்ட ரிலேவை கட்டுப்படுத்த, channelControl() செயல்பாட்டை ரிலே சேனல் (0-15), விரும்பிய செயல் (1 ON க்கு, 0 OFF க்கு) மற்றும் மில்லி விநாடிகளில் கால அளவுடன் அழைக்கவும். எடுத்துக்காட்டாக, ரிலே 6 ஐ 2 விநாடிகளுக்கு இயக்க (வீடியோவில் 11:53):
channelControl(6, 1, 2000); // ரிலே 7 ஐ 2 விநாடிகளுக்கு ON செய்யவும்
பல ரிலேக்களை ஒரே நேரத்தில் கட்டுப்படுத்த, கீழே காட்டப்பட்டுள்ளபடி loop() செயல்பாட்டிற்குள் தனிப்பட்ட `digitalWrite` கட்டளைகளைப் பயன்படுத்தவும் (வீடியோவில் 09:03):
digitalWrite(controlPin[5], LOW); // ரிலே 6 ON
digitalWrite(controlPin[2], LOW); // ரிலே 3 ON
digitalWrite(controlPin[12], LOW); // ரிலே 13 ON
நேரடி திட்டம்/செயல்விளக்கம்
செயல்விளக்கம் (வீடியோவில் 14:17) ஒவ்வொரு ரிலேவும் வரிசையாக செயல்படுவதைக் காட்டுகிறது. சீரியல் மானிட்டர் ஒவ்வொரு ரிலேவின் நிலை மற்றும் செயல்படுத்தும் நேரத்தைக் காட்டுகிறது. வெப்பநிலை ஒரு குறிப்பிட்ட வரம்பை மீறும்போது ஹீட்டரை இயக்குவது போன்ற உங்கள் திட்டத் தேவைகளின் அடிப்படையில் குறிப்பிட்ட ரிலேக்களை கட்டுப்படுத்த குறியீட்டை மாற்றலாம் (வீடியோவில் 16:24).
வீடியோ அத்தியாயங்கள்
- அறிமுகம்: 00:00
- வன்பொருள் விளக்கம்: 01:20
- எவ்வளவு சுமை இணைக்க வேண்டும்?: 05:37
- ரிலே மின்னழுத்தம் விளக்கம்: 06:46
- குறியீடு விளக்கம்: 08:45
- வயரிங் விளக்கம்: 12:53
- செயல்விளக்கம்: 14:17
```
```படங்கள்
/*
 * Arduino code to control 16 channel relay with Arduino UNO
 *
 * Written by Ahmad Shamshiri for Robojax.com on Sunday, October 8, 2018
 * at 10:35 in Ajax, Ontario, Canada
 * Watch video instructions for this code: https://youtu.be/Q9aBI4ELKC4
 *
 * This code is "AS IS" without warranty or liability. Free to be used as long as you keep this note intact.
 * This code has been downloaded from Robojax.com
    This program is free software: you can redistribute it and/or modify
    it under the terms of the GNU General Public License as published by
    the Free Software Foundation, either version 3 of the License, or
    (at your option) any later version.

    This program is distributed in the hope that it will be useful,
    but WITHOUT ANY WARRANTY; without even the implied warranty of
    MERCHANTABILITY or FITNESS FOR A PARTICULAR PURPOSE.  See the
    GNU General Public License for more details.

    You should have received a copy of the GNU General Public License
    along with this program.  If not, see <https://www.gnu.org/licenses/>.
 */


const int controlPin[16] = {2,3,4,5,6,7,8,9,10,11,12,A0,A1,A2,A3,A4}; // define pins

const int triggerType = LOW;// your relay type
int loopDelay = 1000;// delay in loop
int tmpStat =1;


void setup() {
  for(int i=0; i<16; i++)
  {
    pinMode(controlPin[i], OUTPUT);// set pin as output
    if(triggerType ==LOW){
      digitalWrite(controlPin[i], HIGH); // set initial state OFF for low trigger relay
    }else{
       digitalWrite(controlPin[i], LOW); // set initial state OFF for high trigger relay
    }
  }

  Serial.begin(9600);// initialize serial monitor with 9600 baud
}

void loop() {

  for(int i=0; i<16; i++)
  {

   channelControl(i,tmpStat,200);// turn each relay ON for 200ms


  }
  if(tmpStat)
  {
    tmpStat=0;
  }else{
    tmpStat=1;
  }
 Serial.println("===============");
 //channelControl(6,1, 2000); // turn relay 7 ON for 2 seconds
 //channelControl(6,0, 5000); // turn relay 7 OFF for 5 seconds
 //channelControl(9,1, 3000); // turn relay 10 OFF for ever

 delay(loopDelay);// wait for loopDelay ms

}

/*
 * funciton: channelControl
 * turns ON or OFF specific relay channel
 * @param relayChannel is integer value channel from 0 to 15
 * @param action is 1 for ON or 0 for OFF
 * @param t is time in milliseconds
 */
void channelControl(int relayChannel, int action, int t)
{
  int state =LOW;
  String statTXT =" ON";
  if(triggerType == LOW)
  {
    if (action ==0)// if OFF requested
    {
      state = HIGH;
      statTXT = " OFF";
    }
    digitalWrite(controlPin[relayChannel], state);
    if(t >0 )
    {
      delay(t);
    }
       Serial.print ("Channel: ");
       Serial.print(relayChannel);
       Serial.print(statTXT);
       Serial.print(" - ");
       Serial.println(t);
  }else{
    if (action ==1)// if ON requested
    {
      state = HIGH;
    }else{
      statTXT = " OFF";
    }
    digitalWrite(controlPin[relayChannel], state);
    if(t >0 )
    {
      delay(t);
    }
       Serial.print ("Channel: ");
       Serial.print(relayChannel);
       Serial.print(statTXT);
       Serial.print(" - ");
       Serial.println(t);
  }

}/*
* Arduino code to control 16 channel relay with Arduino UNO
* Control more than 1 relay
* Written by Ahmad Shamshiri for Robojax.com on Sunday, October 8, 2018
* at 10:35 in Ajax, Ontario, Canada
* Watch video instructions for this code: https://youtu.be/Q9aBI4ELKC4
*
* This code is "AS IS" without warranty or liability. Free to be used as long as you keep this note intact.
* This code has been downloaded from Robojax.com
This program is free software: you can redistribute it and/or modify
it under the terms of the GNU General Public License as published by
the Free Software Foundation, either version 3 of the License, or
(at your option) any later version.
This program is distributed in the hope that it will be useful,
but WITHOUT ANY WARRANTY; without even the implied warranty of
MERCHANTABILITY or FITNESS FOR A PARTICULAR PURPOSE. See the
GNU General Public License for more details.
You should have received a copy of the GNU General Public License
along with this program. If not, see <https://www.gnu.org/licenses/>.
*/
const int controlPin[16] = {2,3,4,5,6,7,8,9,10,11,12,A0,A1,A2,A3,A4}; // define pins
const int triggerType = LOW;// your relay type
int loopDelay = 1000;// delay in loop
int tmpStat =1;
void setup() {
for(int i=0; i<16; i++)
{
pinMode(controlPin[i], OUTPUT);// set pin as output
if(triggerType ==LOW){
digitalWrite(controlPin[i], HIGH); // set initial state OFF for low trigger relay
}else{
digitalWrite(controlPin[i], LOW); // set initial state OFF for high trigger relay
}
}
Serial.begin(9600);// initialize serial monitor with 9600 baud
}
void loop() {
digitalWrite(controlPin[5], LOW); // relay 6 ON
digitalWrite(controlPin[2], LOW); // relay 3 ON
digitalWrite(controlPin[12], LOW); // relay 13 ON
digitalWrite(controlPin[5], HIGH); // relay 6 OFF
}நீங்கள் தேவைப்படும் எண்ணங்கள்
-
இபேய்
-
இபேய்
-
அலிஎக்ஸ்பிரஸ்Purchase 16 Channel 5V, 12V or 24V relay module from AliExpresss.click.aliexpress.com
-
பாங்குட்Purchase 16 Channel relay module from Banggoodbanggood.com
வளங்கள் மற்றும் மேற்கோள்கள்
-
வெளியுறுப்புDIP 4-pin photocouplerwebpagefx.com
-
வெளியுறுப்பு
-
வெளியுறுப்பு
-
வெளியுறுப்புPurchase 16 Channel 5V, 12V or 24V relay module from AliExpresss.click.aliexpress.com
-
வெளியுறுப்புPurchase 16 Channel relay module from Banggoodbanggood.com
-
வெளியுறுப்பு
-
வெளியுறுப்பு
-
வெளியுறுப்பு
கோப்புகள்📁
வரைபடம்
-
robojax_16ch_relay module schematic
robojax_16ch_relay_schematic.pdf0.37 MB