Ардуино арқылы 16 арналы реле модулін басқару
```html
Arduino көмегімен 16 арналы реле модулін басқару
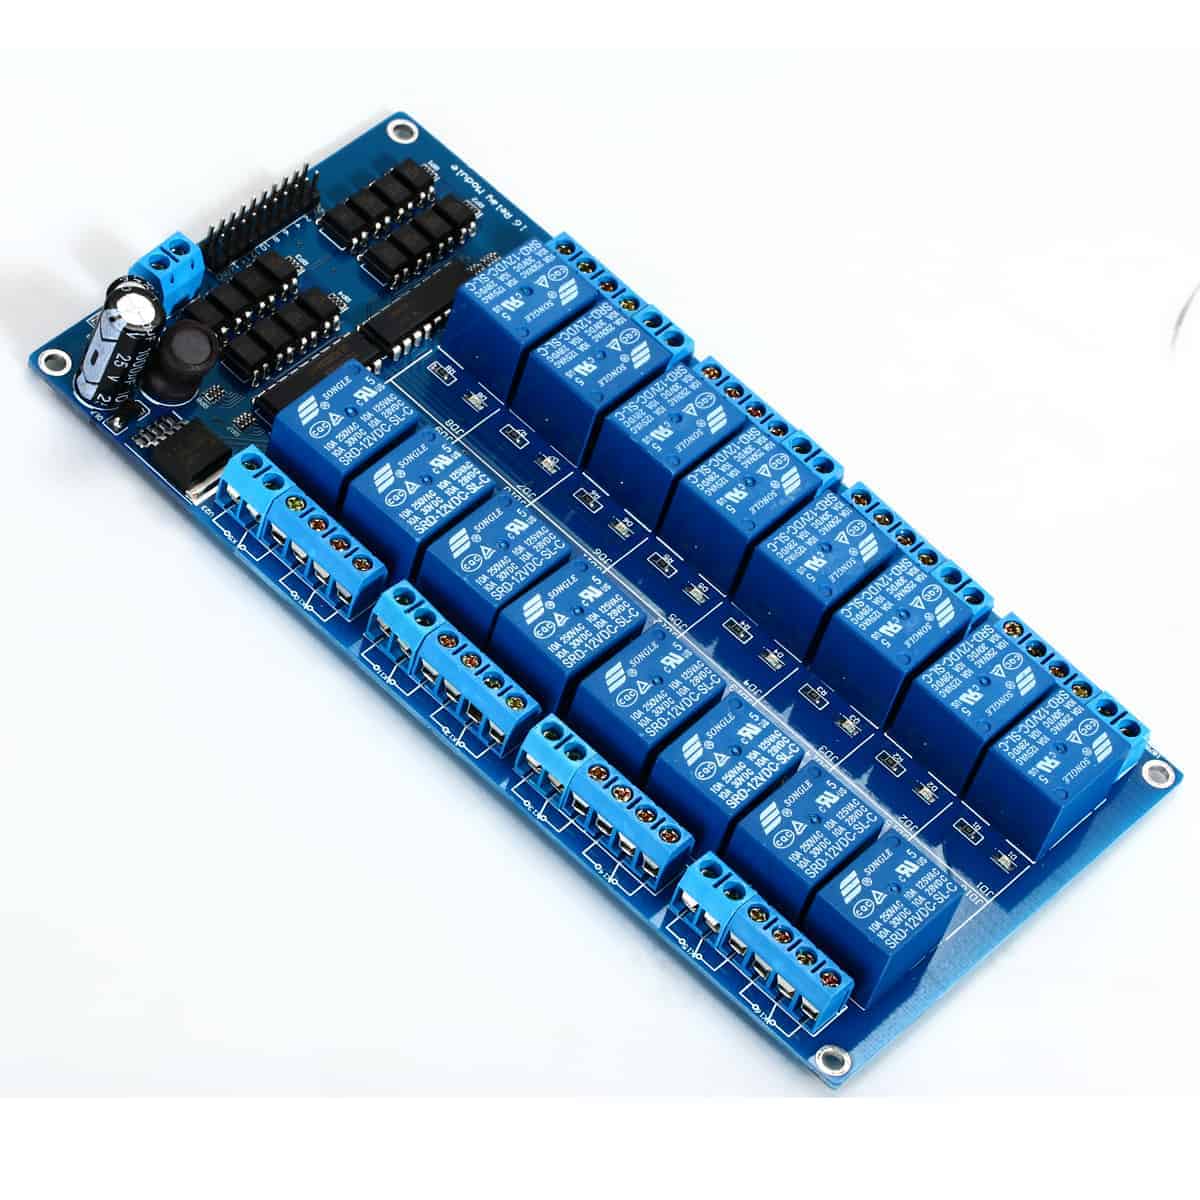
Бұл жоба Arduino Uno көмегімен 16 арналы реле модуліндегі әрбір релені жеке басқаруды көрсетеді. Бұл қондырғы әртүрлі айнымалы немесе тұрақты ток жүктемелерін басқаруға мүмкіндік береді, бұл оны шамдарды, желдеткіштерді, жылытқыштарды немесе басқа электр құрылғыларын басқару сияқты қолданбаларға қолайлы етеді. Бұл нұсқаулық жобаңызды іске қосу үшін қажетті аппараттық құралдар, сымдар және код туралы толық шолуды ұсынады.
Аппараттық құралдар/Компоненттер
- Arduino Uno (Mega да үйлесімді, Nano және Mini шектеулі пиндерге байланысты ұсынылмайды, егер бөлек видеода көрсетілгендей өзгертілген тәсіл қолданылмаса.) (видеода 08:53)
- 16 арналы реле модулі (видеода 00:04)
- Сыртқы қуат көзі (кемінде 1,5А өңдей алатын) (видеода 02:12)
- Қосу сымдары
- Жүктемелер (мысалы, шамдар, желдеткіштер және т.б.)
Сымдарды қосу нұсқаулығы
16 арналы реле модулі релелерді қозғау үшін сыртқы қуат көзін қажет етеді. Сыртқы қуат көзінің оң және жер терминалдарын сәйкесінше реле модулінің VCC және GND пиндеріне қосыңыз (видеода 12:55). Модульдің жер пині де Arduino-ның GND пиніне қосылуы керек. Модульдегі әрбір реле арнасы 1-ден 16-ға дейін нөмірленген пинге сәйкес келеді. Бұл пиндер кодта анықталғандай Arduino-ның цифрлық пиндеріне (2-ден 12-ге дейін және A0-ден A4-ке дейін) қосылуы керек. (видеода 09:03) Егер Arduino-ны сол сыртқы қуат көзінен қуаттандырғыңыз келсе, оң терминалды Arduino-ның VIN пиніне қосыңыз. (видеода 13:24)
Кодты түсіндіру
Ұсынылған Arduino коды 16 арналы реле модулін басқарады. Ол реле арналарына қосылған пиндерді, реленің іске қосу түрін (бұл жағдайда LOW) және цикл кідірісін анықтайды. Негізгі функционалдық channelControl() функциясында жатыр, ол белгілі бір релені белгіленген уақыт аралығында қосуға немесе өшіруге мүмкіндік береді.
const int controlPin[16] = {2,3,4,5,6,7,8,9,10,11,12,A0,A1,A2,A3,A4}; // пиндерді анықтау

const int triggerType = LOW;// сіздің реле түріңіз
Егер релеңіз жоғары деңгеймен іске қосылса, triggerType мәнін HIGH деп өзгертіңіз. (видеода 09:48)
void channelControl(int relayChannel, int action, int t)
{
  // ... (қысқалық үшін код алынып тасталды)
  digitalWrite(controlPin[relayChannel], state);
  // ...
}
Белгілі бір релені басқару үшін channelControl() функциясын реле арнасымен (0-15), қажетті әрекетпен (1 - қосу, 0 - өшіру) және миллисекундтағы ұзақтықпен шақырыңыз. Мысалы, 6-релені 2 секундқа қосу үшін (видеода 11:53):
channelControl(6, 1, 2000); // 7-релені 2 секундқа қосу
Бірнеше релені бір уақытта басқару үшін төменде көрсетілгендей loop() функциясында жеке `digitalWrite` командаларын қолданыңыз (видеода 09:03):
digitalWrite(controlPin[5], LOW); // 6-реле қосу
digitalWrite(controlPin[2], LOW); // 3-реле қосу
digitalWrite(controlPin[12], LOW); // 13-реле қосу
Тірі жоба/Демонстрация
Демонстрация (видеода 14:17) әрбір реленің ретімен іске қосылуын көрсетеді. Сериялық монитор әрбір реленің күйін және іске қосу уақытын көрсетеді. Жоба талаптарыңызға байланысты нақты релелерді басқару үшін кодты өзгерте аласыз, мысалы, температура белгілі бір шектен асқанда жылытқышты қосу (видеода 16:24).
Видео тараулары
- Кіріспе: 00:00
- Аппараттық құралдар түсіндірілді: 01:20
- Қанша жүктеме қосу керек?: 05:37
- Реле кернеуі түсіндірілді: 06:46
- Код түсіндірілді: 08:45
- Сымдар түсіндірілді: 12:53
- Демонстрация: 14:17
```
Суреттер
/*
 * Arduino code to control 16 channel relay with Arduino UNO
 *
 * Written by Ahmad Shamshiri for Robojax.com on Sunday, October 8, 2018
 * at 10:35 in Ajax, Ontario, Canada
 * Watch video instructions for this code: https://youtu.be/Q9aBI4ELKC4
 *
 * This code is "AS IS" without warranty or liability. Free to be used as long as you keep this note intact.
 * This code has been downloaded from Robojax.com
    This program is free software: you can redistribute it and/or modify
    it under the terms of the GNU General Public License as published by
    the Free Software Foundation, either version 3 of the License, or
    (at your option) any later version.

    This program is distributed in the hope that it will be useful,
    but WITHOUT ANY WARRANTY; without even the implied warranty of
    MERCHANTABILITY or FITNESS FOR A PARTICULAR PURPOSE.  See the
    GNU General Public License for more details.

    You should have received a copy of the GNU General Public License
    along with this program.  If not, see <https://www.gnu.org/licenses/>.
 */


const int controlPin[16] = {2,3,4,5,6,7,8,9,10,11,12,A0,A1,A2,A3,A4}; // define pins

const int triggerType = LOW;// your relay type
int loopDelay = 1000;// delay in loop
int tmpStat =1;


void setup() {
  for(int i=0; i<16; i++)
  {
    pinMode(controlPin[i], OUTPUT);// set pin as output
    if(triggerType ==LOW){
      digitalWrite(controlPin[i], HIGH); // set initial state OFF for low trigger relay
    }else{
       digitalWrite(controlPin[i], LOW); // set initial state OFF for high trigger relay
    }
  }

  Serial.begin(9600);// initialize serial monitor with 9600 baud
}

void loop() {

  for(int i=0; i<16; i++)
  {

   channelControl(i,tmpStat,200);// turn each relay ON for 200ms


  }
  if(tmpStat)
  {
    tmpStat=0;
  }else{
    tmpStat=1;
  }
 Serial.println("===============");
 //channelControl(6,1, 2000); // turn relay 7 ON for 2 seconds
 //channelControl(6,0, 5000); // turn relay 7 OFF for 5 seconds
 //channelControl(9,1, 3000); // turn relay 10 OFF for ever

 delay(loopDelay);// wait for loopDelay ms

}

/*
 * funciton: channelControl
 * turns ON or OFF specific relay channel
 * @param relayChannel is integer value channel from 0 to 15
 * @param action is 1 for ON or 0 for OFF
 * @param t is time in milliseconds
 */
void channelControl(int relayChannel, int action, int t)
{
  int state =LOW;
  String statTXT =" ON";
  if(triggerType == LOW)
  {
    if (action ==0)// if OFF requested
    {
      state = HIGH;
      statTXT = " OFF";
    }
    digitalWrite(controlPin[relayChannel], state);
    if(t >0 )
    {
      delay(t);
    }
       Serial.print ("Channel: ");
       Serial.print(relayChannel);
       Serial.print(statTXT);
       Serial.print(" - ");
       Serial.println(t);
  }else{
    if (action ==1)// if ON requested
    {
      state = HIGH;
    }else{
      statTXT = " OFF";
    }
    digitalWrite(controlPin[relayChannel], state);
    if(t >0 )
    {
      delay(t);
    }
       Serial.print ("Channel: ");
       Serial.print(relayChannel);
       Serial.print(statTXT);
       Serial.print(" - ");
       Serial.println(t);
  }

}/*
* Arduino code to control 16 channel relay with Arduino UNO
* Control more than 1 relay
* Written by Ahmad Shamshiri for Robojax.com on Sunday, October 8, 2018
* at 10:35 in Ajax, Ontario, Canada
* Watch video instructions for this code: https://youtu.be/Q9aBI4ELKC4
*
* This code is "AS IS" without warranty or liability. Free to be used as long as you keep this note intact.
* This code has been downloaded from Robojax.com
This program is free software: you can redistribute it and/or modify
it under the terms of the GNU General Public License as published by
the Free Software Foundation, either version 3 of the License, or
(at your option) any later version.
This program is distributed in the hope that it will be useful,
but WITHOUT ANY WARRANTY; without even the implied warranty of
MERCHANTABILITY or FITNESS FOR A PARTICULAR PURPOSE. See the
GNU General Public License for more details.
You should have received a copy of the GNU General Public License
along with this program. If not, see <https://www.gnu.org/licenses/>.
*/
const int controlPin[16] = {2,3,4,5,6,7,8,9,10,11,12,A0,A1,A2,A3,A4}; // define pins
const int triggerType = LOW;// your relay type
int loopDelay = 1000;// delay in loop
int tmpStat =1;
void setup() {
for(int i=0; i<16; i++)
{
pinMode(controlPin[i], OUTPUT);// set pin as output
if(triggerType ==LOW){
digitalWrite(controlPin[i], HIGH); // set initial state OFF for low trigger relay
}else{
digitalWrite(controlPin[i], LOW); // set initial state OFF for high trigger relay
}
}
Serial.begin(9600);// initialize serial monitor with 9600 baud
}
void loop() {
digitalWrite(controlPin[5], LOW); // relay 6 ON
digitalWrite(controlPin[2], LOW); // relay 3 ON
digitalWrite(controlPin[12], LOW); // relay 13 ON
digitalWrite(controlPin[5], HIGH); // relay 6 OFF
}Сізге қажет болуы мүмкін нәрселер
-
eBay
-
eBay
-
AliExpressPurchase 16 Channel 5V, 12V or 24V relay module from AliExpresss.click.aliexpress.com
-
BanggoodPurchase 16 Channel relay module from Banggoodbanggood.com
Ресурстар мен сілтемелер
-
СыртқыDIP 4-pin photocouplerwebpagefx.com
-
Сыртқы
-
СыртқыPurchase 16 Channel 5V, 12V or 24V relay module from AliExpresss.click.aliexpress.com
-
СыртқыPurchase 16 Channel relay module from Banggoodbanggood.com
-
Сыртқы
-
Сыртқы
-
Сыртқы
Файлдар📁
Схема
-
robojax_16ch_relay module schematic
robojax_16ch_relay_schematic.pdf0.37 MB