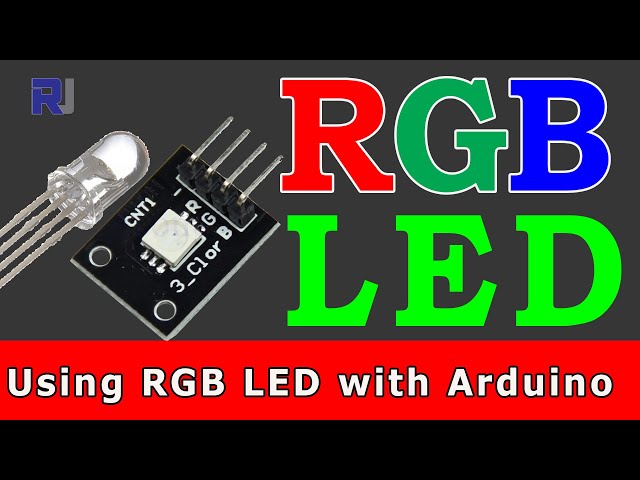
How to Use RGB LEDs with Arduino Code to Calculate Resistor Values
On this page, you will find the code to control an RGB LED using Arduino.
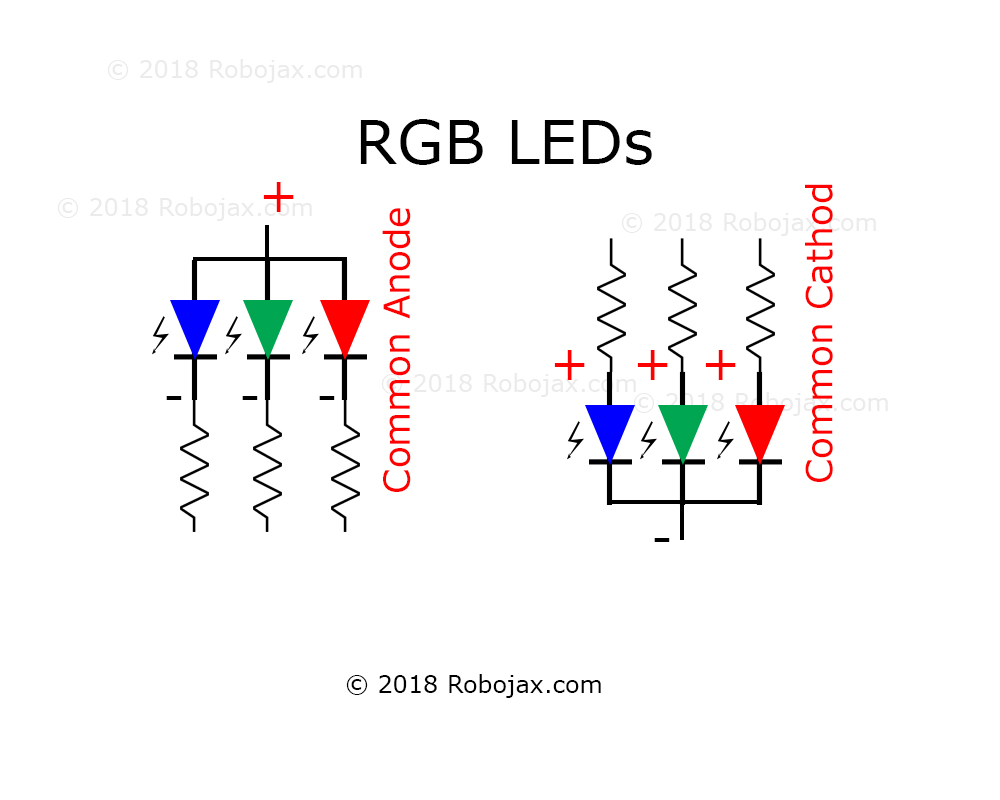
The image above shows that the RGB LED has three LEDs in one package.
The image above shows connecting resistors to common-cathode and common-anode configurations.
Images

Controlling RGB LED using Arduino
Controlling RGB LED using Arduino
159-Controlling an RGB LED using Arduino
Language: C++
/*
 * This Arduino sketch is to control color on RGB LED
 * Written by Ahmad Shamshiri for Robojax.com
 * on October 06th, 2018 at 14:00 in Ajax, Ontario, Canada

  Watch instruction video for this code: https://youtu.be/rggg-_wb56I

 * This code is "AS IS" without warranty or liability. Free to be used as long as you keep this note intact.
 * This code has been downloaded from Robojax.com
    This program is free software: you can redistribute it and/or modify
    it under the terms of the GNU General Public License as published by
    the Free Software Foundation, either version 3 of the License, or
    (at your option) any later version.

    This program is distributed in the hope that it will be useful,
    but WITHOUT ANY WARRANTY; without even the implied warranty of
    MERCHANTABILITY or FITNESS FOR A PARTICULAR PURPOSE.  See the
    GNU General Public License for more details.

    You should have received a copy of the GNU General Public License
    along with this program.  If not, see <https://www.gnu.org/licenses/>.
 */
int RED = 11;// the PWM pin the RED LED is attached to
int GREEN = 10;// the PWM pin the GREEN LED is attached to
int BLUE = 6;// the PWM pin the BLUE LED is attached to
int colorTime = 2000; // time to wait between color change


int color[8][3] =
              {
               {255,255,255},// white
               {255,0,0},// red
               {0,255,0},// green
               {0,0,255},// blue
               {255,255,0},// yellow
               {0,255,255},// aqua
               {255,0,255},// pink
               {139,69,19},//brown
              };
String colorName[8]=
              {
               "White",
               "Red",
               "Green",
               "Blue",
               "Yellow",
               "Aqua",
               "Pink",
               "Brown"
              };
void setup() {
   // Robojax.com RGB LED code 20181006
  Serial.begin(9600);
  // declare pin 11,12, 13 for RED , GREEN and BLUE to be an output:
  pinMode(RED, OUTPUT);
     digitalWrite(RED,LOW);// turn RED led off
  pinMode(GREEN, OUTPUT);
     digitalWrite(GREEN,LOW);// turn RED led off
  pinMode(BLUE, OUTPUT);
     digitalWrite(BLUE,LOW);// turn RED led off
}

// the loop routine runs over and over again forever:
void loop() {

  // Robojax.com RGB LED code 20181006


      for(int j=0; j<8; j++)
      {
        RGB_LED(color[j][0], color[j][1], color[j][2]);
                       Serial.println(colorName[j]);

      delay(colorTime);// delay for each color
      }

}

/*
  sends correct value to R, G and B and LED pin

  @param r is received red value
  @param g is received green value
  @param b is received blue value
 */
void RGB_LED(int r, int g, int b)
{
        analogWrite(RED, r);// set value for RED LED
        analogWrite(GREEN, g);// set value for GREEN LED
        analogWrite(BLUE, b);// set value for BLUE LED

}
Resources & references
No resources yet.
Files📁
No files available.