Get GPS Location from U-blox Neo-6 and Neo-7 GPS Modules with Arduino
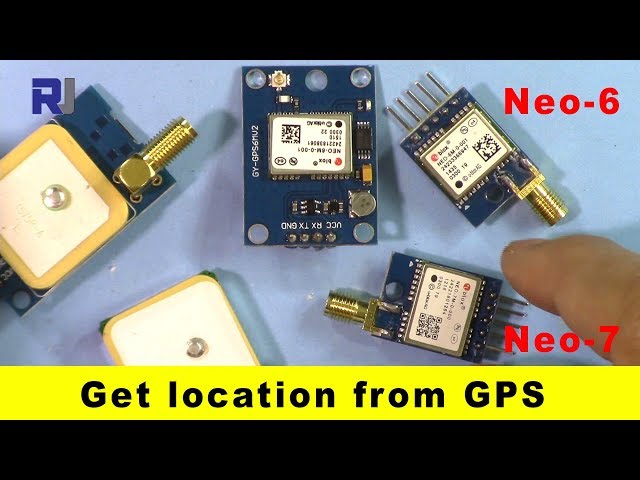
This project demonstrates how to interface a U-blox Neo-6M or Neo-7M GPS module with an Arduino to obtain location data (latitude and longitude). These affordable modules, readily available online, provide a simple way to add GPS functionality to your projects. The distinct blue LED on the Neo-7M (in video at 02:53) signals GPS fix, a handy feature for confirming signal acquisition.
Here are some project ideas using a GPS module and Arduino:
- GPS Tracker: Log location data and display it on a map.
- Geocaching Tool: Navigate to specific coordinates.
- Automated Vehicle Navigation: Guide a robot or drone.
- Weather Station: Add location data to weather readings.
- Wildlife Tracking: Monitor animal movements.
Hardware/Components
- Arduino Uno (or compatible board)
- U-blox Neo-6M or Neo-7M GPS module
- Jumper wires
- USB cable
- (Optional) External antenna and SMA connector
Wiring Guide
The wiring is straightforward (in video at 10:39):
%%WIRING%%- GPS VCC to Arduino 3.3V
- GPS GND to Arduino GND
- GPS TX to Arduino pin 3 (defined as RX in code)
- GPS RX to Arduino pin 4 (defined as TX in code)
Remember, TX connects to RX and vice-versa (in video at 11:10). The video also shows how to use simple jumper wires for connections (in video at 10:24).
Code Explanation
This project uses the TinyGPS++ library. Download and install it through the Arduino IDE's library manager. The essential code adjustments are the software serial pin definitions and baud rate (in video at 07:00):
#include <TinyGPS++.h>
#include <SoftwareSerial.h>

static const int RXPin = 3, TXPin = 4;
static const uint32_t GPSBaud = 9600; // Default for U-blox modules
The RXPin and TXPin variables define the Arduino pins connected to the GPS module. The default baud rate for the U-blox modules is 9600. The core of the code lies in reading the serial data from the GPS and parsing it using the TinyGPS++ library (in video at 08:03):
// The TinyGPS++ object
TinyGPSPlus gps;

// The serial connection to the GPS device
SoftwareSerial ss(RXPin, TXPin);

// ... (inside loop function) ...
while (ss.available() > 0)
  if (gps.encode(ss.read()))
    displayInfo();
The displayInfo() function then extracts and prints the latitude and longitude whenever a valid GPS fix is obtained (in video at 09:07):
void displayInfo()
{
  // ... other code ...

  if (gps.location.isValid())
  {
    Serial.print(gps.location.lat(), 6); // Latitude with 6 decimal places
    Serial.print(F(","));
    Serial.print(gps.location.lng(), 6); // Longitude with 6 decimal places
  }
  // ... other code ...
}
Live Project/Demonstration
The video (in video at 12:29) demonstrates the project in action, showing the initial "INVALID" output when no GPS signal is present and then displaying valid coordinates once a fix is acquired. The blinking blue LED on the Neo-7M provides visual confirmation of the GPS signal (in video at 13:49).
Chapters
- [00:00] Introduction and Project Overview
- [00:32] GPS Module Variations (Neo-6M and Neo-7M)
- [04:30] Wiring the GPS Module to Arduino
- [06:12] Code Explanation and TinyGPS++ Library
- [10:07] Detailed Wiring Explanation and TX/RX Principles
- [12:29] Live Demonstration and Signal Acquisition
This code has not been parsed yet. Please return to the admin panel to parse it.资源与参考
-
外部TingyGPS Plus官方网站arduiniana.org
-
外部Ublox网站u-blox.com
-
外部获取TinyGPSPlus(来自GitHub)github.com
文件📁
没有可用的文件。