รับตำแหน่ง GPS จากโมดูล GPS U-blox Neo-6 และ Neo-7 ด้วย Arduino
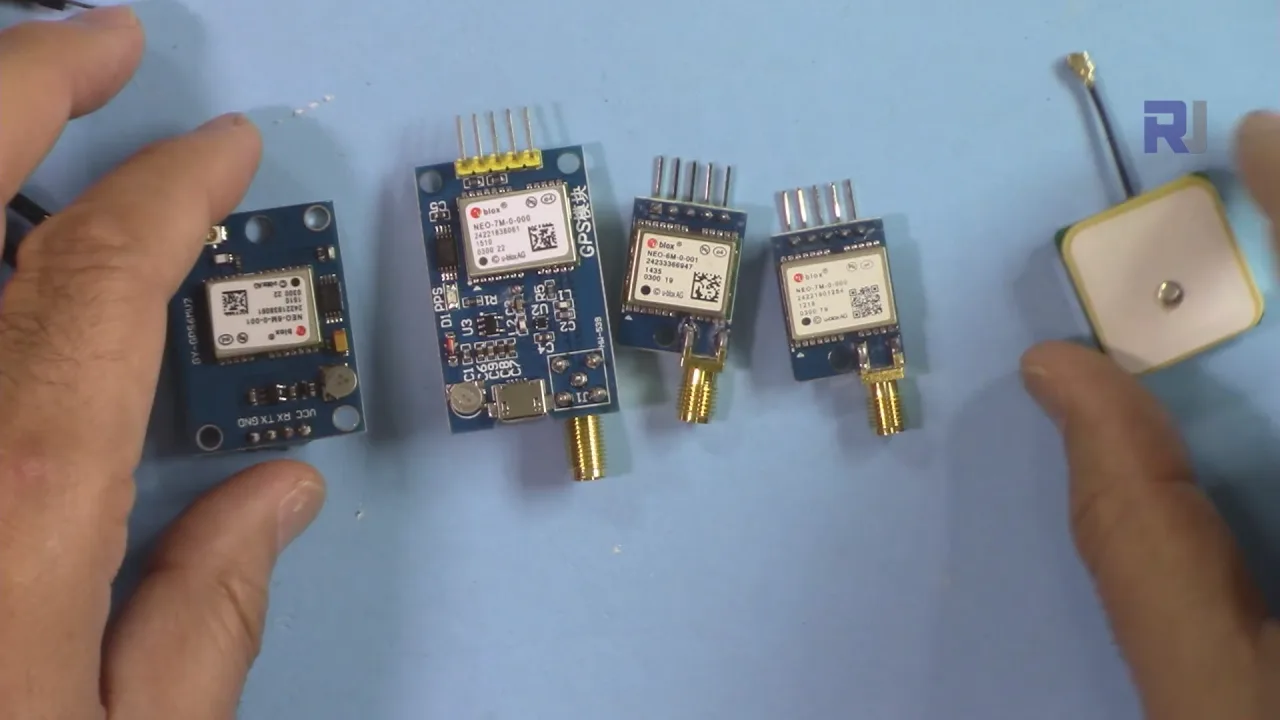
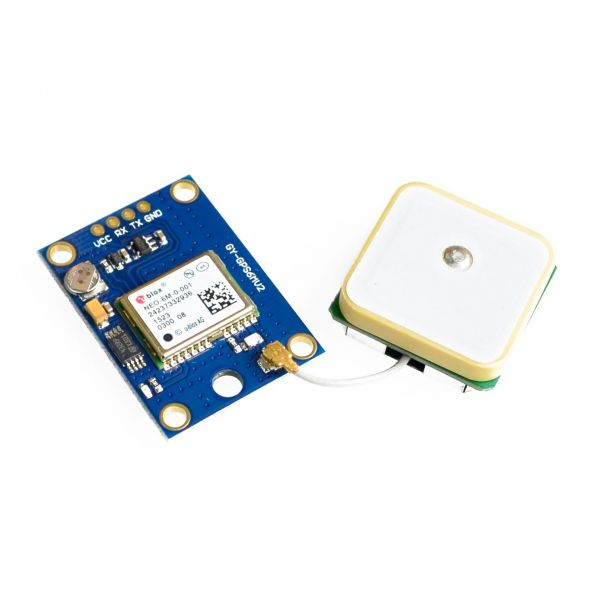
โปรเจกต์นี้สาธิตวิธีการเชื่อมต่อโมดูล GPS U-blox Neo-6M หรือ Neo-7M เข้ากับ Arduino เพื่อรับข้อมูลตำแหน่ง (ละติจูดและลองจิจูด) โมดูลราคาไม่แพงเหล่านี้ หาซื้อได้ง่ายทางออนไลน์ เป็นวิธีง่ายๆ ในการเพิ่มฟังก์ชัน GPS ให้กับโปรเจกต์ของคุณ LED สีฟ้าที่โดดเด่นบน Neo-7M (ในวิดีโอที่ 02:53) บ่งบอกถึงการรับสัญญาณ GPS ซึ่งเป็นคุณสมบัติที่มีประโยชน์สำหรับการยืนยันการรับสัญญาณ
นี่คือแนวคิดโปรเจกต์บางส่วนที่ใช้โมดูล GPS และ Arduino:
- เครื่องติดตาม GPS: บันทึกข้อมูลตำแหน่งและแสดงบนแผนที่
- เครื่องมือ Geocaching: นำทางไปยังพิกัดเฉพาะ
- การนำทางยานพาหนะอัตโนมัติ: นำทางหุ่นยนต์หรือโดรน
- สถานีตรวจอากาศ: เพิ่มข้อมูลตำแหน่งให้กับการอ่านค่าสภาพอากาศ
- การติดตามสัตว์ป่า: ติดตามการเคลื่อนไหวของสัตว์
ฮาร์ดแวร์/อุปกรณ์
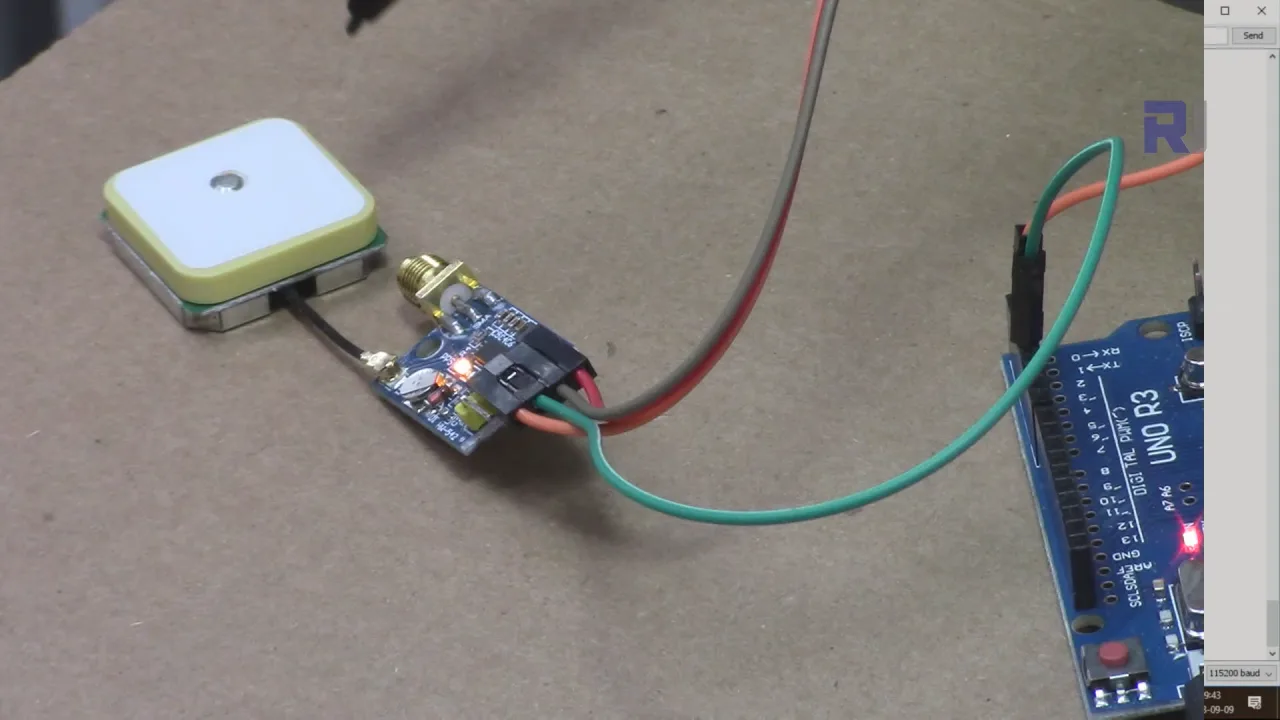
- Arduino Uno (หรือบอร์ดที่เข้ากันได้)
- โมดูล GPS U-blox Neo-6M หรือ Neo-7M
- สายจัมเปอร์
- สาย USB
- (ไม่บังคับ) เสาอากาศภายนอกและขั้วต่อ SMA
คู่มือการเดินสายไฟ
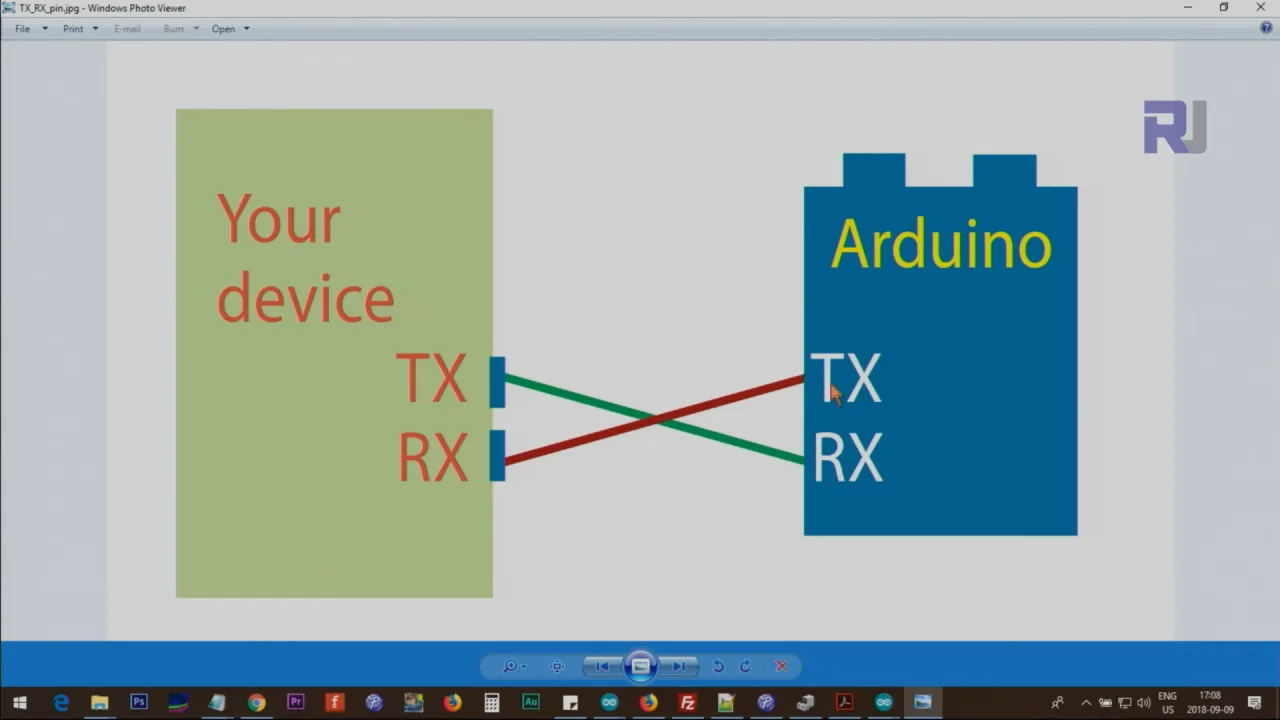
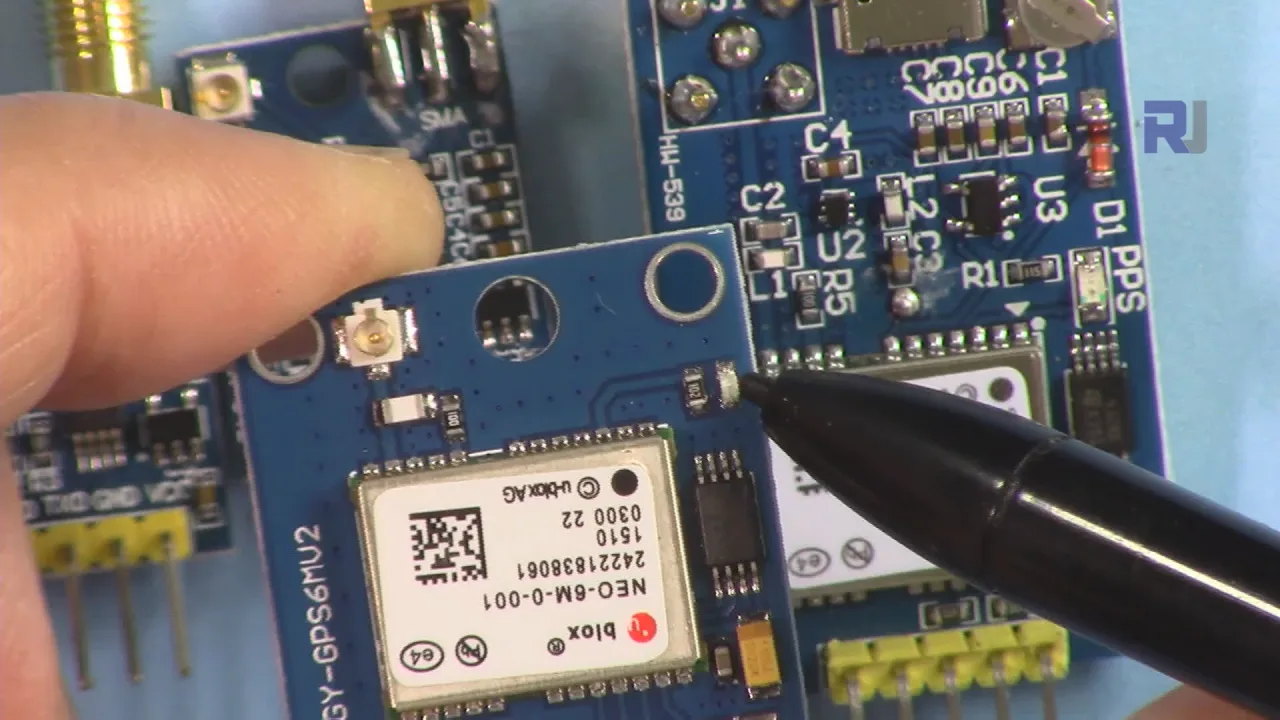
การเดินสายไฟทำได้ง่าย (ในวิดีโอที่ 10:39):
%%WIRING%%
- ขา VCC ของ GPS ไปยัง 3.3V ของ Arduino
- ขา GND ของ GPS ไปยัง GND ของ Arduino
- ขา TX ของ GPS ไปยังขา 3 ของ Arduino (กำหนดเป็น RX ในโค้ด)
- ขา RX ของ GPS ไปยังขา 4 ของ Arduino (กำหนดเป็น TX ในโค้ด)
โปรดจำไว้ว่า TX เชื่อมต่อกับ RX และในทางกลับกัน (ในวิดีโอที่ 11:10) วิดีโอยังแสดงวิธีใช้สายจัมเปอร์ธรรมดาสำหรับการเชื่อมต่อ (ในวิดีโอที่ 10:24)
คำอธิบายโค้ด
โปรเจกต์นี้ใช้ ไลบรารี TinyGPS++ ดาวน์โหลดและติดตั้งผ่านตัวจัดการไลบรารีของ Arduino IDE การปรับโค้ดที่จำเป็นคือการกำหนดพิน serial แบบซอฟต์แวร์และอัตราบอด (ในวิดีโอที่ 07:00):
#include <TinyGPS++.h>
#include <SoftwareSerial.h>

static const int RXPin = 3, TXPin = 4;
static const uint32_t GPSBaud = 9600; // ค่าเริ่มต้นสำหรับโมดูล U-blox
ตัวแปร RXPin และ TXPin กำหนดพินของ Arduino ที่เชื่อมต่อกับโมดูล GPS อัตราบอดเริ่มต้นสำหรับโมดูล U-blox คือ 9600 แกนหลักของโค้ดอยู่ที่การอ่านข้อมูล serial จาก GPS และแยกวิเคราะห์โดยใช้ไลบรารี TinyGPS++ (ในวิดีโอที่ 08:03):
// ออบเจกต์ TinyGPS++
TinyGPSPlus gps;

// การเชื่อมต่อ serial ไปยังอุปกรณ์ GPS
SoftwareSerial ss(RXPin, TXPin);

// ... (ภายในฟังก์ชัน loop) ...
while (ss.available() > 0)
  if (gps.encode(ss.read()))
    displayInfo();
ฟังก์ชัน displayInfo() จากนั้นจะแยกและพิมพ์ละติจูดและลองจิจูดเมื่อใดก็ตามที่ได้รับสัญญาณ GPS ที่ถูกต้อง (ในวิดีโอที่ 09:07):
void displayInfo()
{
  // ... โค้ดอื่นๆ ...

  if (gps.location.isValid())
  {
    Serial.print(gps.location.lat(), 6); // ละติจูดพร้อมทศนิยม 6 ตำแหน่ง
    Serial.print(F(","));
    Serial.print(gps.location.lng(), 6); // ลองจิจูดพร้อมทศนิยม 6 ตำแหน่ง
  }
  // ... โค้ดอื่นๆ ...
}
โปรเจกต์สด/การสาธิต
วิดีโอ (ในวิดีโอที่ 12:29) สาธิตการทำงานของโปรเจกต์ โดยแสดงผลลัพธ์ "INVALID" ในตอนแรกเมื่อไม่มีสัญญาณ GPS และจากนั้นแสดงพิกัดที่ถูกต้องเมื่อรับสัญญาณได้ LED สีฟ้ากระพริบบน Neo-7M ให้การยืนยันด้วยภาพของสัญญาณ GPS (ในวิดีโอที่ 13:49)
บทต่างๆ
- [00:00] บทนำและภาพรวมโปรเจกต์
- [00:32] โมดูล GPS รุ่นต่างๆ (Neo-6M และ Neo-7M)
- [04:30] การเดินสายไฟโมดูล GPS เข้ากับ Arduino
- [06:12] คำอธิบายโค้ดและไลบรารี TinyGPS++
- [10:07] คำอธิบายการเดินสายไฟโดยละเอียดและหลักการ TX/RX
- [12:29] การสาธิตสดและการรับสัญญาณ
ภาพ
#include <TinyGPS++.h>
#include <SoftwareSerial.h>
/*
 * Original library source: https://github.com/mikalhart/TinyGPSPlus
   This sample sketch demonstrates the normal use of a TinyGPSPlus object.
   It requires the use of SoftwareSerial, and assumes that you have a
   4800-baud serial GPS device hooked up on pins 3(rx) and 4(tx).

   Modified by Ahmad Shamshiri for Robojax.com
   on September 09, 2018 at 20:20 in Ajax, Ontario, Canada
   Watch video instructions for this code:https://youtu.be/hbRpr1HbDf8
*/
static const int RXPin = 3, TXPin = 4;
static const uint32_t GPSBaud = 9600;

// The TinyGPS++ object
TinyGPSPlus gps;

// The serial connection to the GPS device
SoftwareSerial ss(RXPin, TXPin);

void setup()
{
  Serial.begin(115200);
  ss.begin(GPSBaud);

  Serial.println(F("Robojax GPS Demo"));
  Serial.println(F("A simple demonstration of TinyGPS++ with an attached GPS module"));
  Serial.print(F("Testing TinyGPS++ library v. ")); Serial.println(TinyGPSPlus::libraryVersion());
  Serial.println(F("by Mikal Hart"));
  Serial.println();
}

void loop()
{

  // This sketch displays information every time a new sentence is correctly encoded.
  while (ss.available() > 0)
    if (gps.encode(ss.read()))
      displayInfo();

  if (millis() > 5000 && gps.charsProcessed() < 10)
  {
    Serial.println(F("No GPS detected: check wiring."));
    while(true);
  }
 delay(100);
}

void displayInfo()
{
  Serial.print(F("Location: "));
  if (gps.location.isValid())
  {
    Serial.print(gps.location.lat(), 6);
    Serial.print(F(","));
    Serial.print(gps.location.lng(), 6);
  }
  else
  {
    Serial.print(F("INVALID"));
  }

  Serial.print(F("  Date/Time: "));
  if (gps.date.isValid())
  {
    Serial.print(gps.date.month());
    Serial.print(F("/"));
    Serial.print(gps.date.day());
    Serial.print(F("/"));
    Serial.print(gps.date.year());
  }
  else
  {
    Serial.print(F("INVALID"));
  }

  Serial.print(F(" "));
  if (gps.time.isValid())
  {
    if (gps.time.hour() < 10) Serial.print(F("0"));
    Serial.print(gps.time.hour());
    Serial.print(F(":"));
    if (gps.time.minute() < 10) Serial.print(F("0"));
    Serial.print(gps.time.minute());
    Serial.print(F(":"));
    if (gps.time.second() < 10) Serial.print(F("0"));
    Serial.print(gps.time.second());
    Serial.print(F("."));
    if (gps.time.centisecond() < 10) Serial.print(F("0"));
    Serial.print(gps.time.centisecond());
  }
  else
  {
    Serial.print(F("INVALID"));
  }

  Serial.println();
}
แหล่งข้อมูลและเอกสารอ้างอิง
-
ภายนอกGet TinyGPSPlus (from GitHub)github.com
-
ภายนอกOfficial TinyGPSPlus Websitearduiniana.org
-
ภายนอกUblox websiteu-blox.com
ไฟล์📁
ไฟล์อื่น ๆ
-
เอกสารข้อมูล GPS TinyGPSPlus NEO-7เอกสารข้อมูลสำหรับโมดูล GPS u-blox NEO-7 ซึ่งเป็นเครื่องรับ GNSS ขนาดกะทัดรัดที่มีความไวสูงและใช้พลังงานต่ำ ให้ข้อมูลตำแหน่งผ่าน UART และมักใช้กับ Arduino และไลบรารี TinyGPSPlus
robojax_GPS_TinyGPSPlus_NEO-7_DataSheet.pdf1.73 MB