د آردوینو موټر شیلډ کارول د L298N چپ سره
دا پروژه ښیي چې څنګه دوه DC موټورونه د Arduino Uno او د L298N موټور چپ پر بنسټ د موټور شیلډ په کارولو سره کنټرول کړو. دا هر اړخیز ترتیب د هر موټور د سرعت او لوري خپلواک کنټرول ته اجازه ورکوي، د بریک کولو فعالیت سره یوځای. شیلډ تارونه ساده کوي او د مختلفو پروژو کې د موټورونو چلولو لپاره یو کمپیکٹ حل چمتو کوي.
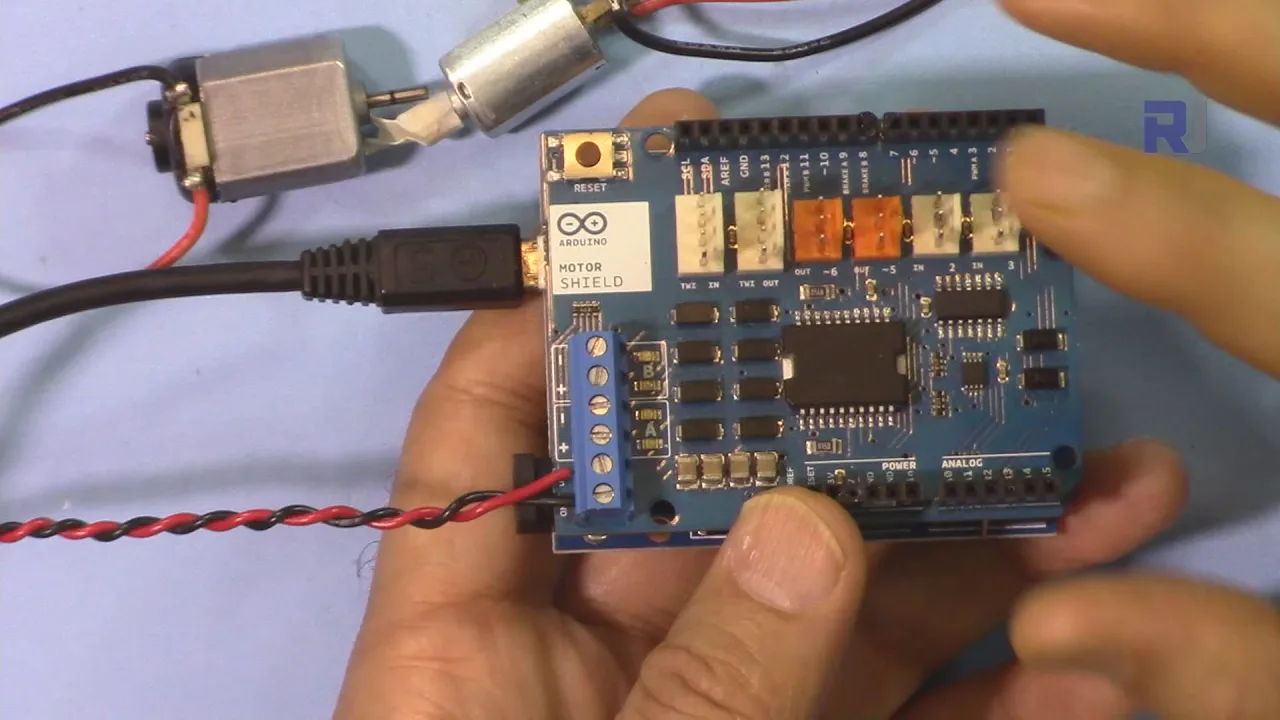
دلته د دې ترتیب په کارولو سره ځینې پروژې نظرونه دي:
- د خپلواک څرخ کنټرول سره یو کوچنی روبوټ جوړ کړئ.
- د کیمرې یا سینسر لپاره یو موټوریز پلیټ فارم جوړ کړئ.
- یو ساده conveyor بیلټ سیسټم ډیزاین کړئ.
- د یو کوچني موټر یا لوبو حرکت کنټرول کړئ.
هارډویر/اجزاوې
- Arduino Uno
- L298N موټور شیلډ
- دوه DC موټورونه
- بهرنی بریښنا رسول (د لویو موټورونو لپاره)
- نښلونکي تارونه
د تارونو لارښود
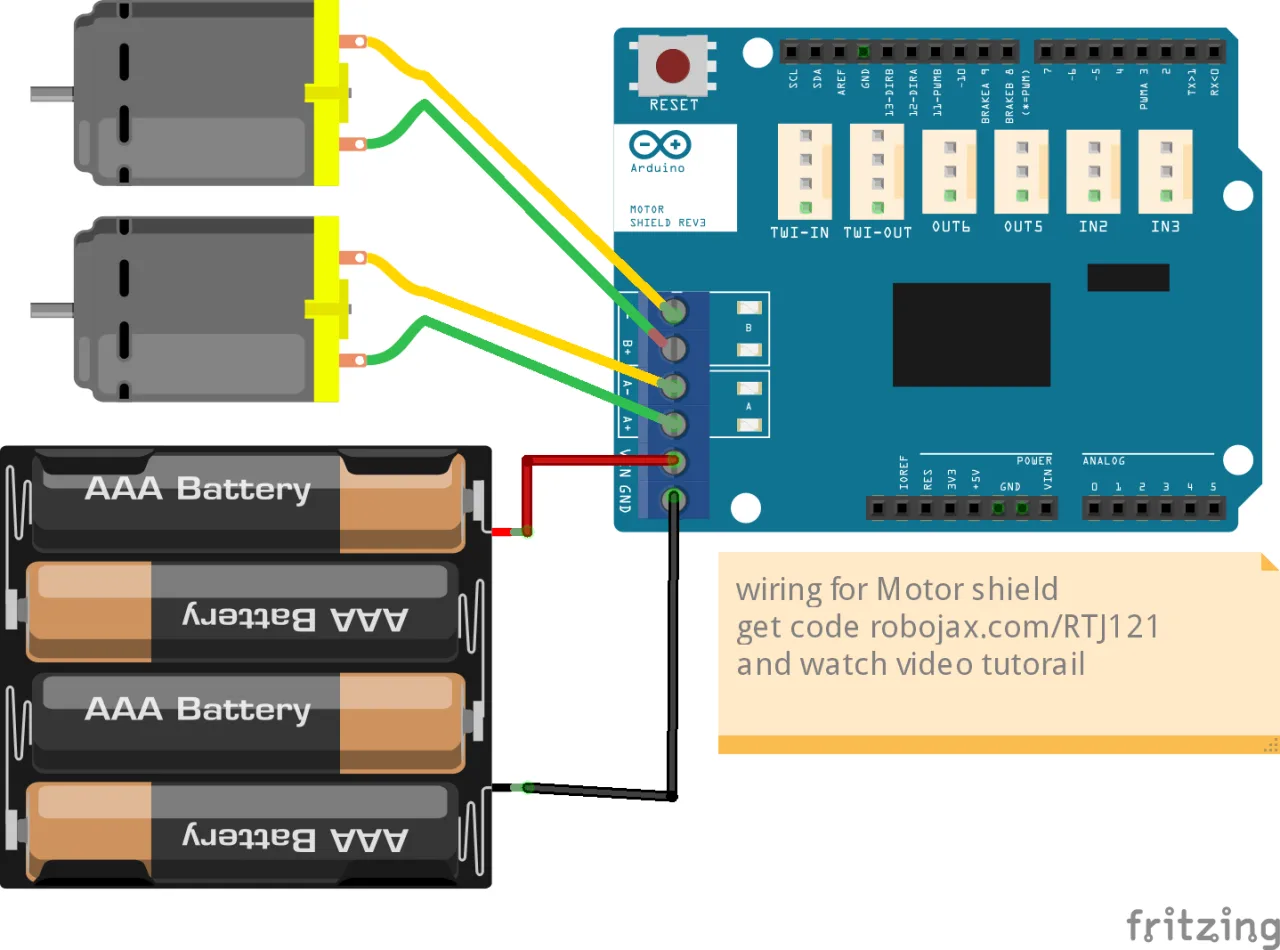
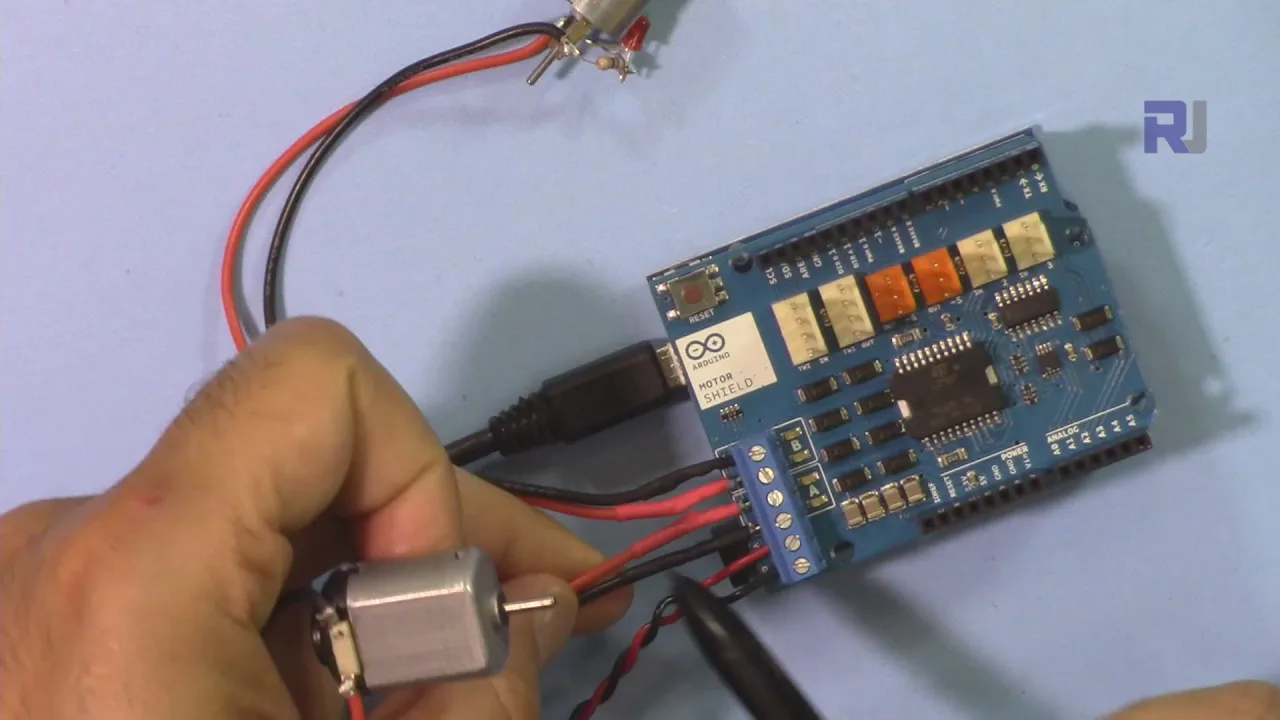
موټور شیلډ مستقیم د Arduino Uno په سر نصب کیږي. موټورونه د شیلډ پر "Motor A" او "Motor B" نښه شوي سکرو ترمینلونو سره وصل کړئ (په ویډیو کې په 08:27). د موټور د نښلولو قطبيت په پیل کې مهم نه دی، ځکه چې کوډ لوری کنټرولوي. که موټور په غلط لوري وګرځي، په ساده ډول تارونه بدل کړئ. د کوچنیو موټورونو لپاره چې له 500mA څخه کم مصرف کوي، بریښنا مستقیم له Arduino څخه اخیستل کیدی شي. لوی موټورونه به د شیلډ د بریښنا ترمینلونو سره وصل شوي بهرني بریښنا رسول ته اړتیا ولري (په ویډیو کې په 09:03).
د کوډ تشریح
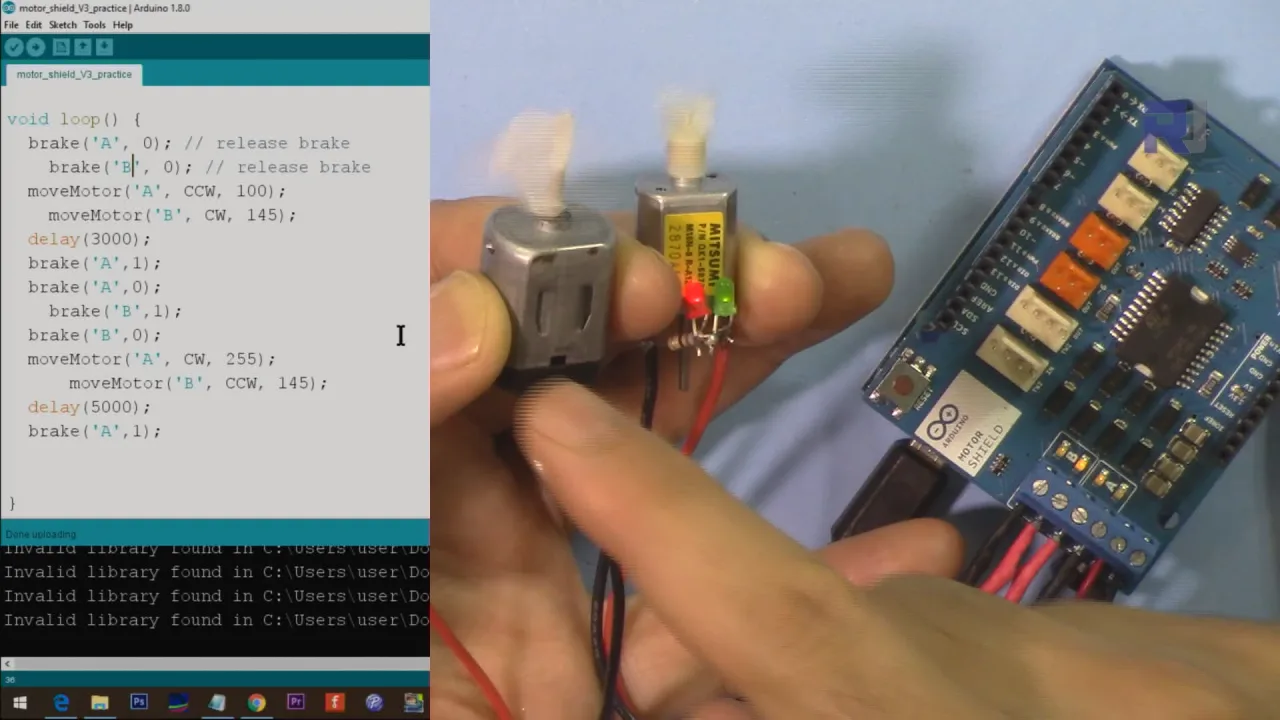
کوډ د هر موټور د لوري، سرعت، او بریک لپاره د پن ټاکل تعریفوي. دا مهمه ده چې د موټور شیلډ ډیزاین سره سم سم پنونه وکارول شي. کوډ د ساده کنټرول لپاره یو ګټور فنکشن، moveMotor()، هم شاملوي (په ویډیو کې په 13:21).
// د موټور A او B لپاره د پن ټاکل (بدلون مه کوئ)
const int MotorPinA = 12;
const int MotorSpeedPinA = 3;
const int MotorBrakePinA = 9;

const int MotorPinB = 13;
const int MotorSpeedPinB = 11;
const int MotorBrakePinB = 8;

const int CW  = HIGH; // ساعت لوري
const int CCW = LOW; // د ساعت مخالف لوري
د moveMotor() فنکشن موټور ('A' یا 'B')، لوری (CW یا CCW)، او سرعت (0-255) د دلیلونو په توګه اخلي (په ویډیو کې په 13:21). دا فنکشن د loop() فنکشن دننه د موټور کنټرول ساده کوي.
void moveMotor(char motor, int dir, int speed) {
  // ... (د تطبیق جزئیات پریښودل شوي)
}
د brake() فنکشن تاسو ته اجازه درکوي چې د یو ځانګړي موټور لپاره بریک تطبیق یا خوشې کړئ (په ویډیو کې په 14:06). دا موټور ('A' یا 'B') او د بریک حالت (1 د بریک لپاره، 0 د خوشې کولو لپاره) د دلیلونو په توګه اخلي.
void brake(char motor, int brk) {
  // ... (د تطبیق جزئیات پریښودل شوي)
}
ژوندی پروژه/مظاهره
ویډیو د انفرادي موټورونو کنټرول، د سرعت او لوري تنظیم، او د بریک تطبیق ښیي. دا دا هم ښیي چې څنګه دوه موټورونه په یو وخت کې د مختلفو پیرامیټرو سره کنټرول کړو، پشمول د یو لوی موټور د یو کوچني تر څنګ چلول (په ویډیو کې په 19:14).
فصلونه
- [00:00] د Arduino موټور شیلډ پیژندنه
- [00:59] د موټور شیلډ تشریح
- [06:41] د L298N ډیټاشیټ کتنه
- [08:27] د هارډویر مظاهره او د موټور نښلول
- [09:28] د کوډ تشریح: بنسټیز موټور کنټرول
- [12:36] مظاهره: د واحد موټور کنټرول
- [13:21] د کوډ تشریح: پرمختللي فنکشنونه (moveMotor, brake)
- [14:39] مظاهره: پرمختللی موټور کنټرول
- [17:43] مظاهره: د دوه موټورونو کنټرول
- [19:14] مظاهره: د مختلفو بریښنا اړتیاو سره د موټورونو کنټرول
انځورونه
/*
 * Code to control 2 DC motors using Arduino Motor Shield (Basic Code)
 * Written by Ahmad Shamshiri for Robojax.com on August 28, 2018 at 21:33 in Ajax, Ontario, Canada
 * Watch video instruction for this code:https://youtu.be/kIgbjyqNrV8
 * Watch how to use current sensing with Motor Shield : https://youtu.be/-uQKBDTWHPM
 *
 * This code has been downloaded from Robojax.com
    This program is free software: you can redistribute it and/or modify
    it under the terms of the GNU General Public License as published by
    the Free Software Foundation, either version 3 of the License, or
    (at your option) any later version.

    This program is distributed in the hope that it will be useful,
    but WITHOUT ANY WARRANTY; without even the implied warranty of
    MERCHANTABILITY or FITNESS FOR A PARTICULAR PURPOSE.  See the
    GNU General Public License for more details.

    You should have received a copy of the GNU General Public License
    along with this program.  If not, see <https://www.gnu.org/licenses/>.
 *
 */
const int MotorPinA = 12; // for motor A
const int MotorSpeedPinA = 3; // for motor A
const int MotorBrakePinA = 9; // for motor A


const int MotorPinB = 13; // for motor B
const int MotorSpeedPinB = 11;// for motor B
const int MotorBrakePinB = 8;// for motor B

const int CW  = HIGH;
const int CCW = LOW;

void setup() {
  // motor A pin assignment
  pinMode(MotorPinA, OUTPUT);
  pinMode(MotorSpeedPinA, OUTPUT);
  pinMode(MotorBrakePinA, OUTPUT);

  // motor B pin assignment
  pinMode(MotorPinB, OUTPUT);
  pinMode(MotorSpeedPinB, OUTPUT);
  pinMode(MotorBrakePinB, OUTPUT);


  Serial.begin(9600);//  serial monitor initialized

}

void loop() {

  //start motor A at maximum speed
  digitalWrite(MotorPinB, CW);// set direction
      Serial.println("Direction CW");
  analogWrite(MotorSpeedPinB, 100);// set speed at maximum
      Serial.println("Speed 100");
  delay(5000);// run for 5 seconds
  digitalWrite(MotorBrakePinB, HIGH);// brake
      Serial.println("Brake applied");
  delay(2000);
  digitalWrite(MotorBrakePinB,LOW);// release brake
      Serial.println("Brake removed");
  analogWrite(MotorSpeedPinB, 70);// set to 1/3
      Serial.println("Speed at 70");
  delay(5000);//


}// loop end++
/*
* Code to control 2 DC motors using Arduino Motor Shield (Advanced)
* Using this code you can control 2 motors very easily
*
* Written by Ahmad Shamshiri for Robojax.com on August 28, 2018 at 21:33 in Ajax, Ontario, Canada
* Watch video instruction for this code:https://youtu.be/kIgbjyqNrV8
*
* This code has been downloaded from Robojax.com
This program is free software: you can redistribute it and/or modify
it under the terms of the GNU General Public License as published by
the Free Software Foundation, either version 3 of the License, or
(at your option) any later version.
This program is distributed in the hope that it will be useful,
but WITHOUT ANY WARRANTY; without even the implied warranty of
MERCHANTABILITY or FITNESS FOR A PARTICULAR PURPOSE. See the
GNU General Public License for more details.
You should have received a copy of the GNU General Public License
along with this program. If not, see <https://www.gnu.org/licenses/>.
*
*/
const int MotorPinA = 12;
const int MotorSpeedPinA = 3;
const int MotorBrakePinA = 9;
const int MotorPinB = 13;
const int MotorSpeedPinB = 11;
const int MotorBrakePinB = 8;
const int CW = HIGH;
const int CCW = LOW;
const int showComments = 1;// show comments in serial monitor
void setup() {
// motor A pin assignment
pinMode(MotorPinA, OUTPUT);
pinMode(MotorSpeedPinA, OUTPUT);
pinMode(MotorBrakePinA, OUTPUT);
// motor B pin assignment
pinMode(MotorPinB, OUTPUT);
pinMode(MotorSpeedPinB, OUTPUT);
pinMode(MotorBrakePinB, OUTPUT);
Serial.begin(9600);// serial monitor initialized
}
void loop() {
brake('A', 0); // release brake
brake('B', 0); // release brake
moveMotor('A', CCW, 100);// motor A rotate CCW at 100 PWM value
moveMotor('B', CW, 145);// motor B rotate CW at 145 PWM value
delay(3000);
brake('A',1);
brake('A',0);
brake('B',1);
brake('B',0);
moveMotor('A', CW, 255);
moveMotor('B', CCW, 145);
delay(5000);
brake('A',1);
}// loop end
/*
*
* Written by Ahmad Shamshiri August 29, 2018 at 20:59 in Ajax, Ontario, Canada
* moveMotor controls the motor
@param motor is char A or B referring to motor A or B.
@param dir is motor direction, CW or CCW
@param speed is PWM value between 0 to 255
Example 1: to start moving motor A in CW direction with 135 PWM value
moveMotor('A', CW, 135);
Example 2: to start moving motor B in CCW direction with 200 PWM value
moveMotor('B', CCW, 200);
*/
void moveMotor(char motor, int dir, int speed)
{
int motorPin;
int motorSpeedPin;
if(motor =='A')
{
motorPin = MotorPinA;
motorSpeedPin = MotorSpeedPinA;
}else{
motorPin = MotorPinB;
motorSpeedPin = MotorSpeedPinB;
}
digitalWrite(motorPin, dir);// set direction for motor
analogWrite(motorSpeedPin, speed);// set speed of motor
}//moveMotor end
/*
* brake, stops the motor, or releases the brake
* @param motor is character A or B
* @param brk if 1, brake; if 0, release brake
* example of usage:
* brake('A', 1);// applies brake to motor A
* brake('A', 0);// releases brake from motor A
*/
void brake(char motor, int brk)
{
if(motor =='A')
{
digitalWrite(MotorBrakePinA, brk);// brake
delay(1000);
}else{
digitalWrite(MotorBrakePinB, brk);// brake
delay(1000);
}
}هغه شیان چې تاسو ورته اړتیا لرئ
-
امازون
-
امازون
-
ای بی
-
علی ایکسپریسPurchase L298N Module from eBayebay.us
-
علی ایکسپریسPurchase Prototyping Shield for Arduino UNO from AliExpresss.click.aliexpress.com
سرچینې او حوالې
-
بهرنیArduino Motor Shield (official webpage)store.arduino.cc
فایلونه📁
ډیټاشیټ (pdf)
-
Datashet for L298N Dual H-bridge motor driver
robojax_L298N datasheet.pdf0.18 MB


![Arduino Motor Shield REV3 [A000079] - Motor Control, 4 DC Motors, 2 Stepper Motors, 1.2A per Motor, Integrated Power Supply, Compatible with Arduino IDE for Robotics and Automation Projects](https://m.media-amazon.com/images/I/418cyf68VoL._SL75_.jpg)