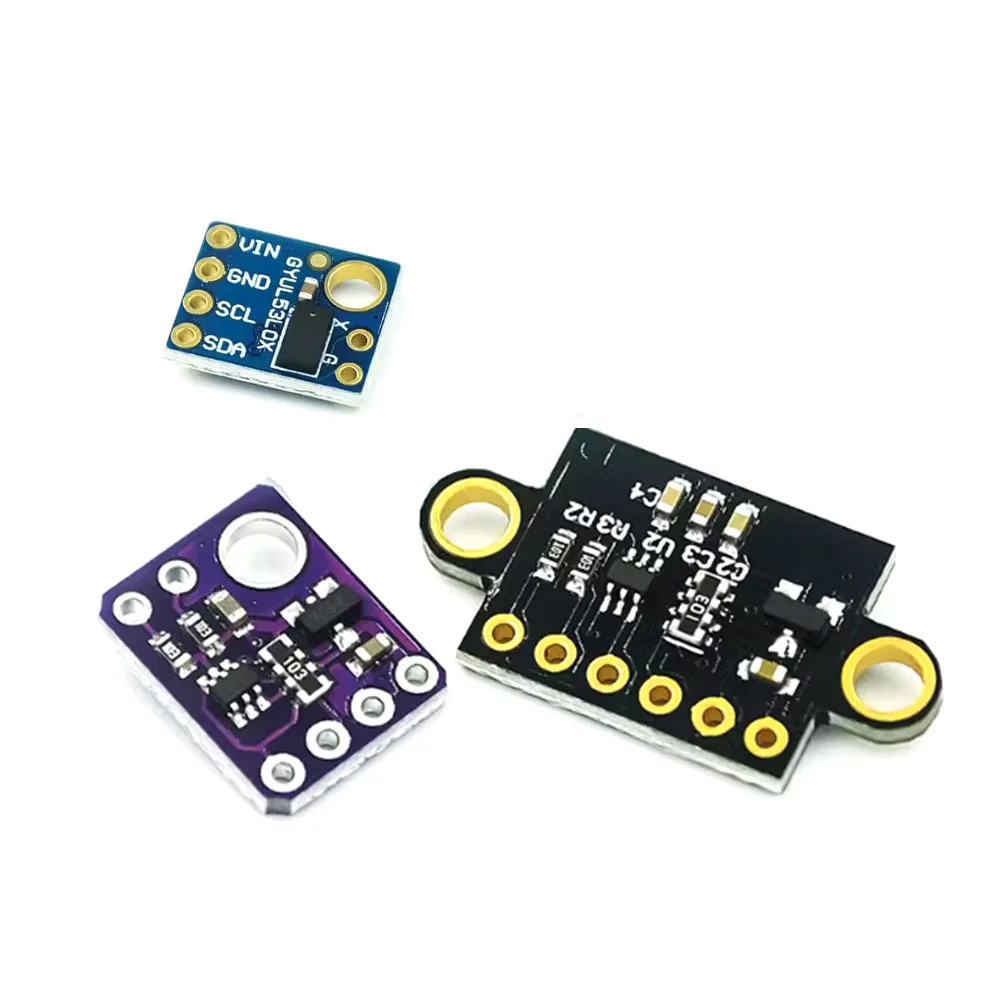
การใช้เครื่องวัดระยะด้วยเลเซอร์ VL53L0X กับ Arduino
ในบทช่วยสอนนี้ เราจะสํารวจวิธีใช้เครื่องวัดระยะด้วยเลเซอร์ VL53L0X กับ Arduino อุปกรณ์นี้ช่วยให้คุณวัดระยะทางได้อย่างแม่นยําโดยใช้เลเซอร์ จึงเหมาะสําหรับการใช้งานต่างๆ เช่น หุ่นยนต์และระบบอัตโนมัติ ในตอนท้ายของบทช่วยสอนนี้ คุณจะมีการตั้งค่าการทํางานที่สามารถวัดระยะทางและแสดงผลในจอภาพแบบอนุกรม

สําหรับโครงการของเรา เราจะใช้ไลบรารี Adafruit VL53L0X ซึ่งช่วยลดความยุ่งยากในกระบวนการเชื่อมต่อกับเซ็นเซอร์ ไลบรารีนี้มีฟังก์ชันที่จําเป็นในการเริ่มต้นเซ็นเซอร์ อ่านการวัด และจัดการข้อผิดพลาดที่อาจเกิดขึ้น คุณสามารถดูวิดีโอสําหรับคําแนะนําภาพเกี่ยวกับการตั้งค่า (ในวิดีโอเวลา 02:15 น.)
อธิบายฮาร์ดแวร์
ส่วนประกอบหลักของโครงการนี้ ได้แก่ เครื่องวัดระยะเลเซอร์ VL53L0X และบอร์ด Arduino VL53L0X เป็นเซ็นเซอร์เวลาบินที่ใช้เลเซอร์วัดระยะทางสูงสุด 2 เมตรด้วยความแม่นยําสูง ทํางานผ่านโปรโตคอล I2C ทําให้สามารถสื่อสารกับ Arduino ได้ง่าย
บอร์ด Arduino ทําหน้าที่เป็นไมโครคอนโทรลเลอร์ที่ประมวลผลข้อมูลจาก VL53L0X ส่งคําสั่งไปยังเซ็นเซอร์และรับการวัดระยะทาง ซึ่งสามารถแสดงหรือใช้ในแอปพลิเคชันอื่นๆ ได้ การเดินสายที่เหมาะสมเป็นสิ่งสําคัญสําหรับการรับรองการอ่านค่าที่แม่นยําจากเซ็นเซอร์
รายละเอียดเอกสารข้อมูลสินค้า
| ผู้ผลิต | เอสทีมิโครอิเล็กทรอนิกส์ |
|---|---|
| ส่วนจํานวน | VL53L0X |
| ปริมาณการดําเนินงาน tage | 2.6 V ถึง 3.5 V |
| เทือก | 30 มม. ถึง 2000 มม |
| ความถูกต้อง | ±3% ทั่วไป |
| อิน เทอร์ เฟซ | ไอทูซี |
| ช่วงอุณหภูมิ | -40 °C ถึง +85 °C |
| การบริโภคในปัจจุบัน | <1 mA (สแตนด์บาย), 20 mA (ใช้งานอยู่) |
| ห่อ | วีเอฟแอลจีเอ-8 |
- ตรวจสอบให้แน่ใจว่าเซ็นเซอร์ได้รับพลังงานอย่างถูกต้อง (2.6 V ถึง 3.5 V)
- รักษาการตั้งค่าที่อยู่ I2C ให้ถูกต้องเพื่อหลีกเลี่ยงความขัดแย้ง
- รักษาความสะอาดของเซ็นเซอร์เพื่อการวัดระยะทางที่แม่นยํา
- ใช้ตัวต้านทานแบบดึงขึ้นที่เหมาะสมบนสาย I2C หากจําเป็น
- หลีกเลี่ยงแสงแดดโดยตรงบนเซ็นเซอร์เพื่อการอ่านค่าที่เชื่อถือได้
คําแนะนําในการเดินสายไฟ

ในการต่อสายเซ็นเซอร์ VL53L0X เข้ากับ Arduino ให้เชื่อมต่อพิน VCC ของเซ็นเซอร์เข้ากับพิน 5V บน Arduino พิน GND ควรเชื่อมต่อกับกราวด์ (GND) ของ Arduino สําหรับการสื่อสาร I2C ให้เชื่อมต่อพิน SDA ของ VL53L0X กับพิน A4 บน Arduino และเชื่อมต่อพิน SCL กับพิน A5 หากคุณใช้ Arduino รุ่นอื่น โปรดดูการกําหนดพิน SDA และ SCL เฉพาะสําหรับบอร์ดนั้น
ตัวอย่างเช่น บน Arduino Mega คุณจะเชื่อมต่อ SDA กับพิน 20 และ SCL กับพิน 21 ตรวจสอบให้แน่ใจว่าการเชื่อมต่อทั้งหมดปลอดภัยเพื่อหลีกเลี่ยงปัญหาการสื่อสาร หากเซ็นเซอร์ไม่ตอบสนอง ให้ตรวจสอบสายไฟอีกครั้งและตรวจดูให้แน่ใจว่า Arduino ได้รับพลังงานอย่างถูกต้อง
ตัวอย่างโค้ดและคําแนะนํา
ด้านล่างนี้คือตัวอย่างข้อมูลจากฟังก์ชันการตั้งค่าที่เริ่มต้นเซ็นเซอร์ VL53L0X:
void setup() {
  Serial.begin(9600);
  while (! Serial) {
    delay(1);
  }
  Serial.println("Robojax Test");
  if (!lox.begin()) {
    Serial.println(F("Failed to boot VL53L0X"));
    while(1);
  }
}
รหัสนี้จะเริ่มต้นการสื่อสารแบบอนุกรมและพยายามเริ่มเซ็นเซอร์ VL53L0X หากเซ็นเซอร์ไม่สามารถบู๊ตได้ เซ็นเซอร์จะพิมพ์ข้อความแสดงข้อผิดพลาดและหยุดโปรแกรม
ต่อไปนี้คือตัวอย่างข้อมูลจากฟังก์ชันลูปที่อ่านการวัดระยะทาง:
void loop() {
  VL53L0X_RangingMeasurementData_t measure;
  lox.rangingTest(&measure, false);
  if (measure.RangeStatus != 4) {
    Serial.print("Distance (mm): "); Serial.println(measure.RangeMilliMeter);
  } else {
    Serial.println(" out of range ");
  }
  delay(100);
}
บล็อกนี้จะอ่านการวัดระยะทางจากเซ็นเซอร์อย่างต่อเนื่องและพิมพ์ไปยังจอภาพแบบอนุกรม หากการวัดอยู่นอกช่วง แสดงว่าสิ่งนี้เป็นไปตามนั้น
การสาธิต / สิ่งที่คาดหวัง
เมื่อคุณเรียกใช้โปรแกรม คุณจะเห็นการวัดระยะทางที่แสดงในจอภาพแบบอนุกรม การอ่านควรอัปเดตทุกๆ 100 มิลลิวินาที หากเซ็นเซอร์ชี้ไปที่วัตถุ เซ็นเซอร์จะแสดงระยะทางเป็นมิลลิเมตร หากวัตถุอยู่นอกระยะ ก็จะระบุเช่นกัน ตรวจสอบให้แน่ใจว่าได้ทดสอบเซ็นเซอร์ภายในช่วงที่กําหนดเพื่อให้ได้ผลลัพธ์ที่ดีที่สุด (ในวิดีโอเวลา 10:00 น.)
การประทับเวลาวิดีโอ
- 00:00-แนะ นำ
- 02:15- การตั้งค่าสายไฟ
- 05:30- คําอธิบายรหัส
- 10:00-การสาธิต
ภาพ
/* This example shows how to use continuous mode to take
range measurements with the VL53L0X.
// Original source from Adafruit https://github.com/adafruit/Adafruit_VL53L0X
// Modified by Ahmad Shamshiri for RoboJax.com
// Date modified: Sep 26, 2017
// Nejrabi

* Get this code and other Arduino codes from Robojax.com
Learn Arduino step by step in a structured course with all material, wiring diagrams, and libraries
all in one place.

If you found this tutorial helpful, please support me so I can continue creating
content like this.

or make a donation using PayPal http://robojax.com/L/?id=64

 *  * This code is "AS IS" without warranty or liability. Free to be used as long as you keep this note intact.*
 * This code has been downloaded from Robojax.com
    This program is free software: you can redistribute it and/or modify
    it under the terms of the GNU General Public License as published by
    the Free Software Foundation, either version 3 of the License, or
    (at your option) any later version.

    This program is distributed in the hope that it will be useful,
    but WITHOUT ANY WARRANTY; without even the implied warranty of
    MERCHANTABILITY or FITNESS FOR A PARTICULAR PURPOSE.  See the
    GNU General Public License for more details.

    You should have received a copy of the GNU General Public License
    along with this program.  If not, see <https://www.gnu.org/licenses/>.

   Copyright (c) 2015, Majenko Technologies
   All rights reserved.

   Redistribution and use in source and binary forms, with or without modification,
   are permitted provided that the following conditions are met:

 * * Redistributions of source code must retain the above copyright notice, this
     list of conditions and the following disclaimer.

 * * Redistributions in binary form must reproduce the above copyright notice, this
     list of conditions and the following disclaimer in the documentation and/or
     other materials provided with the distribution.

 * * Neither the name of Majenko Technologies nor the names of its
     contributors may be used to endorse or promote products derived from
     this software without specific prior written permission.

   THIS SOFTWARE IS PROVIDED BY THE COPYRIGHT HOLDERS AND CONTRIBUTORS "AS IS" AND
   ANY EXPRESS OR IMPLIED WARRANTIES, INCLUDING, BUT NOT LIMITED TO, THE IMPLIED
   WARRANTIES OF MERCHANTABILITY AND FITNESS FOR A PARTICULAR PURPOSE ARE
   DISCLAIMED. IN NO EVENT SHALL THE COPYRIGHT HOLDER OR CONTRIBUTORS BE LIABLE FOR
   ANY DIRECT, INDIRECT, INCIDENTAL, SPECIAL, EXEMPLARY, OR CONSEQUENTIAL DAMAGES
   (INCLUDING, BUT NOT LIMITED TO, PROCUREMENT OF SUBSTITUTE GOODS OR SERVICES;
   LOSS OF USE, DATA, OR PROFITS; OR BUSINESS INTERRUPTION) HOWEVER CAUSED AND ON
   ANY THEORY OF LIABILITY, WHETHER IN CONTRACT, STRICT LIABILITY, OR TORT
   (INCLUDING NEGLIGENCE OR OTHERWISE) ARISING IN ANY WAY OUT OF THE USE OF THIS
   SOFTWARE, EVEN IF ADVISED OF THE POSSIBILITY OF SUCH DAMAGE.
*/

#include "Adafruit_VL53L0X.h"

Adafruit_VL53L0X lox = Adafruit_VL53L0X();

void setup() {
  Serial.begin(9600);

  // wait until serial port opens for native USB devices
  while (! Serial) {
    delay(1);
  }

  Serial.println("Robojax Test");
  if (!lox.begin()) {
    Serial.println(F("Failed to boot VL53L0X"));
    while(1);
  }
  // power
  Serial.println(F("VL53L0X API Simple Ranging example\n\n"));
}


void loop() {
  VL53L0X_RangingMeasurementData_t measure;

  Serial.print("Reading a measurement... ");
  lox.rangingTest(&measure, false); // pass in 'true' to get debug data printout!

  if (measure.RangeStatus != 4) {  // phase failures have incorrect data
    Serial.print("Distance (mm): "); Serial.println(measure.RangeMilliMeter);
  } else {
    Serial.println(" out of range ");
  }

  delay(100);
}
แหล่งข้อมูลและเอกสารอ้างอิง
-
ภายนอกVL53L0X datasheet (PDF)st.com
ไฟล์📁
ไฟล์ Fritzing
-
Adafruit VL6180X Time of Flight Distance SensorFritzing part for the Adafruit VL6180X Time of Flight distance sensor. This sensor measures absolute distance up to 100mm and ambient light, communicating via I2C. Includes the sensor breakout board and pin connections for use in Fritzing projects.
Adafruit VL6180X Time of Flight Distance Sensor-1.fzpz0.02 MB
ไฟล์อื่น ๆ
-
ห้องสมุด Polou VL53L0X
robojax-VL53L0X-polou-arduino-master.zip0.02 MB