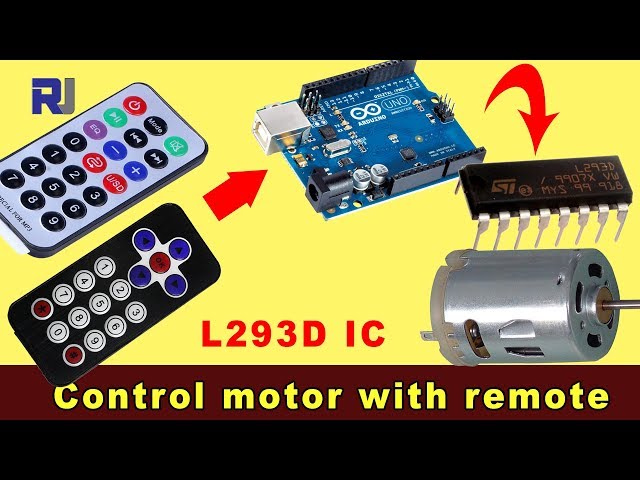
کنترل یک موتور DC با کنترل از راه دور IR با استفاده از آردوینو و L293D
این پروژه نشان میدهد که چگونه میتوان جهت و سرعت یک موتور DC را با استفاده از یک ریموت کنترل مادون قرمز (IR)، یک آردوینو Uno و یک تراشه درایور موتور L293D کنترل کرد. این راهاندازی امکان کنترل دقیق موتور را فراهم میکند و آن را برای انواع مختلفی از کاربردها مناسب میسازد.
این پروژه دنیایی از امکانات را برای تلاشهای الکترونیکی DIY شما باز میکند. در اینجا چند ایده برای شروع شما آورده شده است:
- ربات کنترلی از راه دور:حرکت یک ربات کوچک را با استفاده از کنترل از راه دور IR کنترل کنید.
- سیستم پرده برقیپردهها یا کرکرهها را بهطور از راه دور باز و بسته کنید.
- نصبهای هنری تعاملی:آثار هنری پویایی ایجاد کنید که با قطعات متحرک کنترلشده توسط یک ریموت IR کار میکنند.
- سیستم پن و تیلت:کنترل زاویه افقی و عمودی دوربین یا حساس(حس کننده) با استفاده از یک کنترل از راه دور IR.
سختافزار/قطعات
- آردوینو اونو
- آیسی درایور موتور L293D
- موتور دیسی
- کنترل از راه دور IR و گیرنده
- دیودها (1N4001 x4)
- سیمهای متصل کننده
- منبع تغذیه (برای مثال، باتری 9 ولتی برای موتور)
راهنمای سیمکشی
%%WIRING%%
(in video at 02:14)
چیپ L293D به اتصالات به هر دو Arduino و یک منبع تغذیه خارجی برای موتور نیاز دارد. دیودها برای حفاظت در برابر بازگشت ولتاژ استفاده میشوند. گیرنده IR به پایههای 5V و GND آردوینو متصل میشود و پایه سیگنال به پایه دیجیتال 11 متصل میشود (در شِفر (کود) قابل تنظیم است). موتور به پایههای خروجی L293D متصل میشود که توسط آردوینو کنترل میشوند.
توضیح شِفر (کود)
(در ویدئو در ساعت ۰۷:۳۰)
شِفر (کود) آردوینو ارائه شده از کتابخانه IRremote برای رمزگشایی سیگنالها از کنترل از راه دور IR استفاده میکند. پارامترهای قابل تنظیم مهم در داخل شِفر (کود) شامل:
const char type ='B';// W for white, B for black. Must keep single quotes like 'B' or 'W'
const boolean PCB = 0;// if receiver is PCB set to 1, if not set to 0. See video for details
تنظیم کنیدtypeمتغیر را به 'W' برای کنترل از راه دور سفید یا 'B' برای کنترل از راه دور سیاه قرار دهید (در ویدیو در 07:41). PCBمتغیر باید بر روی 1 تنظیم شود اگر گیرنده IR شما دارای PCB باشد، و 0 اگر یک ماجیول عریان باشد (در ویدیو در 07:50).
const String RIGHT=">";// move motor to the right (CW) with this key on remote
const String LEFT ="<";// move motor to the left (CCW) with this key on remote
const String STOP ="OK";// stop motor with this key on remote
این خطوط برچسبهای دکمههای کنترل از راه دور IR را برای کنترل موتور تعریف میکنند. اطمینان حاصل کنید که این برچسبها با برچسبهای روی کنترل از راه دور شما مطابقت دارند (در ویدیو در 08:12). شما میتوانید اینها را برای استفاده از دکمههای مختلف روی کنترل از راه دور خود سفارشی کنید.
#define P1A 2 // define pin 2 as for P1A
#define P2A 7 // define pin 7 as for P2A
#define EN12 8 // define pin 8 as for 1,2EN enable
int RECV_PIN = 11;
این خطوط پایههای آردوینوی استفاده شده برای کنترل درایور موتور L293D را تعریف میکنند (در ویدیو در ۰۹:۵۲).P1AوP2Aکنترل جهت وEN12موتور را فعال میکند.RECV_PINپایه متصل به خروجی سیگنال گیرنده IR است (در ویدئو در 06:52). اگر از پایههای مختلف استفاده میکنید، اینها را تغییر دهید.
پروژه زنده/نمایشگاه
در ویدئو در ساعت ۱۴:۱۵
این ویدئو پروژه را در عمل نشان میدهد و نشان میدهد که چگونه موتور DC به دستورات ریموت IR پاسخ میدهد. این نمایش چگونگی کنترل چرخش موتور در جهت عقربههای ساعت و خلاف عقربههای ساعت و نیز چگونگی متوقف کردن موتور با استفاده از دکمههای مختلف ریموت کنترل را نشان میدهد.
فصلها
- :00 مقدمه و مرور کلی پروژه
- اجزای پروژه و پیشنیازها
- [02:14] توضیحات سیمکشی
- [07:30] توضیح شِفر (کود) و پیکربندی
- [۱۴:۱۵] نمایش پروژه با ریموت مشکی و PCB
- [16:04] نمایش با ریموت نقرهای و PCB
- [17:42] نمایش با ریموت نقرهای و ماجیول خالی
- [18:23] نمایش با کنترل از راه دور مشکی و ماجیول بدون پوشش
/*
 * Original Infrared library from - http://arcfn.com
 *
 * This is Arduino code for the L293D DC motor driver.
 * It uses an IR remote control to rotate the DC motor clockwise (CW), counter-clockwise (CCW), and stop it.
 * Watch instructions for this video: https://youtu.be/e0pvfJbdw_o
 * To get the library and files related to this code, visit http://robojax.com/learn/arduino
 // Written for Robojax.com video

 * Code is available at http://robojax.com/learn/arduino

 *
 // Written by Ahmad S. for Robojax.com on
// August 10, 2018 at 22:03 in Ajax, Ontario, Canada
    This program is free software: you can redistribute it and/or modify
    it under the terms of the GNU General Public License as published by
    the Free Software Foundation, either version 3 of the License, or
    (at your option) any later version.

    This program is distributed in the hope that it will be useful,
    but WITHOUT ANY WARRANTY; without even the implied warranty of
    MERCHANTABILITY or FITNESS FOR A PARTICULAR PURPOSE.  See the
    GNU General Public License for more details.

    You should have received a copy of the GNU General Public License
    along with this program.  If not, see <https://www.gnu.org/licenses/>.
*/
// DC motor control
#define P1A 2 // define pin 2 as for P1A
#define P2A 7 // define pin 7 as for P2A
#define EN12 8 // define pin 8 as for 1,2EN enable

// remote settings start
#include <IRremote.h>

int RECV_PIN = 11;
const char type ='B';// W for white, B for black. Must keep single quotes like 'B' or 'W'
const boolean PCB = 0;// if receiver is PCB set to 1, if not set to 0. See video for details
boolean displayCode = false;// to display remote code. if not, set to false

// IR remote settings
const String RIGHT=">";// move motor to the right (CW) with this key on remote
const String LEFT ="<";// move motor to the left (CCW) with this key on remote
const String STOP ="OK";// stop motor with this key on remote
// remote settings end

IRrecv irrecv(RECV_PIN);

// this is array holding codes for White Remote when used with PCB version of receiver
unsigned int whiteRemotePCB[] ={
            0xE318261B, // CH-
            0x511DBB,   // CH
            0xEE886D7F,  // CH+

            0x52A3D41F, // |<<
            0xD7E84B1B, // >>|
            0x20FE4DBB, // >||

            0xF076C13B, // -
            0xA3C8EDDB, // +
            0x12CEA6E6, // EQ

            0xC101E57B, // 0
            0x97483BFB, // 100+
            0xF0C41643, // 200+

            0x9716BE3F, // 1
            0x3D9AE3F7, // 2
            0x6182021B, // 3

            0x8C22657B, // 4
            0x488F3CBB, // 5
            0x449E79F,  // 6

            0x32C6FDF7, // 7
            0x1BC0157B, // 8
            0x3EC3FC1B  // 9
            };

// this is array holding codes for White Remote when used with non-PCB version of receiver
unsigned int whiteRemote[] ={
            0xFFA25D, // CH-
            0xFF629D,   // CH
            0xFFE21D,  // CH+

            0xFF22DD, // |<<
            0xFF02FD, // >>|
            0xFFC23D, // >||

            0xFFE01F, // -
            0xFFA857, // +
            0xFF906F, // EQ

            0xFF6897, // 0
            0xFF9867, // 100+
            0xFFB04F, // 200+

            0xFF30CF, // 1
            0xFF18E7, // 2
            0xFF7A85, // 3

            0xFF10EF, // 4
            0xFF38C7, // 5
            0xFF5AA5,  // 6

            0xFF42BD, // 7
            0xFF4AB5, // 8
            0xFF52AD  // 9
            };
// key lables of white remote
 String whiteRemoteKey[] ={
            "CH-",
            "CH",
            "CH+",

            "|<<",
            ">>|",
            ">||",

            "-",
            "+",
            "EQ",

            "0",
            "100+",
            "200+",

            "1",
            "2",
            "3",

            "4",
            "5",
            "6",

            "7",
            "8",
            "9"
            };

// this is array holding codes for Black Remote when used with non-PCB version of receiver
 unsigned int blackRemote[] ={
            0xFF629D, // ^
            0xFF22DD,   // <
            0xFF02FD,  // OK
            0xFFC23D, // >
            0xFFA857, // v

            0xFF6897, // 1
            0xFF9867, // 2
            0xF0C41643, // 3

            0xFF30CF, // 4
            0xFF18E7, // 5
            0xFF7A85,  // 6

            0xFF10EF, // 7
            0xFF38C7, // 8
            0xFF5AA5,  // 9

            0xFF42BD, // *
            0xFF4AB5, // 0
            0xFF52AD  // #
            };

// this is array holding codes for Black Remote when used with PCB version of receiver
 unsigned int blackRemotePCB[] ={
            0x511DBB, // ^
            0x52A3D41F,   // <
            0xD7E84B1B,  // OK
            0x20FE4DBB, // >
            0xA3C8EDDB, // v


            0xC101E57B, // 1
            0x97483BFB, // 2
            0xF0C41643, // 3

            0x9716BE3F, // 4
            0x3D9AE3F7, // 5
            0x6182021B,  // 6

            0x8C22657B, // 7
            0x488F3CBB, // 8
            0x449E79F,  // 9

            0x32C6FDF7, // *
            0x1BC0157B, // 0
            0x3EC3FC1B  // #
            };

// Black remote key names
 String blackRemoteKey[] ={
            "^",
            "<",
            "OK",
            ">",
            "v",

            "1",
            "2",
            "3",

            "4",
            "5",
            "6",

            "7",
            "8",
            "9",

            "*",
            "0",
            "#"
            };

decode_results results;


/*
 * Permission granted to share this code given that this
 * note is kept with the code.
 * Disclaimer: this code is "AS IS" and for educational purposes only.
 *
 */

void setup() {
  // L293 Motor Control Code by Robojax.com 2018025
  Serial.begin(9600);// setup Serial Monitor to display information
  pinMode(P1A, OUTPUT);// define pin as OUTPUT for P1A
  pinMode(P2A, OUTPUT);// define pin as OUTPUT for P2A
  pinMode(EN12, OUTPUT);// define pin as OUTPUT for 1,2EN

  Serial.println("Robojax IR Decode");
  Serial.println("Motor Control with Remote");
  irrecv.enableIRIn(); // Start the receiver


  // L293 Motor Control Code by Robojax.com 20180810
}

void loop() {
  // L293d Motor Control Code with IR by Robojax.com 20180810

  if (irrecv.decode(&results)) {
    if(displayCode)Serial.println(results.value, HEX);
    robojaxValidateCode(results.value);// used the "robojaxValidateCode" bellow
    irrecv.resume(); // Receive the next value
  }
  delay(50);// 50 millisecond delay
  // L293d Motor Control Code with IR by Robojax.com 20180810
}//loop end


/*
 * function: robojaxValidateCode
 * validates the remote code and prints the correct key name
 * cd is the code passed from the loop
 * Written by A. S. for Robojax
 */
void robojaxValidateCode(int cd)
{

  // Robojax IR Remote decoder
  int found=0;

 if(type =='W' && !PCB)
 {
    // Robojax IR White Remote decoder
    // if type is set to 'W' (white remote) and PCB=0 then check White remote code
      for(int i=0; i< sizeof(whiteRemote)/sizeof(int); i++)
      {
        if(whiteRemote[i] ==cd)
        {

          Serial.print("Key pressed:");
          Serial.println(whiteRemoteKey[i]);
          motorAction(whiteRemoteKey[i]);// take action
          found=1;
        }// if matched
      }// for
 }else if(type =='W' && PCB){
    // Robojax IR White Remote decoder
    // if type is set to 'W' (white remote) and PCB=1 then check White remote code
      for(int i=0; i< sizeof(whiteRemotePCB)/sizeof(int); i++)
      {
        if(whiteRemotePCB[i] ==cd)
        {

          Serial.print("Key pressed:");
          Serial.println(whiteRemoteKey[i]);
          motorAction(whiteRemoteKey[i]);// take action
          found=1;
        }// if matched
      }// for
 }else if(type =='B' && PCB){
    // Robojax IR Black Remote decoder
       // if type is set to 'B' (black remote) and PCB=1 then check Black remote code
       for(int i=0; i< sizeof(blackRemotePCB)/sizeof(int); i++)
      {
        // Robojax IR black Remote decoder
        if(blackRemotePCB[i] ==cd)
        {

          Serial.print("Key pressed:");
          Serial.println(blackRemoteKey[i]);
         motorAction(blackRemoteKey[i]);// take action
          found=1;
        }// if matched
      }// for
 }else{

      // if type is set to 'B' (black remote) and PCB =0 then check Black remote code
       for(int i=0; i< sizeof(blackRemote)/sizeof(int); i++)
      {
        // Robojax IR black Remote decoder
        if(blackRemote[i] ==cd)
        {

          Serial.print("Key pressed:");
          Serial.println(blackRemoteKey[i]);
          motorAction(blackRemoteKey[i]);// take action

          found=1;
        }// if matched
      }// for
 }// else
  if(!found){
    if(cd !=0xFFFFFFFF)
      {
    Serial.println("Key unknown");
      }
  }// found
}// robojaxValidateCode end

/*
 *
 * motorAction()
 * receives string "value" as input and based on the settings,
 * turns motor CW, CCW or STOP
 */
void motorAction(String value)
{
  // Robojax IR motor control
   if(value == RIGHT)
   {
    L293D('R',1);// rotate motor to the right (CCW)
   }

   if(value == LEFT)
   {
    L293D('L',1);// rotate motor to the left (CW)
   }

   if(value == STOP)
   {
    L293D('R',0);// stop motor
   }
}//motorAction end


/*
 * L293D(char dir, int en)
 * dir is character either L for CW direction
 *  or R for CCW direction
 *  en is integer 1 to rotate, 0 for stop
 */
void L293D(char dir, int en)
{
  if(dir =='L')
  {
    if(en ==0){
       Serial.println("CW Motor Stopped");
    }else{
       Serial.println("Rotating CW");
    }
    digitalWrite(EN12 ,en);// Enable 1A and 2A
    digitalWrite(P1A,HIGH);// send + or HIGH signal to P1A
    digitalWrite(P2A,LOW);// send - or LOW signal to P2A

  }else{
    if(en ==0){
       Serial.println("CCW Motor Stopped");
    }else{
       Serial.println("Rotating CCW");
    }
    digitalWrite(EN12 ,en);// Disable 1A and 2A
    digitalWrite(P1A,LOW);// send + or HIGH signal to P1A
    digitalWrite(P2A,HIGH);// send - or LOW signal to P2A
  }
}//L293D end++
/*
* This is the Arduino code for L293d DC motor Driver
* watch LE18-D80NK video for details https://youtu.be/MrYsmAwzfrM
* Code is available at http://robojax.com/learn/arduino
*
* Written by Ahmad S. for Robojax.com on
* August 9, 2018 at 22:03 in Ajax, Ontario, Canada
*/
// DC motor 1 control
#define P1A 2 // define pin 2 as for P1A
#define P2A 7 // define pin 7 as for P2A
#define EN12 8 // define pin 8 as for 1,2EN enable
/*
* Permission granted to share this code given that this
* note is kept with the code.
* Disclaimer: this code is "AS IS" and for educational purposes only.
*
*/
void setup() {
// L293 Motor Control Code by Robojax.com 2018025
Serial.begin(9600);// setup Serial Monitor to display information
pinMode(P1A, OUTPUT);// define pin as OUTPUT for P1A
pinMode(P2A, OUTPUT);// define pin as OUTPUT for P2A
pinMode(EN12, OUTPUT);// define pin as OUTPUT for 1,2EN
// L293 Motor Control Code by Robojax.com 2018025
}
void loop() {
// L293 Motor Control Code by Robojax.com 2018025
L293D_con('L',1);
delay(4000);
L293D_con('L',0);
delay(2000);
L293D_con('R',1);
delay(4000);
L293D_con('R',0);
delay(2000);
Serial.println("=========== Loop done");
delay(500);
// L293 Motor Control Code by Robojax.com 2018025
}
void L293D_con(char dir, int en)
{
if(dir =='L')
{
if(en ==0){
Serial.println(" CW Motor Stopped");
}else{
Serial.println(" Rotating CW");
}
digitalWrite(EN12 ,en);// Enable 1A and 2A
digitalWrite(P1A,HIGH);// send + or HIGH signal to P1A
digitalWrite(P2A,LOW);// send - or LOW signal to P2A
}else{
if(en ==0){
Serial.println(" CCW Motor Stopped");
}else{
Serial.println(" Rotating CCW");
}
digitalWrite(EN12 ,en);// Disable 1A and 2A
digitalWrite(P1A,LOW);// send + or HIGH signal to P1A
digitalWrite(P2A,HIGH);// send - or LOW signal to P2A
}
}//L293D_con endمنابع و مراجع
-
خارجی
فایلها📁
هیچ فایلی موجود نیست.