Como Usar um Arduino como Controle Remoto de TV
Este guia demonstra como transformar um Arduino em um controle remoto universal para sua TV, player de Blu-ray ou outros dispositivos controlados por infravermelho. Você aprenderá a decodificar sinais de qualquer controle remoto e, em seguida, transmitir esses códigos usando um Arduino e um LED infravermelho. Isso abre um mundo de possibilidades de automação, desde controle simples de liga/desliga até sequências complexas envolvendo múltiplos dispositivos.

Aqui estão algumas ideias de projetos para você começar:
- Crie um sistema programado para ligar/desligar a TV.
- Integre o controle da sua TV em uma configuração de casa inteligente.
- Crie um controle remoto personalizado com funções exclusivas.
- Controle seu sistema de entretenimento com comandos de voz através de um assistente de voz baseado em Arduino.
Hardware/Componentes
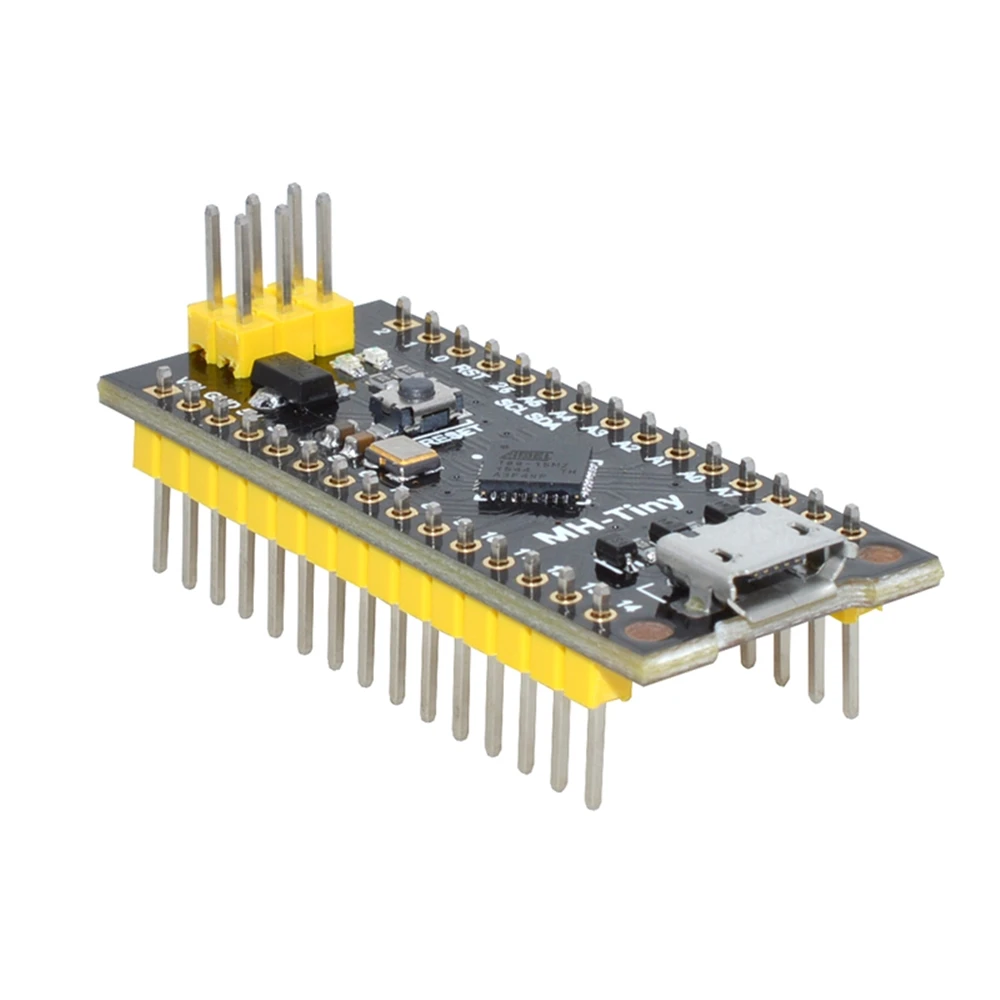
- Arduino Uno (ou placa compatível)
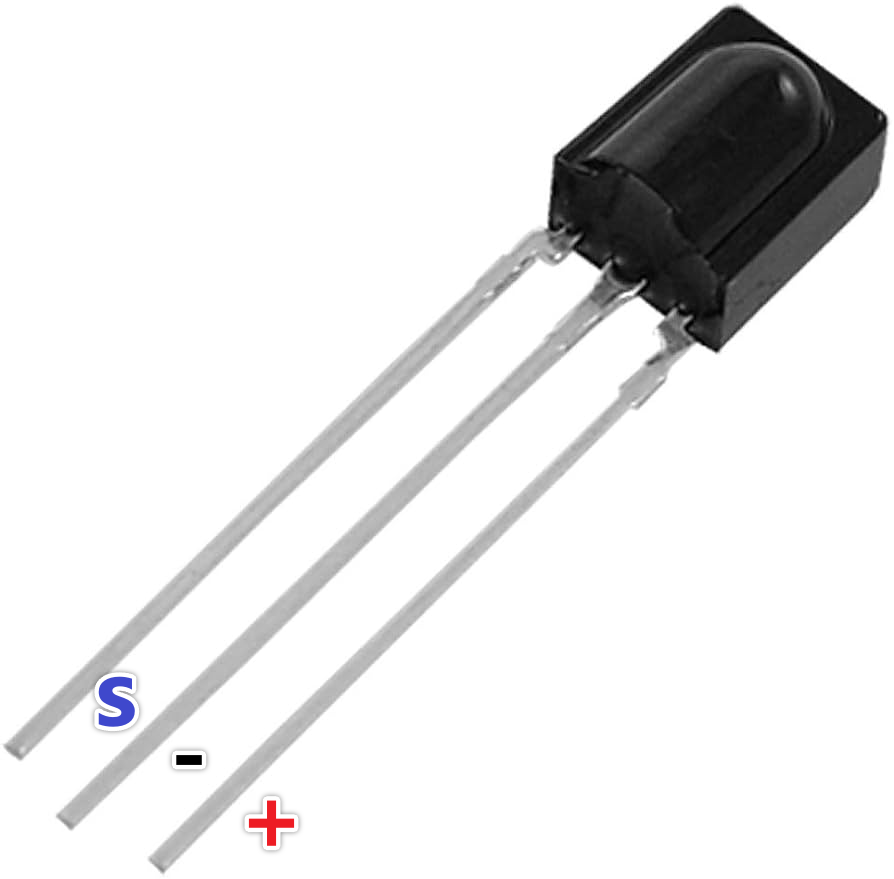
- Módulo receptor infravermelho (IR) (por exemplo, TSOP1738, VS1838B)
- LED infravermelho (IV) (por exemplo, comprimento de onda de 940nm)
- Resistor (270-330 ohm para o LED IR)
- Fios de jumper
- Placa de protótipo (opcional)
Guia de Fiação
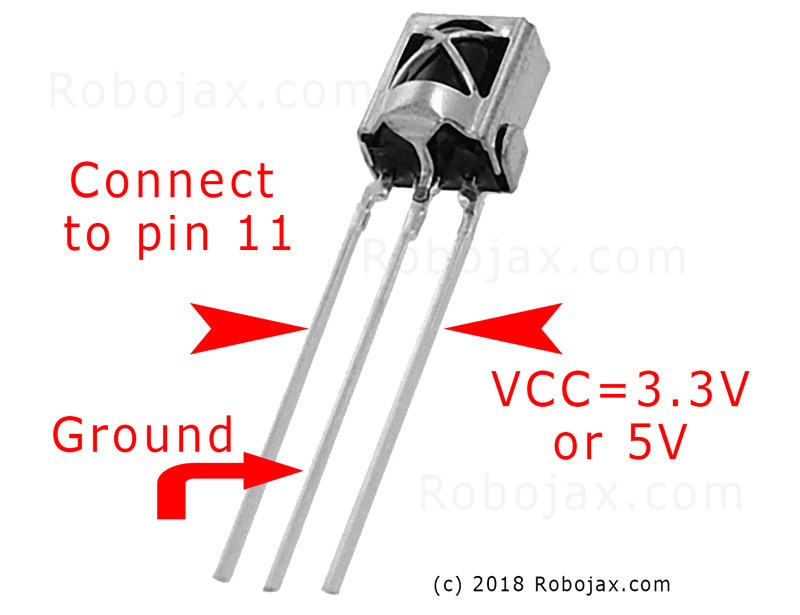
Conecte o módulo receptor IR da seguinte forma (no vídeo aos 02:45):
- VCC para Arduino 5V
- GND para GND do Arduino
- Pino de sinal para o pino 11 do Arduino (pode ser alterado no código)
Conecte o LED IR da seguinte forma (no vídeo em 02:07):
- Um pino LED para o pino 3 do Arduino (através de um resistor de 270-330 ohms)
- Outro pino LED para GND do Arduino
O resistor limita a corrente para o LED IR, protegendo-o de danos (no vídeo às 03:37).
Explicação do Código
Primeiro, instale a biblioteca IRremote (no vídeo em 04:16). Esta biblioteca lida com as intricâncias de enviar e receber sinais infravermelhos. Você pode encontrá-la no Gerenciador de Bibliotecas do Arduino.
Os trechos de código fornecidos são para referência. A biblioteca IRremote inclui código de exemplo para receber e enviar sinais IR. Os exemplos podem ser encontrados no Arduino IDE: Arquivo > Exemplos > IRremote.
Código de Recebimento
Este trecho de código configura o receptor no pino 11 (no vídeo às 04:50). Modifique oRECV_PINse você estiver usando um PIN diferente.
#include
int RECV_PIN = 11;
IRrecv irrecv(RECV_PIN);
decode_results results;
Enviando código
Este código envia o código IR bruto capturado. Orawo array armazena os tempos de sinal, e38representa a frequência (em kHz). Você precisará substituir os dados de exemplo pelo código capturado do seu controle remoto (no vídeo em 05:26).
irsend.sendRaw(raw, sizeof(raw) / sizeof(raw[0]), 38);
Osizeof(raw) / sizeof(raw[0])calcula o número de elementos norawarray (no vídeo às 06:18).
Projeto ao Vivo/Demonstração
O vídeo demonstra a captura do código do botão de ligar/desligar do controle remoto de uma TV Samsung e, em seguida, usando o Arduino para ligar e desligar a TV (no vídeo às 08:29). O processo envolve capturar o código usando o esboço de recebimento e, então, colar esse código no esboço de envio. A demonstração mostra como o Arduino imita com sucesso o controle remoto original.
Capítulos
- [00:00] Introdução e Visão Geral do Projeto
- [00:41] Compreendendo o Controle Remoto Infravermelho
- [02:07] Componentes de Hardware e Fiação
- [04:16] Instalando a Biblioteca IRremote
- [05:26] Enviando Sinais IR com Arduino
- [06:46] Testando a Transmissão IR
- [08:29] Demonstração ao Vivo com uma TV Samsung
- [09:27] Expandindo o Projeto e Outras Ideias
Imagens


#include <IRremote.h>
// Sketch from:
//https://gist.github.com/probonopd/5793692#file-sendandreceive-ino

// http://www.pjrc.com/teensy/td_libs_IRremote.html
// If one keypress results in multiple codes being output, then
// change in IRremoteInt.h:
// #define _GAP 50000
// Provided by Robojax.com on August 4, 2018
// Watch video instructions for this code:https://youtu.be/xA66hXYRx9I

int RECV_PIN = 11;
IRrecv irrecv(RECV_PIN);
decode_results results;

// Compare two tick values, returning 0 if newval is shorter,
// 1 if newval is equal, and 2 if newval is longer.
// Use a tolerance of 20%
int compare(unsigned int oldval, unsigned int newval) {
  if (newval < oldval * .8) {
    return 0;
  }
  else if (oldval < newval * .8) {
    return 2;
  }
  else {
    return 1;
  }
}

// Use FNV hash algorithm: http://isthe.com/chongo/tech/comp/fnv/#FNV-param
#define FNV_PRIME_32 16777619
#define FNV_BASIS_32 2166136261

/* Converts the raw code values into a 32-bit hash code.
 * Hopefully this code is unique for each button.
 */
unsigned long decodeHash(decode_results *results) {
  unsigned long hash = FNV_BASIS_32;
  for (int i = 1; i+2 < results->rawlen; i++) {
    int value =  compare(results->rawbuf[i], results->rawbuf[i+2]);
    // Add value into the hash
    hash = (hash * FNV_PRIME_32) ^ value;
  }
  return hash;
}

void setup()
{
  Serial.begin(9600);
  Serial.println("Robojax IR Capture");
  irrecv.enableIRIn(); // Start the receiver
}

int c = 1;

void dump(decode_results *results) {
  int count = results->rawlen;
  Serial.println(c);
  c++;
  Serial.println("Hash: ");
  unsigned long hash = decodeHash(results);
  Serial.println(hash, HEX);
  Serial.println("For IR Scope/IrScrutinizer: ");
  for (int i = 1; i < count; i++) {

    if ((i % 2) == 1) {
      Serial.print("+");
      Serial.print(results->rawbuf[i]*USECPERTICK, DEC);
    }
    else {
      Serial.print(-(int)results->rawbuf[i]*USECPERTICK, DEC);
    }
    Serial.print(" ");
  }
  Serial.println("-127976");
  Serial.println("For Arduino sketch: ");
  Serial.print("unsigned int raw[");
  Serial.print(count, DEC);
  Serial.print("] = {");
  for (int i = 1; i < count; i++) {

    if ((i % 2) == 1) {
      Serial.print(results->rawbuf[i]*USECPERTICK, DEC);
    }
    else {
      Serial.print((int)results->rawbuf[i]*USECPERTICK, DEC);
    }
    Serial.print(",");
  }
  Serial.print("};");
  Serial.println("");
  Serial.print("irsend.sendRaw(raw,");
  Serial.print(count, DEC);
  Serial.print(",38);");
  Serial.println("");
  Serial.println("");
}


#include <avr/interrupt.h>
#include <stdio.h>
#include <avr/pgmspace.h>
#include <stdint.h>
#include <avr/io.h>
#define IR_PORT PORTB
// #define IR_PIN PINB
// #define IR_DDR DDRB
// #define IR_BV _BV(1)
#define IR_OCR OCR1A
#define IR_TCCRnA TCCR1A
#define IR_TCCRnB TCCR1B
#define IR_TCNTn TCNT1
#define IR_TIFRn TIFR1
#define IR_TIMSKn TIMSK1
#define IR_TOIEn TOIE1
#define IR_ICRn ICR1
#define IR_OCRn OCR1A
#define IR_COMn0 COM1A0
#define IR_COMn1 COM1A1
#define PRONTO_IR_SOURCE 0 // Pronto code byte 0
#define PRONTO_FREQ_CODE 1 // Pronto code byte 1
#define PRONTO_SEQUENCE1_LENGTH 2 // Pronto code byte 2
#define PRONTO_SEQUENCE2_LENGTH 3 // Pronto code byte 3
#define PRONTO_CODE_START 4 // Pronto code byte 4

static const uint16_t *ir_code = NULL;
static uint16_t ir_cycle_count = 0;
static uint32_t ir_total_cycle_count = 0;
static uint8_t ir_seq_index = 0;
static uint8_t ir_led_state = 0;

void ir_on()
{
  IR_TCCRnA |= (1<<IR_COMn1) + (1<<IR_COMn0);
  ir_led_state = 1;
}

void ir_off()
{
  IR_TCCRnA &= ((~(1<<IR_COMn1)) & (~(1<<IR_COMn0)) );
  ir_led_state = 0;
}

void ir_toggle()
{
  if (ir_led_state)
    ir_off();
  else
    ir_on();
}

void ir_start(uint16_t *code)
{
  ir_code = code;
  // IR_PORT &= ~IR_BV; // Turn output off (atmega328 only)
  digitalWrite(9,LOW); // Turn output off
  // IR_DDR |= IR_BV; // Set it as output (atmega328 only)
  pinMode(9,OUTPUT); // Set it as output
  IR_TCCRnA = 0x00; // Reset the pwm
  IR_TCCRnB = 0x00;
  //printf_P(PSTR("FREQ CODE: %hd\r\n"), code[PRONTO_FREQ_CODE]);
  uint16_t top = ( (F_CPU/1000000.0) * code[PRONTO_FREQ_CODE] * 0.241246 ) - 1;
  //printf_P(PSTR("top: %hu\n\r"), top);
  IR_ICRn = top;
  IR_OCRn = top >> 1;
  IR_TCCRnA = (1<<WGM11);
  IR_TCCRnB = (1<<WGM13) | (1<<WGM12);
  IR_TCNTn = 0x0000;
  IR_TIFRn = 0x00;
  IR_TIMSKn = 1 << IR_TOIEn;
  ir_seq_index = PRONTO_CODE_START;
  ir_cycle_count = 0;
  ir_on();
  IR_TCCRnB |= (1<<CS10);
}

#define TOTAL_CYCLES 80000 // Turns off after this number of
// cycles. About 2 seconds.
// FIXME: Turn off after having sent all data
ISR(TIMER1_OVF_vect) {
  uint16_t sequenceIndexEnd;
  uint16_t repeatSequenceIndexStart;
  ir_total_cycle_count++;
  ir_cycle_count++;

  if (ir_cycle_count== ir_code[ir_seq_index]) {
    ir_toggle();
    ir_cycle_count = 0;
    ir_seq_index++;
    sequenceIndexEnd = PRONTO_CODE_START +
      (ir_code[PRONTO_SEQUENCE1_LENGTH]<<1) +
      (ir_code[PRONTO_SEQUENCE2_LENGTH]<<1);

    repeatSequenceIndexStart = PRONTO_CODE_START +
      (ir_code[PRONTO_SEQUENCE1_LENGTH]<<1);

    if (ir_seq_index >= sequenceIndexEnd ) {
      ir_seq_index = repeatSequenceIndexStart;

      if(ir_total_cycle_count>TOTAL_CYCLES) {
        ir_off();
        TCCR1B &= ~(1<<CS10);
      }
    }
  }
}

void ir_stop()
{
  IR_TCCRnA = 0x00; // Reset the pwm
  IR_TCCRnB = 0x00;
}

const uint16_t inputLength = 512;


void loop() {
  if (irrecv.decode(&results)) {
    dump(&results);
    irrecv.resume(); // Receive the next value
  }

  if ( Serial.available() > 0 )
  {
    static char input[inputLength];
    static uint16_t i;
    char c = Serial.read();

    if ( c != '\r' && c != '\n' && i < inputLength-1)
      input[i++] = c;

    else
    {
      input[i] = '\0';
      i = 0;

      uint16_t array[80];
      uint16_t j = 0;

      if ( !strncmp(input, "SEND", 4) )
      {
        char* p = input+4;

        while ( (p = strchr(p, ' ')) != NULL )
          array[j++] = strtol(p, &p, 16);

        ir_start(array);
        Serial.print("SENT ");
        for ( uint8_t i = 0; i < j; i++ )
        {
          Serial.print ("0x");
          Serial.print (array[i], HEX);
          Serial.print(" ");
        }


        Serial.println();
      }
    }
  }
}
Coisas que você pode precisar
-
Amazonas
-
eBay
Recursos e referências
-
Externo
Arquivos📁
Nenhum arquivo disponível.