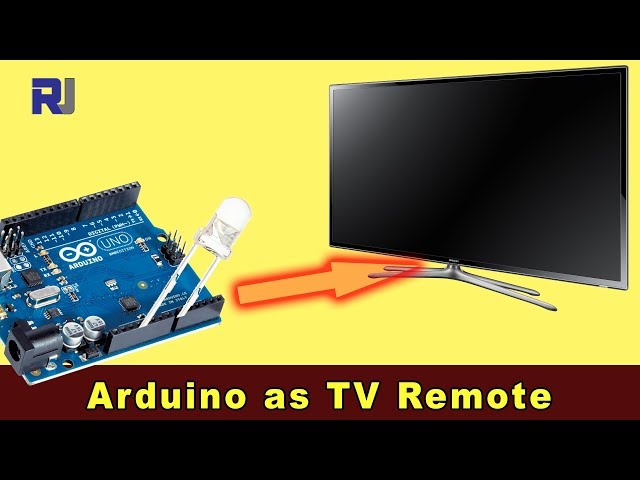
Arduinoをテレビのリモコンとして使う方法
このガイドでは、Arduinoをテレビ、ブルーレイプレーヤー、その他の赤外線制御デバイス用のユニバーサルリモコンに変換する方法を示します。任意のリモコンからの信号をデコードし、そのコードをArduinoと赤外線LEDを使用して送信する方法を学びます。これにより、単純なオン/オフ制御から複数のデバイスを含む複雑なシーケンスに至るまで、自動化の可能性が広がります。

ここにいくつかのプロジェクトアイデアがありますので、始める参考にしてください:
- 予定されたテレビのオン/オフシステムを作成する。
- スマートホームのセットアップにテレビコントロールを統合してください。
- ユニークな機能を持つカスタムリモコンを作成してください。
- Arduinoベースの音声アシスタントを通じて音声コマンドでエンターテインメントシステムを操作します。
ハードウェア/コンポーネント
- Arduino Uno(または互換ボード)
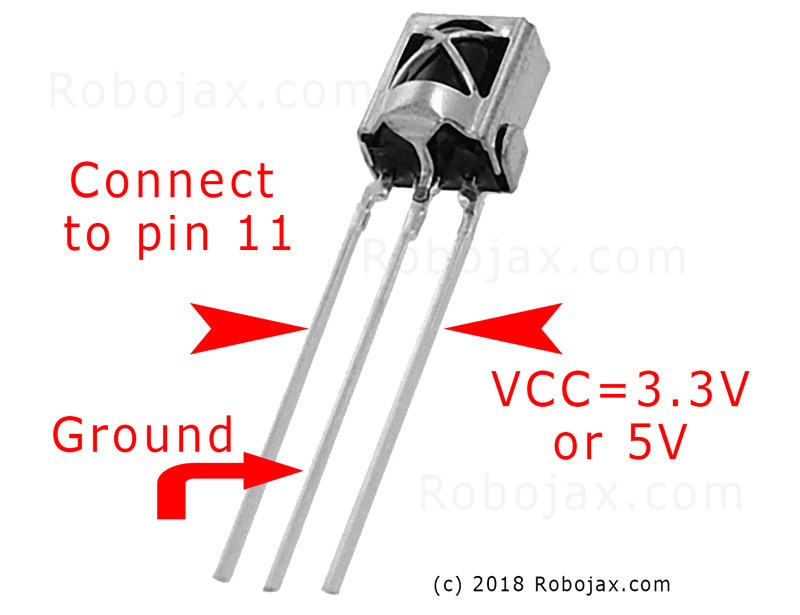
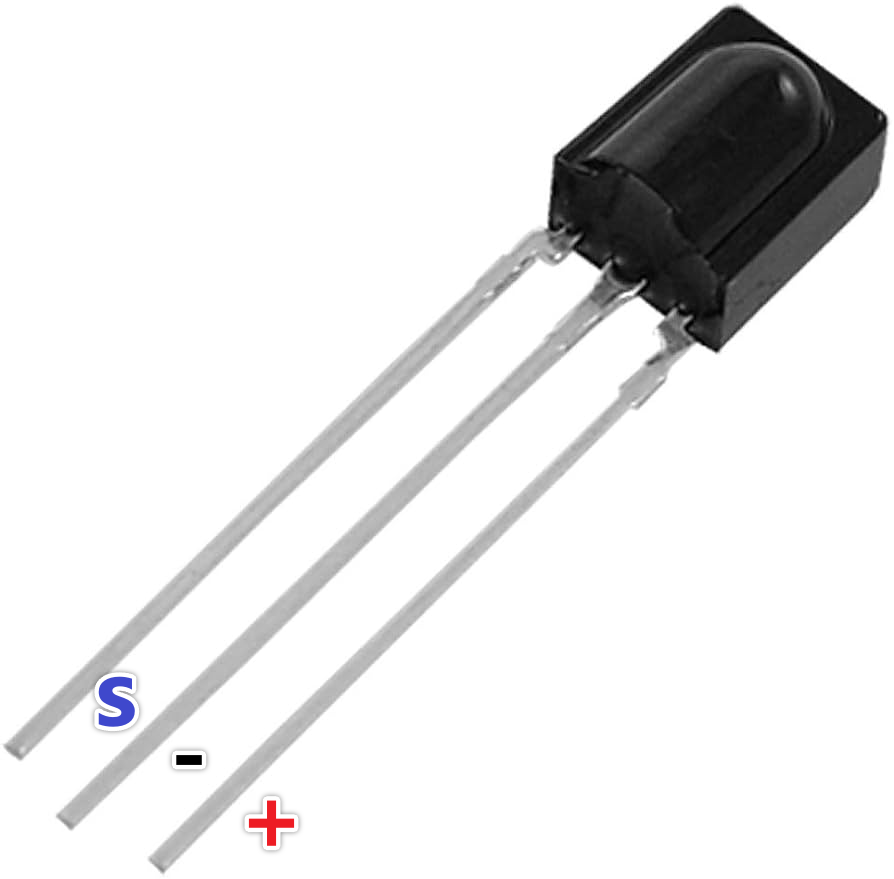
- 赤外線(IR)受信モジュール(例:TSOP1738、VS1838B)
- 赤外線(IR)LED(例:940nm波長)
- 抵抗器(IR LED用270-330オーム)
- ジャンパーワイヤー
- ブレッドボード(オプション)
配線ガイド
次のようにIR受信モジュールを接続します(ビデオの02:45で)。
- VCC を Arduino の 5V に接続
- GNDをArduinoのGNDに接続
- 信号ピンをArduinoのピン11に接続します(コード内で変更可能)。
次のようにIR LEDを接続します(ビデオの02:07で)。
- 1つのLEDピンをArduinoのピン3に接続(270-330オームの抵抗を介して)
- 他のLEDピンをArduinoのGNDに接続します。
抵抗器はIR LEDへの電流を制限し、損傷から保護します(動画の03:37で)。
コードの説明
まず、IRremoteライブラリをインストールします(ビデオの04:16にて)。このライブラリは、赤外線信号の送受信の複雑さを処理します。Arduinoライブラリマネージャーで見つけることができます。
提供されたコードスニペットは参考用です。IRremoteライブラリには、IR信号の受信および送信のためのサンプルコードが含まれています。サンプルはArduino IDEで見つけることができます:ファイル > サンプル > IRremote。
受信コード
このコードスニペットは、ピン11で受信機をセットアップします(動画の04:50にて)。この内容を修正してください。RECV_PIN異なるピンを使用している場合。
#include
int RECV_PIN = 11;
IRrecv irrecv(RECV_PIN);
decode_results results;
コードを送信中
このコードはキャプチャされた生のIRコードを送信します。raw配列は信号のタイミングを格納し、38周波数(kHz)を表します。例のデータをリモコンからキャプチャしたコード(動画の05:26にあります)に置き換える必要があります。
irsend.sendRaw(raw, sizeof(raw) / sizeof(raw[0]), 38);
内容が不足しています。sizeof(raw) / sizeof(raw[0])要素の数を計算するraw動画内の配列(06:18)。
ライブプロジェクト/デモンストレーション
このビデオでは、Samsung TV リモコンから電源ボタンのコードをキャプチャし、その後 Arduino を使用して TV をオンおよびオフにする方法を示しています(ビデオは 08:29 にあります)。このプロセスは、受信スケッチを使用してコードをキャプチャし、そのコードを送信スケッチに貼り付けることを含みます。このデモでは、Arduino がどのように元のリモコンを成功裏に模倣するかを示しています。
章
- [00:00] イントロダクションとプロジェクト概要
- 赤外線リモートコントロールの理解
- [02:07] ハードウェアコンポーネントと配線
- [04:16] IRremoteライブラリのインストール
- [05:26] Arduinoを使ったIR信号の送信
- [06:46] IR送信のテスト
- [08:29] サムスンテレビを使ったライブデモンストレーション
- プロジェクトの拡大とさらなるアイデア
画像


#include <IRremote.h>
// Sketch from:
//https://gist.github.com/probonopd/5793692#file-sendandreceive-ino

// http://www.pjrc.com/teensy/td_libs_IRremote.html
// If one keypress results in multiple codes being output, then
// change in IRremoteInt.h:
// #define _GAP 50000
// Provided by Robojax.com on August 4, 2018
// Watch video instructions for this code:https://youtu.be/xA66hXYRx9I

int RECV_PIN = 11;
IRrecv irrecv(RECV_PIN);
decode_results results;

// Compare two tick values, returning 0 if newval is shorter,
// 1 if newval is equal, and 2 if newval is longer.
// Use a tolerance of 20%
int compare(unsigned int oldval, unsigned int newval) {
  if (newval < oldval * .8) {
    return 0;
  }
  else if (oldval < newval * .8) {
    return 2;
  }
  else {
    return 1;
  }
}

// Use FNV hash algorithm: http://isthe.com/chongo/tech/comp/fnv/#FNV-param
#define FNV_PRIME_32 16777619
#define FNV_BASIS_32 2166136261

/* Converts the raw code values into a 32-bit hash code.
 * Hopefully this code is unique for each button.
 */
unsigned long decodeHash(decode_results *results) {
  unsigned long hash = FNV_BASIS_32;
  for (int i = 1; i+2 < results->rawlen; i++) {
    int value =  compare(results->rawbuf[i], results->rawbuf[i+2]);
    // Add value into the hash
    hash = (hash * FNV_PRIME_32) ^ value;
  }
  return hash;
}

void setup()
{
  Serial.begin(9600);
  Serial.println("Robojax IR Capture");
  irrecv.enableIRIn(); // Start the receiver
}

int c = 1;

void dump(decode_results *results) {
  int count = results->rawlen;
  Serial.println(c);
  c++;
  Serial.println("Hash: ");
  unsigned long hash = decodeHash(results);
  Serial.println(hash, HEX);
  Serial.println("For IR Scope/IrScrutinizer: ");
  for (int i = 1; i < count; i++) {

    if ((i % 2) == 1) {
      Serial.print("+");
      Serial.print(results->rawbuf[i]*USECPERTICK, DEC);
    }
    else {
      Serial.print(-(int)results->rawbuf[i]*USECPERTICK, DEC);
    }
    Serial.print(" ");
  }
  Serial.println("-127976");
  Serial.println("For Arduino sketch: ");
  Serial.print("unsigned int raw[");
  Serial.print(count, DEC);
  Serial.print("] = {");
  for (int i = 1; i < count; i++) {

    if ((i % 2) == 1) {
      Serial.print(results->rawbuf[i]*USECPERTICK, DEC);
    }
    else {
      Serial.print((int)results->rawbuf[i]*USECPERTICK, DEC);
    }
    Serial.print(",");
  }
  Serial.print("};");
  Serial.println("");
  Serial.print("irsend.sendRaw(raw,");
  Serial.print(count, DEC);
  Serial.print(",38);");
  Serial.println("");
  Serial.println("");
}


#include <avr/interrupt.h>
#include <stdio.h>
#include <avr/pgmspace.h>
#include <stdint.h>
#include <avr/io.h>
#define IR_PORT PORTB
// #define IR_PIN PINB
// #define IR_DDR DDRB
// #define IR_BV _BV(1)
#define IR_OCR OCR1A
#define IR_TCCRnA TCCR1A
#define IR_TCCRnB TCCR1B
#define IR_TCNTn TCNT1
#define IR_TIFRn TIFR1
#define IR_TIMSKn TIMSK1
#define IR_TOIEn TOIE1
#define IR_ICRn ICR1
#define IR_OCRn OCR1A
#define IR_COMn0 COM1A0
#define IR_COMn1 COM1A1
#define PRONTO_IR_SOURCE 0 // Pronto code byte 0
#define PRONTO_FREQ_CODE 1 // Pronto code byte 1
#define PRONTO_SEQUENCE1_LENGTH 2 // Pronto code byte 2
#define PRONTO_SEQUENCE2_LENGTH 3 // Pronto code byte 3
#define PRONTO_CODE_START 4 // Pronto code byte 4

static const uint16_t *ir_code = NULL;
static uint16_t ir_cycle_count = 0;
static uint32_t ir_total_cycle_count = 0;
static uint8_t ir_seq_index = 0;
static uint8_t ir_led_state = 0;

void ir_on()
{
  IR_TCCRnA |= (1<<IR_COMn1) + (1<<IR_COMn0);
  ir_led_state = 1;
}

void ir_off()
{
  IR_TCCRnA &= ((~(1<<IR_COMn1)) & (~(1<<IR_COMn0)) );
  ir_led_state = 0;
}

void ir_toggle()
{
  if (ir_led_state)
    ir_off();
  else
    ir_on();
}

void ir_start(uint16_t *code)
{
  ir_code = code;
  // IR_PORT &= ~IR_BV; // Turn output off (atmega328 only)
  digitalWrite(9,LOW); // Turn output off
  // IR_DDR |= IR_BV; // Set it as output (atmega328 only)
  pinMode(9,OUTPUT); // Set it as output
  IR_TCCRnA = 0x00; // Reset the pwm
  IR_TCCRnB = 0x00;
  //printf_P(PSTR("FREQ CODE: %hd\r\n"), code[PRONTO_FREQ_CODE]);
  uint16_t top = ( (F_CPU/1000000.0) * code[PRONTO_FREQ_CODE] * 0.241246 ) - 1;
  //printf_P(PSTR("top: %hu\n\r"), top);
  IR_ICRn = top;
  IR_OCRn = top >> 1;
  IR_TCCRnA = (1<<WGM11);
  IR_TCCRnB = (1<<WGM13) | (1<<WGM12);
  IR_TCNTn = 0x0000;
  IR_TIFRn = 0x00;
  IR_TIMSKn = 1 << IR_TOIEn;
  ir_seq_index = PRONTO_CODE_START;
  ir_cycle_count = 0;
  ir_on();
  IR_TCCRnB |= (1<<CS10);
}

#define TOTAL_CYCLES 80000 // Turns off after this number of
// cycles. About 2 seconds.
// FIXME: Turn off after having sent all data
ISR(TIMER1_OVF_vect) {
  uint16_t sequenceIndexEnd;
  uint16_t repeatSequenceIndexStart;
  ir_total_cycle_count++;
  ir_cycle_count++;

  if (ir_cycle_count== ir_code[ir_seq_index]) {
    ir_toggle();
    ir_cycle_count = 0;
    ir_seq_index++;
    sequenceIndexEnd = PRONTO_CODE_START +
      (ir_code[PRONTO_SEQUENCE1_LENGTH]<<1) +
      (ir_code[PRONTO_SEQUENCE2_LENGTH]<<1);

    repeatSequenceIndexStart = PRONTO_CODE_START +
      (ir_code[PRONTO_SEQUENCE1_LENGTH]<<1);

    if (ir_seq_index >= sequenceIndexEnd ) {
      ir_seq_index = repeatSequenceIndexStart;

      if(ir_total_cycle_count>TOTAL_CYCLES) {
        ir_off();
        TCCR1B &= ~(1<<CS10);
      }
    }
  }
}

void ir_stop()
{
  IR_TCCRnA = 0x00; // Reset the pwm
  IR_TCCRnB = 0x00;
}

const uint16_t inputLength = 512;


void loop() {
  if (irrecv.decode(&results)) {
    dump(&results);
    irrecv.resume(); // Receive the next value
  }

  if ( Serial.available() > 0 )
  {
    static char input[inputLength];
    static uint16_t i;
    char c = Serial.read();

    if ( c != '\r' && c != '\n' && i < inputLength-1)
      input[i++] = c;

    else
    {
      input[i] = '\0';
      i = 0;

      uint16_t array[80];
      uint16_t j = 0;

      if ( !strncmp(input, "SEND", 4) )
      {
        char* p = input+4;

        while ( (p = strchr(p, ' ')) != NULL )
          array[j++] = strtol(p, &p, 16);

        ir_start(array);
        Serial.print("SENT ");
        for ( uint8_t i = 0; i < j; i++ )
        {
          Serial.print ("0x");
          Serial.print (array[i], HEX);
          Serial.print(" ");
        }


        Serial.println();
      }
    }
  }
}
必要かもしれないもの
-
アマゾンAmazonで赤外線リモコンを購入するamzn.to
-
イーベイeBayから赤外線リモコンを購入するebay.us
リソースと参考文献
-
外部IR信号を受信する方法が知りたい場合は、このビデオを視聴してください。youtu.be
ファイル📁
ファイルは利用できません。