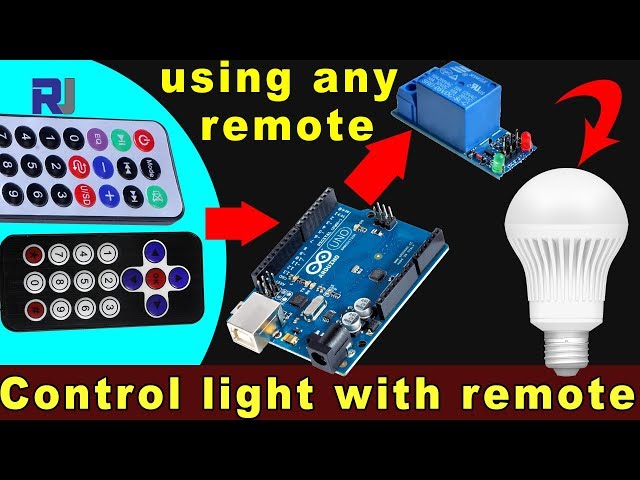
کنترل یک لامپ AC با استفاده از هر ریموت مادون قرمز با آردوینو و ریلی
در این آموزش، یاد میگیریم که چگونه از یک کنترل از راه دور مادون قرمز برای کار با یک لامپ AC از طریق یک آردوینو و یک ماجیول ریلی استفاده کنیم. این پروژه شامل رمزگشایی سیگنالهای کنترل از راه دور و استفاده از آنها برای کنترل ریلی است که به نوبه خود لامپ AC را روشن و خاموش میکند. در پایان این آموزش، شما قادر خواهید بود تا از هر کنترل از راه دور مادون قرمز برای کنترل روشنایی خود استفاده کنید.
ما از یک گیرنده مادون قرمز برای دریافت سیگنالها از ریموت استفاده خواهیم کرد و برد آردوینو این سیگنالها را برای انجام اقدامات خاص تفسیر خواهد کرد. شِفر (کود) ارائه شده به شما این امکان را میدهد که نوع ریموت (سیاه یا سفید) و اینکه آیا از یک برد PCB یا ماجیول عریان برای گیرنده استفاده میکنید، انتخاب کنید. حتماً ویدئوی مرتبط را برای جزئیات و توضیحات بیشتر مشاهده کنید (در ویدیو در 0:00).
توضیح سختافزار
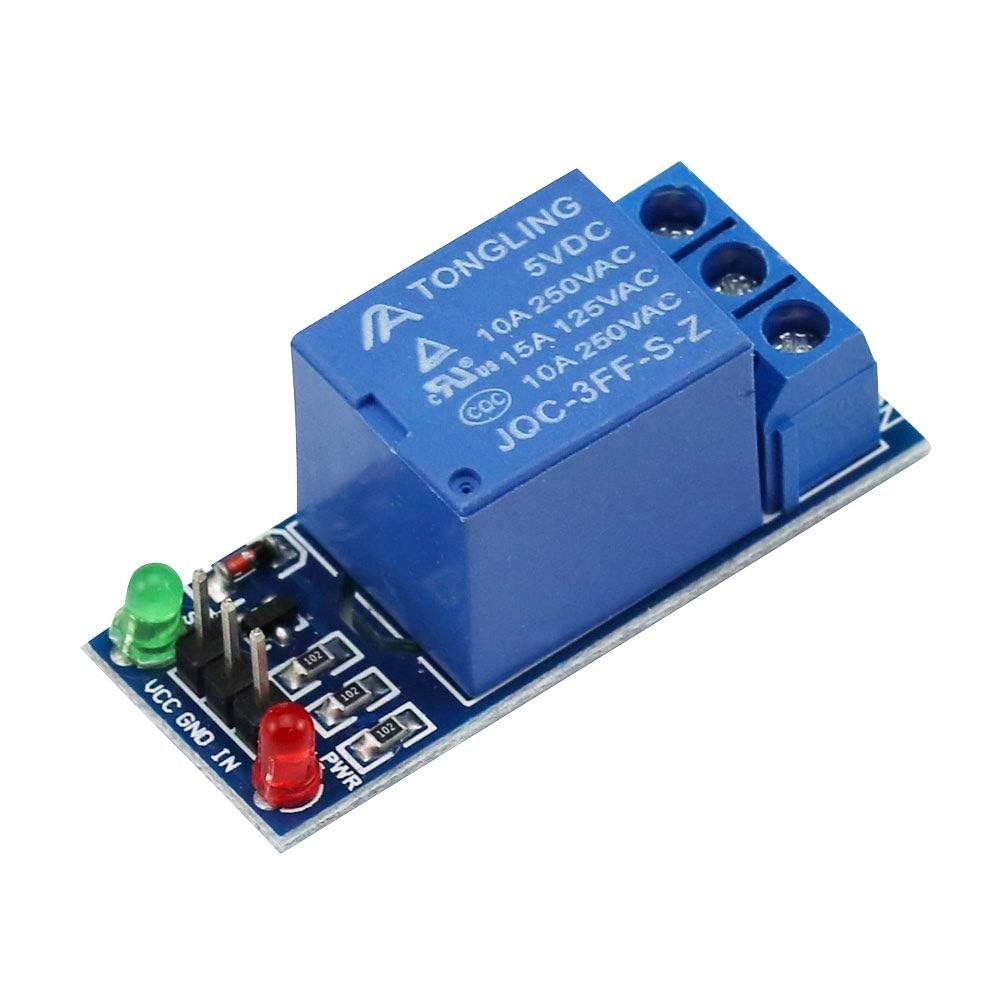
برای این پروژه، اجزای اصلی شامل برد آردوینو، ماجیول گیرنده مادون قرمز و ماجیول ریلی است. گیرنده مادون قرمز مسئول دریافت سیگنالها از کنترل از راه دور و ارسال آنها به آردوینو است. ماجیول ریلی به عنوان یک کلید عمل میکند تا لامپ AC را کنترل کند و به آن اجازه میدهد که بر اساس سیگنالهای دریافتی روشن و خاموش شود.

د دریافتر مادون قرمز معمولاً در فرکانس ۳۸ کیلوهرتز کار میکند و میتواند سیگنالها را از فاصلهای در حدود ۱۰ تا ۱۵ متر شناسایی کند. هنگامی که آردوینو سیگنال را دریافت میکند، آن را رمزگشایی کرده و از ریلی برای کنترل برق به لامپ استفاده میکند.
دستورالعملهای سیمکشی

شروع به اتصالات با وصل کردن ماجیول دریافت کننده مادون قرمز به آردوینو کنید. پایه VCC دریافت کننده به پایه 5V آردوینو متصل میشود و پایه زمین به یک پایه GND متصل میشود. پایه سیگنال از دریافت کننده مادون قرمز باید به پایه دیجیتال متصل شود.11بر روی آردوینو.
سپس، ماجیول ریلی را متصل کنید. پایانه کنترل ریلی باید به پایانه دیجیتال وصل شود.2بر روی آردوینو. همچنین، پایههای VCC و GND ریلی را به ترتیب به ۵ ولت و GND آردوینو متصل کنید. در نهایت، لامپ AC را به ریلی طبق مشخصات ریلی وصل کنید تا از عملکرد ایمن آن اطمینان حاصل شود.
نمونههای شِفر (کود) و راهنمایی
در مرحله راهاندازی برنامه، ما ارتباط سری را راهاندازی کرده و پایه ریلی را تنظیم میکنیم. شناسهRECV_PINتنظیم شده است به11که در آن پایه سیگنال دریافتکننده مادون قرمز متصل شده است. این به ما اجازه میدهد تا دادهها را از کنترل از راه دور دریافت کنیم.
void setup() {
  Serial.begin(9600);
  irrecv.enableIRIn(); // Start the receiver
  pinMode(RELAY_PIN, OUTPUT); // define a pin for relay as OUTPUT
  digitalWrite(RELAY_PIN, HIGH); // set relay to OFF at the beginning
}
در تابع حلقه، ما به طور مداوم سیگنالهای ورودی از ریموت را بررسی میکنیم. هنگامی که سیگنال شناسایی میشود، مقدار آن رمزگشایی شده و اقدام مربوطه بر اساس کلید فشرده شده انجام میشود.
void loop() {
  if (irrecv.decode(&results)) {
    Serial.println(results.value, HEX); // Print the received value
    robojaxValidateCode(results.value); // Validate the code
    irrecv.resume(); // Receive the next value
  }
  delay(100);
}متن:robojaxValidateCodeعملکرد شِفر (کود) دریافتی را با مقادیر شناخته شده برای ریموت چک میکند. بسته به اینکه کدام کلید فشرده شده است، عمل مربوطه را با استفاده از ریلی اجرا خواهد کرد.
void robojaxValidateCode(int cd) {
  if (type == 'W' && !PCB) {
    // Check White remote codes
    for (int i = 0; i < sizeof(whiteRemote) / sizeof(int); i++) {
      if (whiteRemote[i] == cd) {
        Serial.print("Key pressed: ");
        Serial.println(whiteRemoteKey[i]);
        relayAction(whiteRemoteKey[i]); // Take action
      }
    }
  }
}
در این تابع، شِفر (کود) بررسی میکند که آیا کلید فشرده شده با مقادیر آرایه تعریفشده مطابقت دارد یا خیر. اگر تطابقی پیدا شود، آن را فراخوانی میکندrelayActionعملکردی برای روشن یا خاموش کردن ریلی، با توجه به کلید فشرده شده.
نمایش / چه انتظاری داشته باشید
بعد از اتمام سیمکشی و بارگذاری شِفر (کود)، میتوانید با استفاده از ریموت کنترل مادون قرمز خود، لامپ AC را کنترل کنید. کلیدهای مشخص شده روی ریموت را فشار دهید و ریلی باید لامپ را بهطور مناسب فعال یا غیرفعال کند. حتماً هر کلید را آزمایش کنید تا واکنش آن را ببینید (در ویدیو در دقیقه ۵:۰۰).
زمانبندی ویدئو
- ۰۰:۰۰ شروع
- 00:49 مقدمه
- :00 سیمکشی و اتصال
- شِفر (کود) آردوینو توضیح داده شده در ۰۵:۲۷
- :51 نمایش کنترل لامپ AC با ریموتهای مختلف
- کنترل لامپ کولر گازی با ریموت تلویزیون شما :13
تصاویر

/*
 * Original library from - http://arcfn.com
 *
 * This Arduino code decodes any remote code and then you can control an AC load using a relay
 * sold on eBay for Arduino.
 * You have to select the type of your remote as Black or White in the code below
 * and also select your receiver 1838 as either a PCB or bare module. See video for details
 *
 * You have to watch this video: https://youtu.be/muAkBQb24NI
 * before proceeding with this code.
 *
 * Modified/Written by Ahmad Shamshiri
 * on July 31, 2018 at 20:33 in Ajax, Ontario, Canada
 * for Robojax.com
 * Watch video instructions for this code: https://youtu.be/j5kb0WBpD30
 * Get other Arduino codes from Robojax.com
 *
 */

#include <IRremote.h>

int RECV_PIN = 11;
const char type ='W';// W for white, B for black. Must keep single quotes like 'B' or 'W'
const boolean PCB = 1;// if receiver is PCB set to 1, if not set to 0. See video for details
boolean displayCode = true;// to display remote code. if not, set to false

//***** Relay settings begins
const int RELAY_PIN = 2;//
const String ON="3";// turn relay ON with + key on remote
const String OFF="1";// turn relay OFF with - key on remote
//**** Relay settings ends

IRrecv irrecv(RECV_PIN);


// this is array holding codes for White Remote when used with PCB version of receiver
unsigned int whiteRemotePCB[] ={
            0xE318261B, // CH-
            0x511DBB,   // CH
            0xEE886D7F,  // CH+

            0x52A3D41F, // |<<
            0xD7E84B1B, // >>|
            0x20FE4DBB, // >||

            0xF076C13B, // -
            0xA3C8EDDB, // +
            0x12CEA6E6, // EQ

            0xC101E57B, // 0
            0x97483BFB, // 100+
            0xF0C41643, // 200+

            0x9716BE3F, // 1
            0x3D9AE3F7, // 2
            0x6182021B, // 3

            0x8C22657B, // 4
            0x488F3CBB, // 5
            0x449E79F,  // 6

            0x32C6FDF7, // 7
            0x1BC0157B, // 8
            0x3EC3FC1B  // 9
            };

// this is array holding codes for White Remote when used with non-PCB version of receiver
unsigned int whiteRemote[] ={
            0xFFA25D, // CH-
            0xFF629D,   // CH
            0xFFE21D,  // CH+

            0xFF22DD, // |<<
            0xFF02FD, // >>|
            0xFFC23D, // >||

            0xFFE01F, // -
            0xFFA857, // +
            0xFF906F, // EQ

            0xFF6897, // 0
            0xFF9867, // 100+
            0xFFB04F, // 200+

            0xFF30CF, // 1
            0xFF18E7, // 2
            0xFF7A85, // 3

            0xFF10EF, // 4
            0xFF38C7, // 5
            0xFF5AA5,  // 6

            0xFF42BD, // 7
            0xFF4AB5, // 8
            0xFF52AD  // 9
            };
// key lables of white remote
 String whiteRemoteKey[] ={
            "CH-",
            "CH",
            "CH+",

            "|<<",
            ">>|",
            ">||",

            "-",
            "+",
            "EQ",

            "0",
            "100+",
            "200+",

            "1",
            "2",
            "3",

            "4",
            "5",
            "6",

            "7",
            "8",
            "9"
            };

// this is array holding codes for Black Remote when used with non-PCB version of receiver
 unsigned int blackRemote[] ={
            0xFF629D, // ^
            0xFF22DD,   // <
            0xFF02FD,  // OK
            0xFFC23D, // >
            0xFFA857, // v

            0xFF6897, // 1
            0xFF9867, // 2
            0xF0C41643, // 3

            0xFF30CF, // 4
            0xFF18E7, // 5
            0xFF7A85,  // 6

            0xFF10EF, // 7
            0xFF38C7, // 8
            0xFF5AA5,  // 9

            0xFF42BD, // *
            0xFF4AB5, // 0
            0xFF52AD  // #
            };

// this is array holding codes for Black Remote when used with PCB version of receiver
 unsigned int blackRemotePCB[] ={
            0x511DBB, // ^
            0x52A3D41F,   // <
            0xD7E84B1B,  // OK
            0x20FE4DBB, // >
            0xA3C8EDDB, // v


            0xC101E57B, // 1
            0x97483BFB, // 2
            0xF0C41643, // 3

            0x9716BE3F, // 4
            0x3D9AE3F7, // 5
            0x6182021B,  // 6

            0x8C22657B, // 7
            0x488F3CBB, // 8
            0x449E79F,  // 9

            0x32C6FDF7, // *
            0x1BC0157B, // 0
            0x3EC3FC1B  // #
            };

// Black remote key names
 String blackRemoteKey[] ={
            "^",
            "<",
            "OK",
            ">",
            "v",

            "1",
            "2",
            "3",

            "4",
            "5",
            "6",

            "7",
            "8",
            "9",

            "*",
            "0",
            "#"
            };

decode_results results;


void setup()
{
  Serial.begin(9600);
  // In case the interrupt driver crashes on setup, give a clue
  // to the user what's going on.
  Serial.println("Robojax IR Decode");
  Serial.println("Control Relay with Remote");
  irrecv.enableIRIn(); // Start the receiver

  pinMode(RELAY_PIN,OUTPUT);// define a pin for relay as OUTPUT
  digitalWrite(RELAY_PIN, HIGH);// set relay to OFF at the begining
}

void loop() {

  if (irrecv.decode(&results)) {
    if(displayCode)Serial.println(results.value, HEX);
    robojaxValidateCode(results.value);// used the "robojaxValidateCode" bellow
    irrecv.resume(); // Receive the next value
  }
  delay(100);
}

/*
 * function: robojaxValidateCode
 * validates the remote code and prints the correct key name
 * cd is code passed from the loop
 * Written by A. S. for Robojax
 */
void robojaxValidateCode(int cd)
{

  // Robojax IR Remote decoder
  int found=0;

 if(type =='W' && !PCB)
 {
    // Robojax IR White Remote decoder
    // if type is set to 'W' (white remote) and PCB=0 then check White remote code
      for(int i=0; i< sizeof(whiteRemote)/sizeof(int); i++)
      {
        if(whiteRemote[i] ==cd)
        {

          Serial.print("Key pressed:");
          Serial.println(whiteRemoteKey[i]);
          relayAction(whiteRemoteKey[i]);// take action
          found=1;
        }// if matched
      }// for
 }else if(type =='W' && PCB){
    // Robojax IR White Remote decoder
    // if type is set to 'W' (white remote) and PCB=1 then check White remote code
      for(int i=0; i< sizeof(whiteRemotePCB)/sizeof(int); i++)
      {
        if(whiteRemotePCB[i] ==cd)
        {

          Serial.print("Key pressed:");
          Serial.println(whiteRemoteKey[i]);
          relayAction(whiteRemoteKey[i]);// take action
          found=1;
        }// if matched
      }// for
 }else if(type =='B' && PCB){
    // Robojax IR Black Remote decoder
       // if type is set to 'B' (black remote) and PCB=1 then check Black remote code
       for(int i=0; i< sizeof(blackRemotePCB)/sizeof(int); i++)
      {
        // Robojax IR black Remote decoder
        if(blackRemotePCB[i] ==cd)
        {

          Serial.print("Key pressed:");
          Serial.println(blackRemoteKey[i]);
         relayAction(blackRemoteKey[i]);// take action
          found=1;
        }// if matched
      }// for
 }else{

      // if type is set to 'B' (black remote) and PCB =0 then check Black remote code
       for(int i=0; i< sizeof(blackRemote)/sizeof(int); i++)
      {
        // Robojax IR black Remote decoder
        if(blackRemote[i] ==cd)
        {

          Serial.print("Key pressed:");
          Serial.println(blackRemoteKey[i]);
          relayAction(blackRemoteKey[i]);// take action

          found=1;
        }// if matched
      }// for
 }// else
  if(!found){
    if(cd !=0xFFFFFFFF)
      {
    Serial.println("Key unknown");
      }
  }// found
}// robojaxValidateCode end

/*
 *
 * relayAction()
 * receives string "value" as input and based on the settings,
 * turns relay pin HIGH or LOW
 */
void relayAction(String value)
{
  // Robojax IR Relay control
   if(value == ON)
   {
    digitalWrite(RELAY_PIN, LOW);// Turn relay ON
    Serial.println("Relay Turned ON");
   }

   if(value == OFF)
   {
    digitalWrite(RELAY_PIN, HIGH);// Turn relay OFF
    Serial.println("Relay Turned OFF");
   }
}//relayAction end
مواردی که ممکن است به آنها نیاز داشته باشید
-
آمازون
-
ایبی
منابع و مراجع
هنوز هیچ منبعی موجود نیست.
فایلها📁
هیچ فایلی موجود نیست.