搜索代码

为什么在Arduino中使用电阻与按钮和开关一起使用

为什么在Arduino中使用电阻与按钮和开关一起使用

本教程解释了为什么在与 Arduino 连接的按钮和开关中使用电阻对于可靠操作至关重要。理解这一概念对于任何涉及用户输入的 Arduino 项目都是基础。这一知识可以防止意外行为,确保您的项目正常运行。以下是一些需要此知识的项目想法:

  • LED的简单开/关开关
  • 交互式游戏控制器
  • 家用电器遥控器
  • 带按钮激活的安全系统

让我们探讨在这些电路中使用电阻的原因。

Arduino wiring for Push button wihthout resistor

硬件/组件

这个项目所需的核心组件非常简单:一个Arduino主板,一个按钮开关和一个电阻(大于300欧姆)。电阻的数值不是关键;1kΩ、10kΩ甚至100kΩ等值通常都可以正常使用(视频中的00:41)。

接线指南

有两种主要的布线配置(在视频中时间为00:30):

  1. 配置 1:将按键连接到Arduino引脚和+5V之间。按键的另一侧通过电阻连接到地。当按下按钮时,引脚读取为HIGH;松开时,读取为LOW。
  2. 配置 2:将推按钮连接在Arduino引脚和地之间。推按钮的另一侧通过电阻连接到+5V。当按钮被按下时,引脚读取为LOW;松开时,读取为HIGH。

Arduino wriring for push button and LED

这里需要一个视觉接线图。

代码解释

Arduino代码利用了pinMode()配置该引脚为输入的函数。关键部分是使用INPUT_PULLUP此内部上拉电阻在某些配置中消除了对外部电阻的需求,从而简化了接线。digitalRead()函数读取引脚的状态,和一个简单if-else声明确定按钮是否被按下(低电平)或未按下(高电平)(视频中时间为08:34)。


pinMode(2, INPUT_PULLUP); // Configures pin 2 as input with internal pull-up resistor
int pushButton = digitalRead(2); // Reads the state of pin 2
if (pushButton == LOW) {
  // Button is pressed
} else {
  // Button is not pressed
}

实时项目/演示

该视频演示了两种 wiring 配置及其各自的行为。它突出了省略电阻时可能出现的问题,例如由于噪声和电容耦合导致的不稳定读数(视频时间为 06:18、06:39、07:21)。演示清楚地显示了安装电阻时实现的稳定和可靠的操作(视频时间为 08:08)。

章节

  • [00:00] 引言
  • [00:30] 接线配置
  • [04:12] 使用INPUT_PULLUP的代码说明
  • [05:36] 移除电阻:实用演示
  • [08:33] 代码解释

图像

为什么我们在Arduino的按钮上使用电阻?
我们为什么要在与Arduino的按钮中使用电阻?
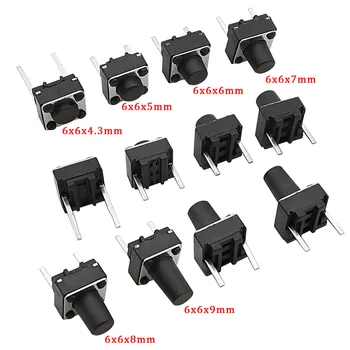
2 pin tactile push button switch
Arduino wriring for push button and LED
Arduino wiring for Push button with resistor-2
Arduino wiring for Push button with resistor-1
Arduino wiring for Push button wihthout resistor
132-Code example using a resistor
语言: C++
/*
 * This is an Arduino Sketch for a tutorial video 
 * explaining why a resistor is needed to be used with a push button
 * with Arduino.
 * 
 * Written by Ahmad Shamshiri on July 17, 2018 at 23:11 in Ajax, Ontario, Canada
 * For Robojax.com
 * Watch the instruction video for this code: https://youtu.be/TTqoKcpIWkQ
 * This code is "AS IS" without warranty or liability. Free to be used as long as you keep this note intact.
 */

void setup() {
  // Robojax.com push button tutorial
  pinMode(3,INPUT_PULLUP);
  Serial.begin(9600);
  Serial.println("Robojax Push Button Tutorial");
  

}

void loop() {
  // Robojax.com push button tutorial
  int pushButton = digitalRead(3);
  if(pushButton == LOW)
  {
    Serial.println("Pin 3 LOW");
  }else{
    Serial.println("Pin 3 HIGH");
  }

delay(500);
}
133-Code example using INPUT_PULLUP without a resistor
语言: C++
/*
 * This is an Arduino Sketch for a Tutorial video 
 * explaining why a resistor is needed to be used with a push button
 * with an Arduino to connect the pin to Ground (GND)
 * 
 * Written by Ahmad Shamshiri on July 18, 2018 at 17:36 in Ajax, Ontario, Canada
 * For Robojax.com
 * Watch the instruction video for this code: https://youtu.be/TTqoKcpIWkQ
 * This code is "AS IS" without warranty or liability. Free to be used as long as you keep this note intact.
 */

void setup() {
  // Robojax.com push button tutorial
  pinMode(2,INPUT_PULLUP);
  Serial.begin(9600);
  Serial.println("Robojax Push Button Tutorial");
  

}

void loop() {
  // Robojax.com push button tutorial
  int pushButton = digitalRead(2);
  if(pushButton == LOW)
  {
    Serial.println("Button is pushed.");
  }else{
    Serial.println("Button is NOT pushed.");    
  }

delay(500);
}

|||您可能需要的东西

资源与参考

尚无可用资源。

文件📁

没有可用的文件。