なぜArduinoでプッシュボタンやスイッチに抵抗を使うのですか?
このチュートリアルでは、Arduinoに接続したプッシュボタンやスイッチに抵抗を使用することが、信頼性の高い動作のためになぜ重要なのかを説明します。この概念を理解することは、ユーザー入力を伴うあらゆるArduinoプロジェクトにおいて基本です。この知識は予期しない動作を防ぎ、プロジェクトが正しく機能することを保証します。ここに、この知識が不可欠なプロジェクトのアイデアを示します:
- LED用のシンプルなオン/オフスイッチ
- インタラクティブなゲームコントローラー
- 家電用リモコン
- プッシュボタンで作動するセキュリティシステム
これらの回路で抵抗器を使用する理由を探ってみましょう。
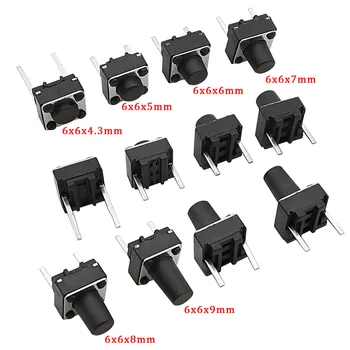

ハードウェア/コンポーネント
このプロジェクトに必要な主要な部品は最小限です: Arduinoボード、プッシュボタンスイッチ、そして抵抗(300オームより大きい)。抵抗の値は厳密ではなく、1kΩ、10kΩ、あるいは100kΩでも一般的に問題なく動作します(ビデオの00:41で)。
配線ガイド
主な配線構成は2つあります(ビデオの00:30):
- 構成1:プッシュボタンをArduinoのピンと+5Vの間に接続します。プッシュボタンのもう一方の端は抵抗を介してグラウンドに接続します。ボタンが押されるとピンはHIGHを読み取り、離すとLOWを読み取ります。
- 構成2:プッシュボタンをArduinoのピンとグラウンド(GND)の間に接続します。プッシュボタンのもう一方の端は抵抗を介して+5Vに接続します。ボタンが押されるとピンはLOWを読み取り、離すとHIGHを読み取ります。

ここには視覚的な配線図があると便利です。
コードの説明
Arduinoのコードは〜を利用していますpinMode()ピンを入力として設定する関数です。重要な部分はその使用にあります。INPUT_PULLUP(ビデオの04:06、04:23で)。この内部プルアップ抵抗は、特定の構成では外付け抵抗を不要にし、配線を簡素化します。そのdigitalRead()関数はピンの状態を読み取り、単純なif-elseこのステートメントは、ボタンが押されている(LOW)か押されていない(HIGH)かを判定します(動画の08:34)。
pinMode(2, INPUT_PULLUP); // Configures pin 2 as input with internal pull-up resistor
int pushButton = digitalRead(2); // Reads the state of pin 2
if (pushButton == LOW) {
  // Button is pressed
} else {
  // Button is not pressed
}
ライブプロジェクト/デモンストレーション
ビデオは両方の配線構成とそれぞれの挙動を実演しています。抵抗が省略された場合に発生し得る問題、例えばノイズや静電容量結合による不安定な計測値(ビデオの06:18、06:39、07:21で)を強調しています。抵抗を入れた場合に得られる安定かつ信頼性の高い動作が(ビデオの08:08で)明確に示されています。
章
- [00:00] イントロダクション
- [00:30] 配線構成
- [04:12] INPUT_PULLUP を使用したコードの解説
- [05:36] 抵抗器の取り外し:実演
- [08:33] コードの説明
画像


/*
 * This is an Arduino Sketch for a tutorial video
 * explaining why a resistor is needed to be used with a push button
 * with Arduino.
 *
 * Written by Ahmad Shamshiri on July 17, 2018 at 23:11 in Ajax, Ontario, Canada
 * For Robojax.com
 * Watch the instruction video for this code: https://youtu.be/TTqoKcpIWkQ
 * This code is "AS IS" without warranty or liability. Free to be used as long as you keep this note intact.
 */

void setup() {
  // Robojax.com push button tutorial
  pinMode(3,INPUT_PULLUP);
  Serial.begin(9600);
  Serial.println("Robojax Push Button Tutorial");


}

void loop() {
  // Robojax.com push button tutorial
  int pushButton = digitalRead(3);
  if(pushButton == LOW)
  {
    Serial.println("Pin 3 LOW");
  }else{
    Serial.println("Pin 3 HIGH");
  }

delay(500);
}/*
* This is an Arduino Sketch for a Tutorial video
* explaining why a resistor is needed to be used with a push button
* with an Arduino to connect the pin to Ground (GND)
*
* Written by Ahmad Shamshiri on July 18, 2018 at 17:36 in Ajax, Ontario, Canada
* For Robojax.com
* Watch the instruction video for this code: https://youtu.be/TTqoKcpIWkQ
* This code is "AS IS" without warranty or liability. Free to be used as long as you keep this note intact.
*/
void setup() {
// Robojax.com push button tutorial
pinMode(2,INPUT_PULLUP);
Serial.begin(9600);
Serial.println("Robojax Push Button Tutorial");
}
void loop() {
// Robojax.com push button tutorial
int pushButton = digitalRead(2);
if(pushButton == LOW)
{
Serial.println("Button is pushed.");
}else{
Serial.println("Button is NOT pushed.");
}
delay(500);
}必要かもしれないもの
-
アマゾンAmazonでプッシュボタンを購入するamzn.to
リソースと参考文献
まだリソースはありません。
ファイル📁
ファイルは利用できません。