Этот учебник является частью: Клавиатуры
Здесь перечислены все видеоролики с демонстрацией работы клавиатуры.

Using 4x3 Keypad with Arduino
In this tutorial, we will explore how to use a 4x3 keypad with an Arduino to read key presses. This keypad can be utilized in various projects, such as creating a simple input interface for a security system or any application requiring user input. By the end of this guide, you will be able to read key presses and respond to specific keys.

Make sure to check the accompanying video for a visual demonstration of the wiring and code implementation (in video at 00:00).
Hardware Explained
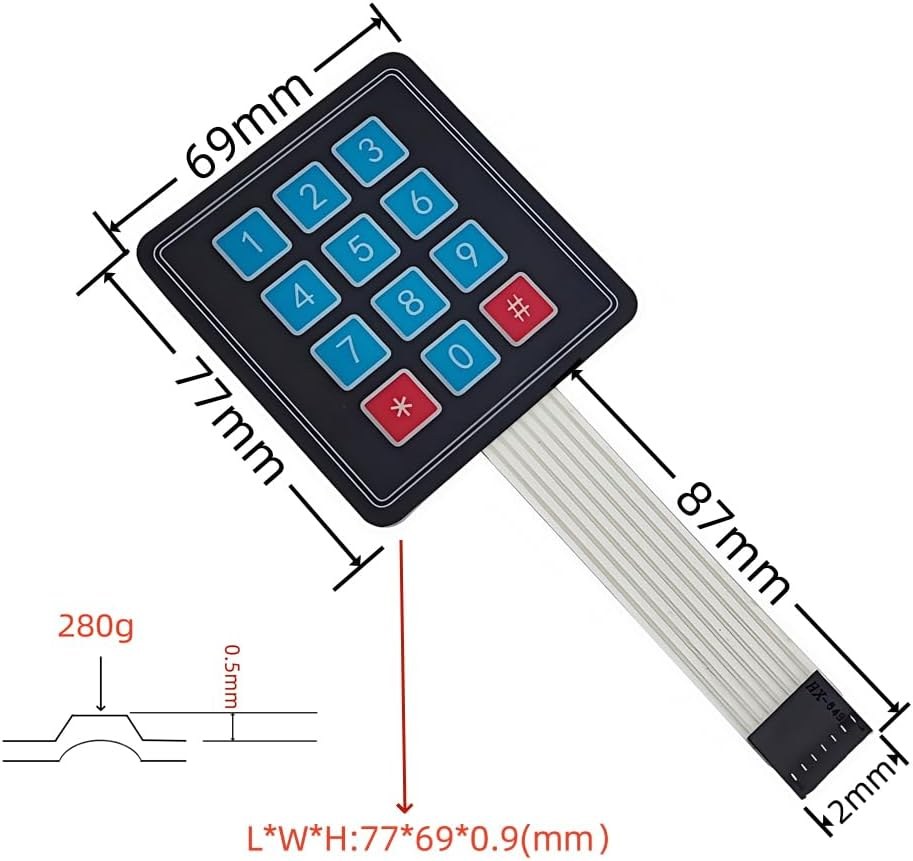
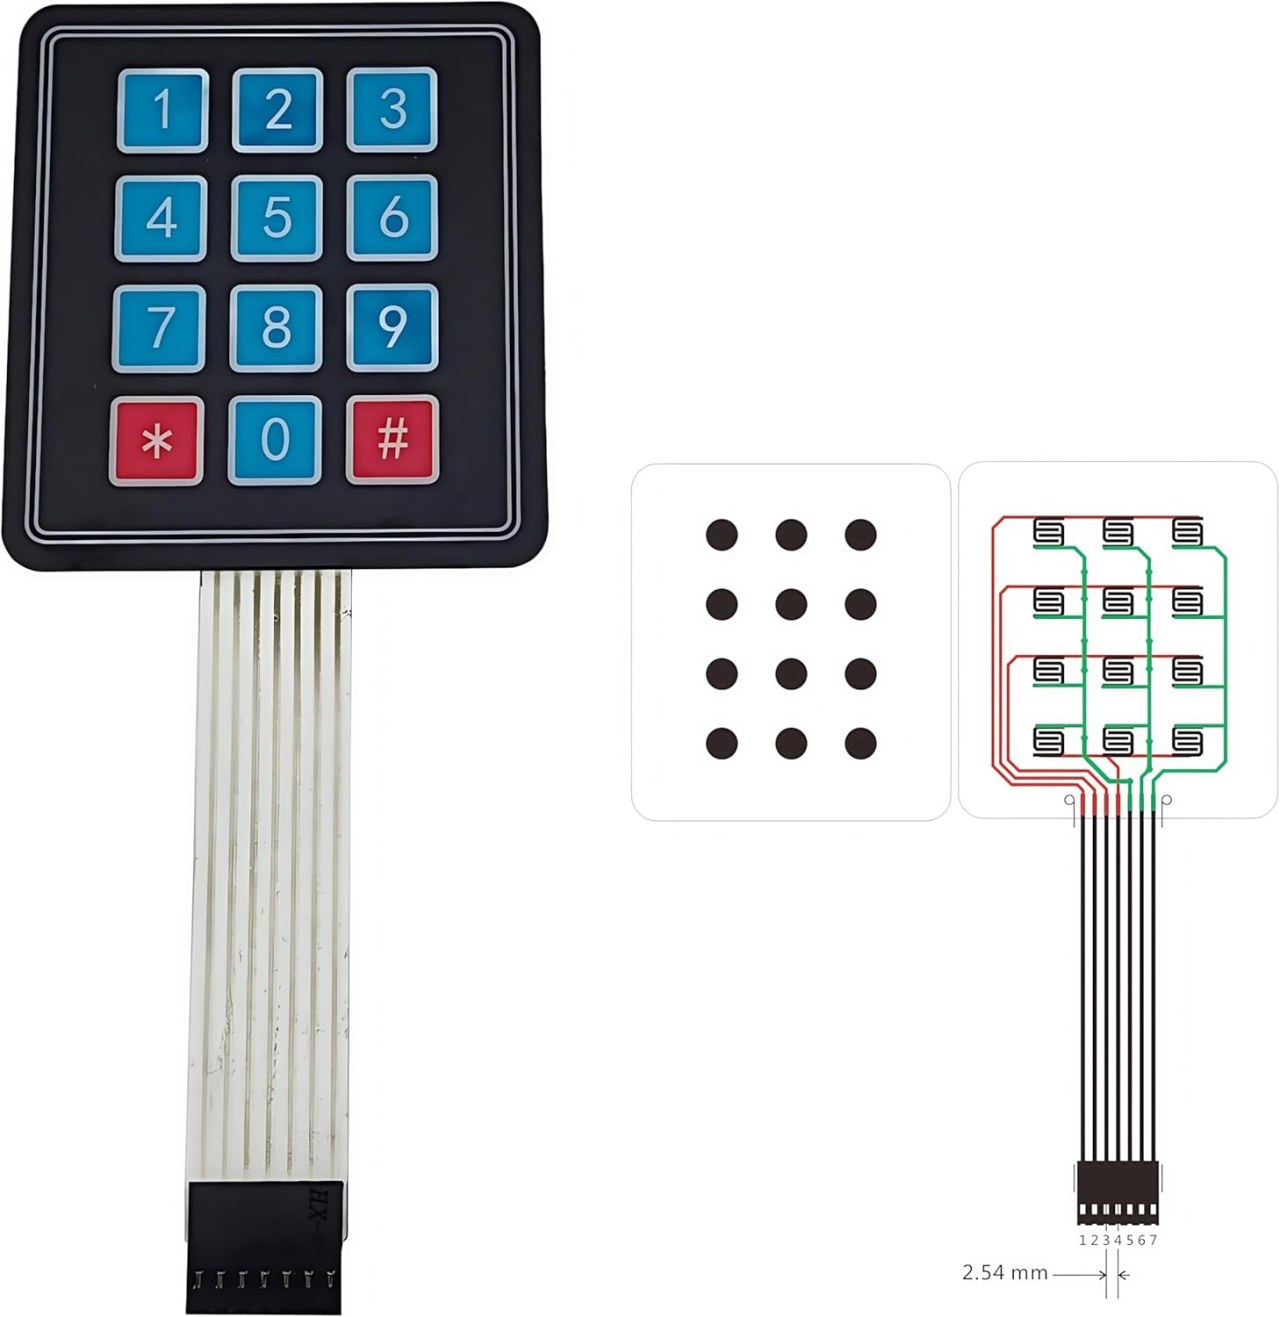
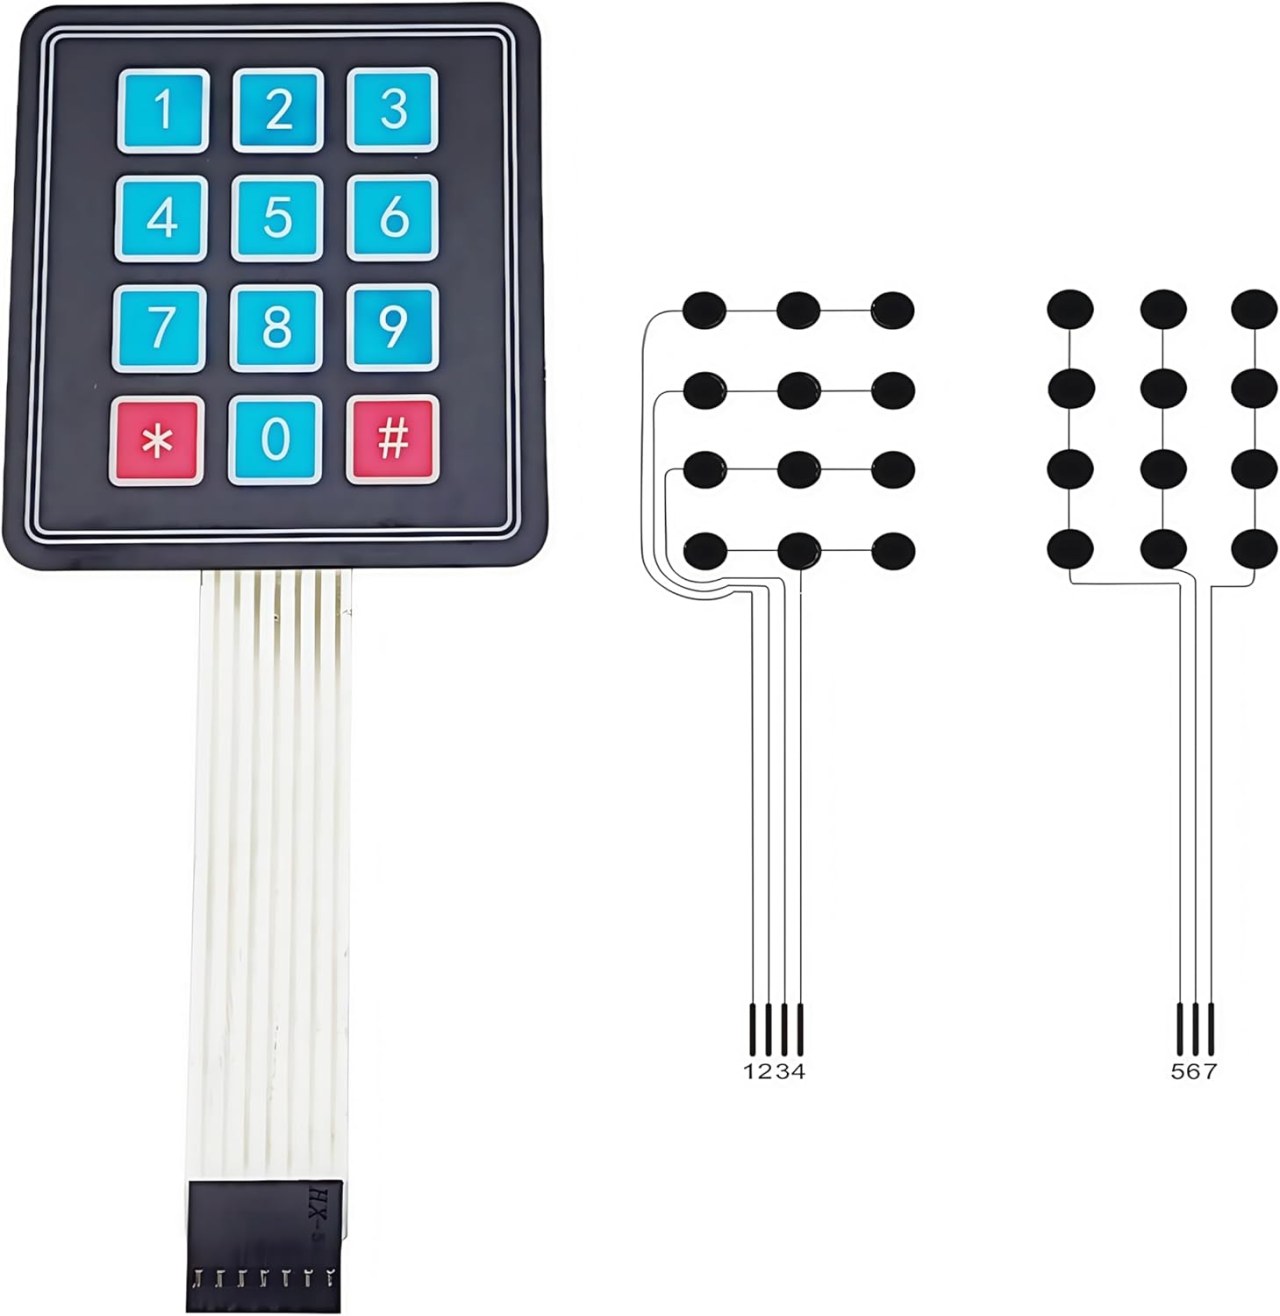
The main components for this project include the 4x3 keypad and the Arduino board. The keypad consists of a matrix of buttons arranged in 4 rows and 3 columns. When a button is pressed, it connects a specific row to a specific column, allowing the Arduino to identify which button was pressed.
The Arduino board acts as the central controller that reads the keypad inputs. It utilizes the Keypad library, which simplifies the process of managing the matrix keypad and makes it easier to detect key presses.
Datasheet Details
| Manufacturer | Various |
|---|---|
| Part number | 4x3 Keypad |
| Logic voltage | 5 V |
| Operating current | ≤ 20 mA |
| Key lifespan | ≥ 1,000,000 presses |
| Package | Matrix Keypad |
- Connect the keypad pins correctly to the Arduino's digital pins.
- Use pull-up or pull-down resistors if needed, depending on your setup.
- Ensure the Keypad library is included in your Arduino IDE.
- Debounce the key presses in software to avoid multiple readings.
- Test each key to confirm proper wiring and functionality.
Wiring Instructions

To wire the 4x3 keypad to the Arduino, you will connect the row and column pins from the keypad to the digital pins on the Arduino. Connect the row pins (typically 4 pins) to pins 2, 3, 4, and 5 on the Arduino. The column pins (typically 3 pins) should be connected to pins 6, 7, and 8.
Ensure that you connect the keypad's ground pin to the Arduino's ground and the power pin to the 5V output. This setup will allow the Arduino to read the state of each key when pressed, using the Keypad library to handle the matrix scanning.
Code Examples & Walkthrough
The following code initializes the keypad and prints the pressed key to the serial monitor. The key values are stored in a character array.
const byte ROWS = 4; //four rows
const byte COLS = 3; //three columns
char keys[ROWS][COLS] = {
  {'1','2','3'},
  {'4','5','6'},
  {'7','8','9'},
  {'*','0','#'}
};
The keys array defines the layout of the keypad, which corresponds to the physical arrangement of keys. Each character represents a button on the keypad.

Next, we set up the keypad in the setup() function:
void setup(){
  Serial.begin(9600);
  Serial.println("Robojax 4x3 keypad");
}
This segment initializes the serial communication at a baud rate of 9600, allowing us to view the key presses in the serial monitor.
Finally, the loop checks for key presses and responds accordingly:
void loop(){
  char key = keypad.getKey();
  if (key){
    Serial.println(key);
  }
  if (key =='4'){
    Serial.println("Key 4 is pressed");
  }
}
Here, the program checks if any key is pressed using keypad.getKey(). If a key is pressed, it prints the key's value. Additionally, if the key '4' is pressed, a specific message is displayed.
Demonstration / What to Expect
When the setup is complete, pressing any key on the keypad should output the corresponding character to the serial monitor. If the key '4' is pressed, a special message will be printed indicating that key's activation. This functionality allows you to build upon this foundation for more complex applications.
Be cautious of floating inputs that can lead to erratic behavior. Ensure all connections are secure and test each key to confirm proper functionality (in video at 00:00).
Изображения
Этот учебник является частью: Клавиатуры
- Arduino Code and Video for a Four-Key Keypad
- Arduino Code and Video: 4x4 Matrix Black Keypad
- Build a Simple Electronic Lock with Keypad and LCD Using Arduino
- Controlling an 8-channel relay with a 4x3 keypad
- How to use 4x4 Soft Keypad with Arduino
- How to Use a 5x4 20-Key Keypad with Arduino to Detect Strings
- Lesson 67: Controlling an 8-Channel Relay with a Keypad Using Arduino
- 1602 LCD Keypad Shield: Basic Code
This code has not been parsed yet. Please return to the admin panel to parse it.Вещи, которые могут вам понадобиться
-
АмазонкаКупите клавиатуру 4x3 на Amazon.amzn.to
Ресурсы и ссылки
Ресурсов пока нет.
Файлы📁
Файл Fritzing
-
Матрица мембранной клавиатуры 4x3
Membrane Matrix Keypad 4x3.fzpz0.01 MB
Другие файлы
-
Библиотека клавиатуры с ЖК-дисплеем
robojax-1602_LCD_keypad.zip