این آموزش بخشی است از: آموزشهای وایفای لورا ۳۲
تمام ویدیوهای مربوط به Heltec WiFi LoRa 32 با استفاده از این گروه مرتبط هستند. لینک سایر ویدیوها در زیر این مقاله قرار دارد.
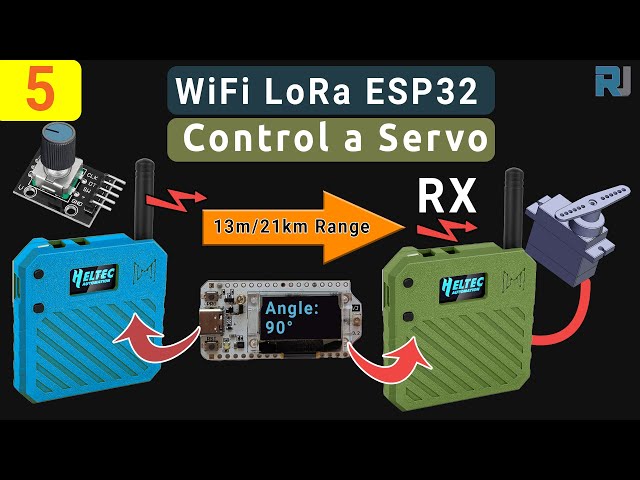
کنترل یک موتور سروو از فاصله دور! آموزش آردوینو Heltec WiFi LoRa 32 V3 (TX)
در این راهنما، طرحهای دقیقی از پروژه سروو Heltec ESP32 LoRa V3 خود را میگیریم و نحوه عملکرد آنها را بررسی میکنیم - بدون افزودن شِفر (کود) اضافی. شما یاد خواهید گرفت که چگونه فرستنده یک انکودر چرخشی را میخواند، آن زاویه را تأمین و از طریق LoRa ارسال میکند و چگونه گیرنده آن را رمزگشایی کرده و یک میکرو سروو را به حرکت در میآورد. تمام واصلهای قطعات و کدها در پایین ذکر شده است و اگر از طریق واصلهای وابسته ما سفارش دهید، به ما کمک میکند تا به ساخت این آموزشها ادامه دهیم.
نصب تختههای ESP32 هلتک
این مسیر را به تنظیمات IDE آردوینو خود اضافه کنید، همانطور که در ویدیو نشان داده شده است:https://resource.heltec.cn/download/package_heltec_esp32_index.json
۱. سختافزار و تنظیمات فرستنده (TX)
در سمت TX شما نیاز دارید:
-
برد Heltec WiFi LoRa 32 V3 (در کیس Meshnology N33، با باتری 3000 میلیآمپر ساعتی)
-
چرخش انکودر متصل به GPIO 6 (CLK)، GPIO 5 (DT)، GPIO 4 (SW)
-
صفحه نمایش OLED بر روی I²C (SDA= ۴، SCL= ۱۵)
طرح اولیه شامل و راهاندازی همه چیز بهطور دقیق مانند استHeltec_ESP32_LoRa_V3_Sevo_TX_AiRotaryEncoder.ino:
cppCopyEdit#include "AiEsp32RotaryEncoder.h"
#include "HT_SSD1306Wire.h"
#include "LoRaWan_APP.h"
#include "mbedtls/aes.h"
// …
static SSD1306Wire display(0x3c, 500000, SDA_OLED, SCL_OLED, GEOMETRY, RST_OLED);
AiEsp32RotaryEncoder rotaryEncoder = AiEsp32RotaryEncoder(
    PIN_A, PIN_B, SW_PIN, ROTARY_ENCODER_VCC_PIN, false, true, true);
const int homePosition = 90;
const int MAX_ANGLE    = 180;
int servoAngel = homePosition;
درsetup()، شِفر (کود):
-
قدرتها در نمایش، قلم را تنظیم میکند
-
تماسها
rotaryEncoder.begin(),rotaryEncoder.setup(readEncoderISR),rotaryEncoder.setBoundaries(0, MAX_ANGLE, true)وrotaryEncoder.setAcceleration(20) -
مُجددکننده را به حالت پیشفرض برمیگرداند
homePosition -
LoRa را راهاندازی میکند از طریق
Mcu.begin(HELTEC_BOARD, SLOW_CLK_TPYE)و راهاندازی میکندRadioEvents, کانال و پارامترها دقیقاً همانطور که در طرح ارائه شده است.
ارسال زاویه به صورت ایمن
هر دوره حلقه اجرا میشودrotary_loop()، که:
-
در ISR انکودر را میخواند
-
زمانی که
servoAngelتغییرات، آن را در یک بافر ۱۶ بایتی بستهبندی میکند، با AES-۱۲۸ رمزنگاری میکندencryptAES()از طرح)، و تماس هاcppCopyEditRadio.Send(data, sizeof(data)); -
ستها
lora_idle = falseتاOnTxDone()آتش میزند و آن را ریست میکند.
۳. سختافزار و تنظیمات گیرنده (RX)
در سمت RX شما به موارد زیر نیاز دارید:
-
برد Heltec WiFi LoRa 32 V3 (همان جعبه/باتری)
-
میکروسرو (مانند SG90) بر روی GPIO 6 (یا هر پایه PWM آزمایش شده دیگر)
-
صفحه نمایش OLED
طرح درHeltec_ESP32_LoRa_V3_Sevo_RX.inoشروع میشود با:
cppCopyEdit#include <ESP32Servo.h>
#include "HT_SSD1306Wire.h"
#include "LoRaWan_APP.h"
#include "mbedtls/aes.h"
// …
const int servoPin       = 6;
const int SERVO_DUTY_MIN = 400;  // us
const int SERVO_DUTY_MAX = 2400; // us
Servo    myservo;
int      servoAngel     = homePosition;
درsetup(), it:
-
قدرتها در Vext برای ماجیول نمایشی/LoRa
VextON()) -
تماسها
Radio.Init(&RadioEvents)و RX را با همان پارامترهای LoRa پیکربندی میکند -
سرو را به آن وصل میکند
myservo.attach(servoPin, SERVO_DUTY_MIN, SERVO_DUTY_MAX)و آن را در مرکز قرار میدهدhomePositionمتن:
۴. دریافت، رمزگشایی و راهاندازی سروو
هسته استOnRxDone(uint8_t *payload, …)کال بک:
cppCopyEditdecryptAES((uint8_t*)rxpacket, userKey);
if (isNumber(rxpacket)) {
  servoAngel = atoi(rxpacket);
  myservo.write(servoAngel);
  delay(15);
}
Serial.println("Angle: " + String(servoAngel));
lora_idle = true;
این بلوک ۱۶ بایتی را رمزگشایی کرده، به یک عدد صحیح تبدیل میکند و بلافاصله سروو را بروز میکند.
پشتیبانی از پایه PWM و تنظیم سروو
این پایههای ESP32 را برای خروجی PWM آزمایش کردیم و همه آنها برای راهاندازی یک میکروسرو کار میکنند:
CopyEdit1, 2, 3, 4, 5, 6, 19, 35, 36, 38, 39, 40, 41, 42, 45, 47, 48
برای یک SG90 استاندارد، شِفر (کود) ما از یک دامنه پالس استفاده میکند400 میکروثانیه(0Ã'°) to2400 میکروثانیه(180 درجه)، که یک حرکت نرم و کامل بدون لرزش را فراهم میآورد.
6. نمودار سیمکشی
در زیر مکانهایی وجود دارد که میتوانید مدارهای TX و RX خود را قرار دهید:


شِفر (کود) و واصلهای وابسته
همه طرحهای فوق برای دانلود در بخش "شِفر (کود) و منابع" در زیر در دسترس هستند. اگر میخواهید این کار را خودتان انجام دهید، لطفاً خرید ماجیول Heltec LoRa32 V3، قاب Meshnology N33، انکودر چرخشی و سروو SG90 را از طریق واصلهای وابسته ما در نظر بگیرید. این برای شما هیچ هزینه اضافی ندارد و به ما کمک میکند تا بتوانیم همچنان آموزشهای رایگان مانند این را ارائه دهیم!
فصول ویدئو برای مرجع
-
۰۰:۰۰ مقدمه و مرور کلی
-
مفاهیم کنترل از راه دور
-
مبانی ارتباطات لوRa
-
00:23 پیشنمایش سختافزار
-
00:28 نمایش کیس و باتری
-
ویژگیهای ماجیول 01:03
-
مشخصات و اتصالات 01:42
-
۲:۵۴ تامین انرژی سروو
-
03:05 سیمکشی و پایهاوت
-
09:35 جایگذاری آنتن
-
۱۱:۰۴ مونتاژ کیس
-
۲۹:۲۶ بارگذاری طرحها
-
35:09 امتحان محدوده 1.2 کیلومتر
-
آزمایش دامنه ۱.۴ کیلومتر
-
خلاصه عملکرد 38:41
-
۴۳:۰۴ نتیجهگیری و پشتیبانی
این آموزش بخشی از: آموزشهای وایفای لورا ۳۲
- استفاده از Heltec WiFi LoRa 32 V3 برای ارسال دما با استفاده از DHT22 تا فاصله ۱.۴ کیلومتر
- 13 مایل 20 کیلومتر بدون WiFi؟ چگونه LoRa ولتاژ را در فواصل دیوانه وار ارسال کرد! (Heltec WiFi LoRa 32 V3)
- یک دستگاه را از ۱۳ مایل (۲۱ کیلومتر) دور روشن کنید - پروژه نهایی لو را بدون شبکه با WiFi LoRa 32!
- سیستم هشدار درب از فاصله ۱۳ مایل (۲۱ کیلومتر) با LoRa – بدون نیاز به شبکه برق! (هلتک WiFi LoRa 32 V3)
- پروژه ریلی از راه دور DIY: ماجیول Heltec LoRa 32 بدون Wi-Fi/بدون سیم کارت به فاصله ۱۳ مایل
- How to Use the Heltec LoRa CubeCell Development Board HTCC-AB01
/*
File: Heltec_ESP32_LoRa_V3_Sevo_TX_AiRotaryEncoder.ino
written on 24 Jun, 2025 by Ahmad Shamshiri

 * =====================================================================
 * ARDUINO CODE DESCRIPTION: SECURE LoRa SERVO CONTROL SYSTEM (TX)
 * =====================================================================
 *
 * HARDWARE COMPONENTS:
 * -------------------
 *  - Main Controller: Heltec WiFi LoRa 32 V3
 *  - Enclosure: Meshnology N33 case with 3000mAh battery
 *  - Input: Rotary encoder with push-button
 *  - Feedback: Built-in OLED display
 *  - Output: Servo motor + LoRa wireless transmission
 *
 * SYSTEM FUNCTIONALITY:
 * -------------------
 * [1] ROTARY ENCODER CONTROL:
 *     - Clockwise/Counter-clockwise rotation adjusts target angle (0°-180°)
 *     - Real-time angle display on OLED screen
 *     - Push-button returns servo to Home position (default: 90°)
 *
 * [2] SECURE WIRELESS TRANSMISSION:
 *     - All angle values encrypted before LoRa transmission
 *     - Home position command transmitted as special secure packet
 *     - Uses 433MHz LoRa band for reliable communication
 *
 * [3] POWER MANAGEMENT:
 *     - Optimized for battery operation (3000mAh)
 *     - Low-power modes between transmissions
 *
 * FOR COMPLETE SETUP INSTRUCTIONS:
 * Please watch the tutorial video at: https://youtu.be/EPynuJ7sasY
 * =====================================================================

Watch full video explaination:  https://youtu.be/EPynuJ7sasY
Resources page: https://robojax.com/T635


 * DISCLAIMER:
 * This code is provided "AS IS" without warranty of any kind. The author
 * shall not be held liable for any damages arising from the use of this code.
 *
 * LICENSE:
 * This work is licensed under the GNU General Public License v3.0
 * Permissions beyond the scope of this license may be available at Robojax.com
 *
 * SHARING TERMS:
 * You are free to share, copy and modify this code for non-commercial purposes
 * PROVIDED you:
 * 1. Keep this entire comment block intact with the original code
 * 2. Include the original Robojax.com link
 * 3. Keep the YouTube tutorial link (if applicable)
 * 4. Clearly indicate any modifications made
 *
 * Original tutorial at: https://robojax.com/T635
 * YouTube Video: https://youtu.be/EPynuJ7sasY
 *
 * ********************************************************************
 */

#include <Wire.h>
#include "HT_SSD1306Wire.h"
#include "WiFi.h"
static SSD1306Wire  display(0x3c, 500000, SDA_OLED, SCL_OLED, GEOMETRY_128_64, RST_OLED); // addr , freq , i2c group , resolution , rst


const int TX_POWER = 2;//dBm from 2 to 20. when powered via battery 2 to 14dBm is the best option
const int MAX_ANGLE = 180;//the most common is 180, but you can set it as needed

String labelAngle = "Angle";
const int homePosition = 90; //initial position


//endcoder
const int SW_PIN = 4;//define a pin for rotary encode switch
const int PIN_A  = 6;
const int PIN_B  = 5;//
const int ANGLE_STEP  = 6;//
const bool debug= false;//to print debug data in serial moinitor set it to true, else false

int servoAngel = homePosition;
int oldAngleValue = servoAngel;
#include "mbedtls/aes.h"//for securing data
#include <cstring>  // For memset, memcpy
mbedtls_aes_context aes;
const char *userKey = "hyhT676#h~_1a"; //Security key.


#include "LoRaWan_APP.h"
#include "AiEsp32RotaryEncoder.h"
#include "Arduino.h"
#define ROTARY_ENCODER_VCC_PIN -1

//instead of changing here, rather change numbers above
AiEsp32RotaryEncoder rotaryEncoder = AiEsp32RotaryEncoder(
            PIN_A,
            PIN_B,
            SW_PIN,
            ROTARY_ENCODER_VCC_PIN,
            ANGLE_STEP);


#define RF_FREQUENCY                                915432000 // Hz

#define TX_OUTPUT_POWER                             TX_POWER        // dBm from 2 to 20. when powered via battery 2 to 14dBm

#define LORA_BANDWIDTH                              0         // [0: 125 kHz,
                                                              //  1: 250 kHz,
                                                              //  2: 500 kHz,
                                                              //  3: Reserved]
#define LORA_SPREADING_FACTOR                       7         // [SF7..SF12]
#define LORA_CODINGRATE                             1         // [1: 4/5,
                                                              //  2: 4/6,
                                                              //  3: 4/7,
                                                              //  4: 4/8]
#define LORA_PREAMBLE_LENGTH                        8         // Same for Tx and Rx
#define LORA_SYMBOL_TIMEOUT                         0         // Symbols
#define LORA_FIX_LENGTH_PAYLOAD_ON                  false
#define LORA_IQ_INVERSION_ON                        false


#define RX_TIMEOUT_VALUE                            1000
#define BUFFER_SIZE                                 64 // Define the payload size here

char txpacket[BUFFER_SIZE];
char rxpacket[BUFFER_SIZE];

double txNumber;

bool lora_idle=true;

static RadioEvents_t RadioEvents;
unsigned long lastTxTime = 0;
void OnTxDone( void );
void OnTxTimeout( void );
void decryptAES(uint8_t *data, const char *key);
void encryptAES(uint8_t *data, const char *key);
void processKey(const char *userKey, uint8_t *processedKey, size_t keySize);
void VextON(void);

void rotary_loop();//prototyp function: rotary encoder
void IRAM_ATTR readEncoderISR();//prototyp function: rotary encoder
void rotary_onButtonClick();//prototyp function: rotary encoder

void setup() {
  Serial.begin(115200);
  Serial.println();

  VextON();
  delay(100);

	//we must initialize rotary encoder
	rotaryEncoder.begin();
	rotaryEncoder.setup(readEncoderISR);
	bool circleValues = false;
	rotaryEncoder.setBoundaries(0, MAX_ANGLE, circleValues); //minValue, maxValue, circleValues true|false (when max go to min and vice versa)
	/*Rotary acceleration introduced 25.2.2021.
   * in case range to select is huge, for example - select a value between 0 and 1000 and we want 785
   * without accelerateion you need long time to get to that number
   * Using acceleration, faster you turn, faster will the value raise.
   * For fine tuning slow down.
   */
	//rotaryEncoder.disableAcceleration(); //acceleration is now enabled by default - disable if you dont need it
	rotaryEncoder.setAcceleration(20); //or set the value - larger number = more accelearation; 0 or 1 means disabled acceleration
  rotaryEncoder.reset(homePosition); //set home position

  // Initialising the UI will init the display too.
  display.init();
  display.setFont(ArialMT_Plain_10);
  //LoRa stuff
  Mcu.begin(HELTEC_BOARD,SLOW_CLK_TPYE);

    txNumber=0;

    RadioEvents.TxDone = OnTxDone;
    RadioEvents.TxTimeout = OnTxTimeout;

    Radio.Init( &RadioEvents );
    Radio.SetChannel( RF_FREQUENCY );
    Radio.SetTxConfig( MODEM_LORA, TX_OUTPUT_POWER, 0, LORA_BANDWIDTH,
                                   LORA_SPREADING_FACTOR, LORA_CODINGRATE,
                                   LORA_PREAMBLE_LENGTH, LORA_FIX_LENGTH_PAYLOAD_ON,
                                   true, 0, 0, LORA_IQ_INVERSION_ON, 3000 );

}


void displayAngle() {
    display.clear();  // Clear display before new content

    // Line 1: Text: Angle
    display.setTextAlignment(TEXT_ALIGN_LEFT);

    // Line 2: Temperature value in 24pt font
    display.setFont(ArialMT_Plain_24);

    // Format
    String angleString = String(servoAngel) + "°"; //

    display.setFont(ArialMT_Plain_16);
    display.drawString(0, 0, labelAngle);
    display.setFont(ArialMT_Plain_24);
    display.drawString(0, 15, angleString);

    display.display();  // Update OLED
}


void VextON(void)
{
  pinMode(Vext,OUTPUT);
  digitalWrite(Vext, LOW);
}

void VextOFF(void) //Vext default OFF
{
  pinMode(Vext,OUTPUT);
  digitalWrite(Vext, HIGH);
}

void sendData()
{

  String txData = String(servoAngel) ;

  uint8_t data[BUFFER_SIZE];
  memset(data, 0, sizeof(data));  // Zero-padding
  strncpy((char*)data, txData.c_str(), sizeof(data) - 1); // Copy string safely

  encryptAES(data, userKey);  // Encrypt before sending
  if(lora_idle == true)
    {
      //delay(1000);
      Radio.Send(data,  sizeof(data));
      if(debug){
      Serial.print("Sending: ");
      Serial.println((char *)data);
      }
      lora_idle = false;
      oldAngleValue =servoAngel;//keep record of angle change
    }
    Radio.IrqProcess( );
}


void loop() {
  rotary_loop();
  // clear the display
  display.clear();

  displayAngle(); //

  if(oldAngleValue != servoAngel)
  {
	  sendData();
  }
  //delay(100);

}


void OnTxDone( void )
{
        if(debug){
	        Serial.println("TX done......");
        }
	lora_idle = true;
}

void OnTxTimeout( void )
{
    Radio.Sleep( );
        if(debug){
	        Serial.println("TX Timeout......");
        }
    lora_idle = true;
}


/**
 * Converts a user-provided plaintext key into a fixed-length 16-byte (128-bit)
 * or 32-byte (256-bit) key.
 */
void processKey(const char *userKey, uint8_t *processedKey, size_t keySize) {
    memset(processedKey, 0, keySize); // Fill with zeros
    size_t len = strlen(userKey);
    if (len > keySize) len = keySize; // Truncate if too long
    memcpy(processedKey, userKey, len); // Copy valid key part
}

/**
 * Encrypts a 16-byte (one block) message using AES-128.
 */
void encryptAES(uint8_t *data, const char *key) {
    uint8_t processedKey[16]; // 128-bit key
    processKey(key, processedKey, 16);

    mbedtls_aes_init(&aes);
    mbedtls_aes_setkey_enc(&aes, processedKey, 128);
    mbedtls_aes_crypt_ecb(&aes, MBEDTLS_AES_ENCRYPT, data, data);
    mbedtls_aes_free(&aes);
}

/**
 * Decrypts a 16-byte (one block) message using AES-128.
 */
void decryptAES(uint8_t *data, const char *key) {
    uint8_t processedKey[16]; // 128-bit key
    processKey(key, processedKey, 16);

    mbedtls_aes_init(&aes);
    mbedtls_aes_setkey_dec(&aes, processedKey, 128);
    mbedtls_aes_crypt_ecb(&aes, MBEDTLS_AES_DECRYPT, data, data);
    mbedtls_aes_free(&aes);
}


void rotary_onButtonClick()
{
	static unsigned long lastTimePressed = 0;
	//ignore multiple press in that time milliseconds
	if (millis() - lastTimePressed < 500)
	{
		return;
	}
	lastTimePressed = millis();

	        if(debug){
	          Serial.print("button pressed ");
	          Serial.print(millis());
	          Serial.println(" milliseconds after restart");
          }
}

void rotary_loop()
{
	//dont print anything unless value changed
	if (rotaryEncoder.encoderChanged())
	{
		        if(debug){
	            Serial.print("Value: ");
		          Serial.println(rotaryEncoder.readEncoder());
            }
    servoAngel = rotaryEncoder.readEncoder();

	}
	if (rotaryEncoder.isEncoderButtonClicked())
	{
    rotaryEncoder.reset(homePosition);
    servoAngel = homePosition;
		rotary_onButtonClick();
	}
}

void IRAM_ATTR readEncoderISR()
{
	rotaryEncoder.readEncoder_ISR();
}
Common Course Links
Common Course Files
منابع و مراجع
-
خارجیواصل وبسایت کیت WiFi 32 هلتکheltec.org
فایلها📁
هیچ فایلی موجود نیست.