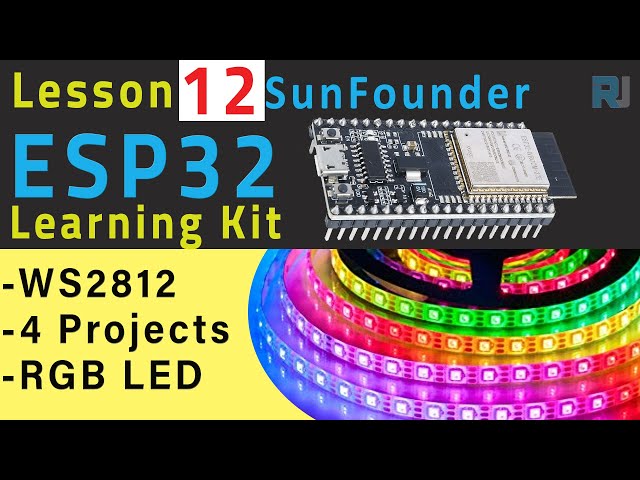
ESP32 Tutorial 12/55 - WS2812 RGB Srip 4 Project with SunFounder's ESP32 IoT Learning kit
In this tutorial, we will explore how to control a WS2812 LED strip using the ESP32 microcontroller. This project allows you to create a variety of colors and control each LED individually, providing a fun and visually appealing way to learn about programming and electronics. By the end of this tutorial, you will have a fully functional setup that can change colors and patterns dynamically.

Using the ESP32 microcontroller from SunFounder, which features built-in Wi-Fi and Bluetooth capabilities, we can easily connect and control the WS2812 RGB LED strip. The flexibility of this LED strip allows for creative applications, whether for decorative lighting or educational projects. For a better understanding of the steps involved, you can refer to the video at (in video at 00:00).
Hardware Explained
The main components for this project include the ESP32 microcontroller and the WS2812 LED strip. The ESP32 is a powerful microcontroller that can perform tasks similar to those of an Arduino, but with added connectivity options. It has a rich set of features that enable it to connect to the cloud, allowing for remote control and data logging.
The WS2812 LED strip consists of individually addressable RGB LEDs, which means that each LED can be controlled to display different colors. The strip operates on a single-wire protocol, allowing multiple LEDs to be chained together without losing signal quality. Each LED contains a built-in driver that takes the input signal and amplifies it for the next LED in the chain.
Datasheet Details
| Manufacturer | Worldsemi |
|---|---|
| Part number | WS2812 |
| Logic/IO voltage | 3.5–5.3 V |
| Supply voltage | 5 V |
| Output current (per channel) | 20 mA max |
| Peak current (per channel) | 60 mA max |
| PWM frequency guidance | 400 Hz |
| Input logic thresholds | 0.3 x VDD to 0.7 x VDD |
| Voltage drop / RDS(on) / saturation | 0.5 V max |
| Thermal limits | -25 to 80 °C |
| Package | 5050 |
| Notes / variants | Can be chained for longer strips |
- Ensure proper power supply (5 V) to avoid LED damage.
- Use a capacitor (100 µF) across the power supply terminals to smooth voltage spikes.
- Keep data wires short to reduce signal degradation.
- Be cautious of the LED temperature; ensure proper heat dissipation.
- Observe correct polarity when connecting power and ground.
- Utilize a pull-up resistor on the data line if using long strips.
Wiring Instructions

To wire the WS2812 LED strip to the ESP32, start by connecting the power supply. The +5V wire from the LED strip should be connected to the 5V pin on the ESP32, and the ground (GND) wire should be connected to one of the GND pins on the ESP32.
Next, connect the data input wire from the LED strip to pin 14 on the ESP32. Make sure the connections are secure to ensure proper data transmission. If you are using multiple strips or longer distances, consider using a level shifter to ensure signal integrity. This setup will allow you to control the LED strip directly from the ESP32.
Code Examples & Walkthrough
The code uses the Adafruit NeoPixel library to control the WS2812 LED strip. It starts by initializing the LED strip and setting the initial color to black. The key identifiers in the code include LED_PIN, which defines the pin connected to the data line of the LED strip, and NUM_LEDS, which specifies the number of LEDs in the strip.
#include  // Include the Adafruit NeoPixel library

#define LED_PIN 14 // NeoPixel LED strip
#define NUM_LEDS 8 // Number of LEDs
In the setup function, the strip is initialized using strip.begin(), and the initial color is set to black with strip.show(). This prepares the strip for color changes when the program runs.
void setup() {
  strip.begin(); // Initialize the NeoPixel strip
  strip.show(); // Set initial color to black
}
The main loop of the program consists of two for loops. The first loop turns on each LED one by one by setting its color and updating the strip. The second loop turns off each LED in the same manner. This creates a simple but effective light animation.
void loop() {
  // Turn on LEDs one by one
  for (int i = 0; i < NUM_LEDS; i++) {
    strip.setPixelColor(i, 100, 45, 0); // Set the color of the i-th LED to red
    strip.show(); // Update the LED strip with the new colors
    delay(100); // Wait for 100 milliseconds
  }

  // Turn off LEDs one by one
  for (int i = 0; i < NUM_LEDS; i++) {
    strip.setPixelColor(i, 0, 0, 0); // Set the color of the i-th LED to black (turn it off)
    strip.show(); // Update the LED strip with the new colors
    delay(100); // Wait for 100 milliseconds
  }
}
Watch the complete code loading below the article for more details on how to implement different color effects and animations.
Demonstration / What to Expect
Once you have completed the wiring and uploaded the code, you should see the LEDs on the strip light up one by one in a specified color, followed by them turning off in the same sequence. This creates a "running light" effect. If the LEDs do not light up as expected, double-check your wiring connections and ensure the power supply is adequate. Also, verify that the correct pin is defined in the code (in video at 12:30).
Video Timestamps
- 00:00 Start
- 1:40 Introduction to WS2812 LED
- 7:25 Project documentation page
- 9:16 RGB Color explained
- 13:16 Wiring explained
- 13:48 Arduino Code-1 explained
- 19:03 Selecting ESP32 board and Port on Arduino IDE
- 20:45 Code-1 Demo
- 22:00 Controlling individual LED
- 24:16 Walking light LED
- 25:41 Back and forth light
图像

#include <Adafruit_NeoPixel.h> // 包含 Adafruit NeoPixel 库

#define LED_PIN 14 // NeoPixel LED灯条
#define NUM_LEDS 8 // LED数量

 // 创建一个Adafruit_NeoPixel类的实例
Adafruit_NeoPixel strip = Adafruit_NeoPixel(NUM_LEDS, LED_PIN, NEO_GRB + NEO_KHZ800);

void setup() {
  strip.begin(); // 初始化 NeoPixel 灯条
  strip.show(); // 将初始颜色设置为黑色
}

void loop() {
 // 逐个打开LED灯
  for (int i = 0; i < NUM_LEDS; i++) {
    strip.setPixelColor(i, 100, 45, 0); // 将第 i 个 LED 的颜色设置为红色。
    strip.show(); // 用新颜色更新LED灯带
    delay(100); // 等待100毫秒
  }

 // 逐个关闭LED灯
  for (int i = 0; i < NUM_LEDS; i++) {
    strip.setPixelColor(i, 0, 0, 0); // 将第 i 个 LED 的颜色设置为黑色(关掉它)
    strip.show(); // 用新颜色更新LED灯带
    delay(100); // 等待100毫秒
  }
}
Common Course Links
Common Course Files
|||您可能需要的东西
-
亚马逊从亚马逊购买WS2812 LED灯条amzn.to
-
易趣从eBay购买WS2812 LED条带ebay.us
-
全球速卖通从AliExpress-2购买WS2812 LED灯带s.click.aliexpress.com
-
全球速卖通从AliExpress购买WS2812 LED灯条s.click.aliexpress.com
-
Banggood从Banggood购买WS2812 LED灯带banggood.com
资源与参考
尚无可用资源。
文件📁
没有可用的文件。