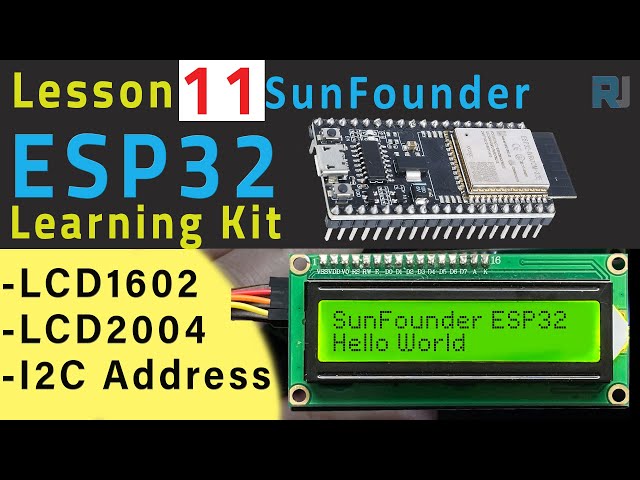
ESP32 Tutorial 11/55 - Using LCD1602 LCD2004 with ESP32 -SunFounder's ESP32 IoT Learning kit
In this tutorial, we will explore how to use the LCD1602 and LCD2004 with the ESP32 microcontroller. These LCD screens allow us to display text and other information effectively, enhancing our projects with visual feedback. We will also cover how to adjust the contrast to ensure readability.

The ESP32, part of the SunFounder ESP32 IoT Learning kit, has built-in Wi-Fi and Bluetooth capabilities, making it a powerful tool for various IoT applications. By connecting the LCD to the ESP32, we can easily display messages or data outputs from our code, making our projects more interactive and user-friendly (in video at 00:30).
Hardware Explained
The main components we will use include the ESP32 microcontroller and the LCD1602 or LCD2004 display module. The ESP32 will serve as the brain of our project, processing inputs and controlling outputs, including the LCD display.
The LCD module communicates via I2C, which simplifies wiring by using only two data pins (SDA and SCL) for communication, along with power and ground connections. This setup significantly reduces the complexity of connecting multiple pins, allowing for a cleaner and more manageable circuit.
Datasheet Details
| Manufacturer | SunFounder |
|---|---|
| Part number | LCD1602 |
| Logic/IO voltage | 5 V |
| Supply voltage | 5 V |
| Display size | 16 x 2 characters |
| Backlight | Yes |
| Interface | I2C |
| Dimensions | 80 x 36 mm |
| Notes / variants | Commonly used with I2C address 0x27 |

- Ensure proper voltage supply (5 V) to prevent damage.
- Use short wires to minimize interference on I2C lines.
- Adjust the potentiometer for optimal contrast visibility.
- Check I2C address if the display does not initialize (common addresses: 0x27, 0x3F).
- Clear the display before updating messages to avoid overlap.
Wiring Instructions


To wire the LCD1602 to the ESP32, first connect the ground pin of the LCD to the ground pin on the ESP32. Then, connect the VCC pin of the LCD to the 5V output of the ESP32. For the I2C communication, connect the SDA pin of the LCD to pin 21 on the ESP32, and connect the SCL pin of the LCD to pin 22 on the ESP32. Make sure the connections are secure to avoid any communication issues.
It is important to note that while the ESP32 operates at 3.3V logic levels, the LCD1602 requires 5V for proper operation. Therefore, ensure that you are using the correct voltage supply to avoid damaging the LCD. If you are using a different LCD size, adjust the wiring accordingly based on the I2C address and specifications.
Code Examples & Walkthrough
In the code, we begin by including the necessary libraries for I2C communication and the LCD. We create an instance of the LCD using the I2C address 0x27 and specify that it has 16 columns and 2 rows.
#include
#include

LiquidCrystal_I2C lcd(0x27,16,2);  // set the LCD address to 0x27 for a 16 chars and 2 line display
This setup allows us to control the LCD easily. In the setup() function, we initialize the LCD and turn on the backlight, followed by printing a welcome message.
void setup()
{
  lcd.init(); // initialize the lcd
  lcd.backlight(); // Turns on the LCD backlight.
  lcd.print("Hello, world!");   // Print a message to the LCD.
  delay(3000);
}
In the loop() function, we continuously update the display by clearing it, setting the cursor position, and printing the current count value. This demonstrates how the LCD can dynamically show changing information.
void loop()
{
  lcd.clear();
  lcd.setCursor(0, 0); // Sets the cursor position to the first row and first column (0, 0).
  lcd.print("COUNT: ");
  lcd.print(count); // Prints the current value of the count variable.
  delay(1000);
  count++; // Increments the counter by 1.
}
The full code will load below the article, where you can see the complete implementation and any additional functionalities added for your project.
Demonstration / What to Expect
Once everything is connected and the code is uploaded, the LCD should display "Hello, world!" for 3 seconds before starting a counter that increments every second. You can adjust the contrast using the potentiometer to ensure that the text is easily readable (in video at 08:45).
If you encounter any issues, check the wiring connections and ensure the correct I2C address is being used. A common mistake is not matching the LCD's I2C address with what is set in the code, which can prevent the display from functioning properly.
Video Timestamps
- 00:00 Start
- 1:47 Introduction to LCD
- 3:26 Documentation page
- 5:06 How to wire LCD with ESP32
- 9:07 Selecting ESP32 board and COMP port on Arduino
- 8:51 Installing LCD Library
- 10:06 Finding I2C address for LCD
- 14:00 Arduino Code explained
- 17:50 Demonstration
- 20:54 using LCD2004 with ESP32
- 22:58 Green LCD1602 is better than blue
Images
#include <Wire.h>
#include <LiquidCrystal_I2C.h>

//SDA->21,SCL->22
LiquidCrystal_I2C lcd(0x27,16,2);  // set the LCD address to 0x27 for a 16 chars and 2 line display

int count = 0;

void setup()
{
  lcd.init();// initialize the lcd
  lcd.backlight(); // Turns on the LCD backlight.
  lcd.print("Hello, world!");   // Print a message to the LCD.
  delay(3000);
}

void loop()
{
  lcd.clear();
  lcd.setCursor(0, 0); // Sets the cursor position to the first row and first column (0, 0).
  lcd.print("COUNT: ");
  lcd.print(count); // Prints the current value of the count variable.
  delay(1000);
  count++; // Increments the counter by 1.
}
Common Course Links
Common Course Files
Resources & references
-
DocumentationESP32 Tutorial 11/55- SunFounder doc page for LCDdocs.sunfounder.com
Files📁
No files available.