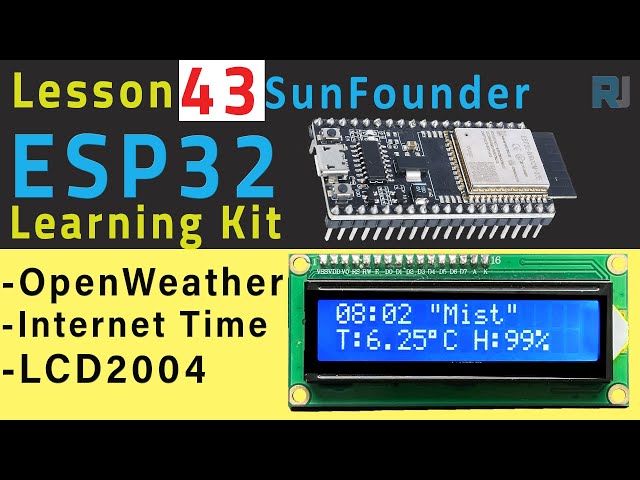
ESP32 Tutorial 43/55 - IoT Internet Weather Station | SunFounder's ESP32 IoT Learning kit
In this tutorial, we will build an Internet-connected weather station using the ESP32 and its camera extension board from SunFounder. This project enables the ESP32 to retrieve real-time weather data, including temperature and humidity, and display it on an LCD screen. This application not only showcases the capabilities of the ESP32 but also demonstrates how to fetch and parse data from an external API.

As we progress through the tutorial, we will wire the components, configure the code, and ensure everything works seamlessly together. The end result will be a fully functional weather station that updates its readings every 10 seconds, providing a clear and concise display of current weather conditions (in video at 00:30).
Hardware Explained
The main components used in this project include the ESP32 microcontroller, an LCD display, and the necessary wiring. The ESP32 is equipped with built-in Wi-Fi and Bluetooth, allowing it to connect to the Internet and retrieve data. The LCD display will show the current weather information, including temperature and humidity.
The LCD we are using is a 16x2 character display, which means it can show two lines of 16 characters each. This will be sufficient for our weather information output. The ESP32 will communicate with the LCD via I2C, which simplifies the wiring by using only two data lines.
Datasheet Details
| Manufacturer | Espressif |
|---|---|
| Part number | ESP32-WROOM-32 |
| Logic/IO voltage | 3.3 V |
| Supply voltage | 3.0–3.6 V |
| Output current (per channel) | 12 mA max |
| Peak current (per channel) | 40 mA |
| PWM frequency guidance | 1 kHz |
| Input logic thresholds | 0.3 V (low), 0.7 V (high) |
| Voltage drop / RDS(on) / saturation | 0.5 V |
| Thermal limits | -40 to 85 °C |
| Package | QFN48 |
| Notes / variants | Includes multiple variants for different applications |
- Ensure the ESP32 is powered with a stable 3.3 V supply.
- Use a common ground for all components to avoid communication issues.
- Check the I2C address of the LCD using an I2C scanner.
- Monitor the Wi-Fi connection status to avoid disconnections during data fetching.
- Handle JSON parsing errors for robustness in data retrieval.
Wiring Instructions

To wire the components, start by connecting the LCD to the ESP32. The LCD will use the I2C interface, so connect the SDA pin of the LCD to GPIO21 on the ESP32 and the SCL pin to GPIO22. Make sure to connect the power and ground pins of the LCD to the 5V and GND pins on the ESP32, respectively.
Next, ensure that the ESP32 is powered correctly using the included lithium battery or a USB connection. The battery provides portability, while the USB connection is useful for programming and debugging. Finally, check all connections are secure to avoid any loose wiring issues that could disrupt functionality.
Code Examples & Walkthrough
In the setup phase of our program, we initialize the serial communication and connect to the Wi-Fi network using the provided SSID and password. The following code snippet handles the Wi-Fi connection:
WiFi.begin(ssid, password);
while(WiFi.status() != WL_CONNECTED) {
  delay(500);
  Serial.print(".");
}
Serial.println("Connected to WiFi network with IP Address: ");
Serial.println(WiFi.localIP());
This code ensures that the ESP32 connects to the specified Wi-Fi network before proceeding with any data fetching. If the connection fails, it will continuously attempt to reconnect.
Next, we need to send an HTTP GET request to retrieve weather data. This is accomplished using the following code snippet:
String serverPath = "http://api.openweathermap.org/data/2.5/weather?q=" + city + "," + countryCode + "&units=metric" + "&APPID=" + openWeatherMapApiKey;
jsonBuffer = httpGETRequest(serverPath.c_str());
Here, we construct the URL for the API request, which includes the city, country code, and our API key. The httpGETRequest function is then called to fetch the weather data.
Finally, we parse the JSON response and display the relevant data on the LCD:
lcd.clear();
lcd.setCursor(0, 0);
lcd.print(time);
lcd.print(" ");
lcd.print(myObject["weather"][0]["main"]);
lcd.setCursor(0, 1);
lcd.print("T:");
lcd.print(myObject["main"]["temp"]);
lcd.print("\xDF");  // "°" char
lcd.print("C ");
lcd.print("H:");
lcd.print(myObject["main"]["humidity"]);
lcd.print("%");
This code snippet updates the LCD display with the current time, weather condition, temperature, and humidity. It clears the previous display and sets the cursor to the appropriate positions for each line.
Demonstration / What to Expect
Upon successful wiring and programming, your weather station will connect to the Wi-Fi and start fetching weather data every 10 seconds. You'll see the current temperature, humidity, and weather conditions displayed on the LCD screen. If the ESP32 fails to connect to Wi-Fi, it will print an error message to the serial monitor.
Be mindful of the API call limits to avoid being blocked from the OpenWeatherMap service. If you encounter any issues with data retrieval, check your API key and ensure your city and country code are correctly specified (in video at 15:45).
Video Timestamps
- 00:00 Start
- 2:00 introduction to project
- 5:04 OpenWeather Account
- 6:11 Wiring
- 8:05 Arduino code explained
- 14:13 JASON Elements in code
- 20:23 Selecting ESP32 board and COM port in Arduino IDE
- 22:05 Demonstration of Weather Station on LCD1602
- 23:45 Demonstration of Weather Station on LCD2004
图像
/*
 * 鲁伊·桑托斯
 * 完整项目详情请访问 https://RandomNerdTutorials.com/esp32-http-get-open-weather-map-thingspeak-arduino/
 *
 * 在此免费授权任何获取本软件及相关文档文件副本的人。
 *
 * 上述版权声明和本许可声明应包含在所有副本或软件的重要部分中。
 */
#include <LiquidCrystal_I2C.h>
#include <WiFi.h>
#include <HTTPClient.h>
#include <Arduino_JSON.h>


 // 将下列变量替换为您的SSID/密码组合。
const char* ssid = "SSID";
const char* password = "PASSWORD";

 // 您的域名及其 URL 路径或带路径的 IP 地址
String openWeatherMapApiKey = "openWeatherMapApiKey";

 // 用您的国家代码和城市替换
 // 通过 https://openweathermap.org/find 查找国家代码
String city = "CITY";
String countryCode = "COUNTRY CODE";

 // 默认定时器设置为 10 秒,供测试之用。
 // 对于最终应用程序,请检查每小时/每分钟的API调用限制,以避免被封锁/禁用。
unsigned long lastTime = 0;
 // 定时器设置为10分钟(600000)
 // 无符号长整型定时器延迟 = 600000;
 // 设置计时器为10秒(10000)
unsigned long timerDelay = 10000;

String jsonBuffer;

 // 设置液晶显示器的列数和行数
int lcdColumns = 16;
int lcdRows = 2;

 // 设置LCD地址、列数和行数
 // SDA -> GPIO21,SCL -> GPIO22
 // LCD地址是0x27,运行一个I2C扫描器代码。
LiquidCrystal_I2C lcd(0x27, lcdColumns, lcdRows);

 // NTP服务器时间
const char* ntpServer = "pool.ntp.org";
long  gmtOffset_sec = 0;
int   daylightOffset_sec = 0; // 3600;

void setup() {
  Serial.begin(115200);

 // WiFi
  WiFi.begin(ssid, password);
  Serial.println("Connecting");
  while(WiFi.status() != WL_CONNECTED) {
    delay(500);
    Serial.print(".");
  }
  Serial.println("");
  Serial.print("Connected to WiFi network with IP Address: ");
  Serial.println(WiFi.localIP());
  Serial.println("Timer set to 10 seconds (timerDelay variable), it will take 10 seconds before publishing the first reading.");

 // 初始化LCD
  lcd.init();
 // 打开LCD背光
  lcd.backlight();

}

void loop() {
 // 发送一个HTTP GET请求
  if ((millis() - lastTime) > timerDelay) {
 // 检查WiFi连接状态
    if(WiFi.status()== WL_CONNECTED){
      String serverPath = "http: // api.openweathermap.org/data/2.5/weather?q=" + city + "," + countryCode + "&units=metric" + "&APPID=" + openWeatherMapApiKey;

      jsonBuffer = httpGETRequest(serverPath.c_str());
      Serial.println(jsonBuffer);
      JSONVar myObject = JSON.parse(jsonBuffer);

 // JSON.typeof(jsonVar) 可以用来获取变量的类型。
      if (JSON.typeof(myObject) == "undefined") {
        Serial.println("Parsing input failed!");
        return;
      }

 // JSON对象 =
 // Serial.println(myObject);
 // 温度:
 // Serial.println(myObject["main"]["temp"]);
 // 压力:
 // Serial.println(myObject["main"]["pressure"]);
 // 湿度:
 // Serial.println(myObject["main"]["湿度"]);
 // 风速:
 // Serial.println(myObject["风"]["速度"]);

 // 获取时间
      gmtOffset_sec =  myObject["timezone"];
      configTime(gmtOffset_sec, daylightOffset_sec, ntpServer);
 // 时间 =
      String time = printLocalTime();

 // 液晶打印
      lcd.clear();
      lcd.setCursor(0, 0);
      lcd.print(time);
      lcd.print(" ");
      lcd.print(myObject["weather"][0]["main"]);
      lcd.setCursor(0, 1);
      lcd.print("T:");
      lcd.print(myObject["main"]["temp"]);
      lcd.print("\xDF"); // "°" 字符
      lcd.print("C ");
      lcd.print("H:");
      lcd.print(myObject["main"]["humidity"]);
      lcd.print("%");

    }
    else {
      Serial.println("WiFi Disconnected");
    }
    lastTime = millis();
  }
}

String printLocalTime(){
  struct tm timeinfo;
  if(!getLocalTime(&timeinfo)){
    Serial.println("Failed to obtain time");
    return "null";
  }
 // Serial.println(&timeinfo, "%A, %B %d %Y %H:%M:%S");

 // 获取时间格式 HH:MM
  char timeHour[3];
  strftime(timeHour,3, "%H", &timeinfo);
  char timeMinute[3];
  strftime(timeMinute,3, "%M", &timeinfo);
  String time = String(timeHour) + ":" + String(timeMinute);
  Serial.println(time)
;  return time;
}


String httpGETRequest(const char* serverName) {
  WiFiClient client;
  HTTPClient http;

 // 您的域名及其 URL 路径或带路径的 IP 地址
  http.begin(client, serverName);

 // 发送HTTP POST请求
  int httpResponseCode = http.GET();

  String payload = "{}";

  if (httpResponseCode>0) {
    Serial.print("HTTP Response code: ");
    Serial.println(httpResponseCode);
    payload = http.getString();
  }
  else {
    Serial.print("Error code: ");
    Serial.println(httpResponseCode);
  }
 // 免费资源
  http.end();

  return payload;
}
Common Course Links
Common Course Files
资源与参考
-
文档ESP32 教程 43/55 - SunFounder 物联网天气站文档页面docs.sunfounder.com
文件📁
没有可用的文件。