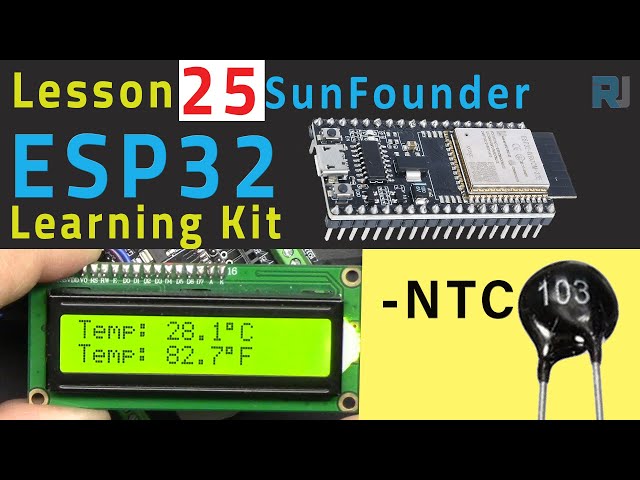
ESP32 Tutorial 25/55 - Measuring Temperature using NTC & LCD | SunFounder's ESP32 IoT Learning kit
In this tutorial, we will learn how to measure temperature using a Negative Temperature Coefficient (NTC) thermistor and display the readings on an LCD screen using the ESP32 microcontroller. The project will involve connecting an NTC thermistor to the ESP32 and using an LCD to show temperature readings in both Celsius and Fahrenheit. This is a great way to get started with temperature sensing and display techniques using the ESP32 platform.

We will be utilizing SunFounder's ESP32 extension board, which enhances the capabilities of the ESP32 with built-in Wi-Fi and Bluetooth. This board can be easily integrated with various sensors and displays, making it ideal for IoT projects. The NTC thermistor will provide temperature readings based on its resistance, which varies inversely with temperature. For further clarification on the setup and code, be sure to check out the video (in video at 00:00).
Hardware Explained
The main components used in this project include the ESP32 microcontroller, an NTC thermistor, a resistor, and an LCD display. The ESP32 serves as the central processing unit, handling data from the thermistor and controlling the LCD display. The NTC thermistor changes its resistance according to temperature, allowing us to calculate the temperature based on the voltage divider configuration with a fixed resistor.

The LCD display will show the temperature readings in both Celsius and Fahrenheit. We will use the I2C protocol to communicate with the LCD, which simplifies wiring by reducing the number of pins needed. The NTC thermistor has a characteristic where its resistance decreases with an increase in temperature, which is crucial for our calculations.
Datasheet Details
| Manufacturer | SunFounder |
|---|---|
| Part number | NTC Thermistor |
| Nominal Resistance | 10 kΩ |
| Beta Value | 3950 K |
| Temperature Range | -40°C to 125°C |
| Package | Axial |
- Ensure the thermistor is rated for the expected temperature range.
- Use a 10 kΩ resistor for the voltage divider; otherwise, readings will be inaccurate.
- Verify connections to avoid short circuits.
- Keep the I2C address of the LCD correct (typically 0x27).
- Use appropriate power supply levels for the ESP32 and peripherals.
- Check that the serial monitor baud rate matches the code settings (115200).
Wiring Instructions


To wire the components, start by connecting the NTC thermistor to the ESP32. The thermistor has no polarity, so it can be connected in either direction. Connect one lead of the thermistor to the ground (GND) pin on the ESP32. The other lead connects to a 10 kΩ resistor, which then connects to the 3.3V pin on the ESP32. The junction between the thermistor and the resistor will connect to pin 35 on the ESP32, which will read the voltage for temperature calculations.
For the LCD, connect the ground pin (typically the second pin from the top) to GND on the ESP32. Then, connect the VCC (often the first pin) to the 5V pin on the ESP32. The SDA pin (usually the third pin) should connect to pin 21 on the ESP32, and the SCL pin (often the fourth pin) should connect to pin 22. Ensure all connections are secure and double-check the pin numbers to avoid any mistakes.
Code Examples & Walkthrough
The code begins by defining the constants for the thermistor, including the pin number, reference voltage, and resistance values. The setup function initializes the serial communication and sets the thermistor pin as an input.
const int thermistorPin = 35; // Pin connected to the thermistor
const float referenceVoltage = 3.3;
const float referenceResistor = 10000; // the 'other' resistor
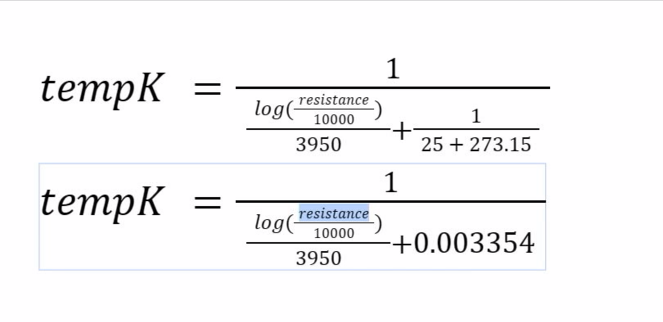
The main loop reads the analog value from the thermistor pin, calculates the resistance, and then computes the temperature in both Celsius and Fahrenheit using the Beta parameter equation. The calculated values are printed to the serial monitor.
int adcValue = analogRead(thermistorPin); // Read ADC value
float voltage = (adcValue * referenceVoltage) / 4095.0; // Calculate voltage
float resistance = (voltage * referenceResistor) / (referenceVoltage - voltage); // Calculate thermistor resistance
Finally, the temperature is displayed on the LCD. The lcd.print() function is used to show the temperature values, along with the degree symbol.
lcd.setCursor(0, 0);
lcd.print("Temp: ");
lcd.print(tempC, 1);
lcd.write(223); // Degree symbol
lcd.print("C");
This code effectively updates the LCD every 300 milliseconds with the latest temperature readings, allowing for real-time monitoring.
Demonstration / What to Expect
Upon running the code and completing the wiring, you should see the temperature readings displayed on the LCD in both Celsius and Fahrenheit. If you hold the thermistor in your hand, you should notice the temperature increasing as the resistance decreases. Be cautious of reversed polarity and ensure the connections are secure, as improper wiring can lead to inaccurate readings (in video at 04:50).
Video Timestamps
- 00:00 Start
- 1:50 introduction to the project
- 5:32 wiring explained
- 8:20 Arduino NTC code for ESP32 explained
- 13:38 Selecting ESP32 board and COM port in Arduino IDE
- 15:20 NTC measuring Temperature demonstration
- 17:34 NTC temperature on LCD1602 with ESP32
- 18:42 NTC Arduino code with LCD explained
- 21:15 Demonstration of Temperature on LCD
- 23:13 Green LCD or Blue LCD1601?
图像


This code has not been parsed yet. Please return to the admin panel to parse it.This code has not been parsed yet. Please return to the admin panel to parse it.Common Course Links
Common Course Files
资源与参考
-
文档ESP32教程 25/55 - SunFounder NTS温度计文档页面docs.sunfounder.com
-
文档了解NTC热敏电阻docs.sunfounder.com
文件📁
没有可用的文件。