
How to use up to 10 push button switch with 1 Arduino input pin ANPB-V1
How to use up to 10 push button switch with 1 Arduino input pin ANPB-V1
In this article, we learn how to connect up to 10 push buttons to one Arduino input pin. This way we save Arduins pins for other purposes.For each push button we need one resistor. For example if you want to use 5 push buttons, then we need 5 resistors and one ground resistor. Ground resistor should be 50 to 100 times largers than resistors connected to push buttons.
Selecting Resistor for this purpose
In this video I've shown to use 1kΩ resistors and for ground resistors I've selected 100kΩ resistor. We can use carbon film resistors with 10% tolerance or metal film resistors with 1% tolerance. The lower the tolerance number the better the result which allows using more push buttons. For example 1% tolrant resistors are better than 10% tolrant resistors.
Code and video for ANPB-V2 To Control RelayMultiple push button to on pin: Setup with Arduino UNO
Click on image to enlarge
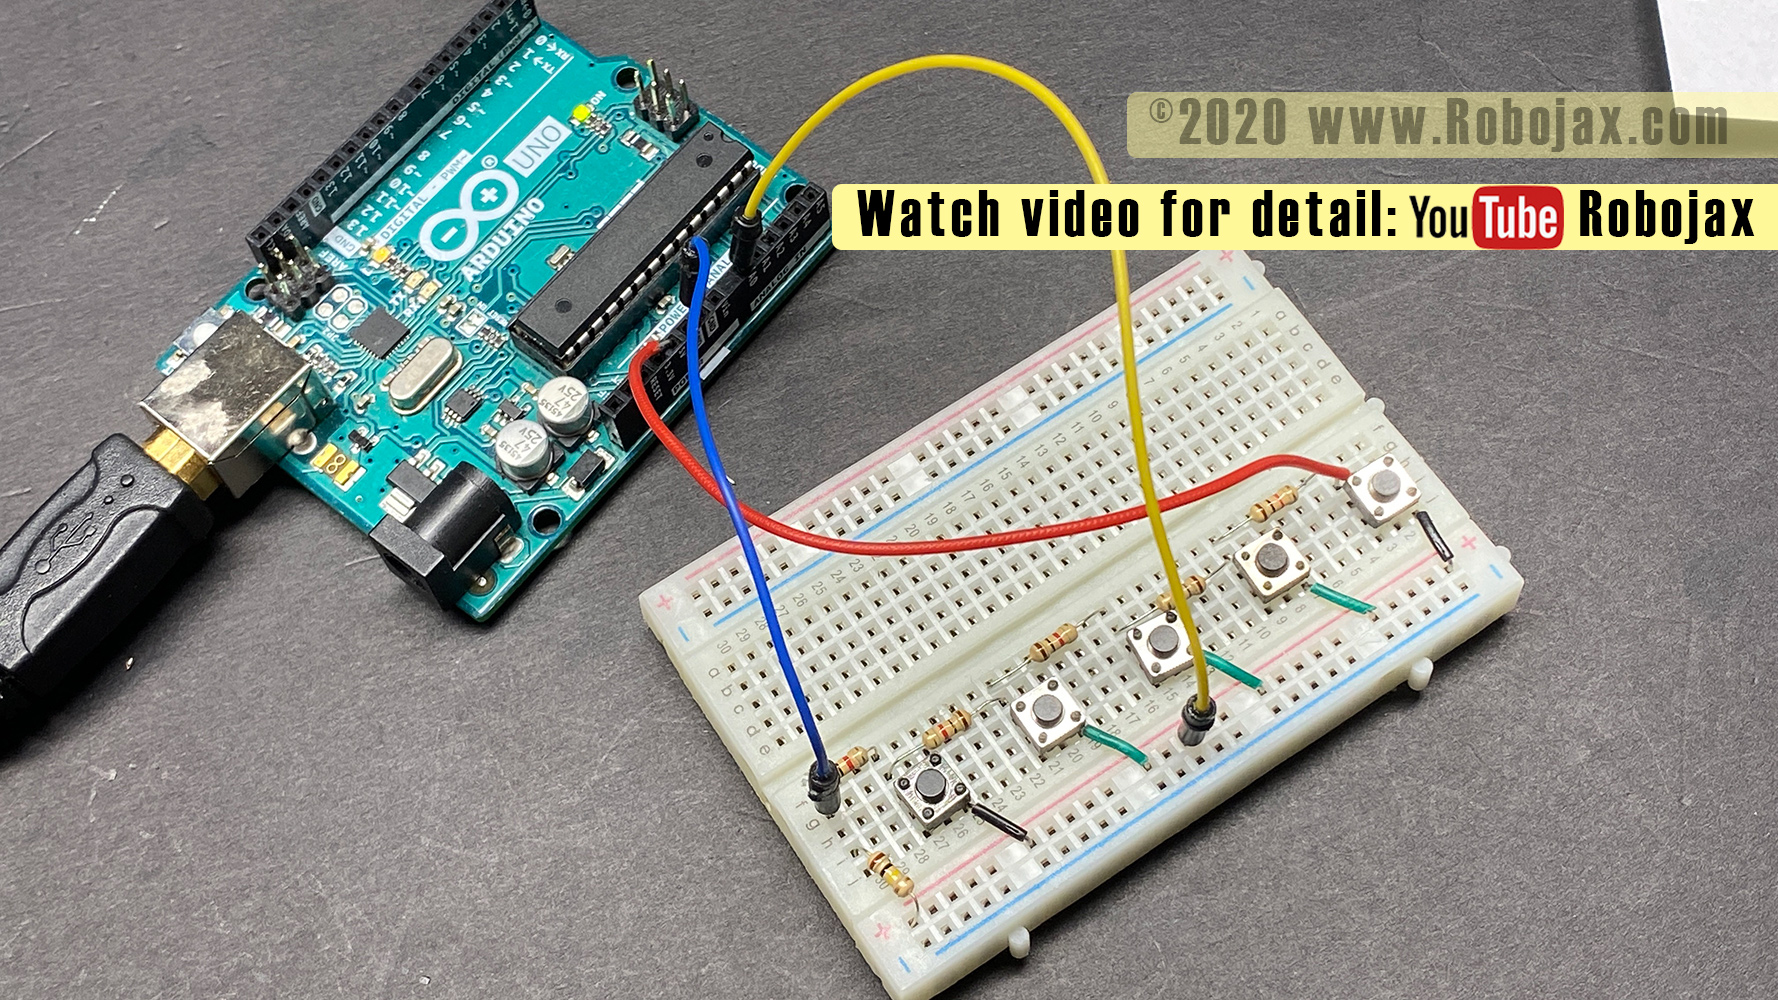
Multiple push button to on pin: Push buttons and resistors on breadboard

Click on image to enlarge
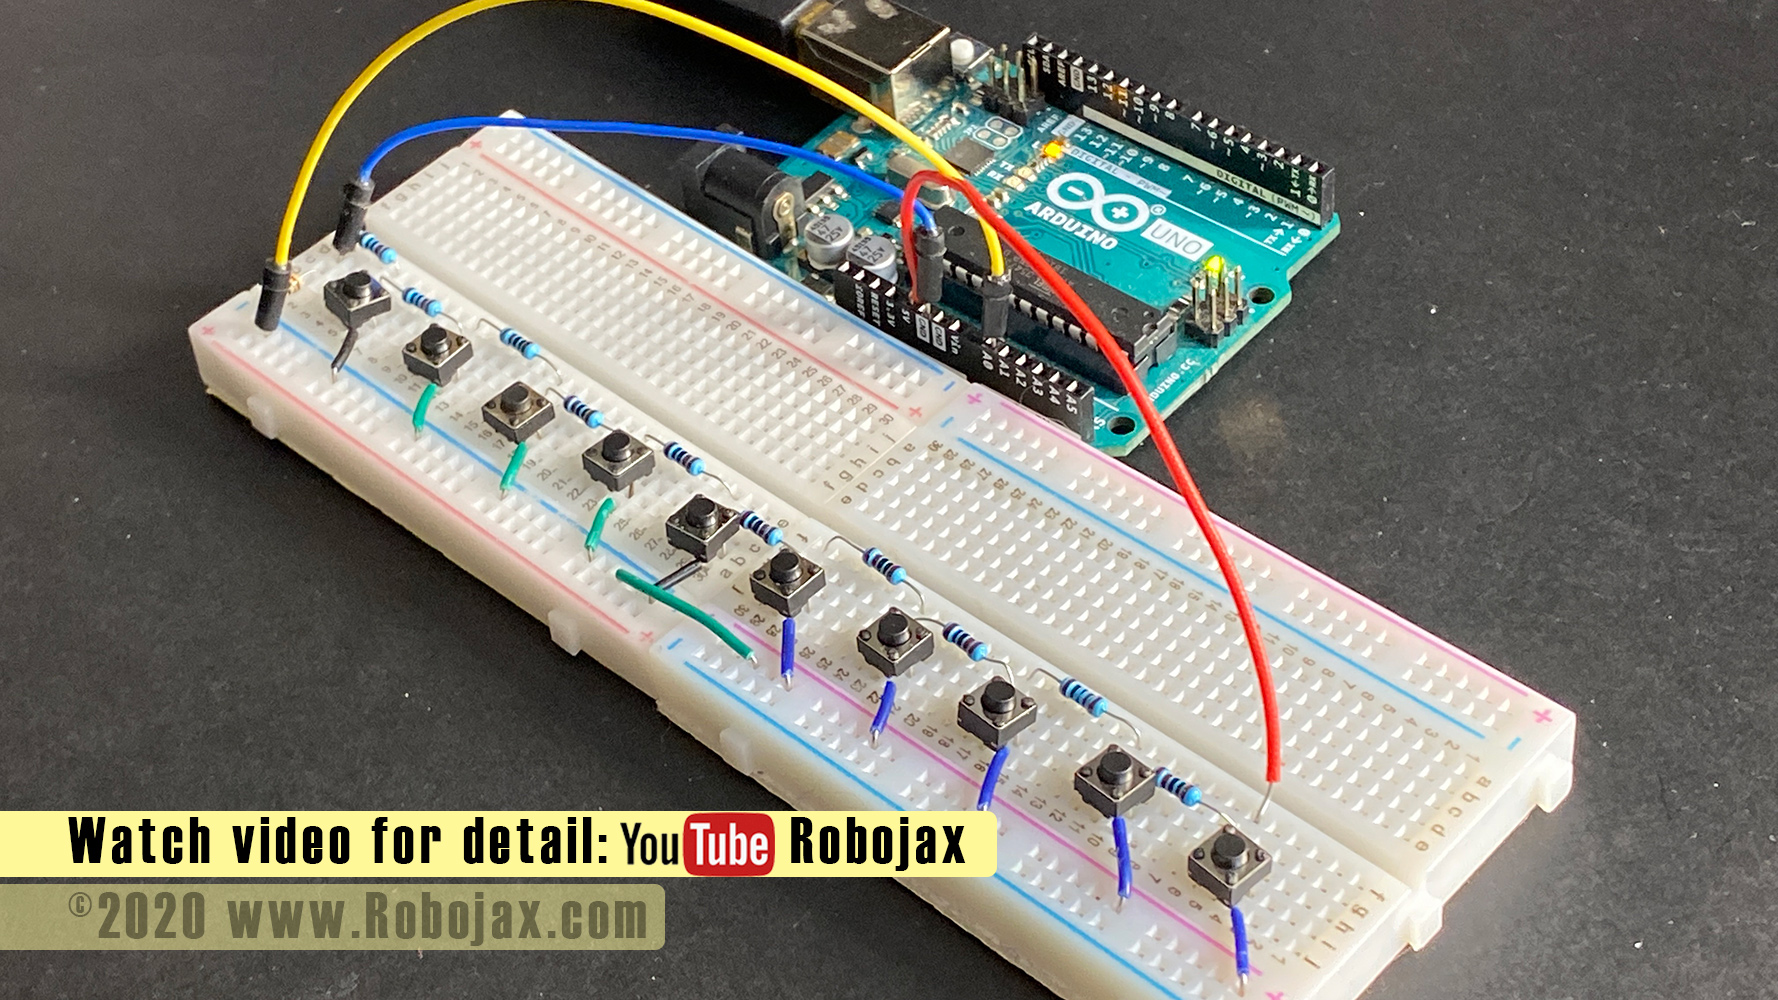
Multiple push button to on pin: Arduion UNO wires to breadbaord

Click on image to enlarge
Multiple push button to on pin: 5 Push buttons with 10% Carbon film resistors

Click on image to enlarge
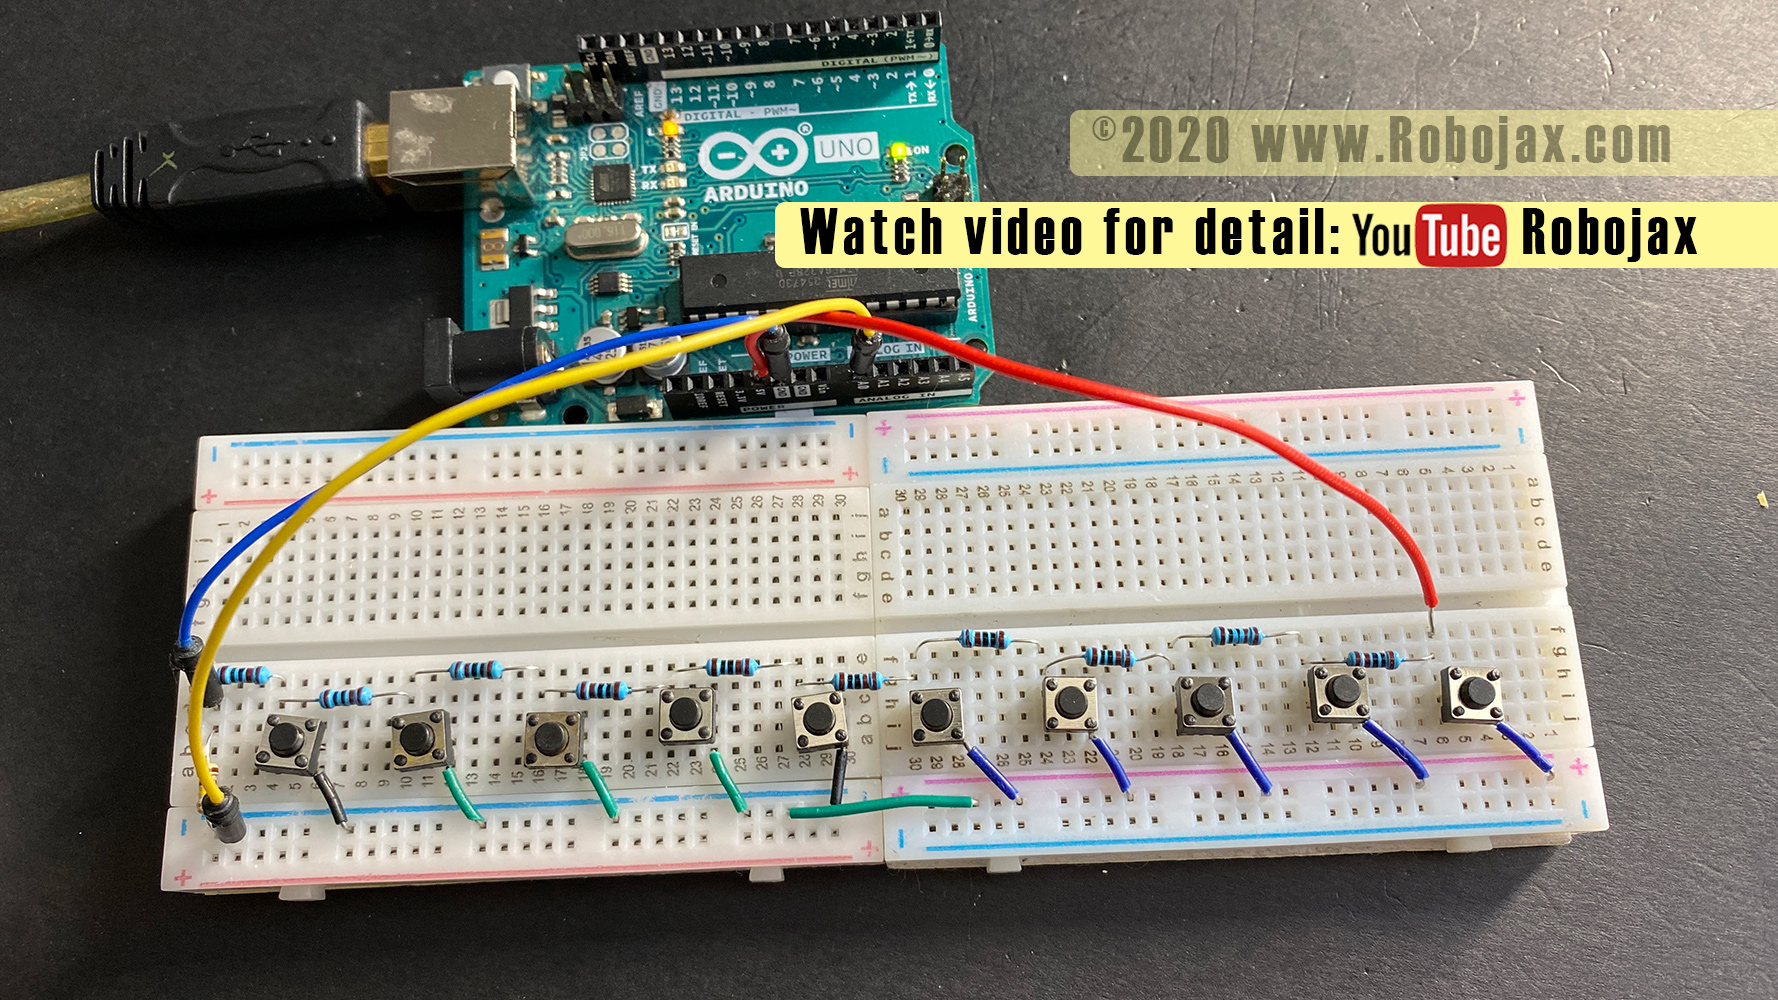
Multiple push button to on pin: Arduino UNO with 10 push buttons and 1% tolerant resisstor
Click on image to enlarge
Multiple push button to on pin: Arduino UNO with 10 push buttons and 1% tolerant resisstor 2
Click on image to enlarge
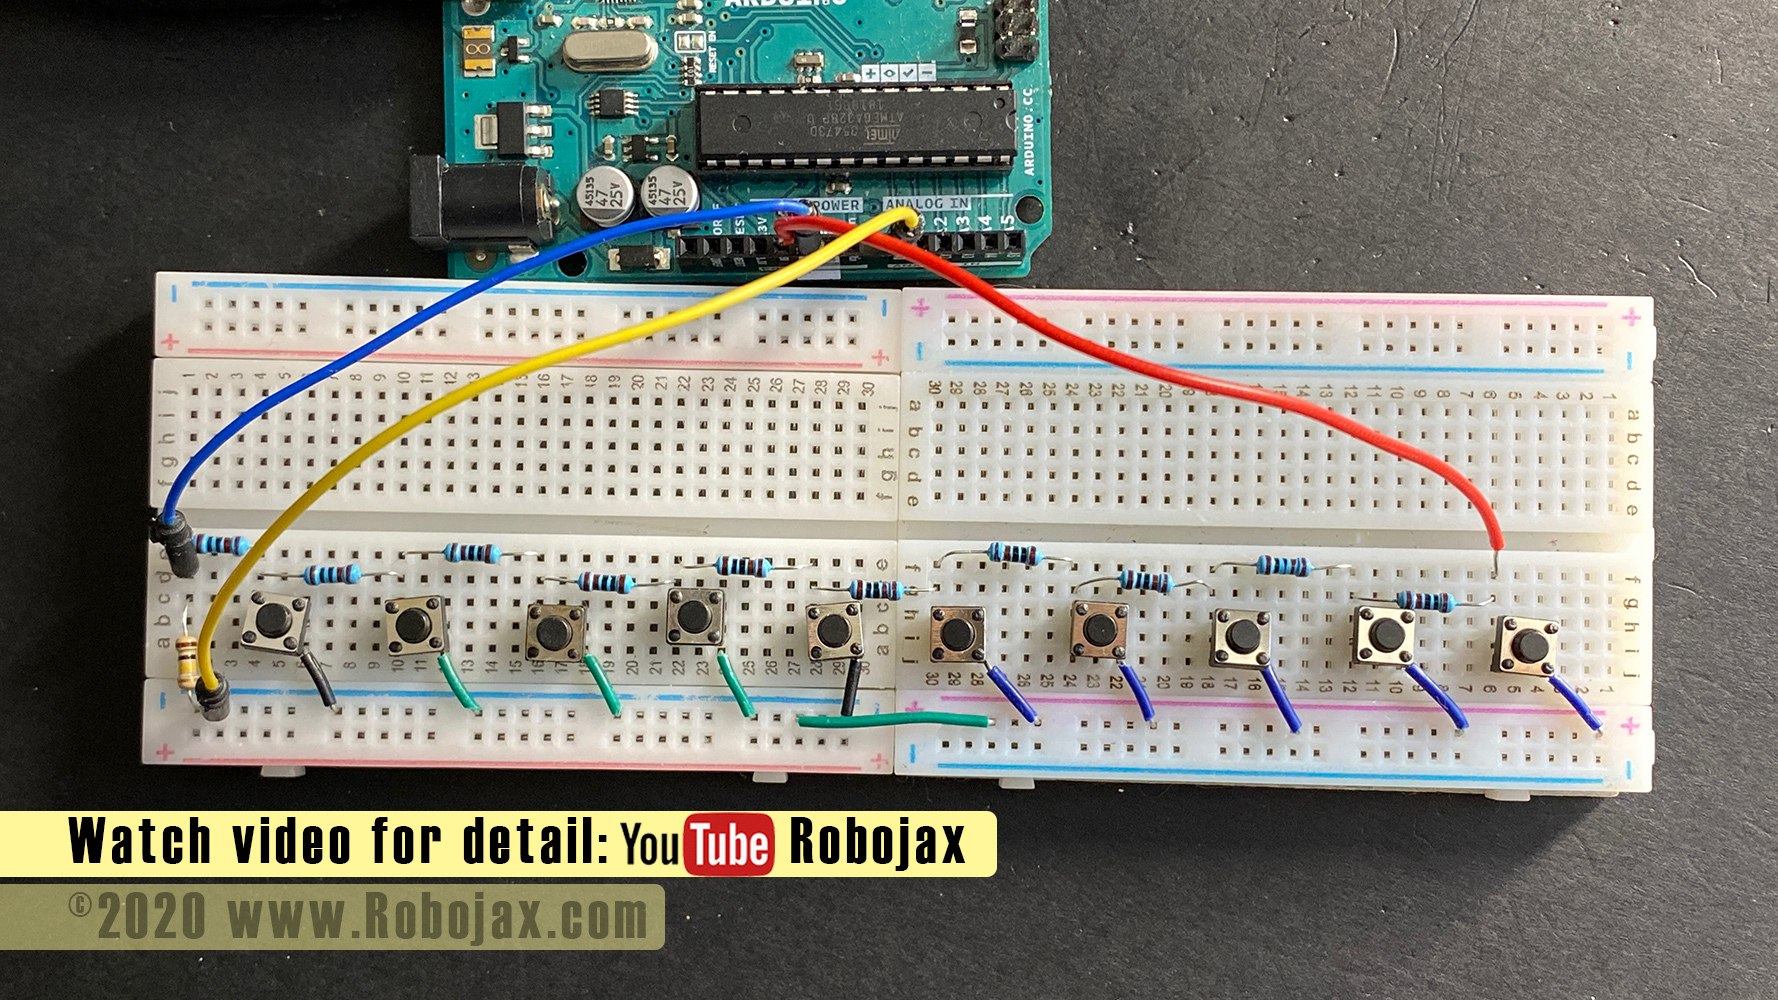
Multiple push button to on pin: Arduino UNO with 10 push buttons and 1% tolerant resisstor 3
Click on image to enlarge
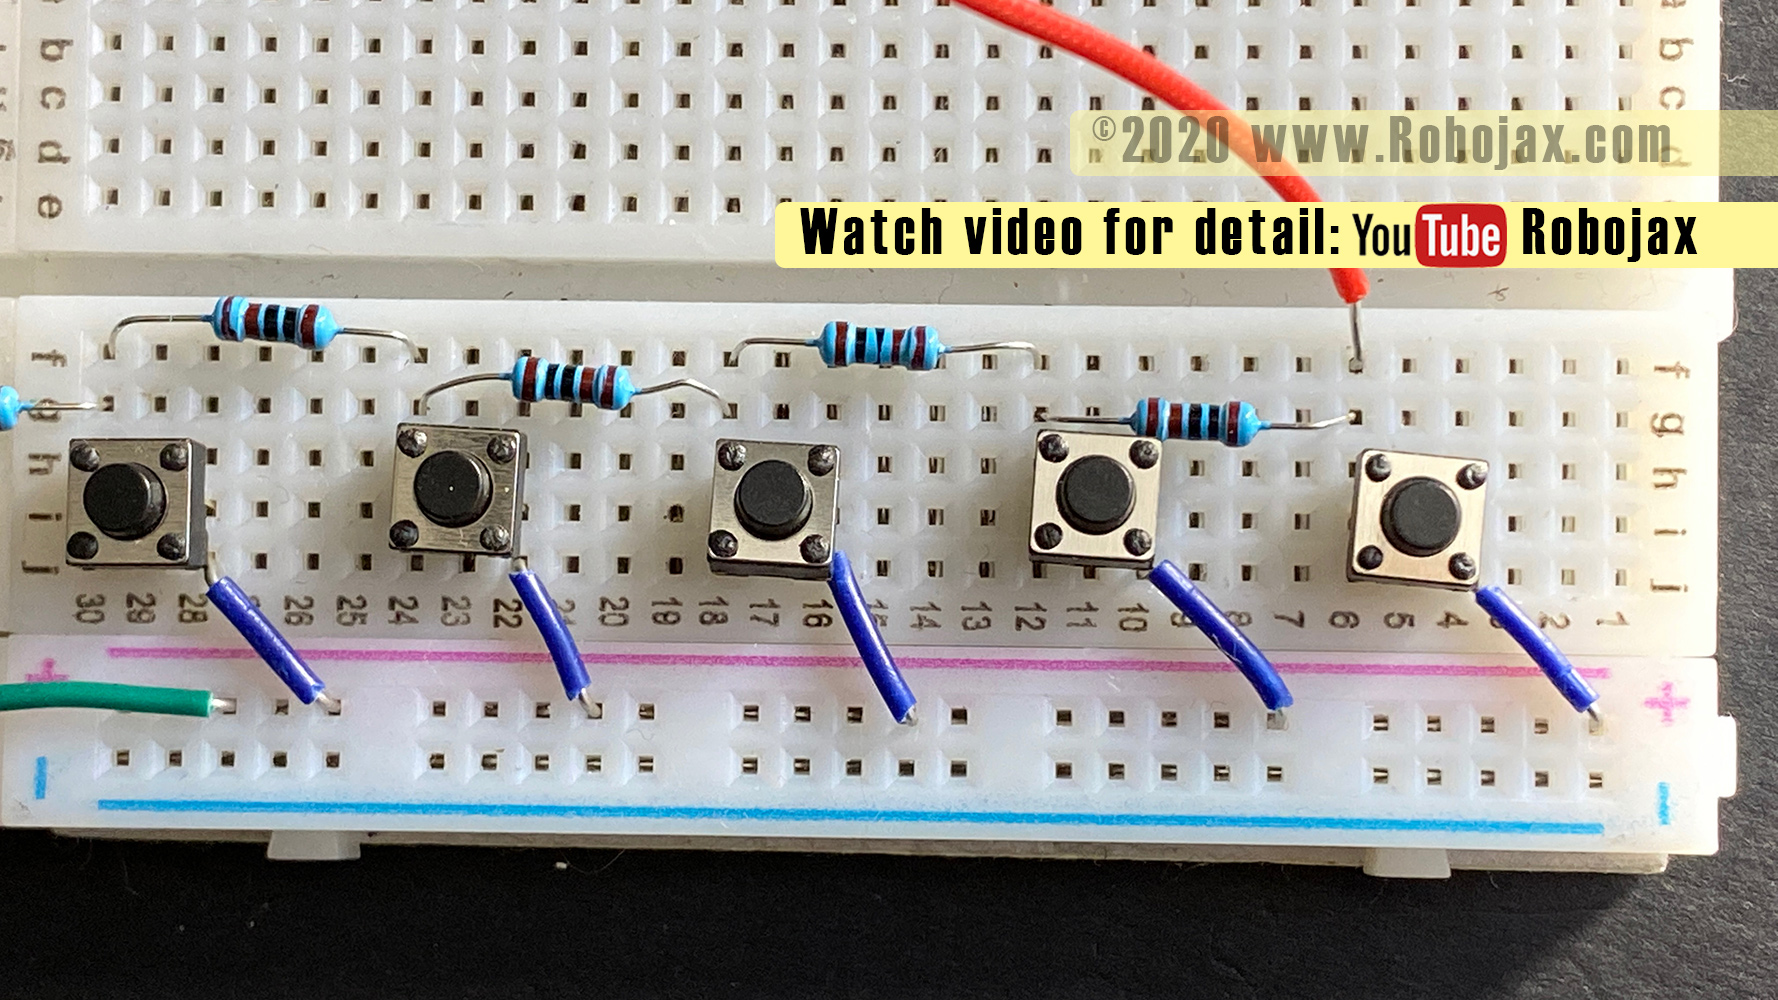
Multiple push button to on pin: Breadboard closeup view with 1% rolerant resistors - Left side

Click on image to enlarge
Multiple push button to on pin: Breadboard closeup view with 1% rolerant resistors - Right side
Click on image to enlarge
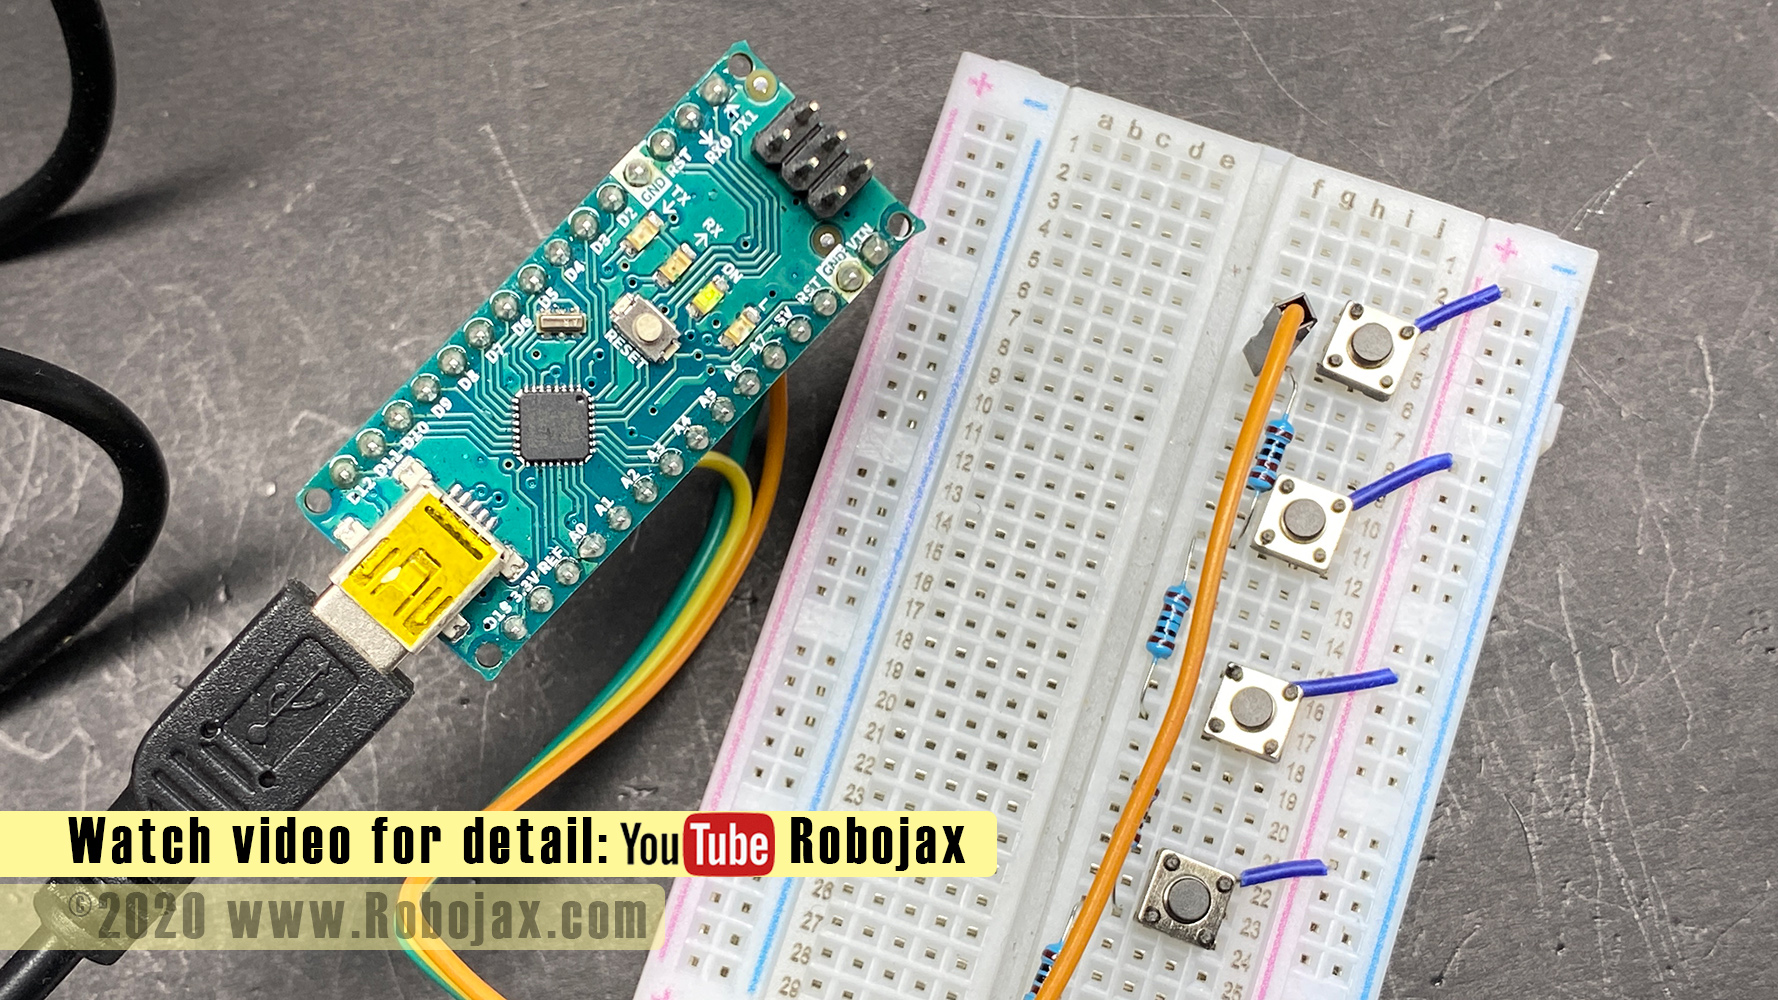
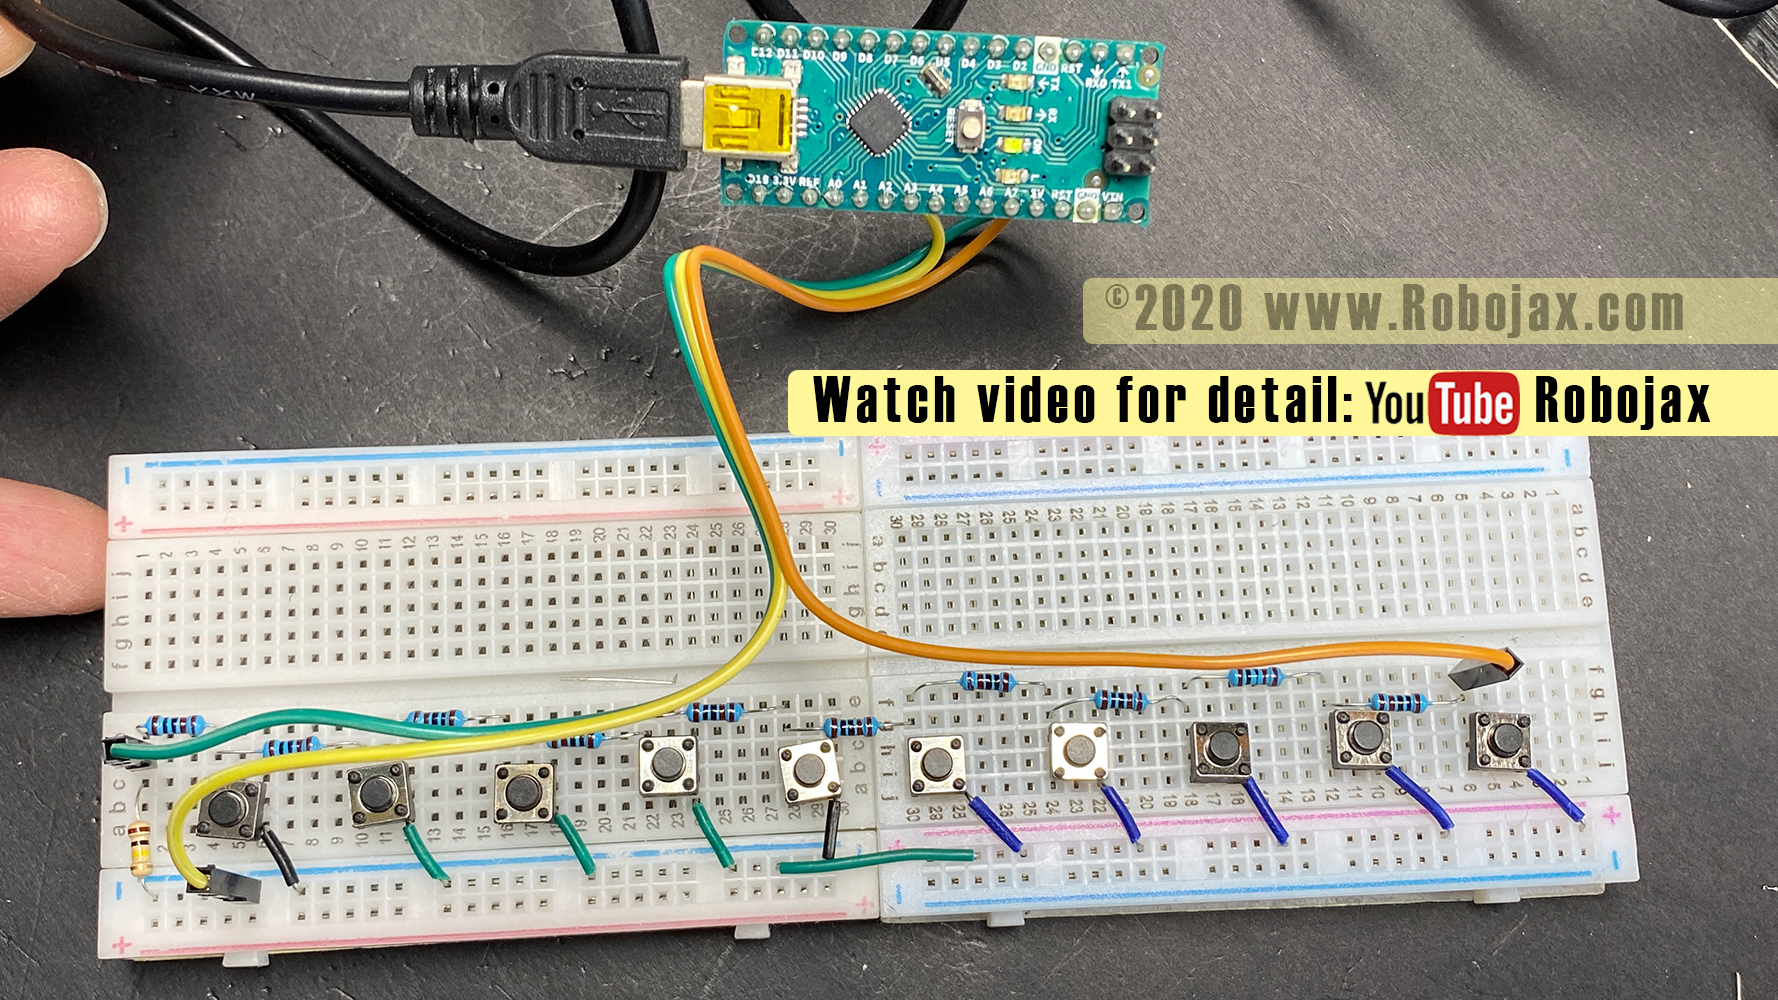
Multiple push button to on pin: Using Arduino NANO
Click on image to enlarge
Multiple push button to on pin: : Using Arduino NANO - 10 push buttons
Click on image to enlarge
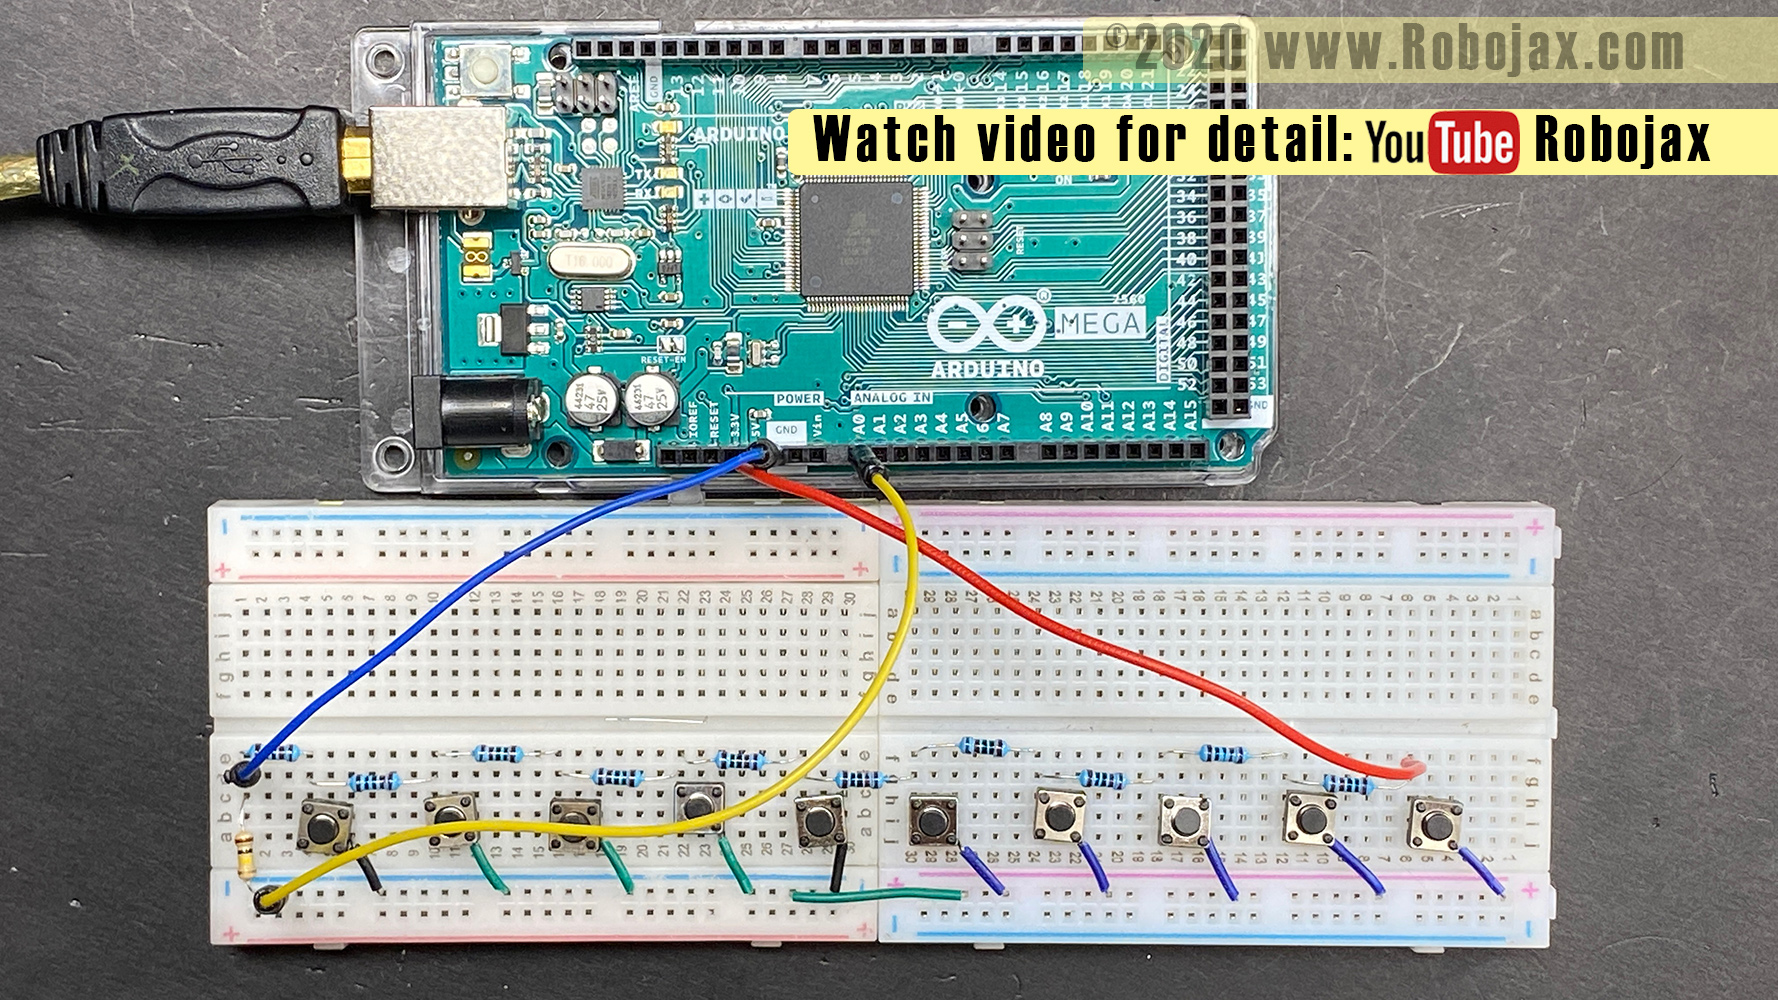
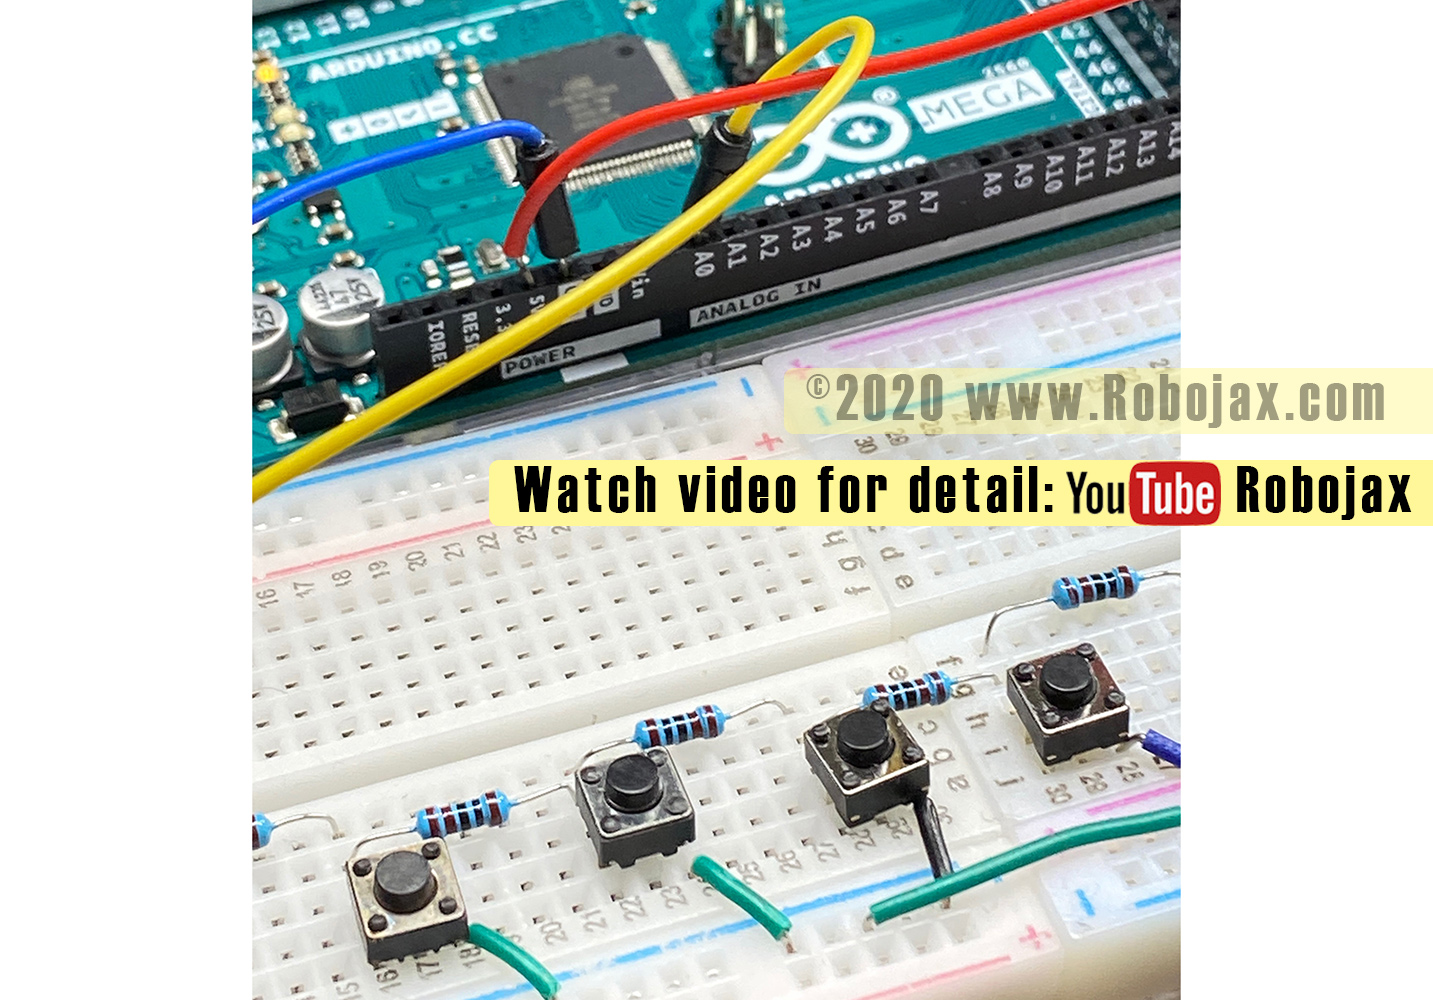
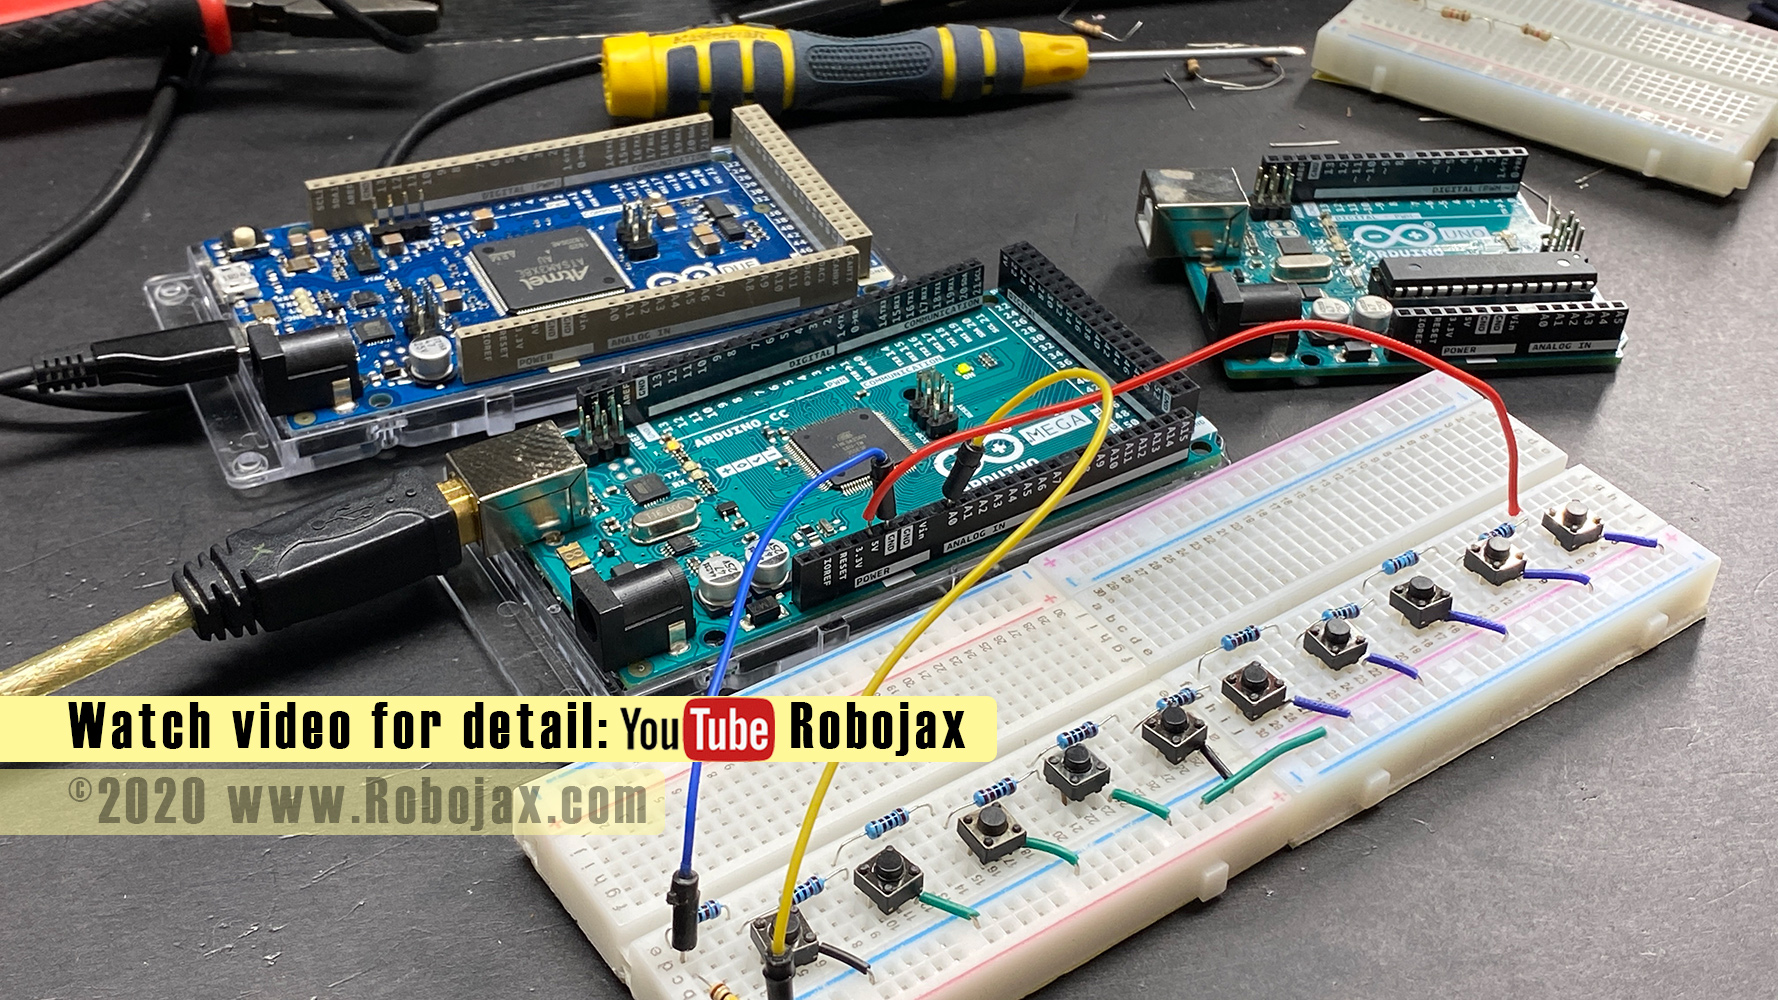
Multiple push button to on pin: Using Arduino MEGA
Click on image to enlarge
Multiple push button to on pin: Using Arduino MEGA - Wires
Click on image to enlarge
Multiple push button to on pin: Arduino MEGA, Due and Uno
Click on image to enlarge
Multiple push button to on pin: Arduino MKR WAN - With 10 push buttons

Click on image to enlarge
Multiple push button to on pin: Arduino MKR WAN

Click on image to enlarge
Related Videso
-Howto use a breadboard -Read any DC voltage using ArduinoResources for this sketch
- Leran Arduino in 30 Minuetes (video)
- Learn Arduino step by step from beginner to Advanced (Course)
- Get Early Access to my videos via Patreon and your name appears on all my videos
Dowload the code
Download this code as zip.
 /*
 * This is Arduino code to use 2 to 10 push button switches with Arduino UNO, Mega, Nano wither with 3.3V or 5V
  There is V2 of this code with video which I used Relays to demonstrate with code: https://youtu.be/AI-zzmSZVfw
 * Written by Ahmad Shamshiri for Robojax Robojax.com
 * on Nov 27 to Dec 04, 2020  in Ajax, Ontario, Canada
 Watch the video instruction for this sketch: https://youtu.be/MeWgnt0YLj8


If you found this tutorial helpful, please support me so I can continue creating
content like this. You can support me on Patreon http://robojax.com/L/?id=63
or make donation using PayPal http://robojax.com/L/?id=64

*
 * Code is available at http://robojax.com/learn/arduino

 * This code is "AS IS" without warranty or liability. Free to be used as long as you keep this note intact.*
 * This code has been download from Robojax.com
    This program is free software: you can redistribute it and/or modify
    it under the terms of the GNU General Public License as published by
    the Free Software Foundation, either version 3 of the License, or
    (at your option) any later version.

    This program is distributed in the hope that it will be useful,
    but WITHOUT ANY WARRANTY; without even the implied warranty of
    MERCHANTABILITY or FITNESS FOR A PARTICULAR PURPOSE.  See the
    GNU General Public License for more details.

    You should have received a copy of the GNU General Public License
    along with this program.  If not, see <https://www.gnu.org/licenses/>.

*/

unsigned int pushbuttonsCount=10;//number of push buttons and resistors
unsigned long resitorValue=1000;
unsigned long resitorToGround=100000;

byte inPin =A0;
float sourceVoltage=5;//5V or 3.3V depending on your arduino
char *push_button_name[]={"PB1", "PB2", "PB3", "PB4","PB5","PB6","PB7", "PB8", "PB9", "PB10"};
bool pbValue[]={0,0,0,0,0,0,0,0,0,0};//this holds the status of each push button
unsigned int outputPin[]={2,3,4,5,6,7,8,9,10,11};


int pushDelayTime=100;//100 milliseconds watch video https://youtu.be/MeWgnt0YLj8 for details
float V_tolerance =0.10;//10% (for example) for 1% set 0.01 for 5% set 0.05
bool debug=false;//to display votlage and calculations
///https://www.arduino.cc/reference/en/language/functions/analog-io/analogread/
//https://www.arduino.cc/reference/en/language/functions/analog-io/analogreference/
const byte BIT_SOLUTION=12;
unsigned int r_total;

void readPushButtons();
void setup()
{
 //analogReadResolution(BIT_SOLUTION);//for Due, MKR only
 Serial.begin(9600);
 Serial.println("Robojax.com Code");
 Serial.print(pushbuttonsCount);
 Serial.println(" Push buttons");
 for(int i=0; i<pushbuttonsCount; i++)
 {
  pinMode(outputPin[i], OUTPUT);//set pin from outputPin[] as output.
 }

}//setup ends

void loop()
{
  readPushButtons();//


    for(unsigned int i=0; i< pushbuttonsCount; i++)
    {
      if(pbValue[i])
      {
        Serial.print("pressed ");
        Serial.println(push_button_name[i]);
        controlOutput(i);//control the output/relay or LED

      }//if


    }//for
  delay(100);
}//loop

/*
 *
 * @brief reads input voltage when push buttons are pressed and updates the value of state of each push button
 * @param none
 * @return none
 * Written by Ahmad Shamshiri for Robojax.com
 * on Dec 04, 2020 in Ajax, Ontatio, Canada
 *
 */
void readPushButtons()
{
   float VR_Calculated,RT, voltage_maximum, voltage_minimum;
   float V_measured =analogRead(inPin);
//        Serial.print("RAW A0: ");
//        Serial.println(V_measured);

   V_measured = V_measured* ( (float)sourceVoltage/(pow(2,BIT_SOLUTION)-1));
//        Serial.print("Measured Voltage: ");
//        Serial.print(V_measured);
//        Serial.println("V");
      if(debug)
      {

        Serial.print("Measured Voltage: ");
        Serial.print(V_measured);
        Serial.println("V");

        Serial.print(pushbuttonsCount);
        Serial.println(" Push buttons");
      }
    for(unsigned int i=0; i< pushbuttonsCount; i++)
    {


       //calculate the R value for parallel resistor with the groudn resistors
      RT= 1/(   (1/ ((i+1)*(float)resitorValue) + (1/(float)resitorToGround)));

      VR_Calculated =( sourceVoltage * RT)/ (  (pushbuttonsCount - (i+1)) *(float)resitorValue + RT);//get voltage for the current resistor i
      if( i+1 == pushbuttonsCount)
      {
        VR_Calculated = sourceVoltage;//for last push button, voltage is the same as power supply
      }

 // watch video https://youtu.be/MeWgnt0YLj8 for details
   voltage_minimum = VR_Calculated-V_tolerance*VR_Calculated;//calcualte minium voltage for 10% (or whaterver set) reistors
   voltage_maximum = VR_Calculated+V_tolerance*VR_Calculated;//calcualte maximum voltage for 10% (or whaterver set) reistors

 if( i< pushbuttonsCount-1 && debug)
 {

  Serial.print("	 R-BP-");
  Serial.print(i+1);
  Serial.print(" ");
  Serial.print(RT);
  Serial.print("Ω");
   if(i==0)
   {
    Serial.print("	");//this is fixing the tab space for first item less than 1000Ω
   }
   Serial.print("	 VR ");
   Serial.print( VR_Calculated );
   Serial.print("V");

   Serial.print("	 V-Min ");
   Serial.print( voltage_minimum );
   Serial.print("V");

   Serial.print("	 V-Max ");
   Serial.print( voltage_maximum );
   Serial.println("V");
 }
      // watch video https://youtu.be/MeWgnt0YLj8 for details
      if( V_measured <= ( voltage_maximum) &&
          V_measured >= ( voltage_minimum)
         )
         {
            pbValue[i]=true;//set puths button value to true
            delay(pushDelayTime);//push time limit
        }else{
          pbValue[i]=false;
        }//if
    }//for

   Serial.println();
}//readPushButtons()


/*
 * controlOutput(int i)
 * @brief contorls the output pin
 * @param i is the corresponding to the push button pressed starting with zero
 * @return none
 * Written by Ahmad Shamshiri for Robojax.com
 * on Dec 04, 2020 in Ajax, Ontatio, Canada
 *
 */
void controlOutput(int i)
{

  digitalWrite(outputPin[i], HIGH);
    if(debug){
  Serial.print("
Pin ");
  Serial.print(outputPin[i]);
  Serial.println(" is ON");
    }
}//controlOutput(int i) end