Using 2 or more Winson WCS Hall Effec Current Sensors with Arduino
Using two or more Winson WCS Hall Effec Current Sensors with Arduino
This tutorial by Robojax explains the WCS1800 Current Sensor, shows how to prepare wiring, explained the Arduino Code and at the end demonstrates measuring DC Current from 0.5A to 35A.
The code is to use two or move WCS Sensors. If you want to use only single sensor, then use the code shown Here.
Topic timing in the video
- 00:56 Introduction to Winson WCS Sensors
- 06:20 Datasheet viewed
- 08:09 Wiring Explained
- 12:31 Arduino Code Explained
- 19:58 Measuring current is demonstrated
- 23:43 Zero Current demonstration
Sensors Supported by Robojax WCS Library
| Sensor Model | Maximum Current | mv/A Sensitivity |
| WCS38A25 | 0.25A | 7.0 |
| WCS37A50 | 0.5A | 3.5 |
| WCS2801 | 1A | 2.0 |
| WCS2702 | 2A | 1.0 |
| WCS2705 | 5A | 260.0 |
| WCS2810 | 10A | 135.0 |
| WCS2720 | 20A | 65.0 |
| WCS3740 | 40A | 32.0 |
| WCS1500 | 200A | 11.0 |
| WCS1600 | 100A | 22.0 |
| WCS1700 | 70A | 33.0 |
| WCS1800 | 35A | 66.0 |
| WCS2800 | 35A | 70.0 |
| WCS6800 | 35A | 65.0 |
Wiring WCS1800: DC Load WCS1800
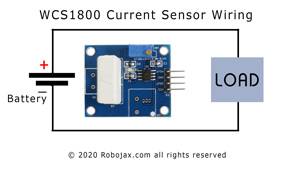
Click on image to enlarge
Wiring WCS: DC Load
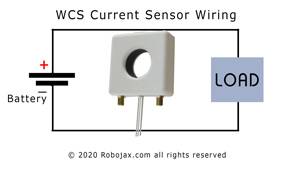
Click on image to enlarge
Wiring WCS: DC Load
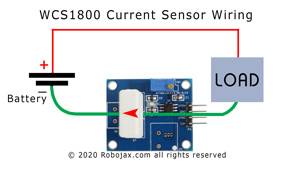
Click on image to enlarge
Wiring WCS: WCS3740
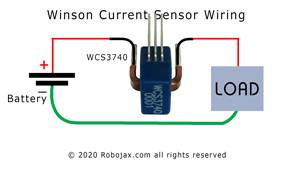
Click on image to enlarge
Wiring WCS: WCS3740
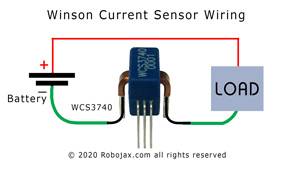
Click on image to enlarge
Wiring WCS: DC Load
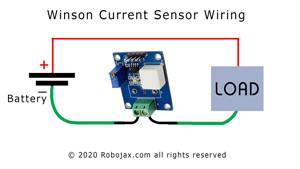
Click on image to enlarge
Wiring WCS: DC Load
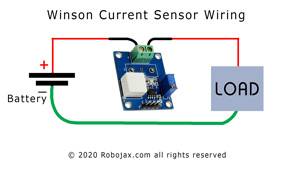
Click on image to enlarge
Wiring WCS: DC Load
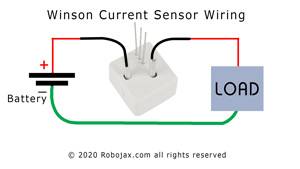
Click on image to enlarge
Wiring WCS: DC Load
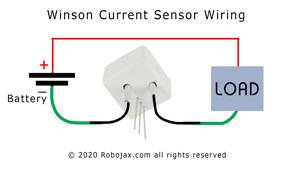
Click on image to enlarge
Wiring WCS: DC Load
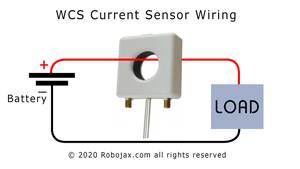
Click on image to enlarge
Wiring WCS: DC Load
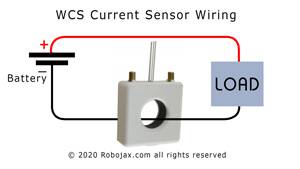
Click on image to enlarge
Wiring WCS: DC Load
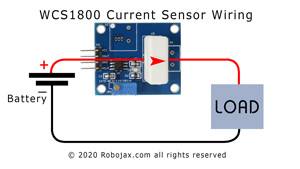
Click on image to enlarge
Wiring WCS: WCS2720
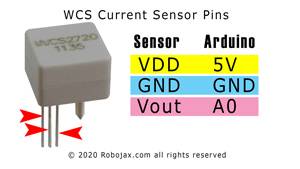
Click on image to enlarge
Wiring WCS: DC Load
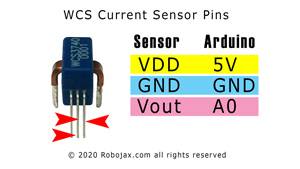
Click on image to enlarge
Wiring WCS: DC Load
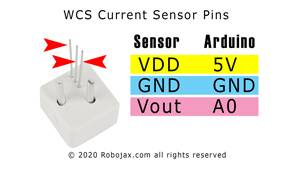
Click on image to enlarge
Resources for this module
- Download Robojax WCS Library (right-click and select Save Link as)
- Winson Semicudoctor WCS Web page
- Robojax Crash Course on Arduino: Learn Arduino in 30 Minutes (code and video)
- Robojax Arduino Course on Udemy
- Get Early Access to my videos via Patreon
Arduino code for Sharp GP2Y0A51SK0F Distance Sensor
 /*
* Using two or more Winson Current Sensors
 * Read the current Winson WCS Current sensor and display it on Serial monitor
 * This is Arduino code based on Robojax WCS library
 * for Winson WSC Current Sensor to measure current
 *
 * Watch video instructions for this code: https://youtu.be/z-s8UvCWGxY

 * Written on July 26, 2020 by Ahmad Shamshiri in Ajax, Ontario, Canada
 * www. Robojax.com
  Model of the sensor to select
     //dirct wiring series
    0  "WCS38A25",//0
    1  "WCS37A50",//1
    2  "WCS2801",//2
    3  "WCS2702",//3
    4  "WCS2705",//4
    5  "WCS2810",//5
    6  "WCS2720",//6
    7  "WCS2750",//7
    8  "WCS3740",//8

      //through hole sensor
    9  "WCS1500",//9
    10  "WCS1600",//10
    11  "WCS1700",//11
    12  "WCS1800",//12
    13  "WCS2800",//13
    14  "WCS6800",//14

      //AC to DC Current sensor
    15  "WCS2202",//15


 * Get this code and other Arduino codes from Robojax.com
Learn Arduino step by step in structured course with all material, wiring diagram and library
all in once place. Purchase My course on Udemy.com http://robojax.com/L/?id=62

If you found this tutorial helpful, please support me so I can continue creating
content like this. You can support me on Patreon http://robojax.com/L/?id=63

or make donation using PayPal http://robojax.com/L/?id=64

 *  * This code is "AS IS" without warranty or liability. Free to be used as long as you keep this note intact.*
 * This code has been download from Robojax.com
    This program is free software: you can redistribute it and/or modify
    it under the terms of the GNU General Public License as published by
    the Free Software Foundation, either version 3 of the License, or
    (at your option) any later version.

    This program is distributed in the hope that it will be useful,
    but WITHOUT ANY WARRANTY; without even the implied warranty of
    MERCHANTABILITY or FITNESS FOR A PARTICULAR PURPOSE.  See the
    GNU General Public License for more details.

    You should have received a copy of the GNU General Public License
    along with this program.  If not, see <https://www.gnu.org/licenses/>.

*/
#include <Wire.h>
#include <Robojax_WCS.h>
#define MODEL_1 12 //see list above
#define SENSOR_PIN_1 A0 //pin for reading sensor
#define SENSOR_VCC_PIN_1 8 //pin for powring up the sensor
#define ZERO_CURRENT_LED_PIN_1 2 //zero current LED pin

#define ZERO_CURRENT_WAIT_TIME_1 5000 //wait for 5 seconds to allow zero current measurement
#define CORRECTION_VLALUE_1 164 //mA
#define MEASUREMENT_ITERATION_1 100
#define VOLTAGE_REFERENCE_1  5000.0 //5000mv is for 5V
#define BIT_RESOLUTION_1 10
#define DEBUT_ONCE_1 true


#define MODEL_2 12 //see list above
#define SENSOR_PIN_2 A1 //pin for reading sensor
#define SENSOR_VCC_PIN_2 9 //pin for powring up the sensor
#define ZERO_CURRENT_LED_PIN_2 3 //zero current LED pin

#define ZERO_CURRENT_WAIT_TIME_2 5000 //wait for 5 seconds to allow zero current measurement
#define CORRECTION_VLALUE_2 164 //mA
#define MEASUREMENT_ITERATION_2 100
#define VOLTAGE_REFERENCE_2  5000.0 //5000mv is for 5V
#define BIT_RESOLUTION_2 10
#define DEBUT_ONCE_2 true


Robojax_WCS sensor1(
          MODEL_1, SENSOR_PIN_1, SENSOR_VCC_PIN_1,
          ZERO_CURRENT_WAIT_TIME_1, ZERO_CURRENT_LED_PIN_1,
          CORRECTION_VLALUE_1, MEASUREMENT_ITERATION_1, VOLTAGE_REFERENCE_1,
          BIT_RESOLUTION_1, DEBUT_ONCE_1
          );

Robojax_WCS sensor2(
          MODEL_2, SENSOR_PIN_2, SENSOR_VCC_PIN_2,
          ZERO_CURRENT_WAIT_TIME_2, ZERO_CURRENT_LED_PIN_2,
          CORRECTION_VLALUE_2, MEASUREMENT_ITERATION_2, VOLTAGE_REFERENCE_2,
          BIT_RESOLUTION_2, DEBUT_ONCE_2
          );

void setup()
{
  Serial.begin(9600);
  Serial.println("Robojax WCS Library");
  sensor.start();
  Serial.print("Sensor: "); Serial.println(sensor.getModel());

}

void loop()
{
  sensor1.readCurrent();//this must be inside loop
  sensor2.readCurrent();//this must be inside loop

  sensor1.printCurrent();
  sensor2.printCurrent();

  //does somethig when current in sensor1 is equal or greator than 12.3A
  if(sensor1.getCurrent() >= 12.3)
  {
    // does somethig here
  }
  delay(500);
	//sensor1.printDebug();
	//sensor2.printDebug();
}
