
STC-3028 Thermostat with Heat and Humidity Fully Explained and demonstrated
STC-3028 Thermostat with Heat and Humidity Fully Explained and demonstrated
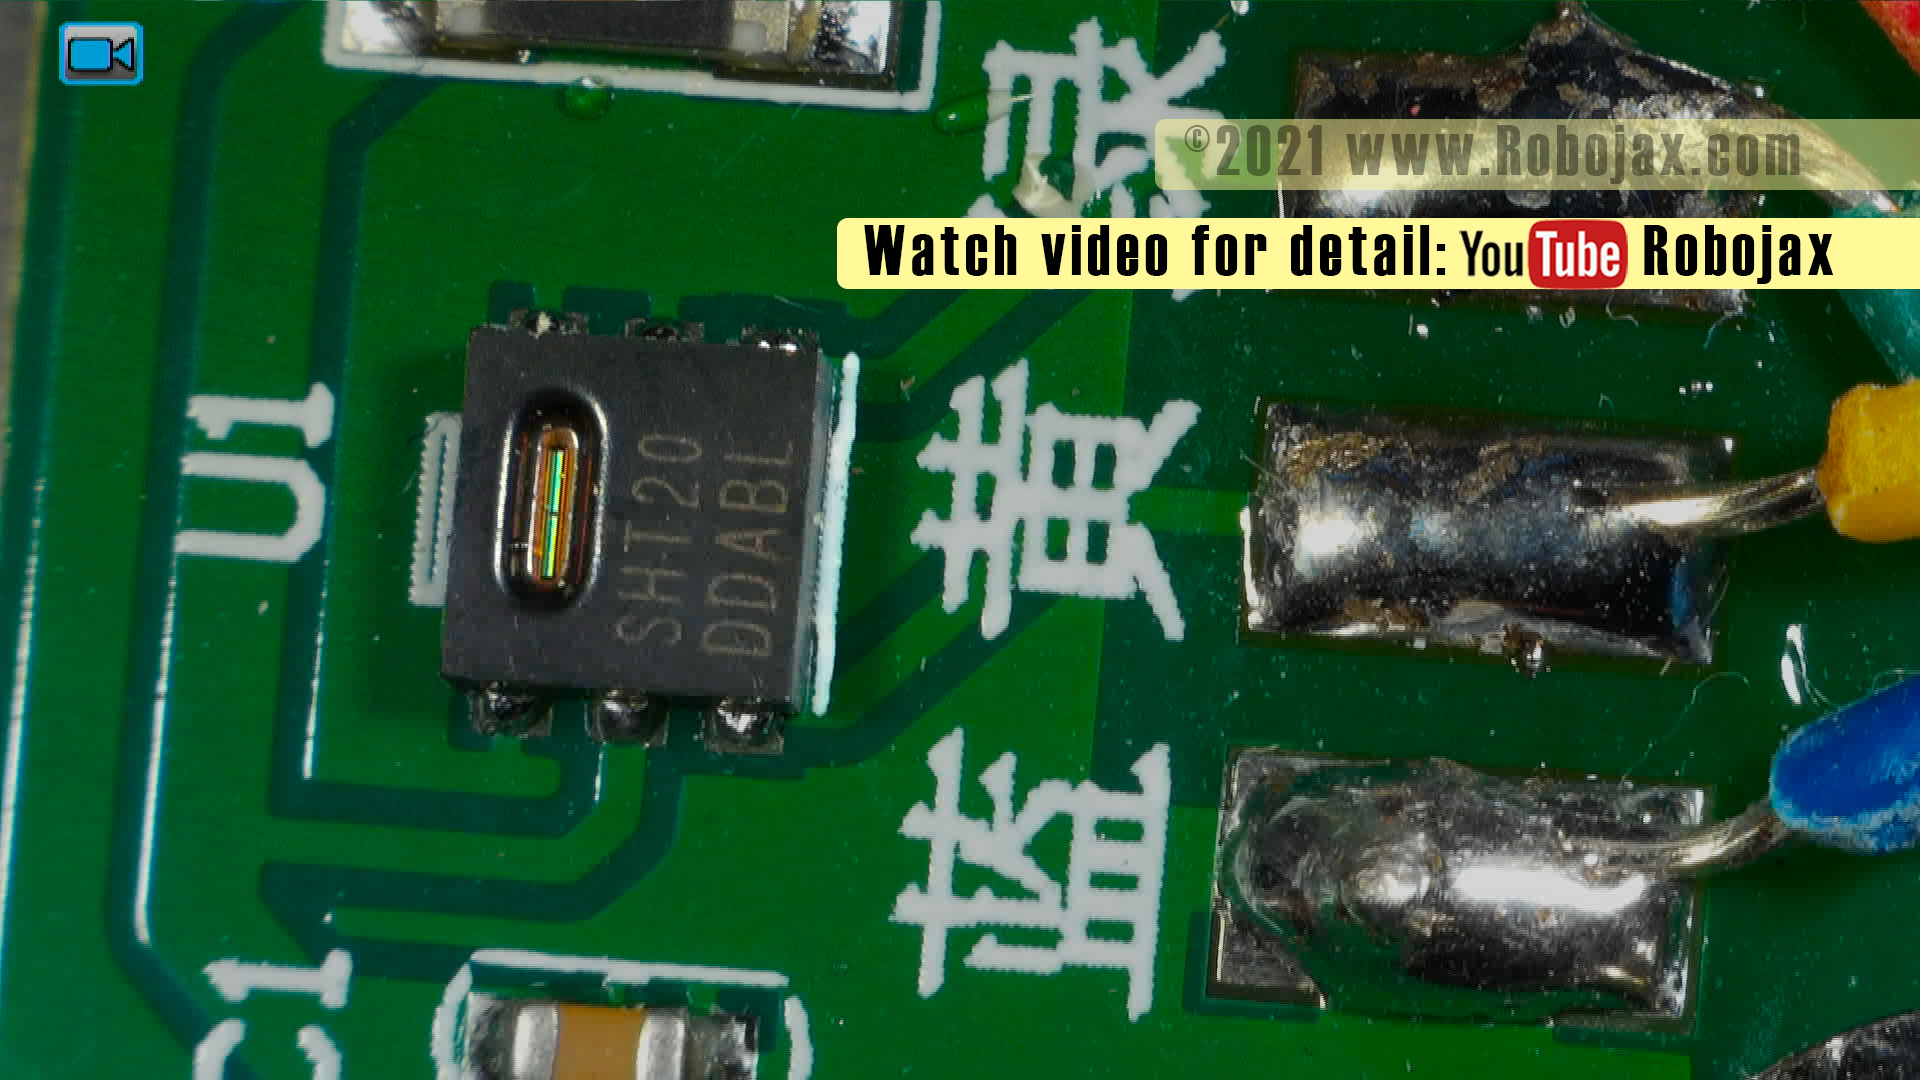
In this video STC-3028 Thermostat is fully explained. This thermost has two load controller so it can be used as temperature controller to control heater or cooler or it can be used at humidity controller to control humidifer or dehumidifier device. Both heat and humidity controller can be used at the same time. The thermostate uses SHT20 Humidity and Temperature sensor which can measure from -40°C to 150°C. Dasheet and list of components shown in this page.
The module is fully explained. All major components explained and datasheet for each component is shown. Then settings of the module is explained with diagram so you it is understood better. Wiring for AC which might be hard for some people shown.
Demonstration shown:
- Temperature: Heater control
- Temperature: Cooler control
- Humidity: Humidifier control
- Humidity: Dehumidifier control
Chapters of this video
- 01:03 Introduction
- 05:56 STC-3028 hardware Explaiend
- 08:57 Inside the module
- 13:52 Sensor wire
- 14:53 Wiring Explained
- 18:14 Settings
- 21:09 Heater Contorl
- 24:25 Cooler Control
- 28:03 Humidifier control
- 28:55 Dehimifier control
Browser Screenshot Gallery
Click on the images below:
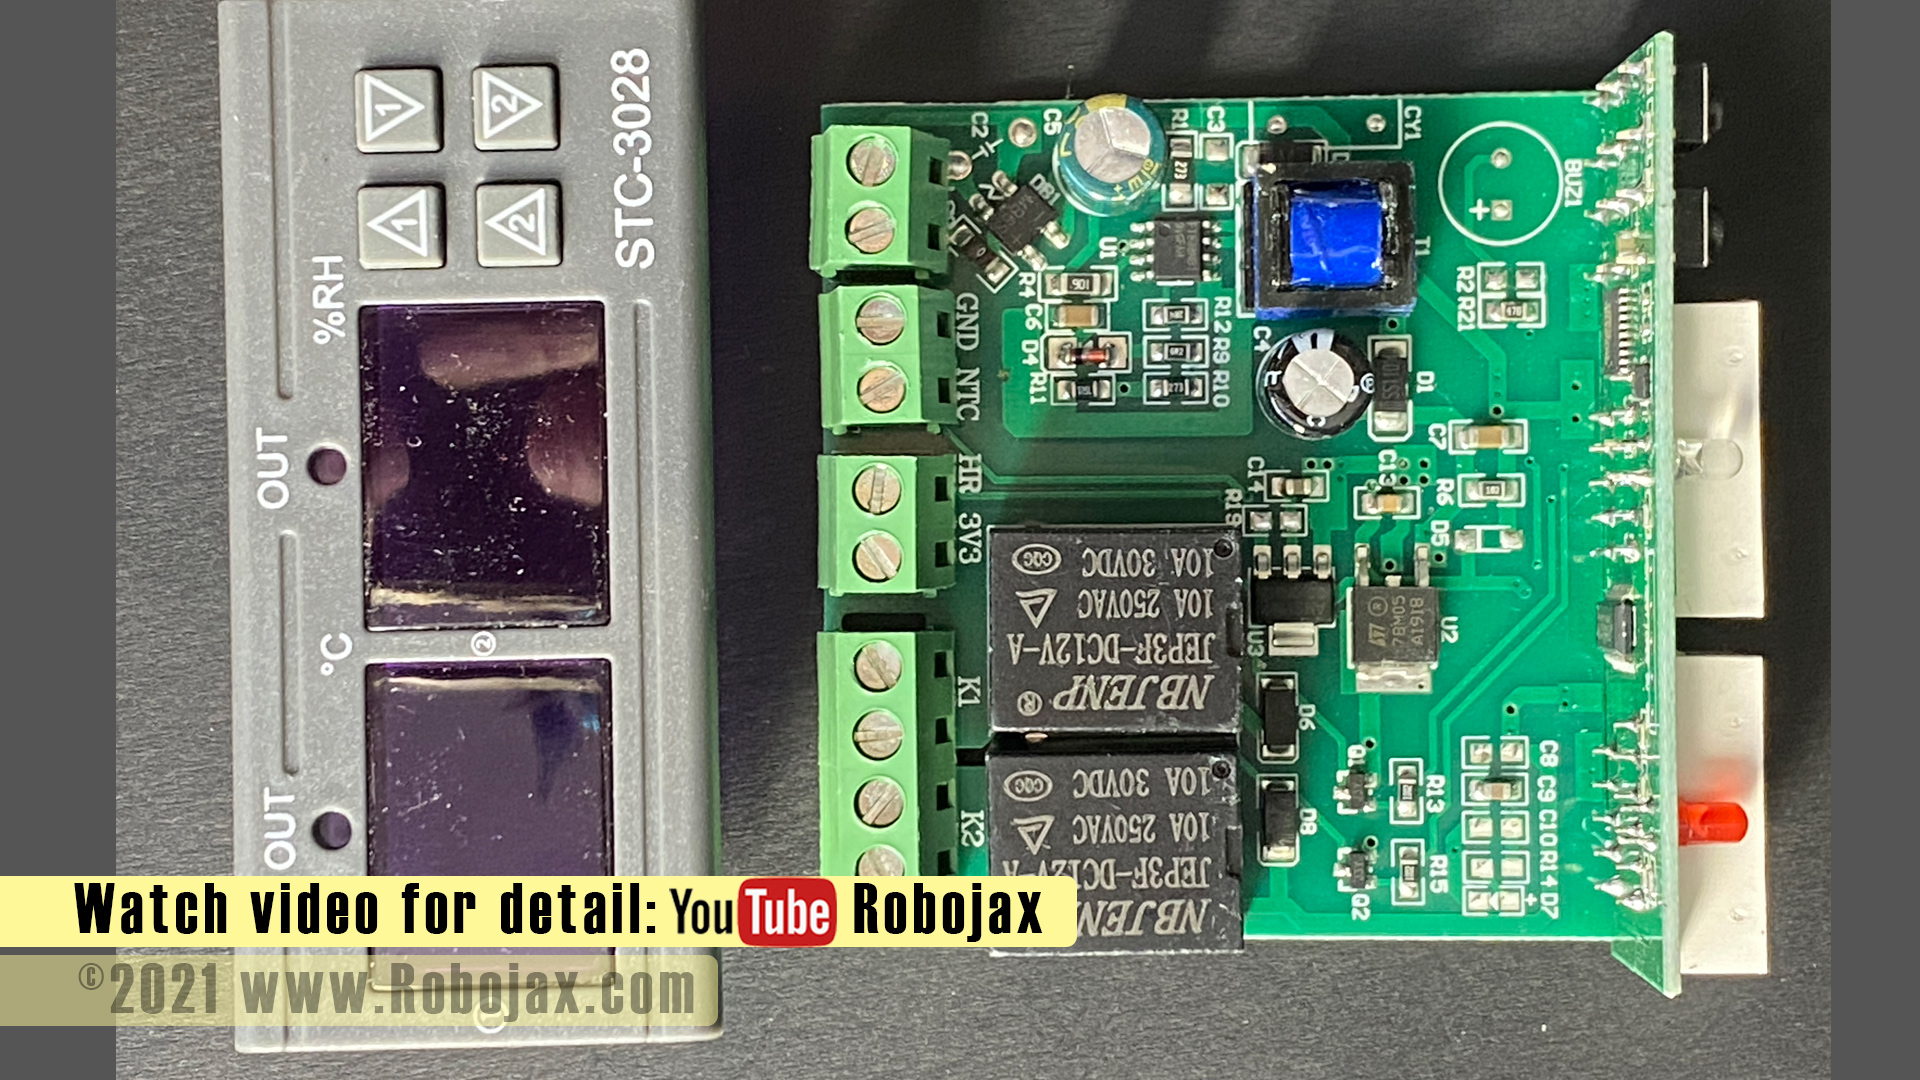
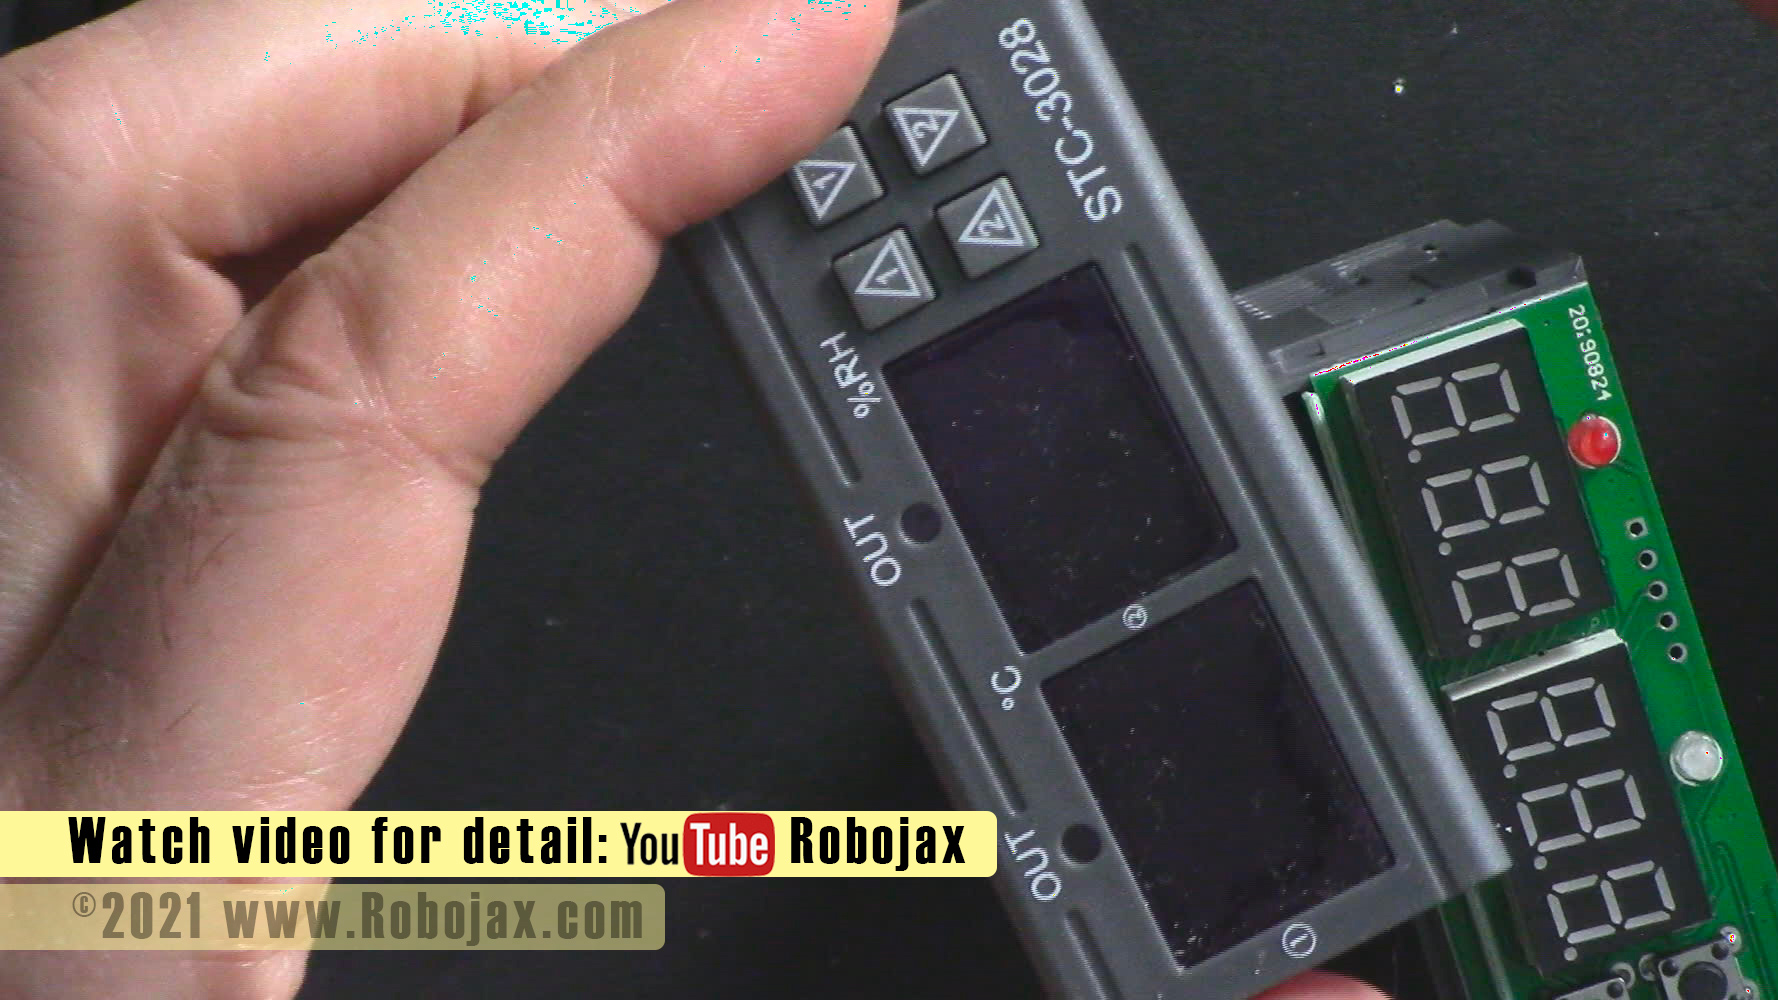
STC-3028 Image: main module
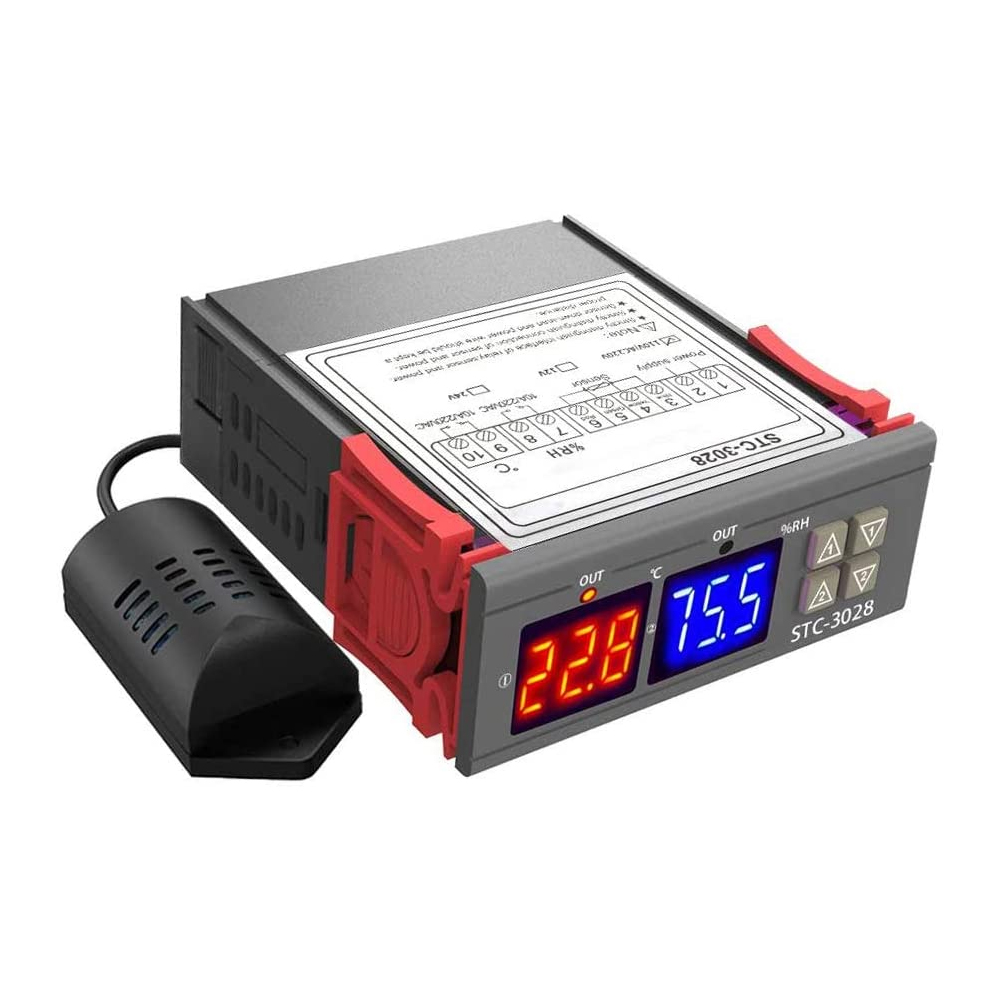
Click on image to enlarge
STC-3028 Image: module with sensor top view
Click on image to enlarge
STC-3028 Image: dimensions
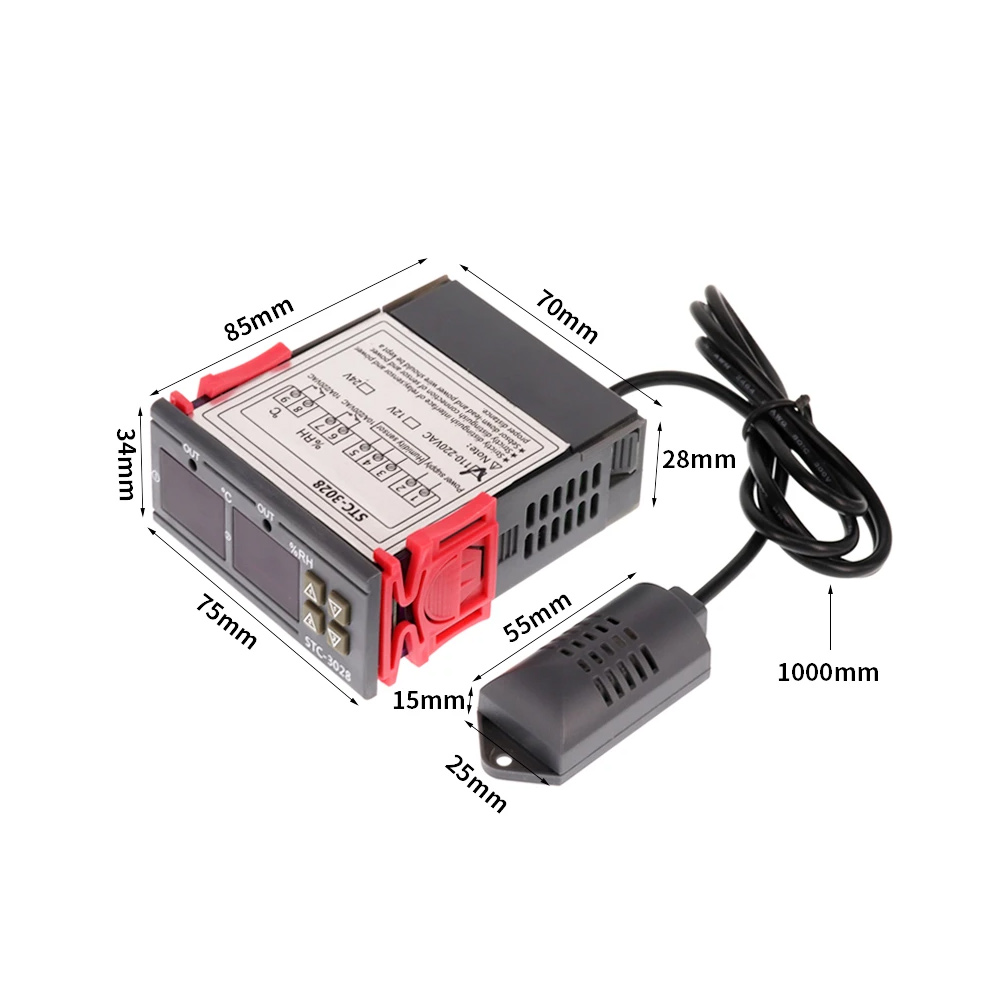
Click on image to enlarge
STC-3028 Image: 120V or 220V AC version mark
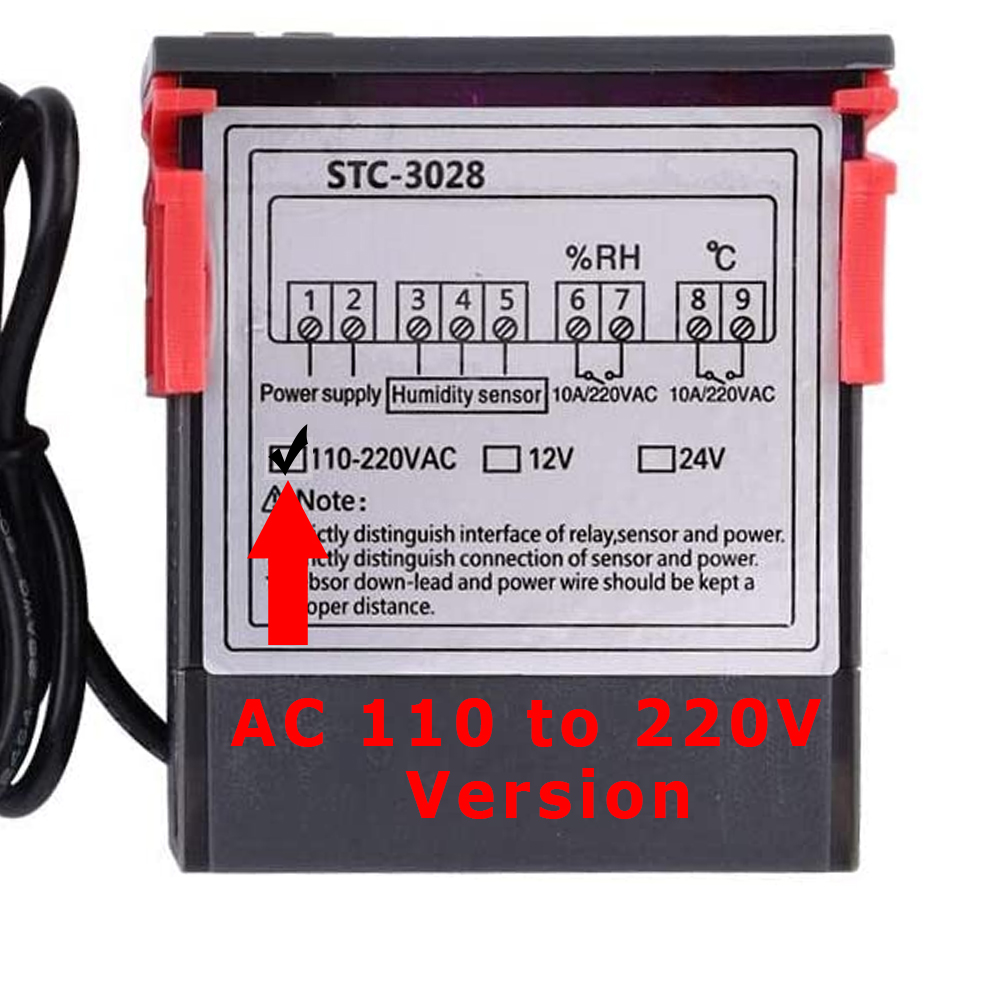
Click on image to enlarge
STC-3028 Image: 12V DC version mark

Click on image to enlarge
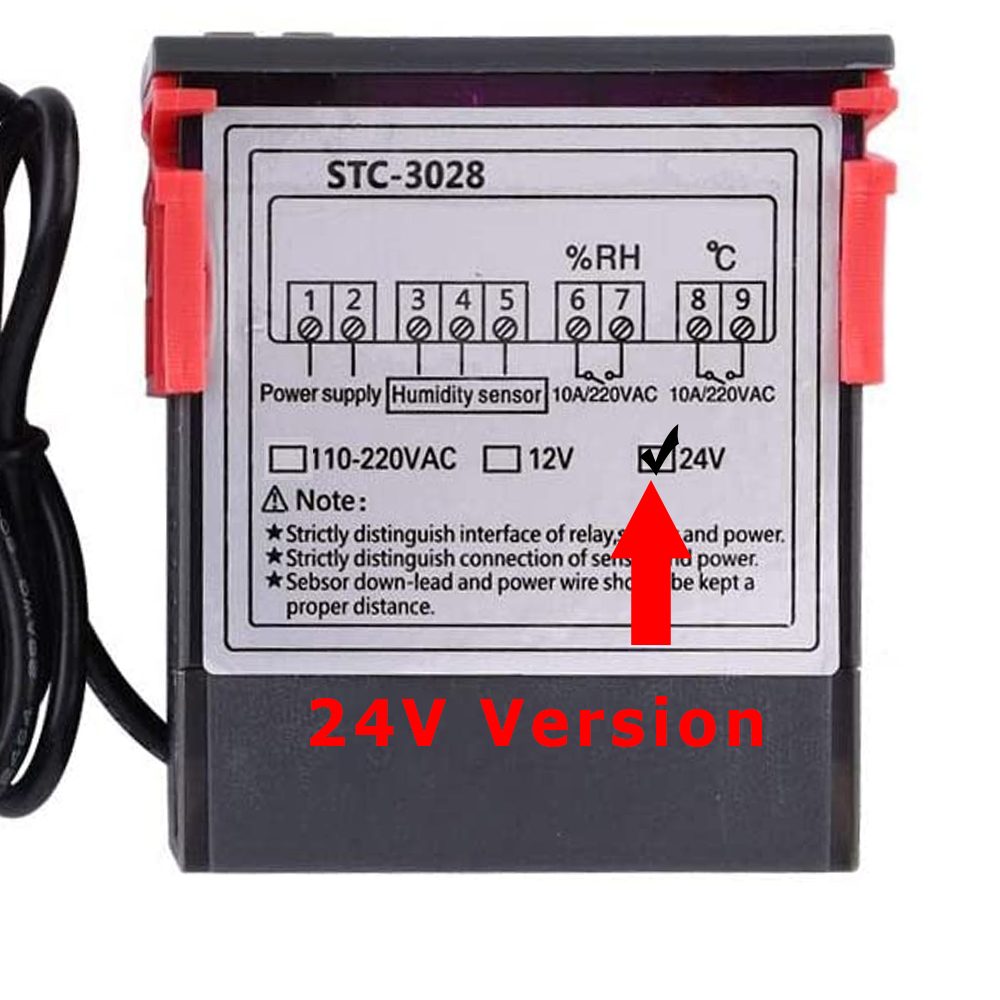
STC-3028 Image: 24V DC version mark
Click on image to enlarge
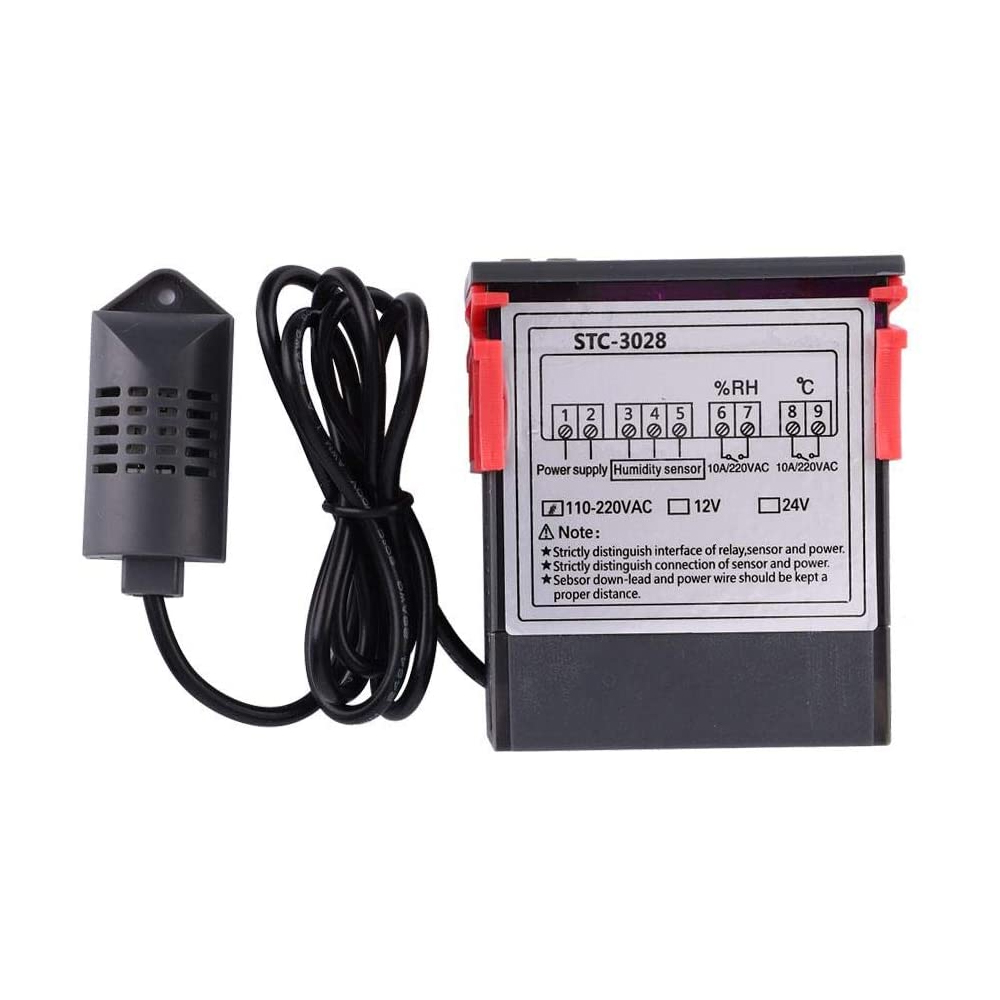
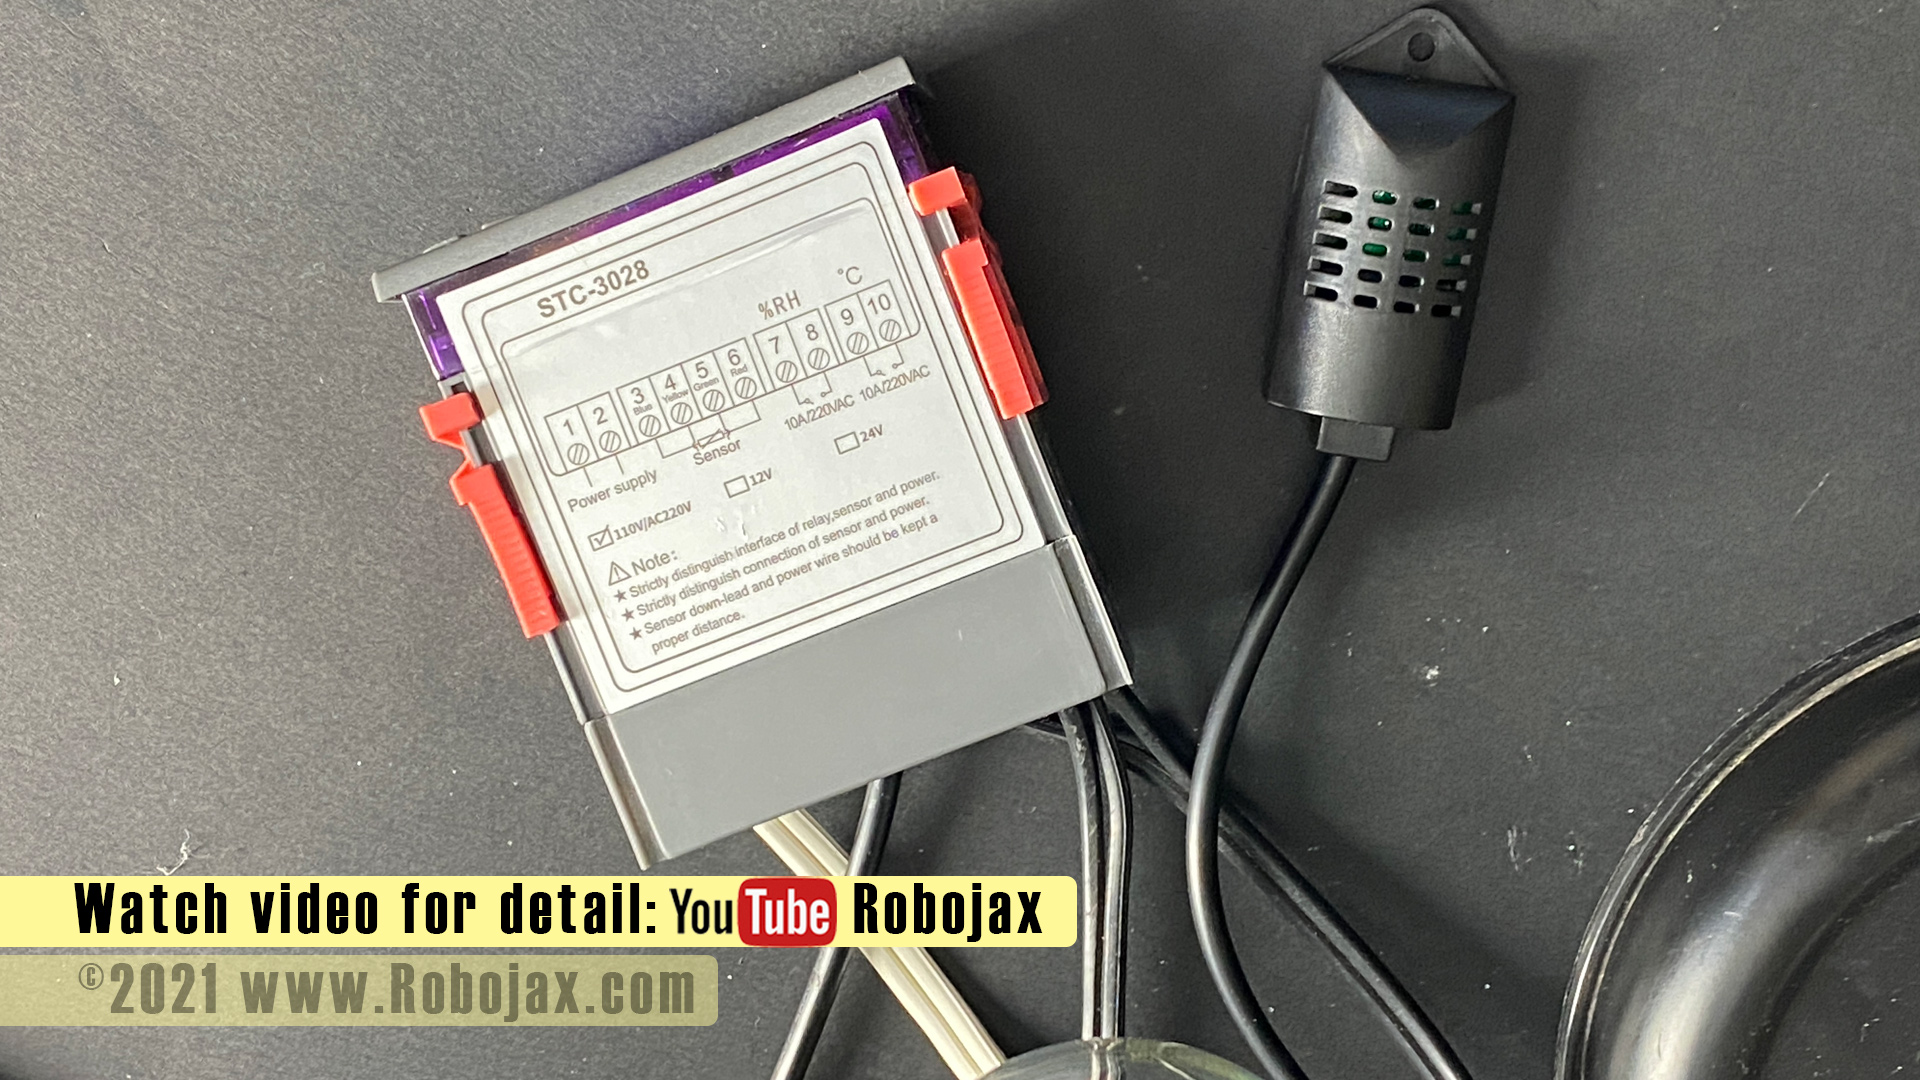
STC-3028 Image: top view with sensor connected
Click on image to enlarge
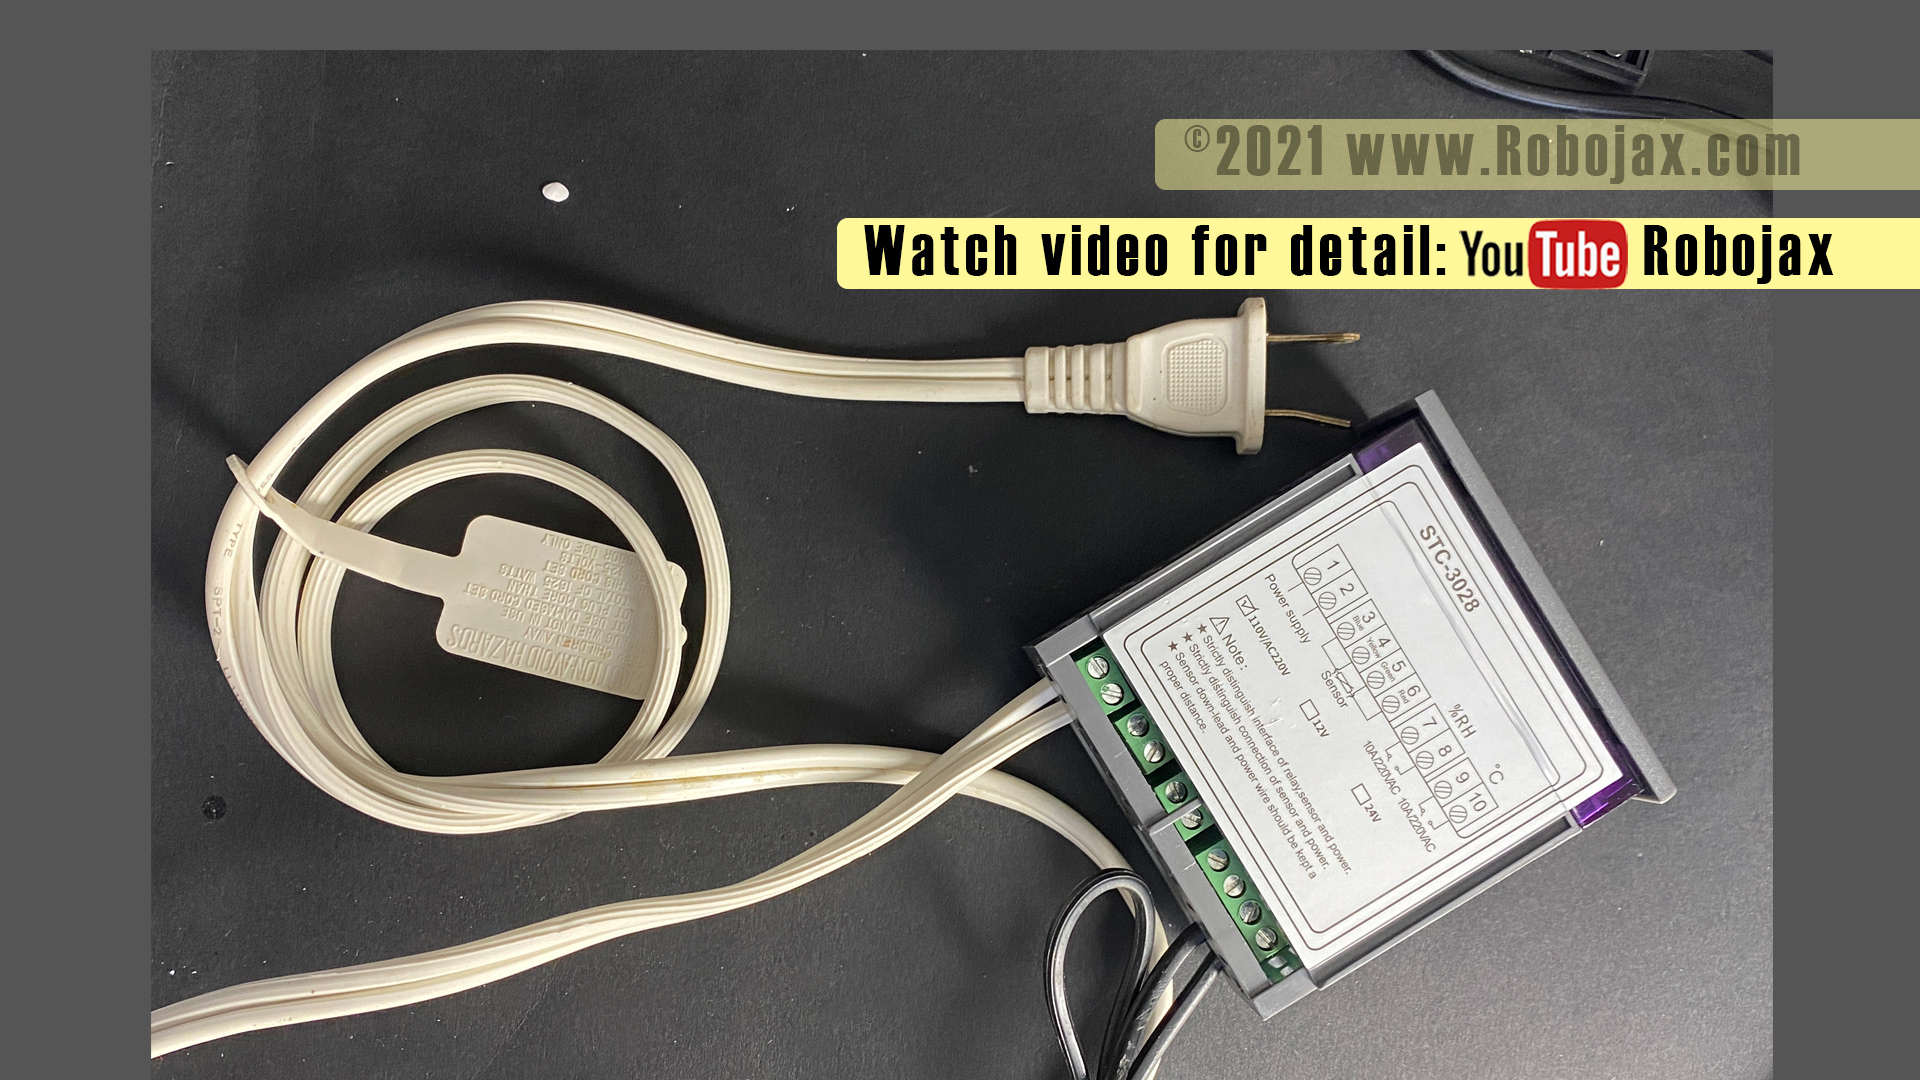
STC-3028 Image: Top view with AC power cable connected
Click on image to enlarge
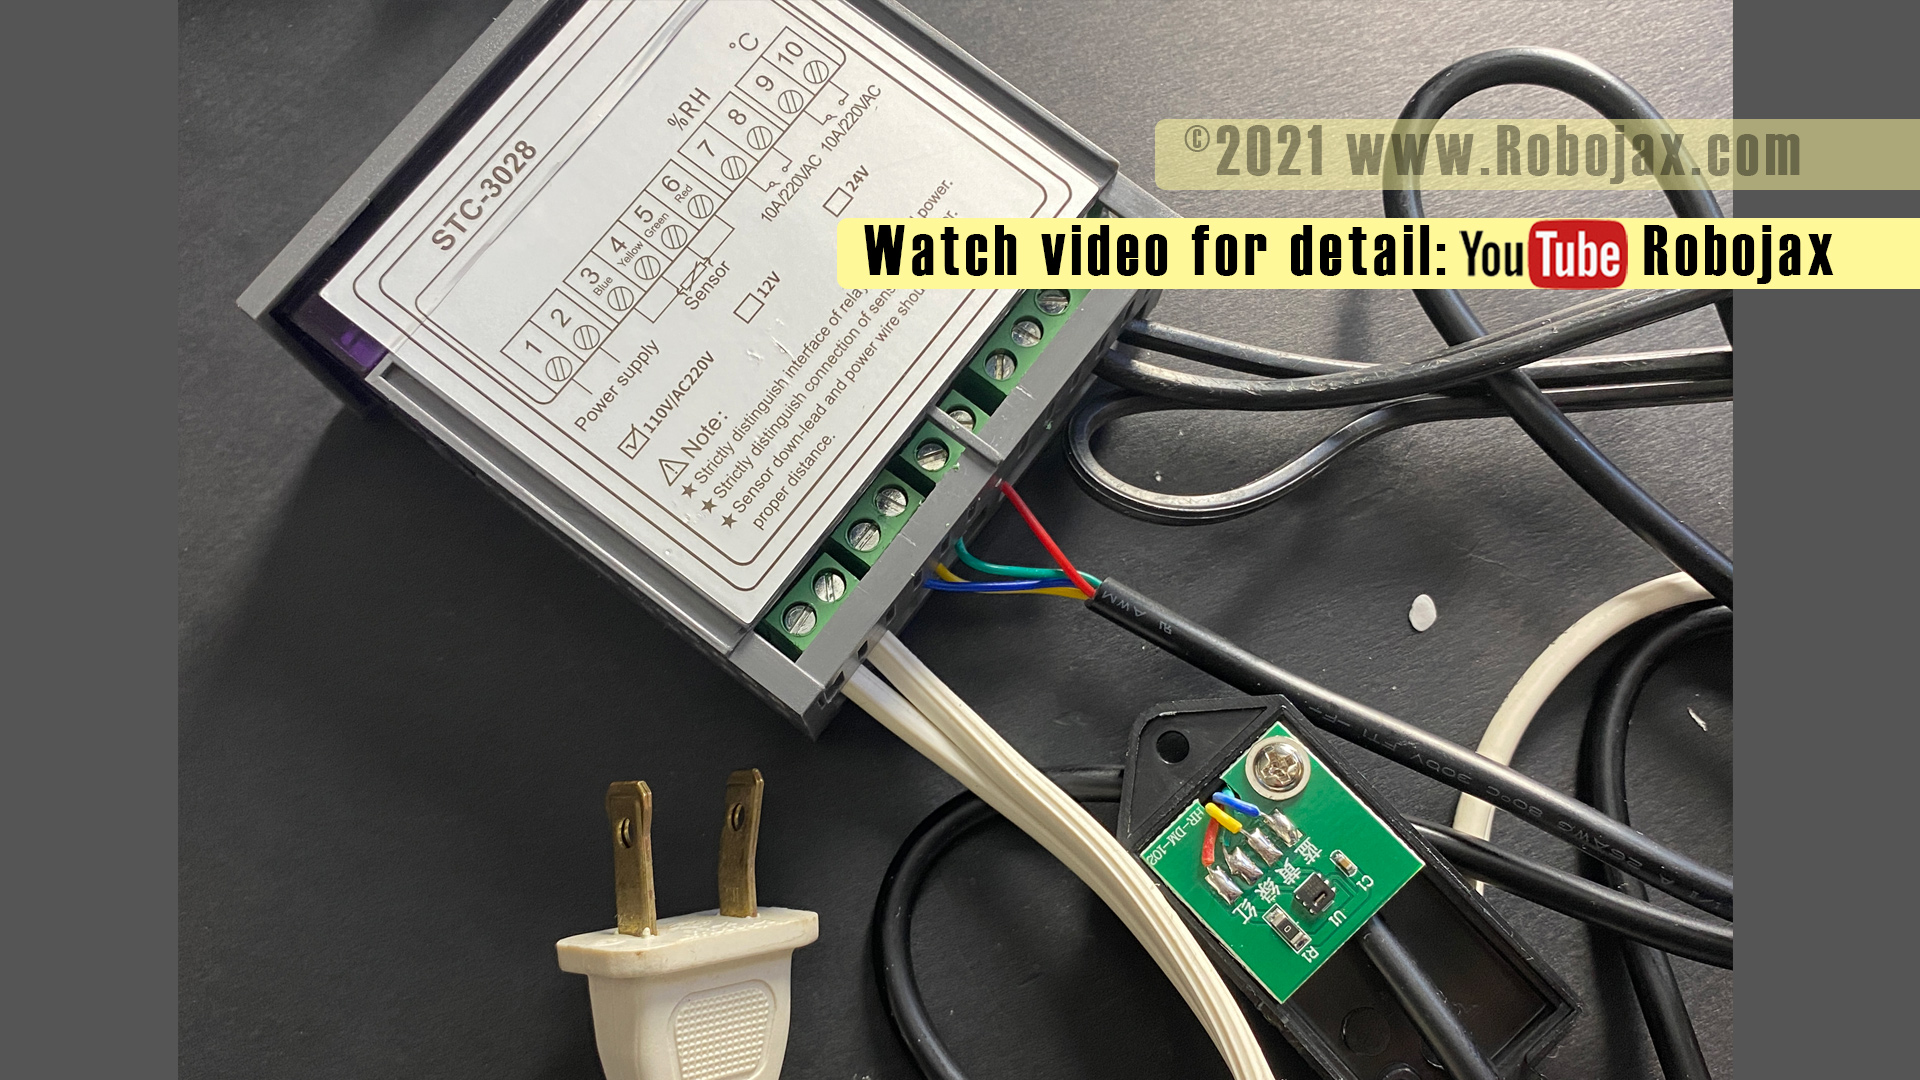
STC-3028 Image: SHT20 Sensor wires connected
Click on image to enlarge
STC-3028 Image: Opened module view from top
Click on image to enlarge
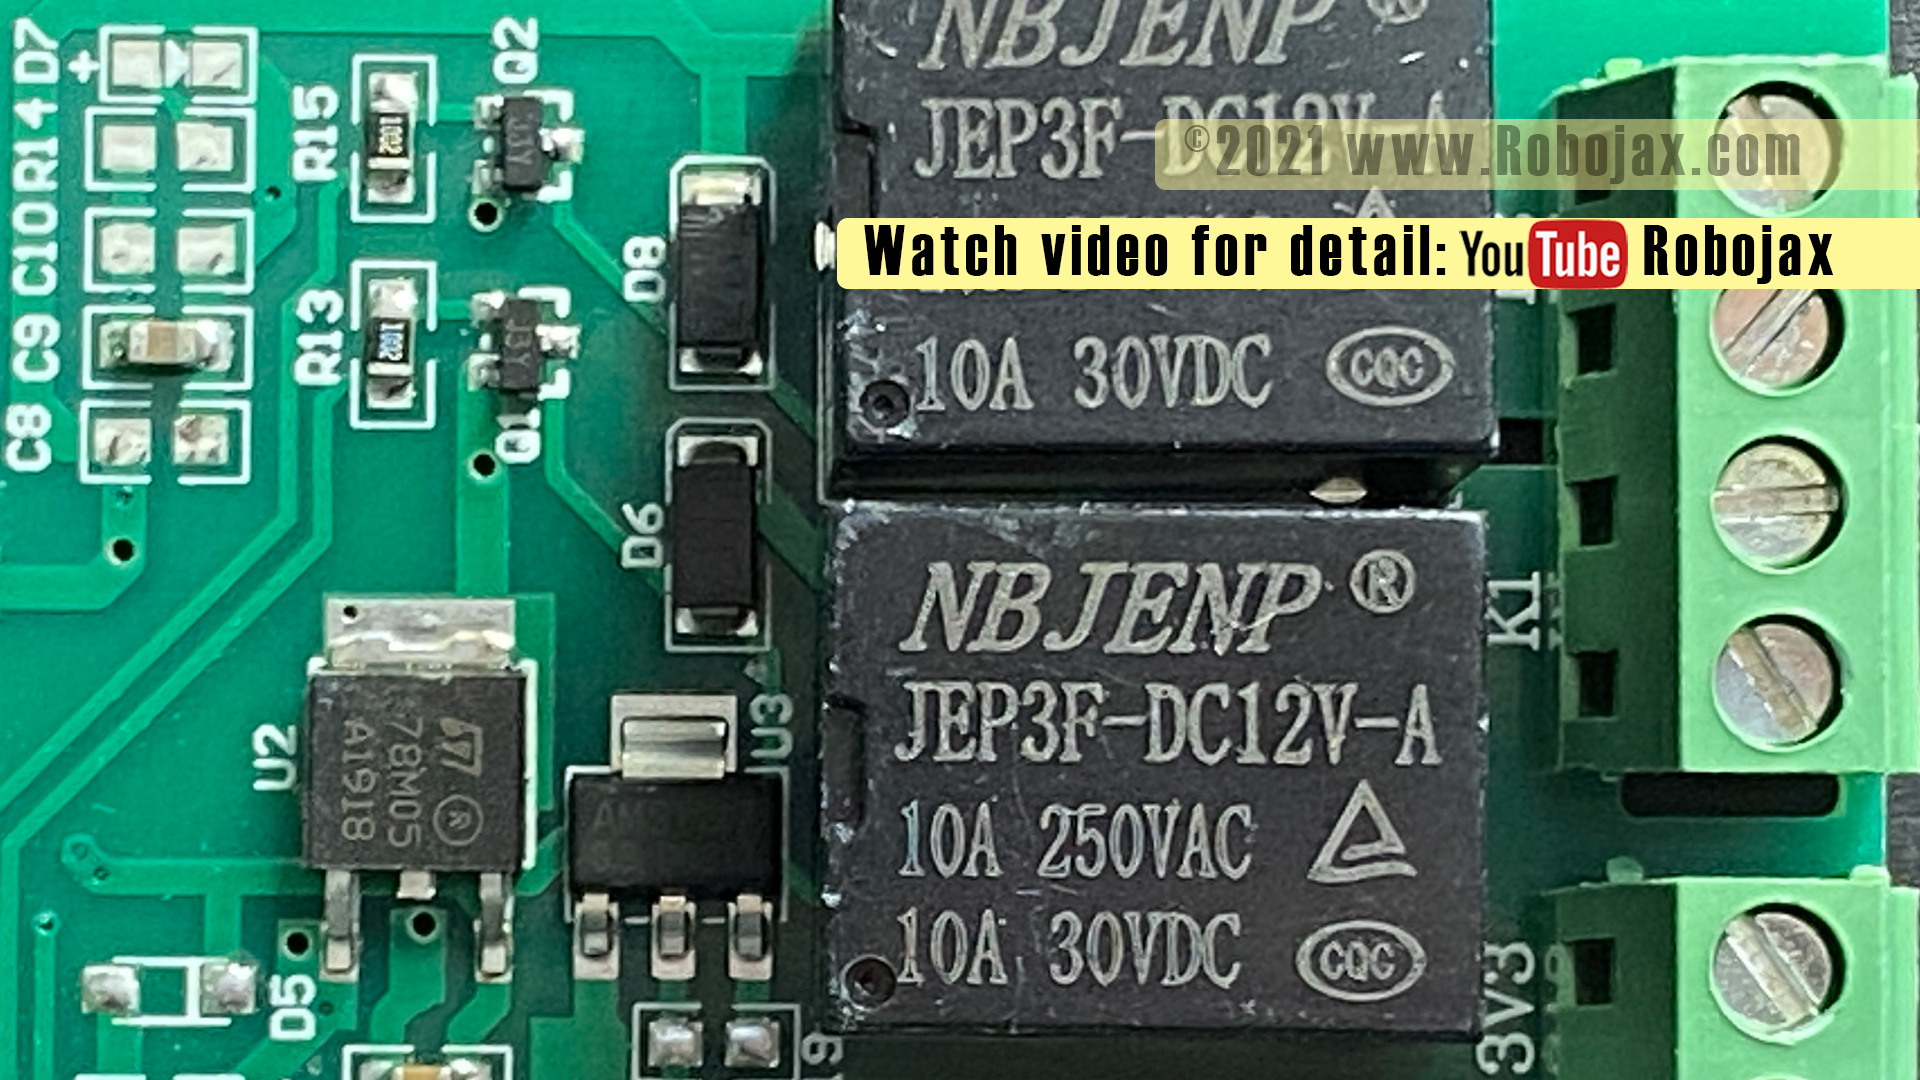
STC-3028 Image: Opened module showing relays
Click on image to enlarge
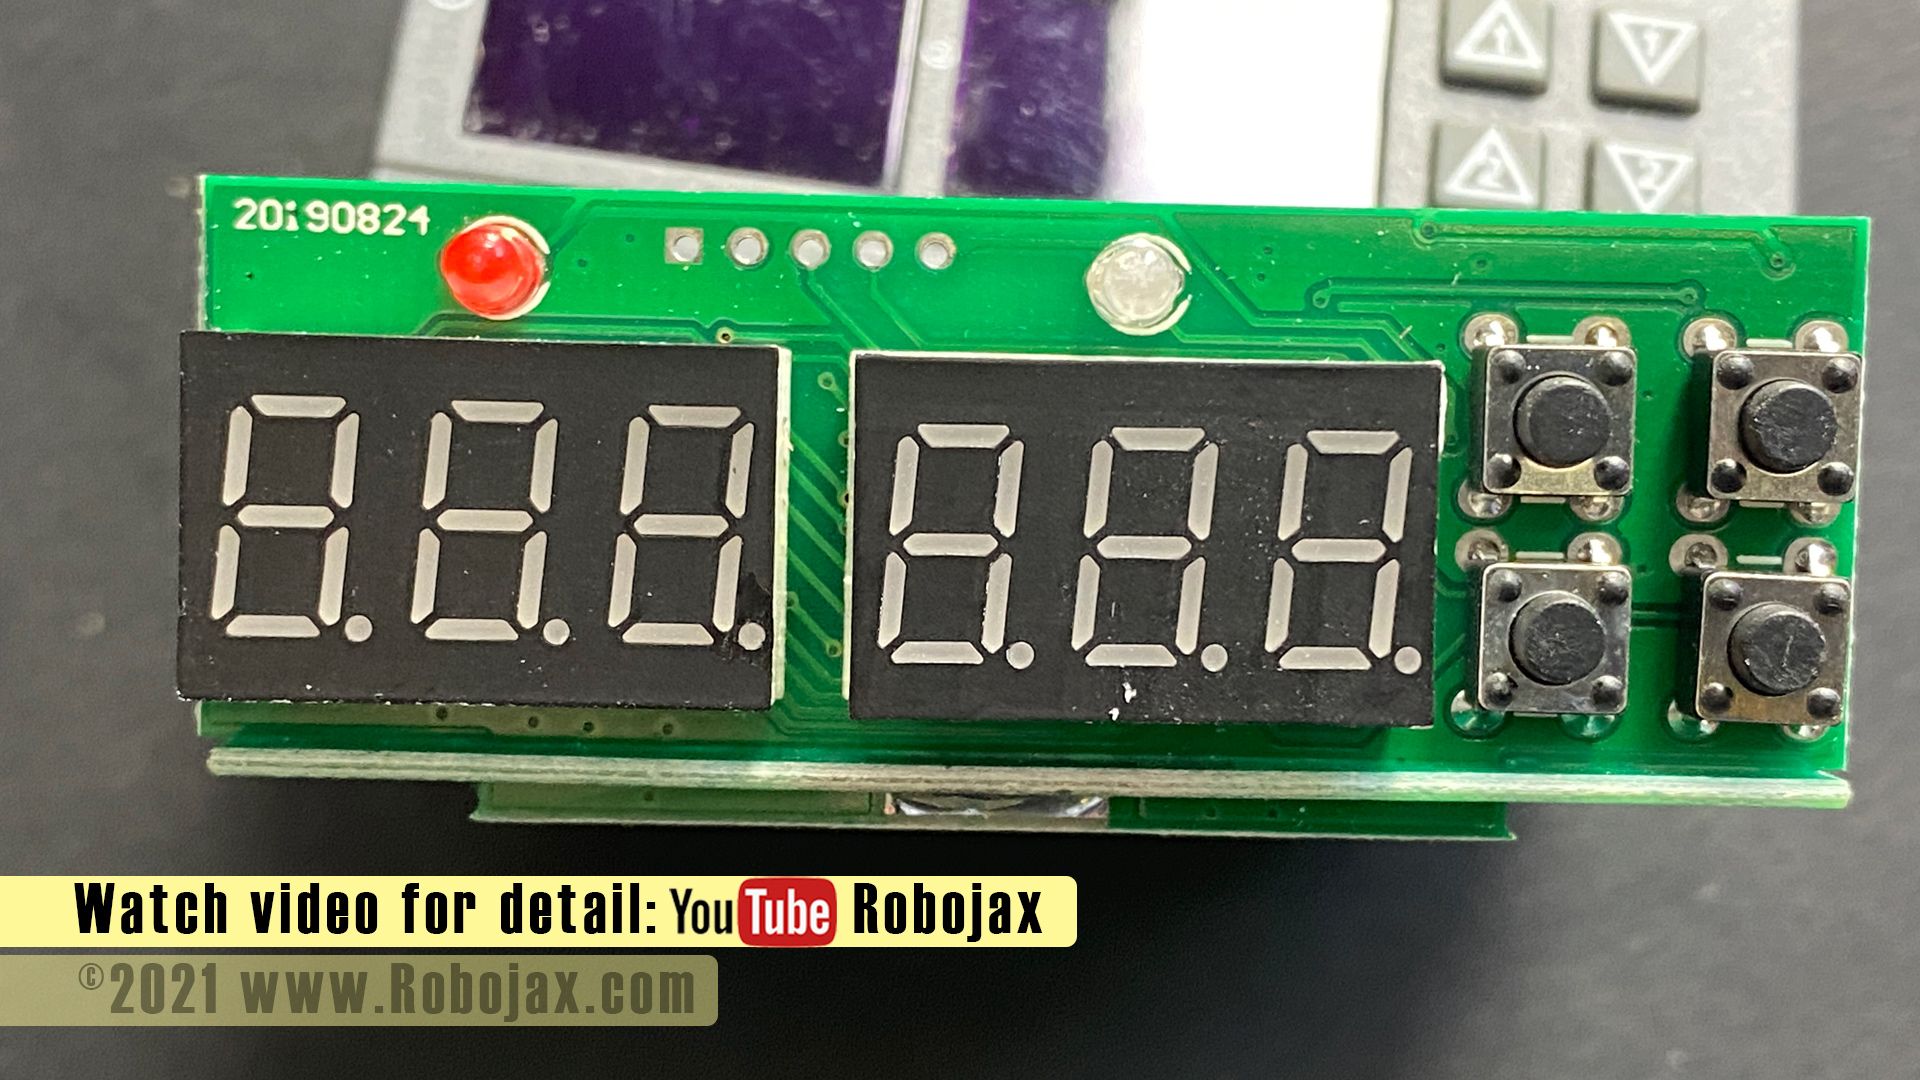
STC-3028 Image: Front panel seven sigment display
Click on image to enlarge
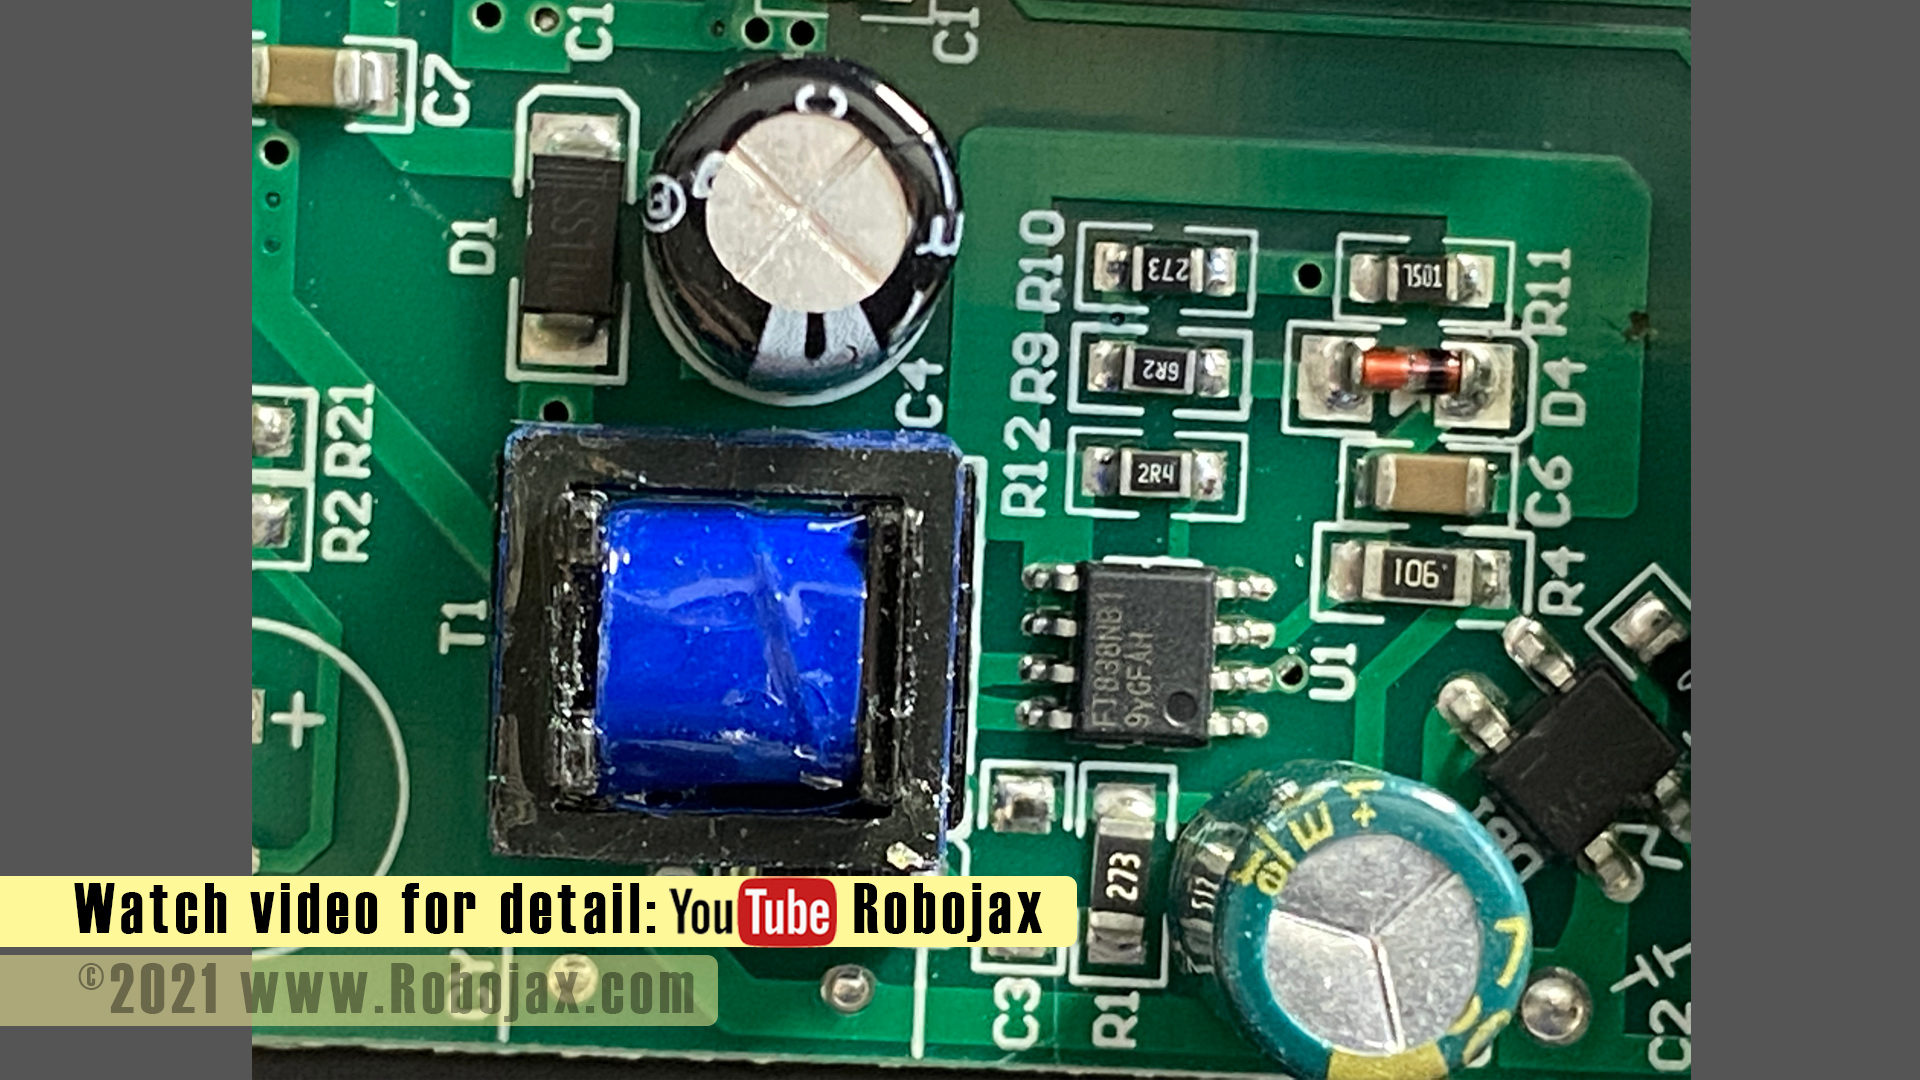
STC-3028 Image: FT838NB CC/CV Switch and bridge rectifier
Click on image to enlarge
STC-3028 Image: Newvoton Microcontroller N76E00

Click on image to enlarge
STC-3028 Image: Opened module view from the back

Click on image to enlarge
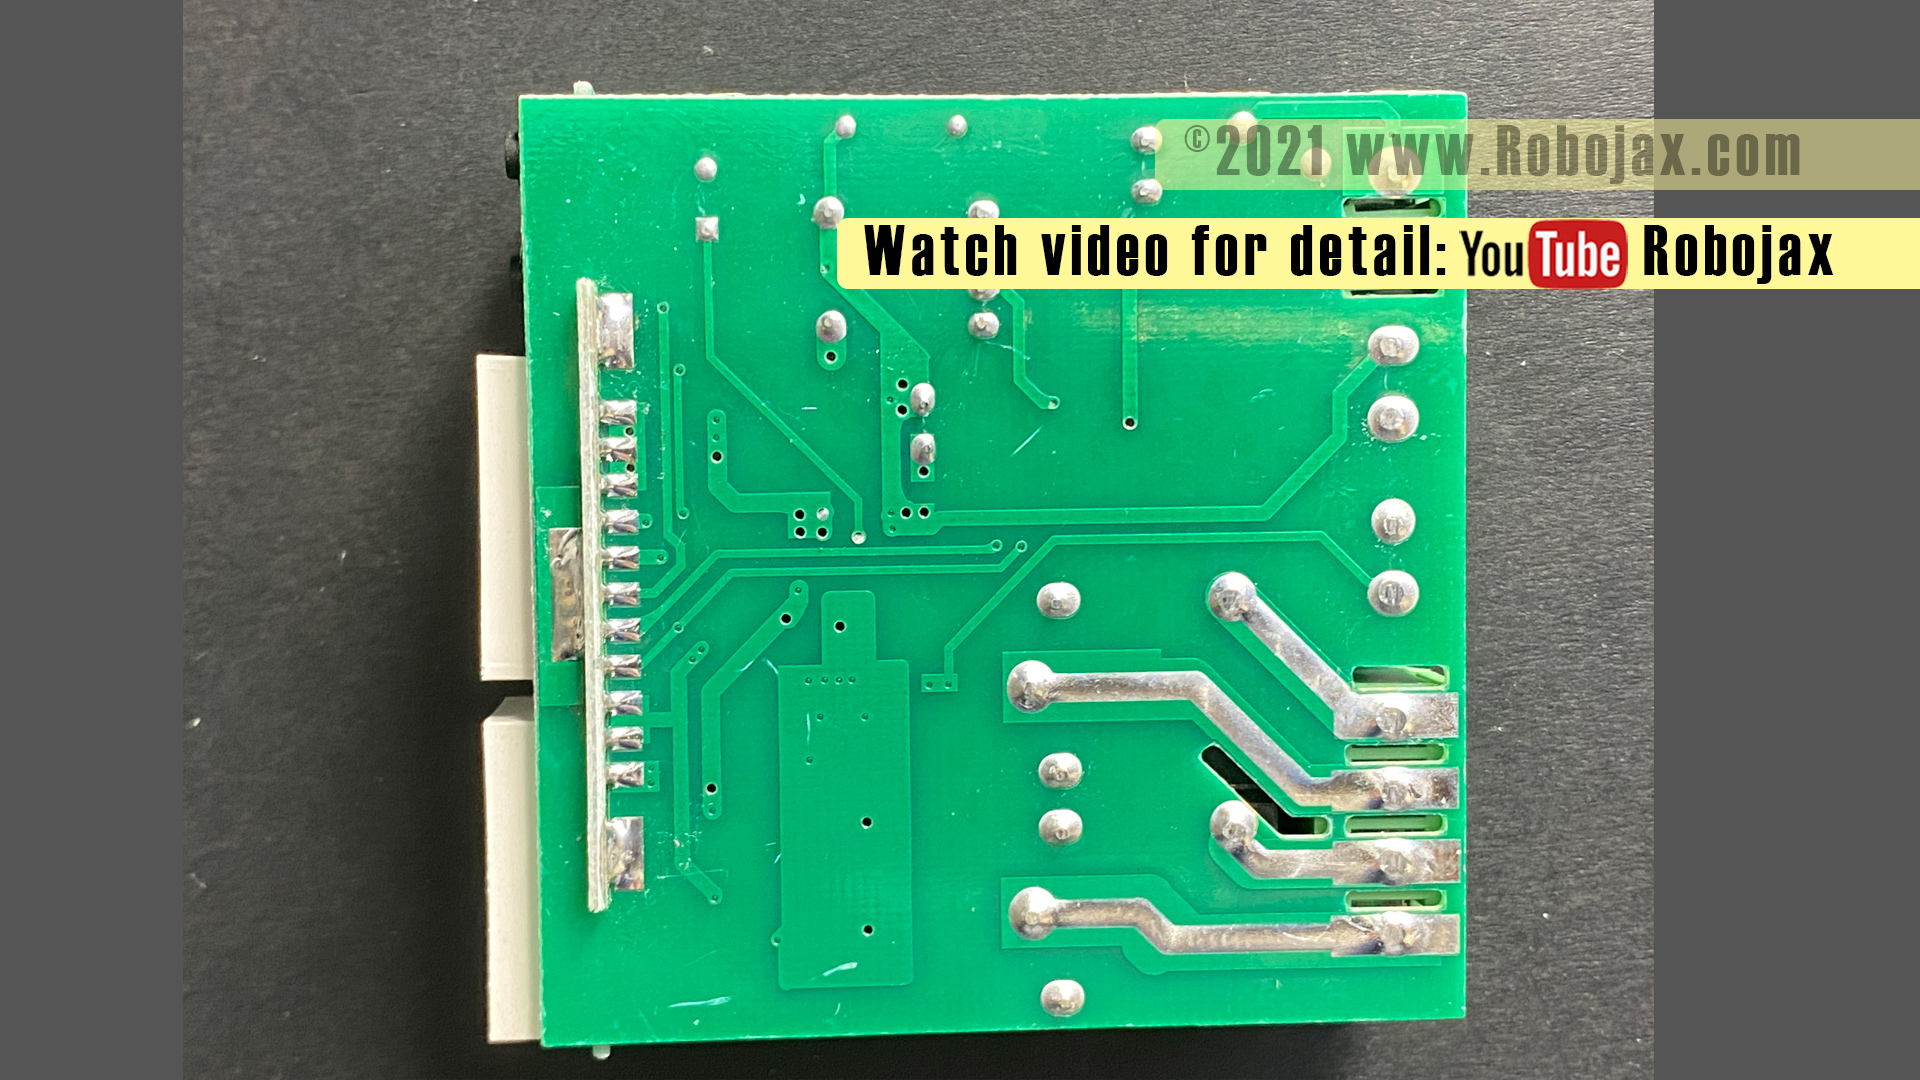
STC-3028 Image: bottom of PCB
Click on image to enlarge
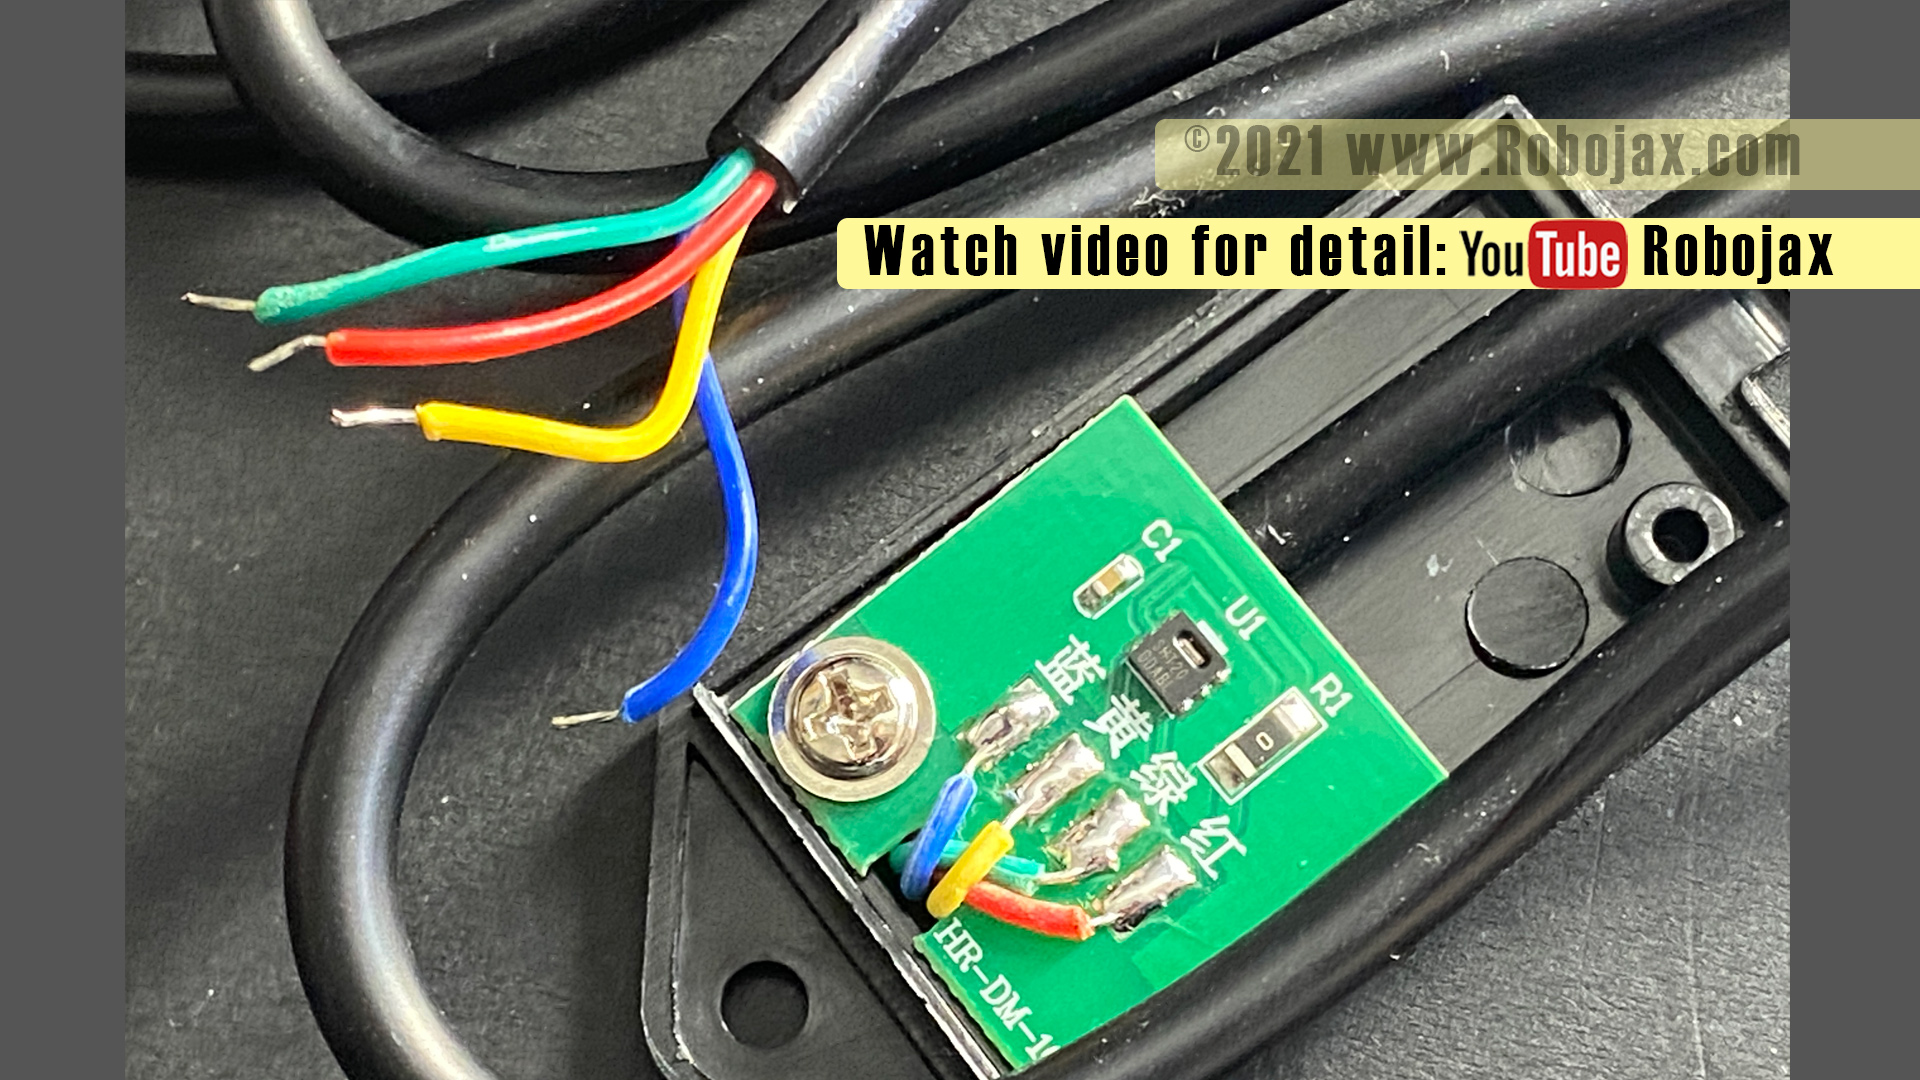
STC-3028 Image: SHT20 sensor and wires
Click on image to enlarge
STC-3028 Image:
Click on image to enlarge
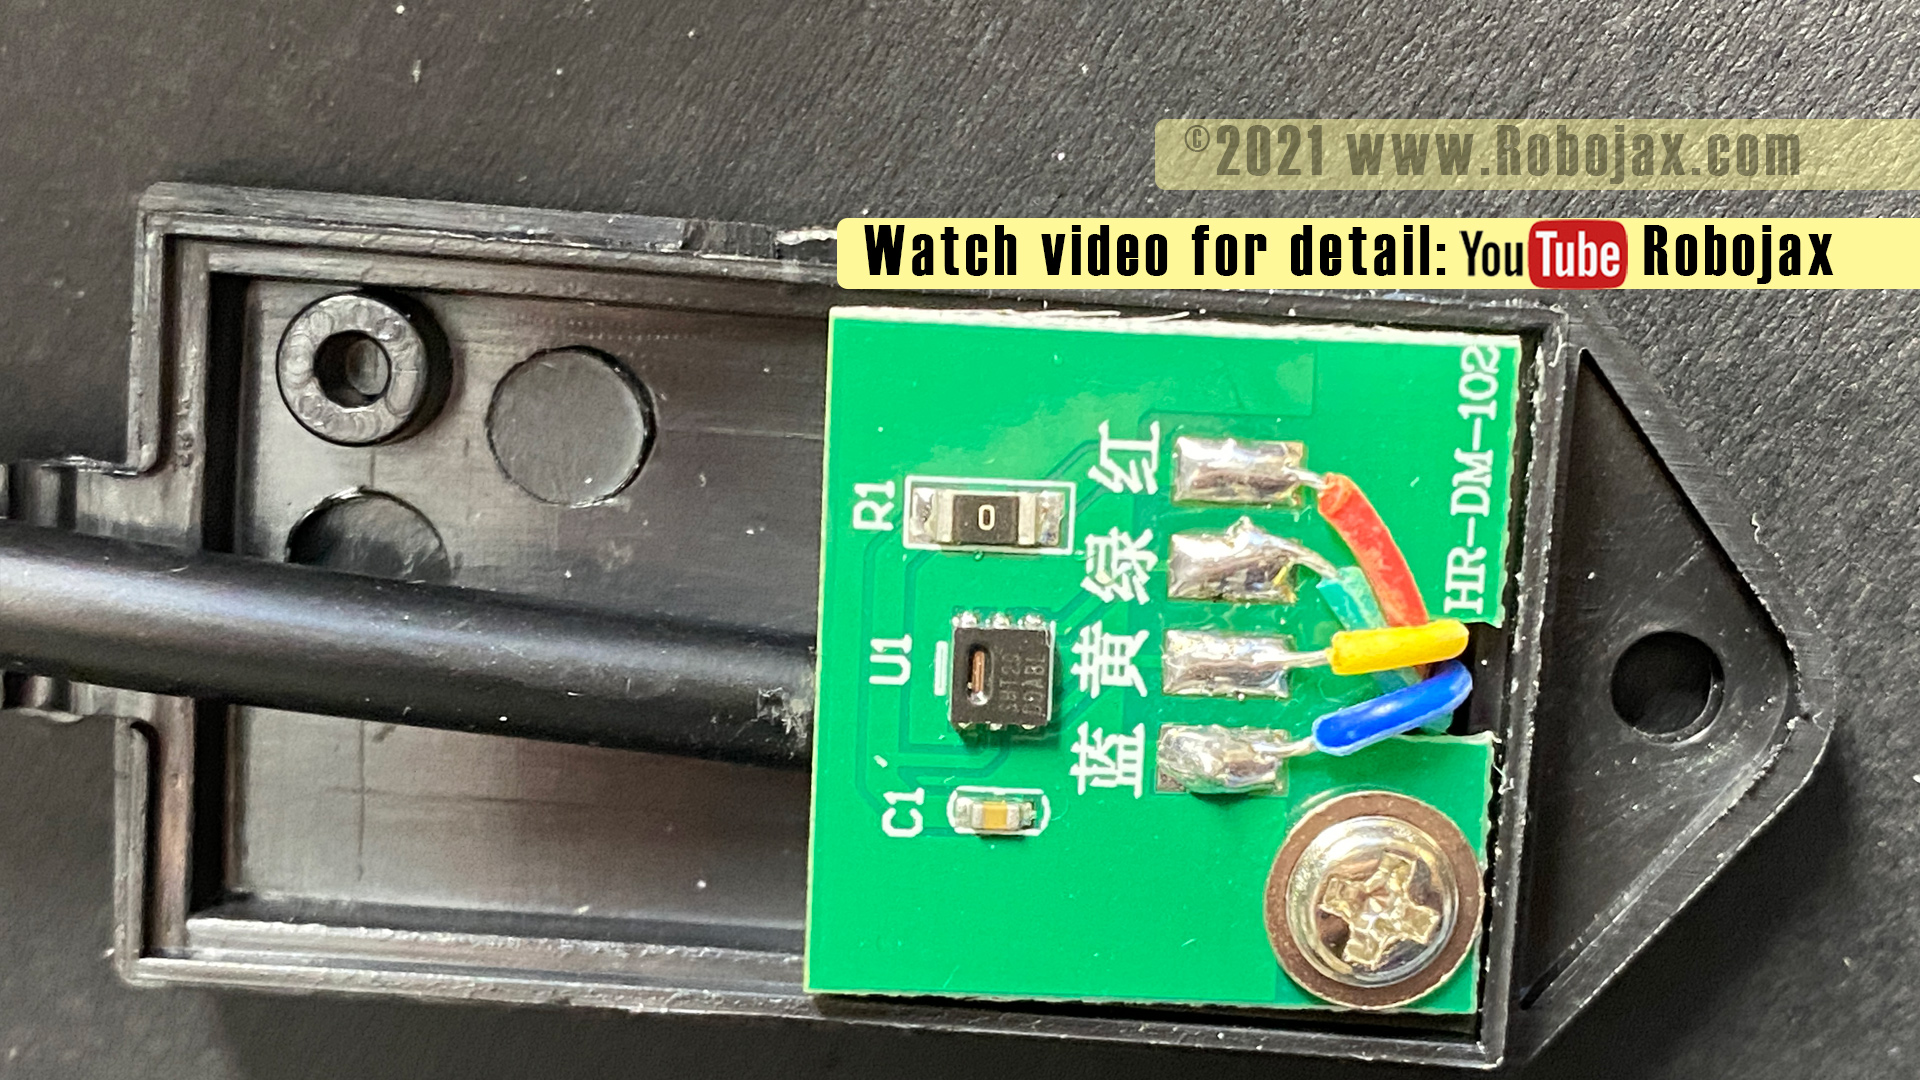
STC-3028 Image: SHT20 PCB Sensor board opened
Click on image to enlarge
STC-3028 Image: MB6S Bridge rectifier (only on AC version)

Click on image to enlarge
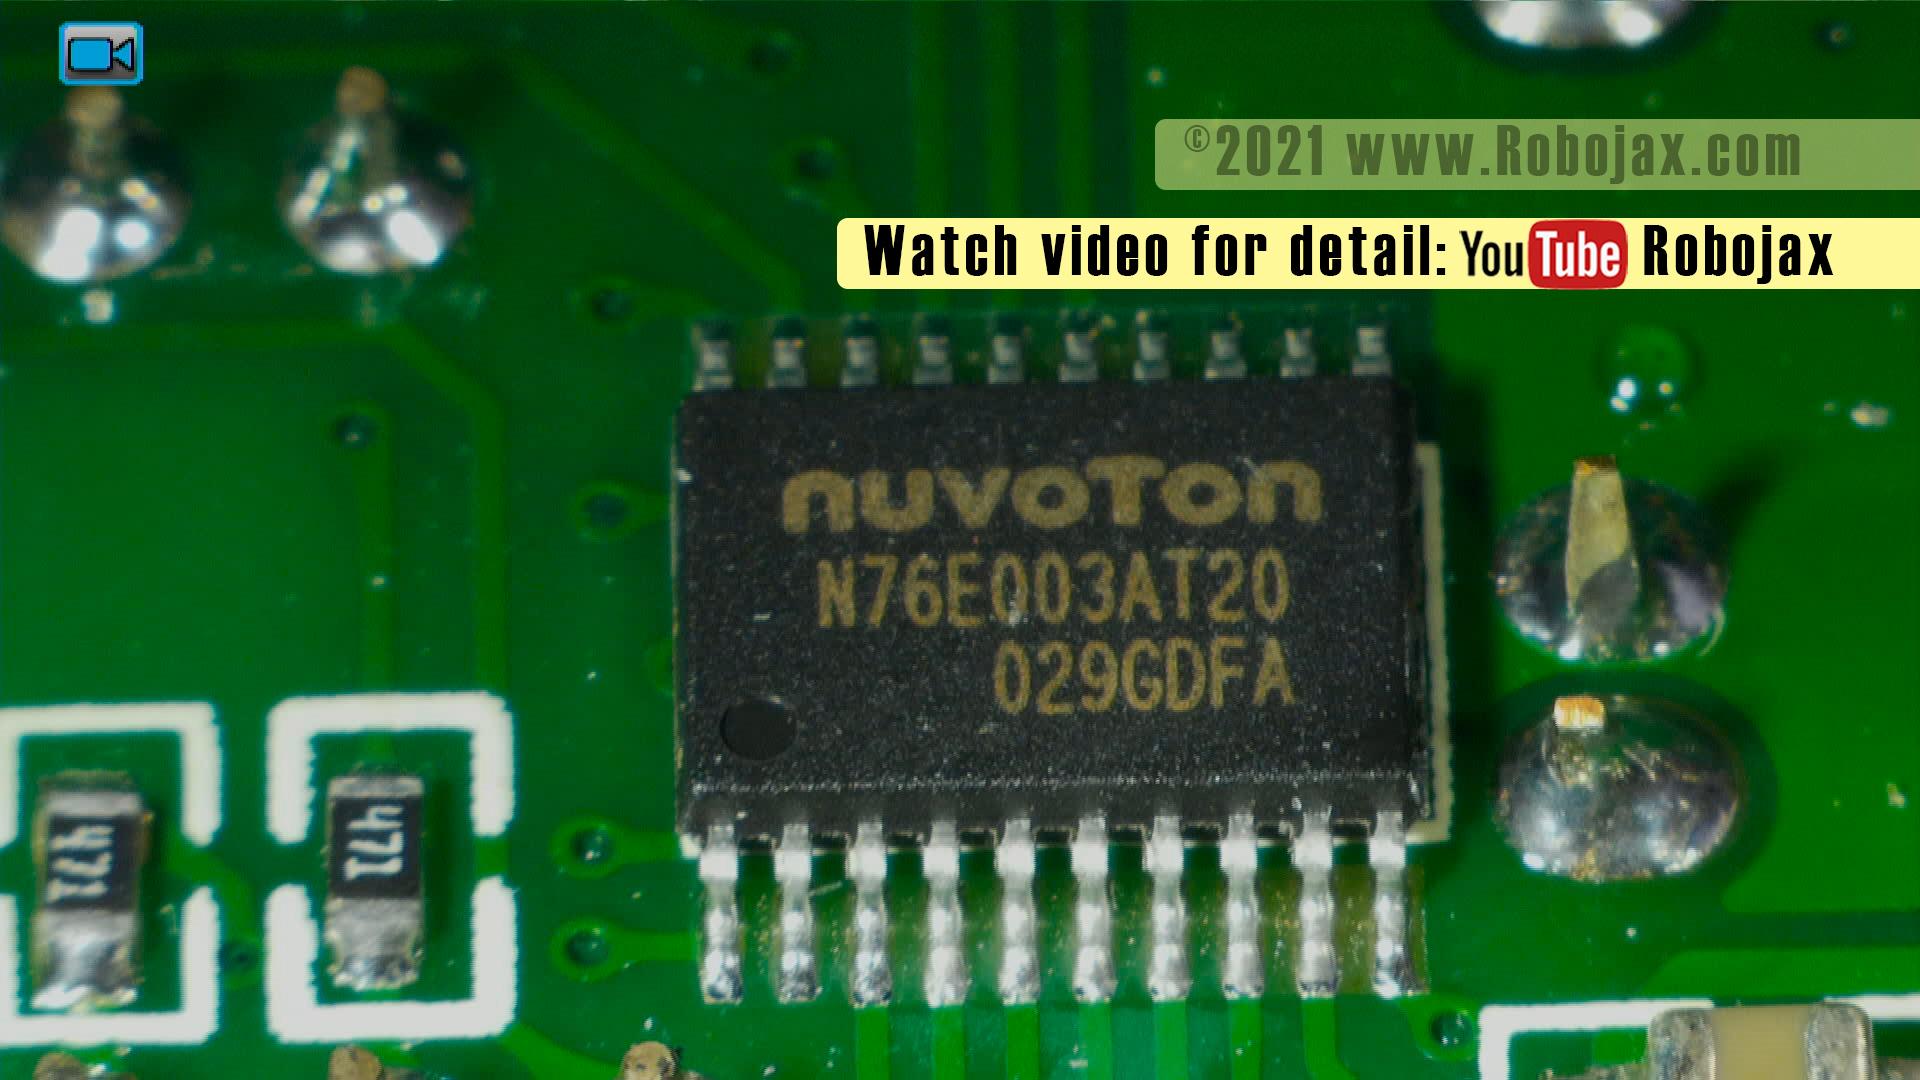
STC-3028 Image: Newvoton N76E003AT2 MCU
Click on image to enlarge
STC-3028 Image: 74HC164D

Click on image to enlarge
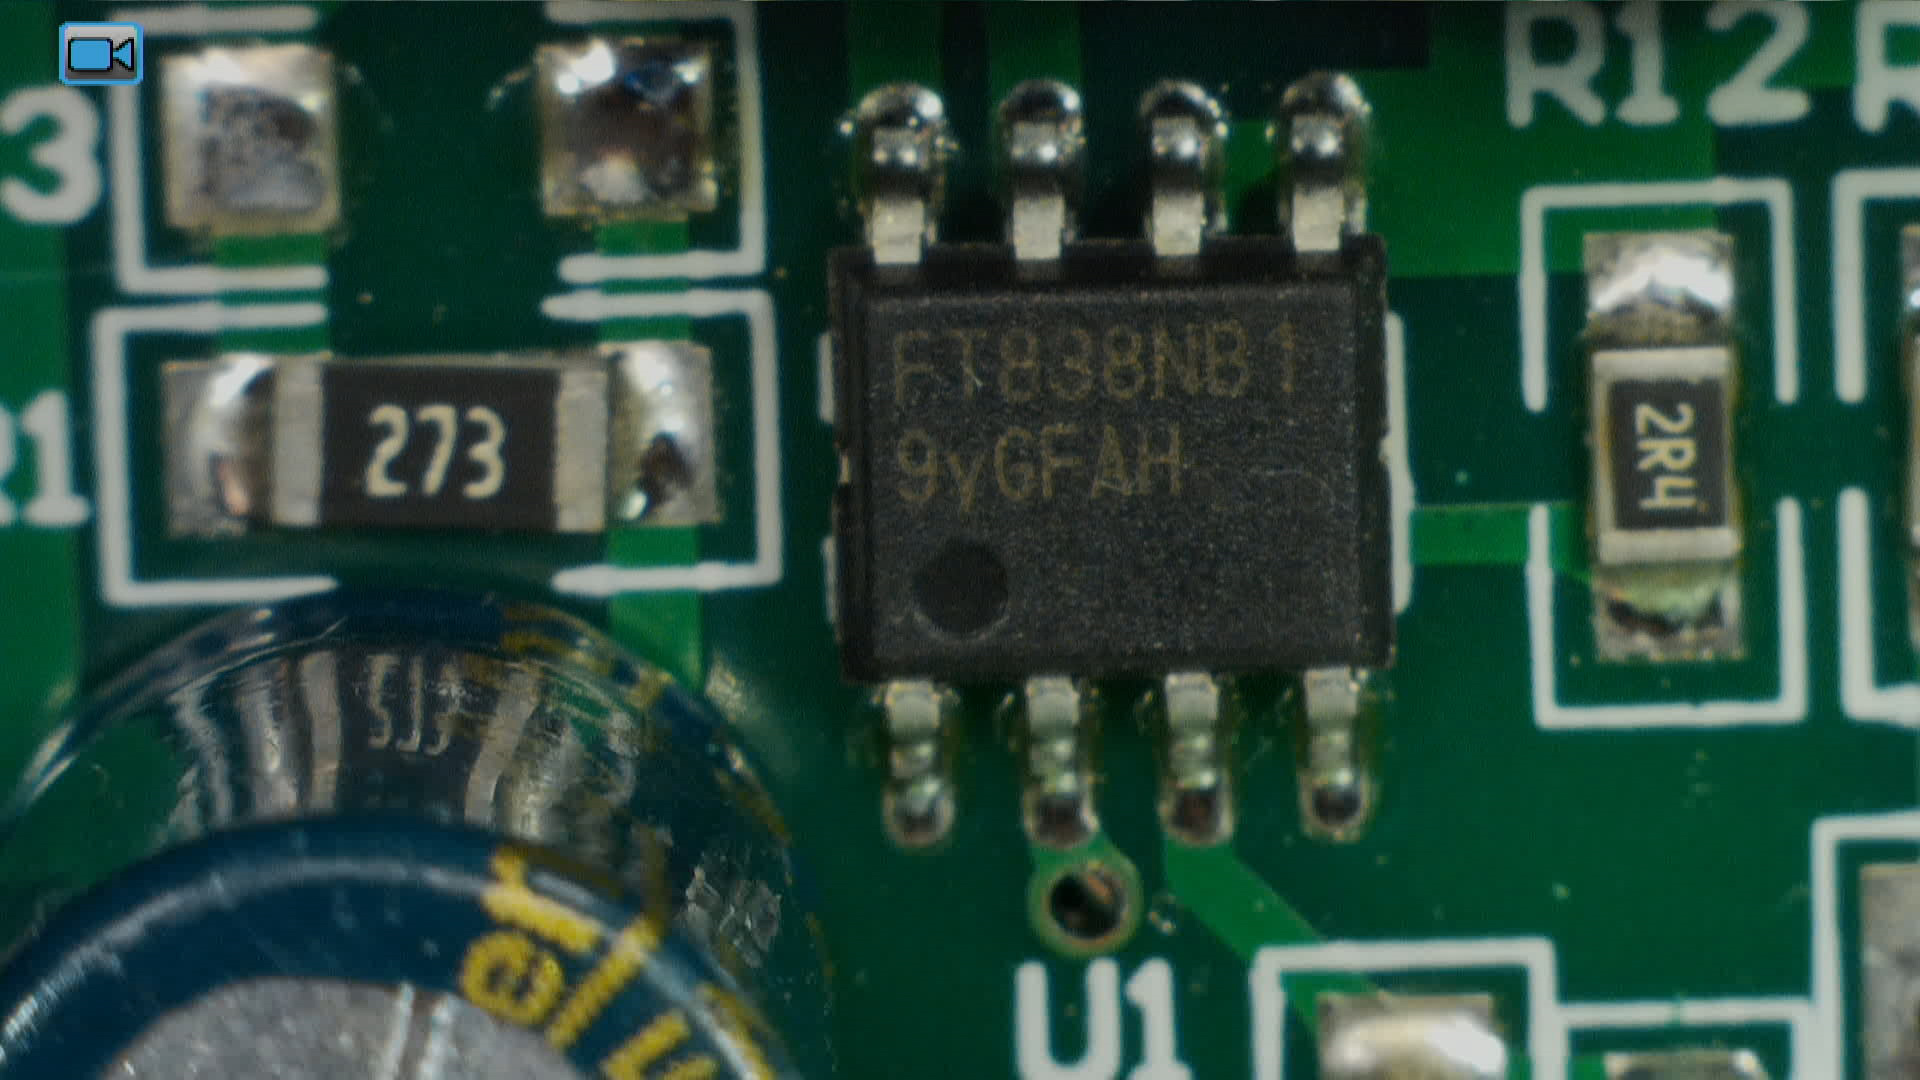
STC-3028 Image: FT838NB
Click on image to enlarge
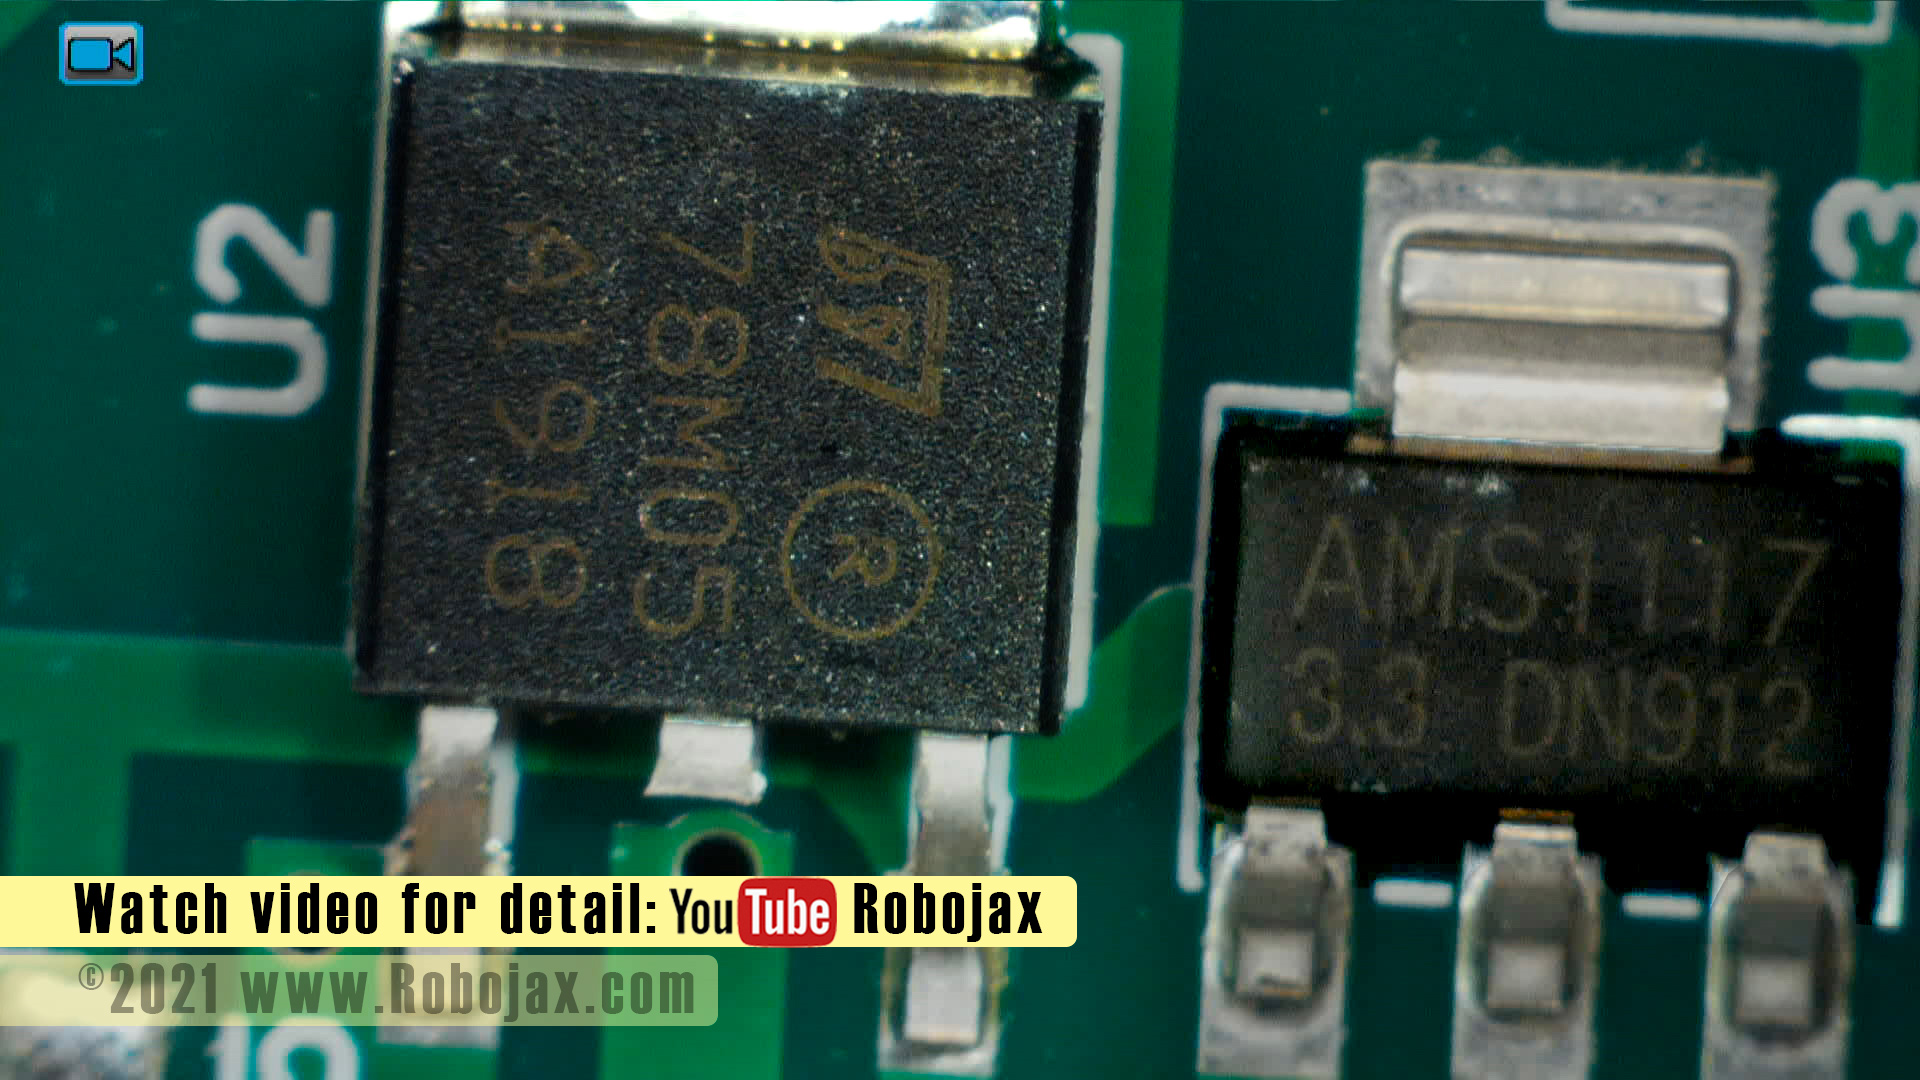
STC-3028 Image: 7805 5V and AMS1117 3.3V regulator
Click on image to enlarge
STC-3028 Image: Inside module top view

Click on image to enlarge
STC-3028 Image: Front panel removed
Click on image to enlarge
Components Used in this module
- SHT20 Temperature and Humidity Sensor datasheet(pdf)
- Newvoton n76e003at20 datasheet(web site)
- SN74HC164 8-Bit Parallel-Out Serial Shift Registers datasheet(pdf)
- MB6S Bridge rectifier datasheet(pdf)
- FT838NB Low-Power Off-Line CC/CV Switch datasheet(pdf)
- 7805 5V DC voltage regulator datasheet(pdf)
- AMS1117 3.3V Regulator datasheet(pdf)