
Other Arduino Codes and Videos by Robojax
In this page you will get the code to control RGB LED using Arduino
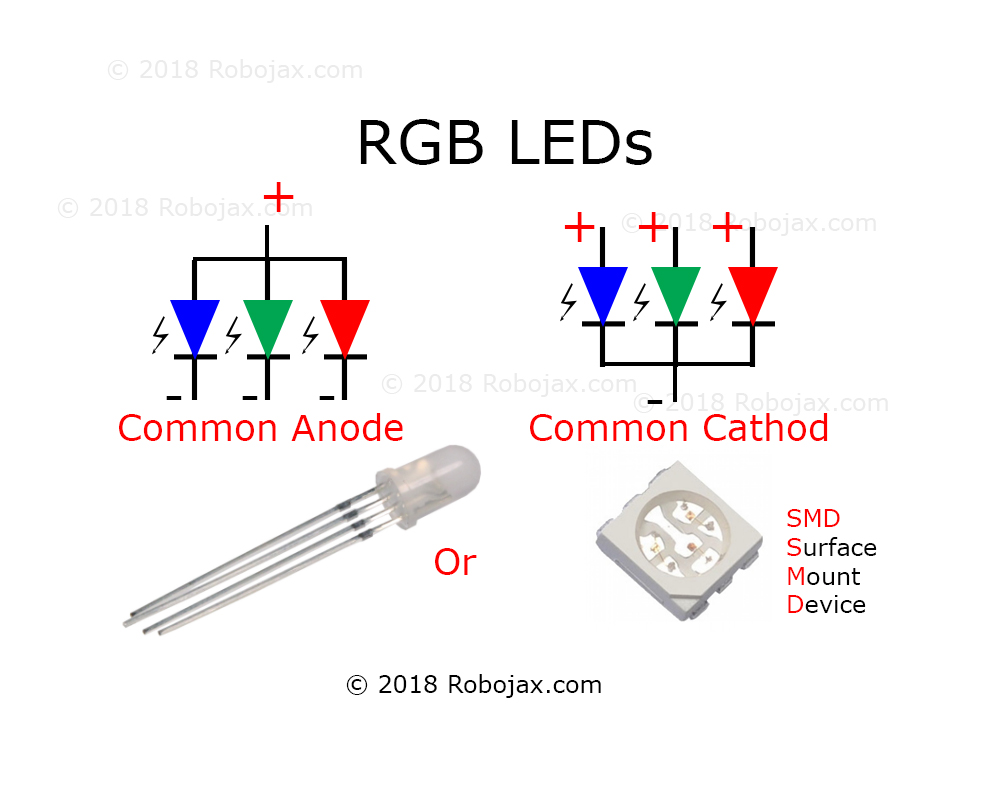
Image above shows the RGB LED has 3 LED in one package
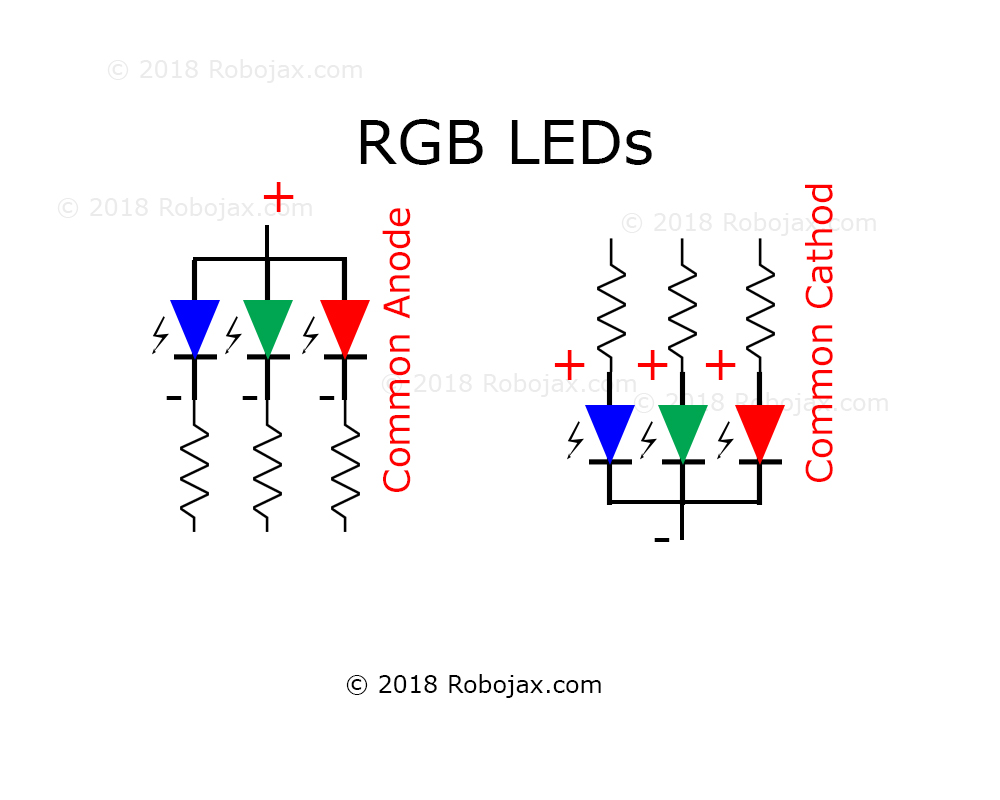
Image above shows connecting resistor on Common-Cathode and Common-Anode
 /*
 * This Arduino sktech is to control color on REG LED
 * Written by Ahmad Shamshiri for Robojax.com
 * on Octover 06th 2018 at 14:00 in Ajax, Ontario, Canada

  Watch instruciton video for this code: https://youtu.be/rggg-_wb56I

 * This code is "AS IS" without warranty or liability. Free to be used as long as you keep this note intact.*
 * This code has been download from Robojax.com
    This program is free software: you can redistribute it and/or modify
    it under the terms of the GNU General Public License as published by
    the Free Software Foundation, either version 3 of the License, or
    (at your option) any later version.

    This program is distributed in the hope that it will be useful,
    but WITHOUT ANY WARRANTY; without even the implied warranty of
    MERCHANTABILITY or FITNESS FOR A PARTICULAR PURPOSE.  See the
    GNU General Public License for more details.

    You should have received a copy of the GNU General Public License
    along with this program.  If not, see <https://www.gnu.org/licenses/>.
 */
int RED = 11;// the PWM pin the RED LED is attached to
int GREEN = 10;// the PWM pin the GREEN LED is attached to
int BLUE = 6;// the PWM pin the BLUE LED is attached to
int colorTime = 2000; // time to wait between color change


int color[8][3] =
              {
               {255,255,255},// white
               {255,0,0},// red
               {0,255,0},// green
               {0,0,255},// blue
               {255,255,0},// yellow
               {0,255,255},// a qua
               {255,0,255},// pink
               {139,69,19},//brown
              };
String colorName[8]=
              {
               "White",
               "Red",
               "Green",
               "Blue",
               "Yellow",
               "Aqua",
               "Pink",
               "Brown"
              };
void setup() {
   // Robojax.com RGB LED code 20181006
  Serial.begin(9600);
  // declare pin 11,12, 13 for RED , GREEN and BLUE to be an output:
  pinMode(RED, OUTPUT);
     digitalWrite(RED,LOW);// turn RED led off
  pinMode(GREEN, OUTPUT);
     digitalWrite(GREEN,LOW);// turn RED led off
  pinMode(BLUE, OUTPUT);
     digitalWrite(BLUE,LOW);// turn RED led off
}

// the loop routine runs over and over again forever:
void loop() {

  // Robojax.com RGB LED code 20181006


      for(int j=0; j<8; j++)
      {
        RGB_LED(color[j][0], color[j][1], color[j][2]);
                       Serial.println(colorName[j]);

      delay(colorTime);// delay for each color
      }

}

/*
  sends correct value to R, G and B and LED pin

  @param r is received red value
  @param g is received green value
  @param b is received blue value
 */
void RGB_LED(int r, int g, int b)
{
        analogWrite(RED, r);// set value for RED LED
        analogWrite(GREEN, g);// set value for GREEN LED
        analogWrite(BLUE, b);// set value for BLUE LED

}

If you found this tutorial helpful, please support me so I can continue creating content like this. support me via PayPal 