
Other Arduino Codes and Videos by Robojax
This article is on how to use the E-Switch module based on IRF5305 MOSFET module. This module can act as a switch and can be controlled as motor speed controller. All aspects of this module has been explained in the provided video at Robojax.com. 3 different codes has been provided for different usage of this. Also we have tested the module to see how much current it can handle under HIGH (24V) and at Low (5V).
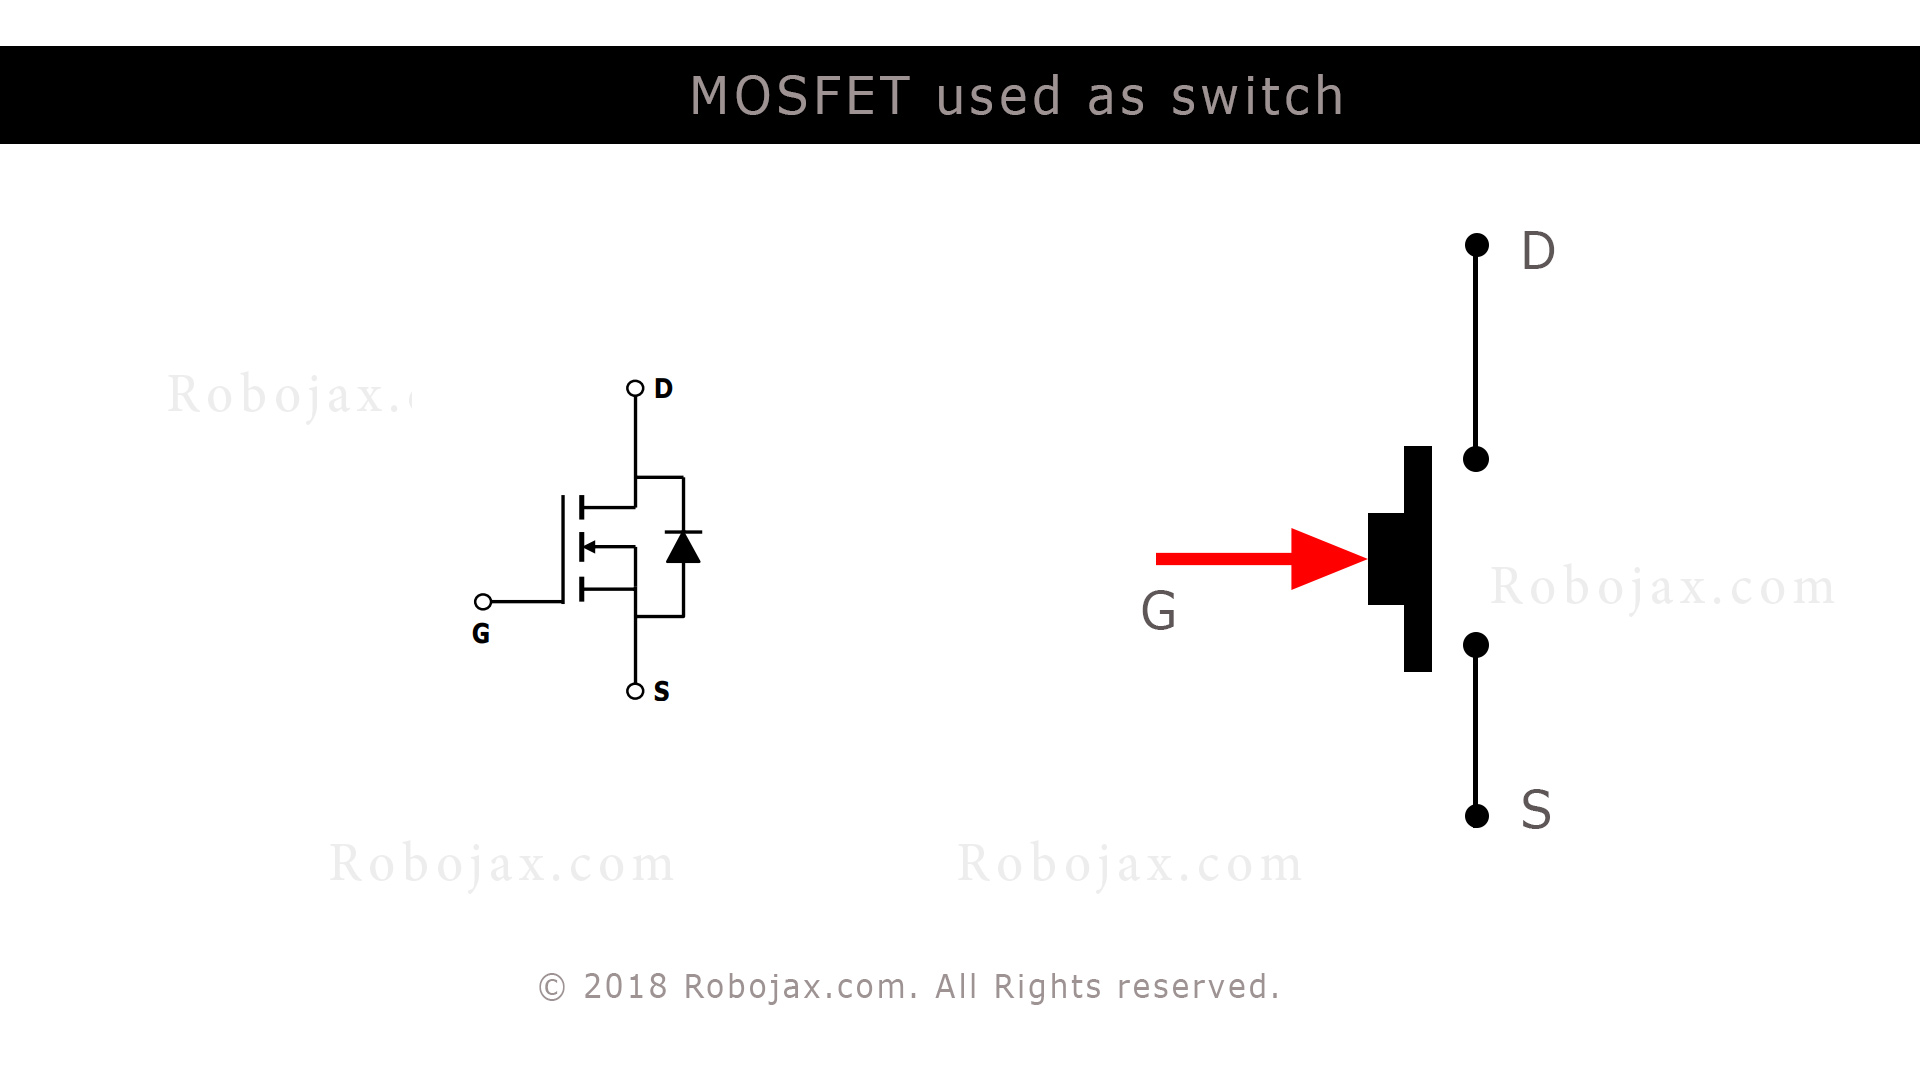
Image above shows Mosfet used as switch.
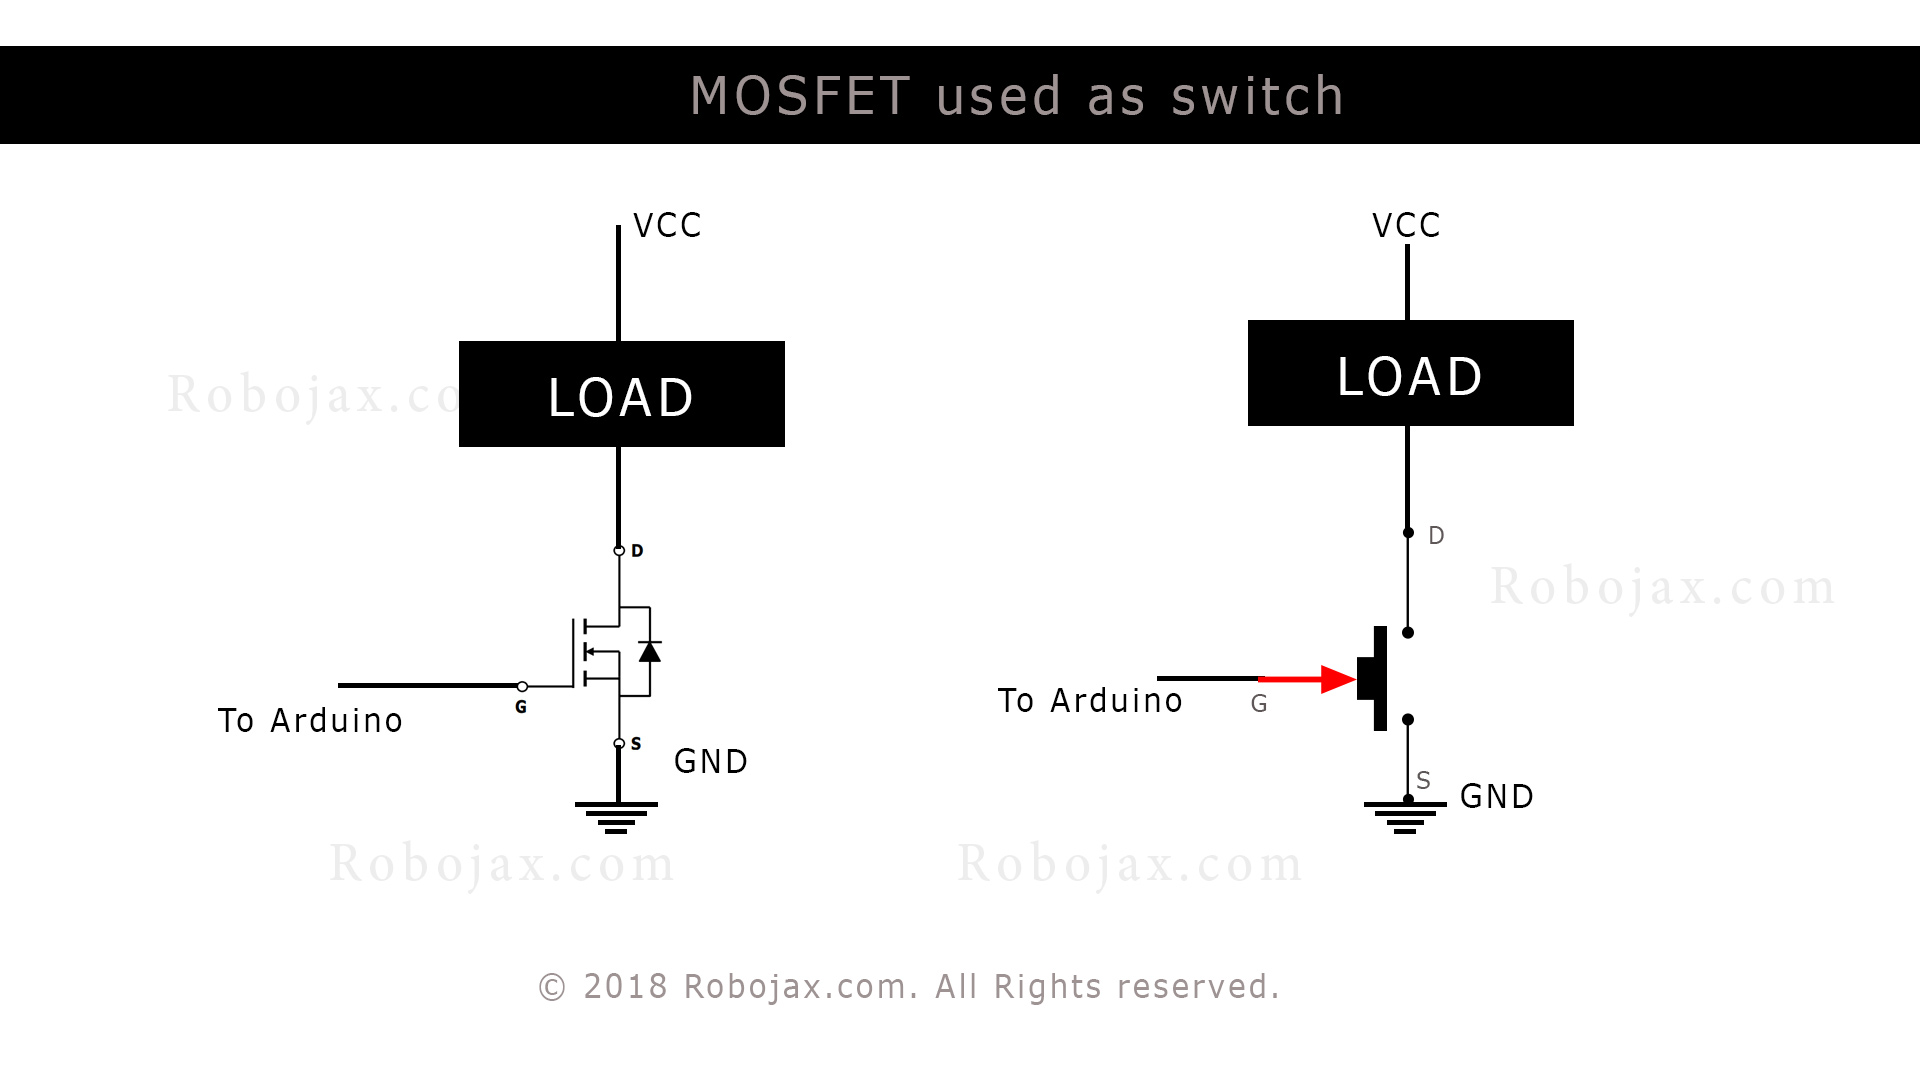
Image above shows MOSFET used to control a load connected at Drain pin.
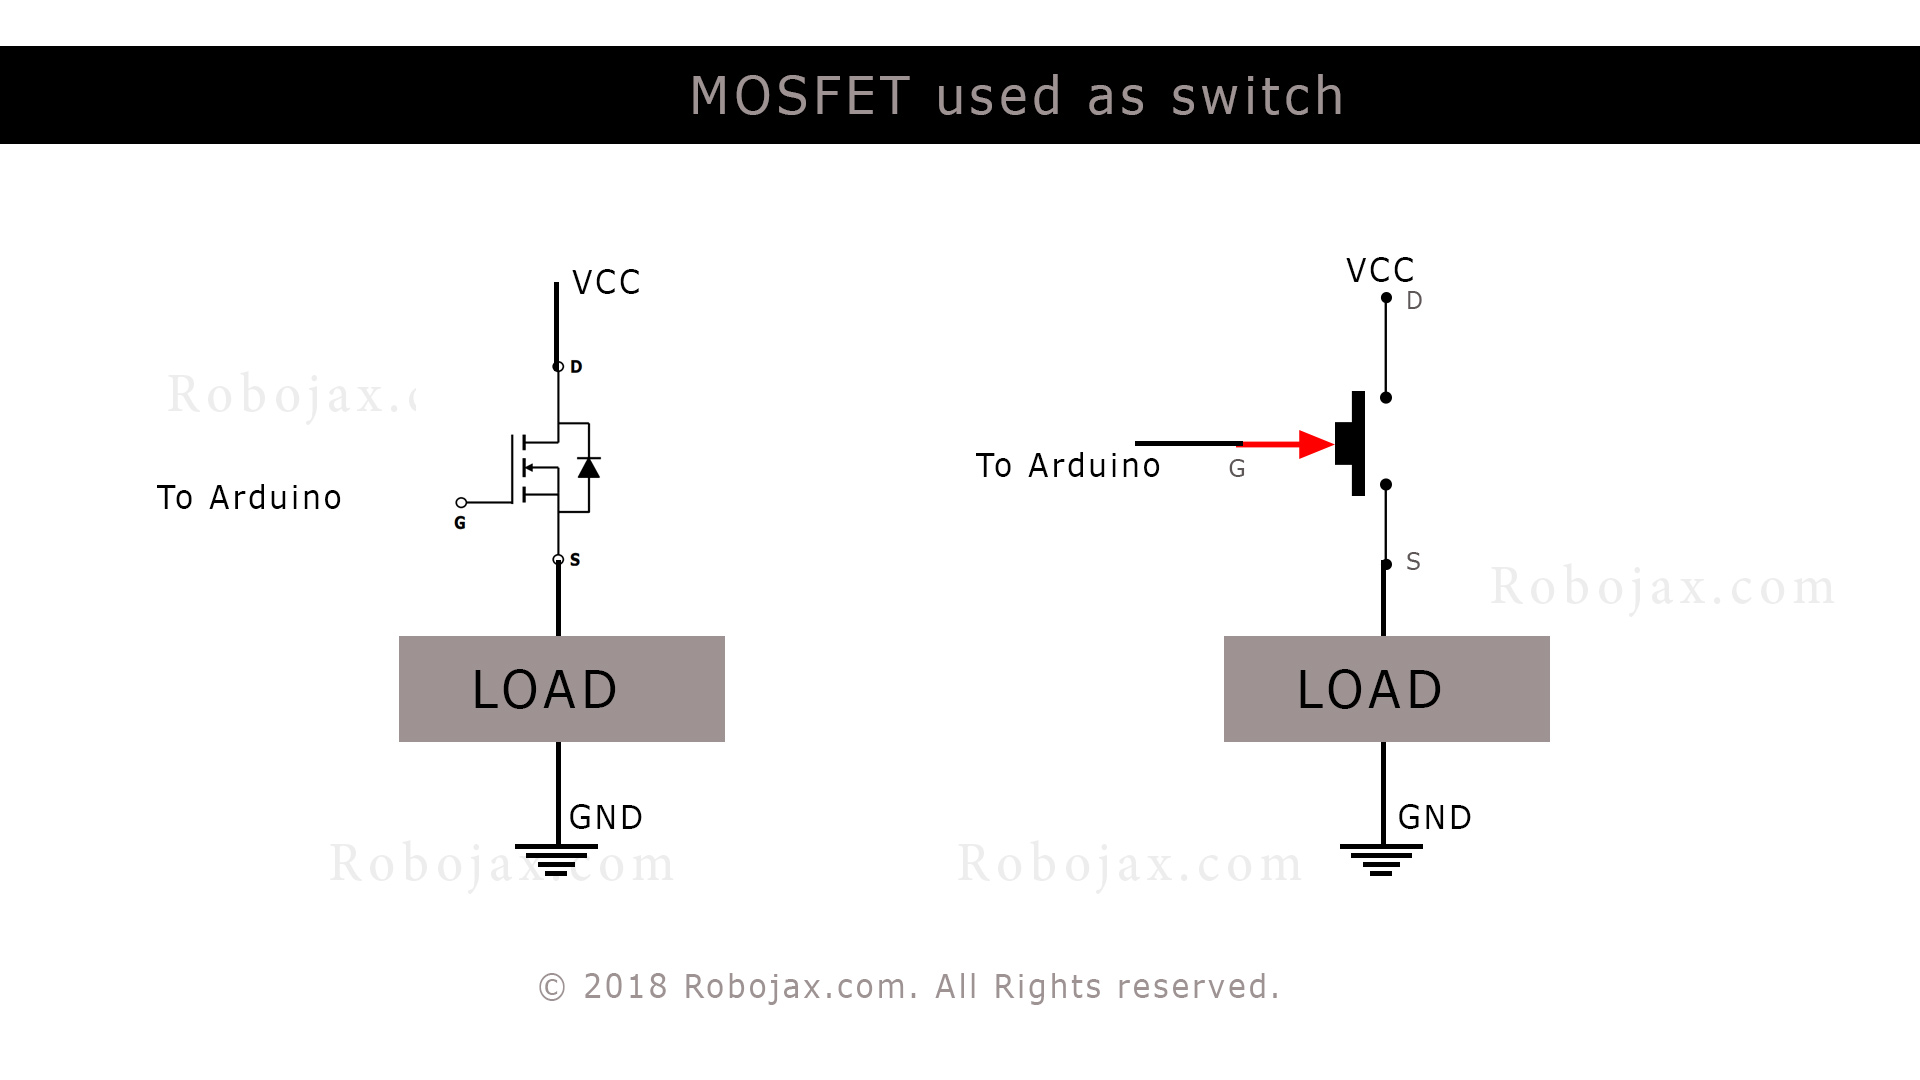
Image above shows MOSFET used to control a load connected at Source pin.
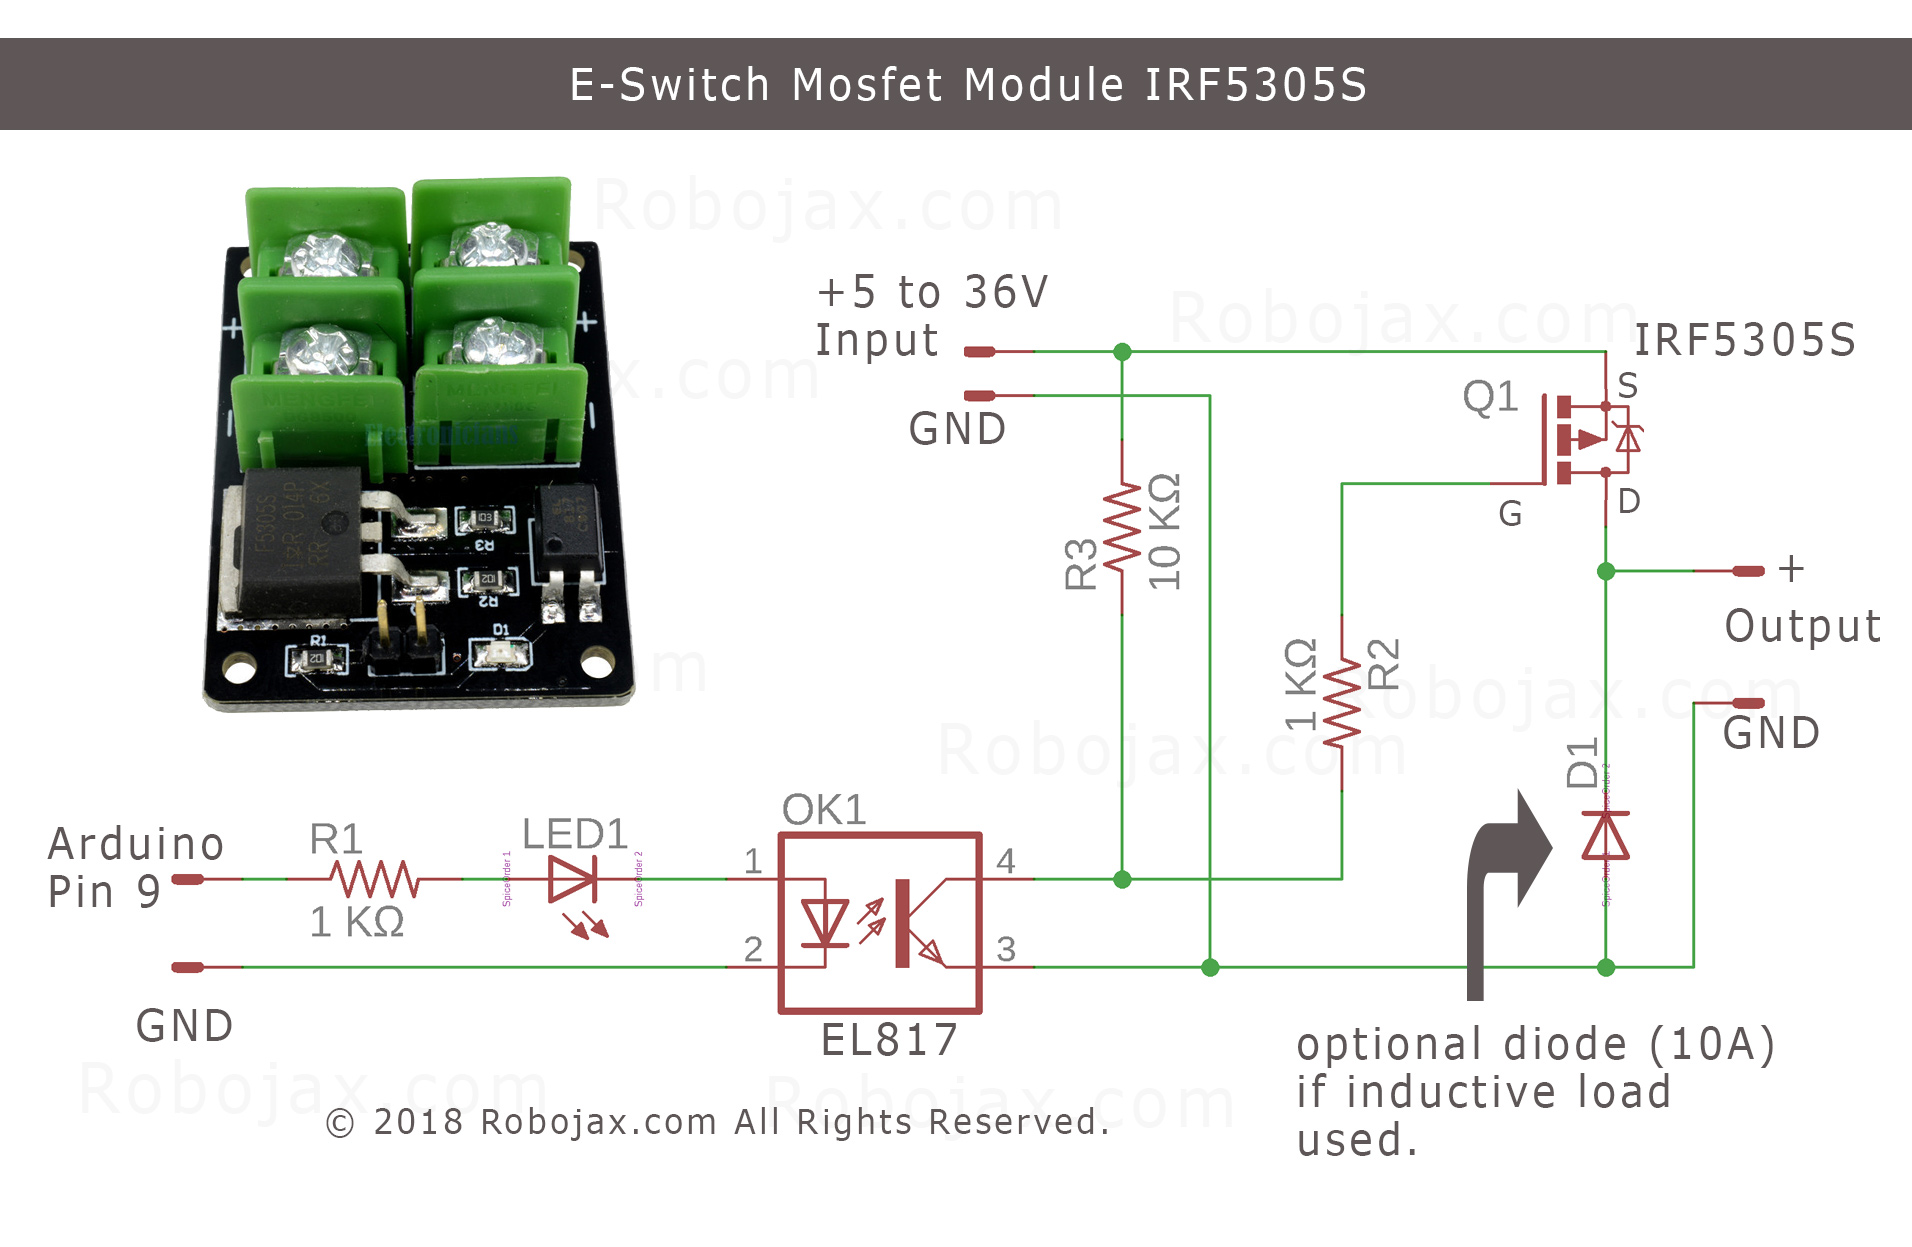
Schematic diagram of E-Switch based on IRF5305 Mosfet
 /*
 * This is Arduino Sketch for Tutorial video
 * explaining the 5305 MOSFET used as switch
 * this sktech turns the MOSFET ON and keeps it ON forever
 *
 * Written by Ahmad Shamshiri on Sep 12, 2018 in Ajax, Ontario, Canada
 * For Robojax.com
 * Watch instruciton video for this code: https://youtu.be/eAANkWDvusU
 * This code is "AS IS" without warranty or liability. Free to be used as long as you keep this note intact.
 */
int loadPin =9;// load pin


void setup() {
  // Robojax.com demo
  pinMode(loadPin,OUTPUT);
  Serial.begin(9600);
  Serial.println("Robojax Demo");

}

void loop() {
  // Robojax.com  tutorial

  digitalWrite(loadPin, HIGH);
 while(1);// wait forever


}
 /*
 * This is Arduino Sketch for Tutorial video
 * explaining the 5305 MOSFET used as switch
 * this sktech turns MOSFET ON for 3 seconds then turns it OFF for 3 seconds.
 *
 * Written by Ahmad Shamshiri on Sep 12, 2018 at 17:36 in Ajax, Ontario, Canada
 * For Robojax.com
 * Watch instruciton video for this code: https://youtu.be/eAANkWDvusU
 * This code is "AS IS" without warranty or liability. Free to be used as long as you keep this note intact.
 */
int cont = HIGH;
int loadPin = 9;
void setup() {
  // Robojax.com demo
  pinMode(loadPin,OUTPUT);
  Serial.begin(9600);
  Serial.println("Robojax Demo");


}

void loop() {
  // Robojax.com  tutorial


  if(cont == HIGH)
  {
    Serial.println("OUTPUT is HIGH");
    digitalWrite(loadPin,HIGH);
    delay(3000);
    cont = LOW;
  }else{
    Serial.println("OUTPUT is LOW");
    digitalWrite(loadPin,LOW);
    delay(3000);
    cont = HIGH;
  }

}
 /*
 * This is Arduino Sketch for Tutorial video
 * explaining the 5305 MOSFET used as switch
 * This sketch will control speed of a motor or intensity of light using PWM
 *
 * Written by Ahmad Shamshiri on Sep 12, 2018 at 23:23 in Ajax, Ontario, Canada
 * For Robojax.com
 * Watch instruciton video for this code: https://youtu.be/eAANkWDvusU
 * This code is "AS IS" without warranty or liability. Free to be used as long as you keep this note intact.
 */
int motorPin =9;// pin to connect to motor module
int mSpeed = 0;// variable to hold speed value
int mStep = 15;// increment/decrement step for PWM motor speed

void setup() {
  // Robojax.com demo
  pinMode(motorPin,OUTPUT);// set mtorPin as output
  Serial.begin(9600);// initialize serial motor
  Serial.println("Robojax Demo");


}

void loop() {
  // Robojax.com  tutorial

analogWrite(motorPin, mSpeed);// send mSpeed value to motor
    Serial.print("Speed: ");
    Serial.println(mSpeed);// print mSpeed value on Serial monitor (click on Tools->Serial Monitor)
  mSpeed = mSpeed + mStep;
  // See video you for details.
  if (mSpeed <= 0 || mSpeed >= 255) {
    mStep = -mStep;
  }

delay(200);

}

If you found this tutorial helpful, please support me so I can continue creating content like this. support me via PayPal 