
Other Arduino Codes and Videos by Robojax
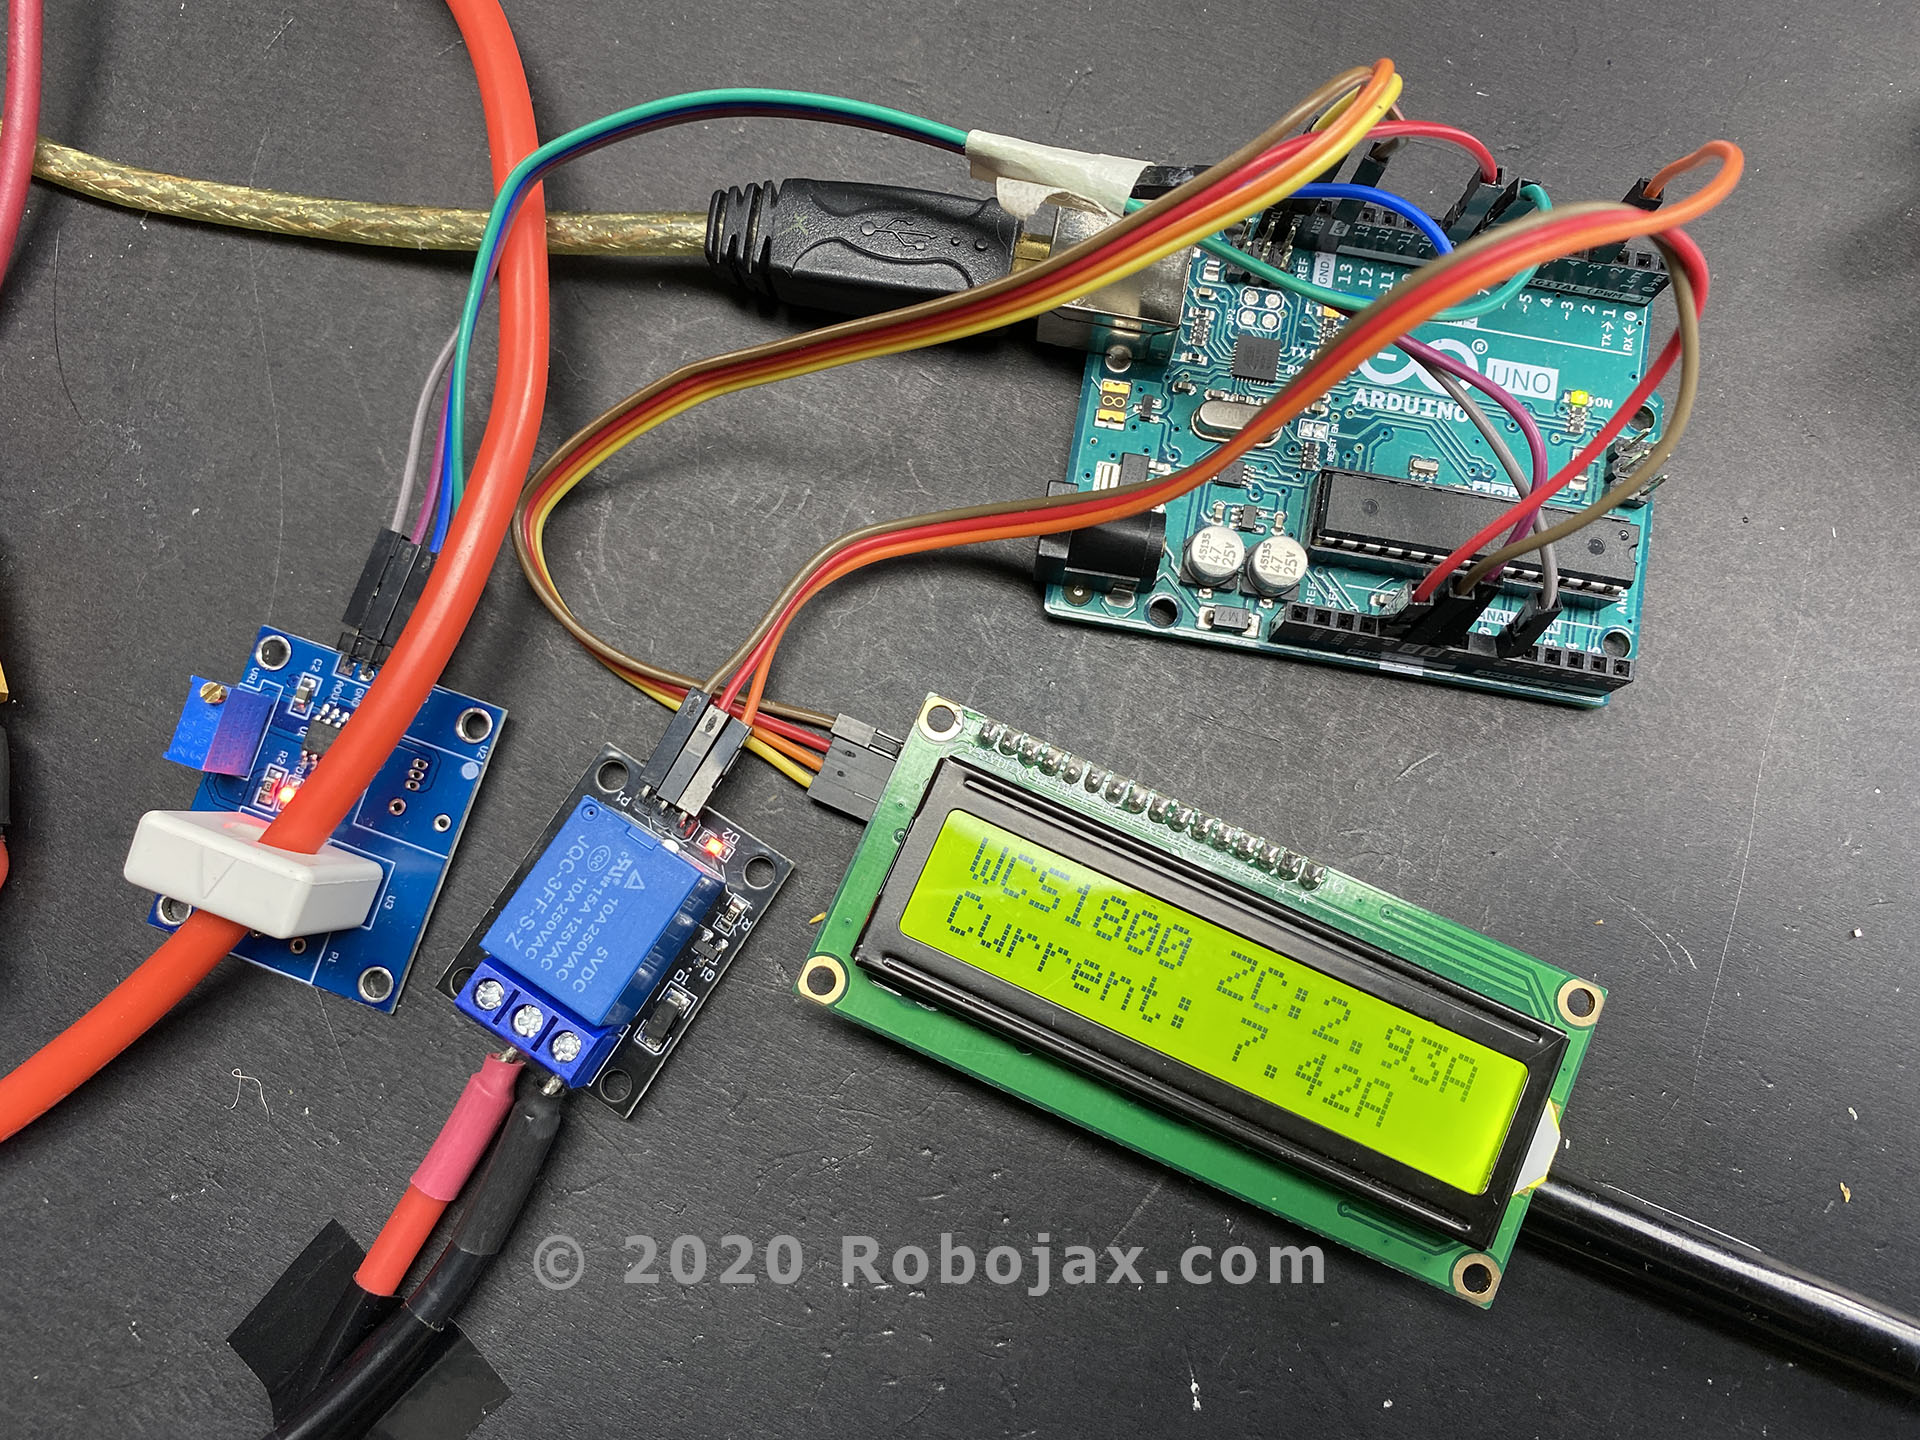
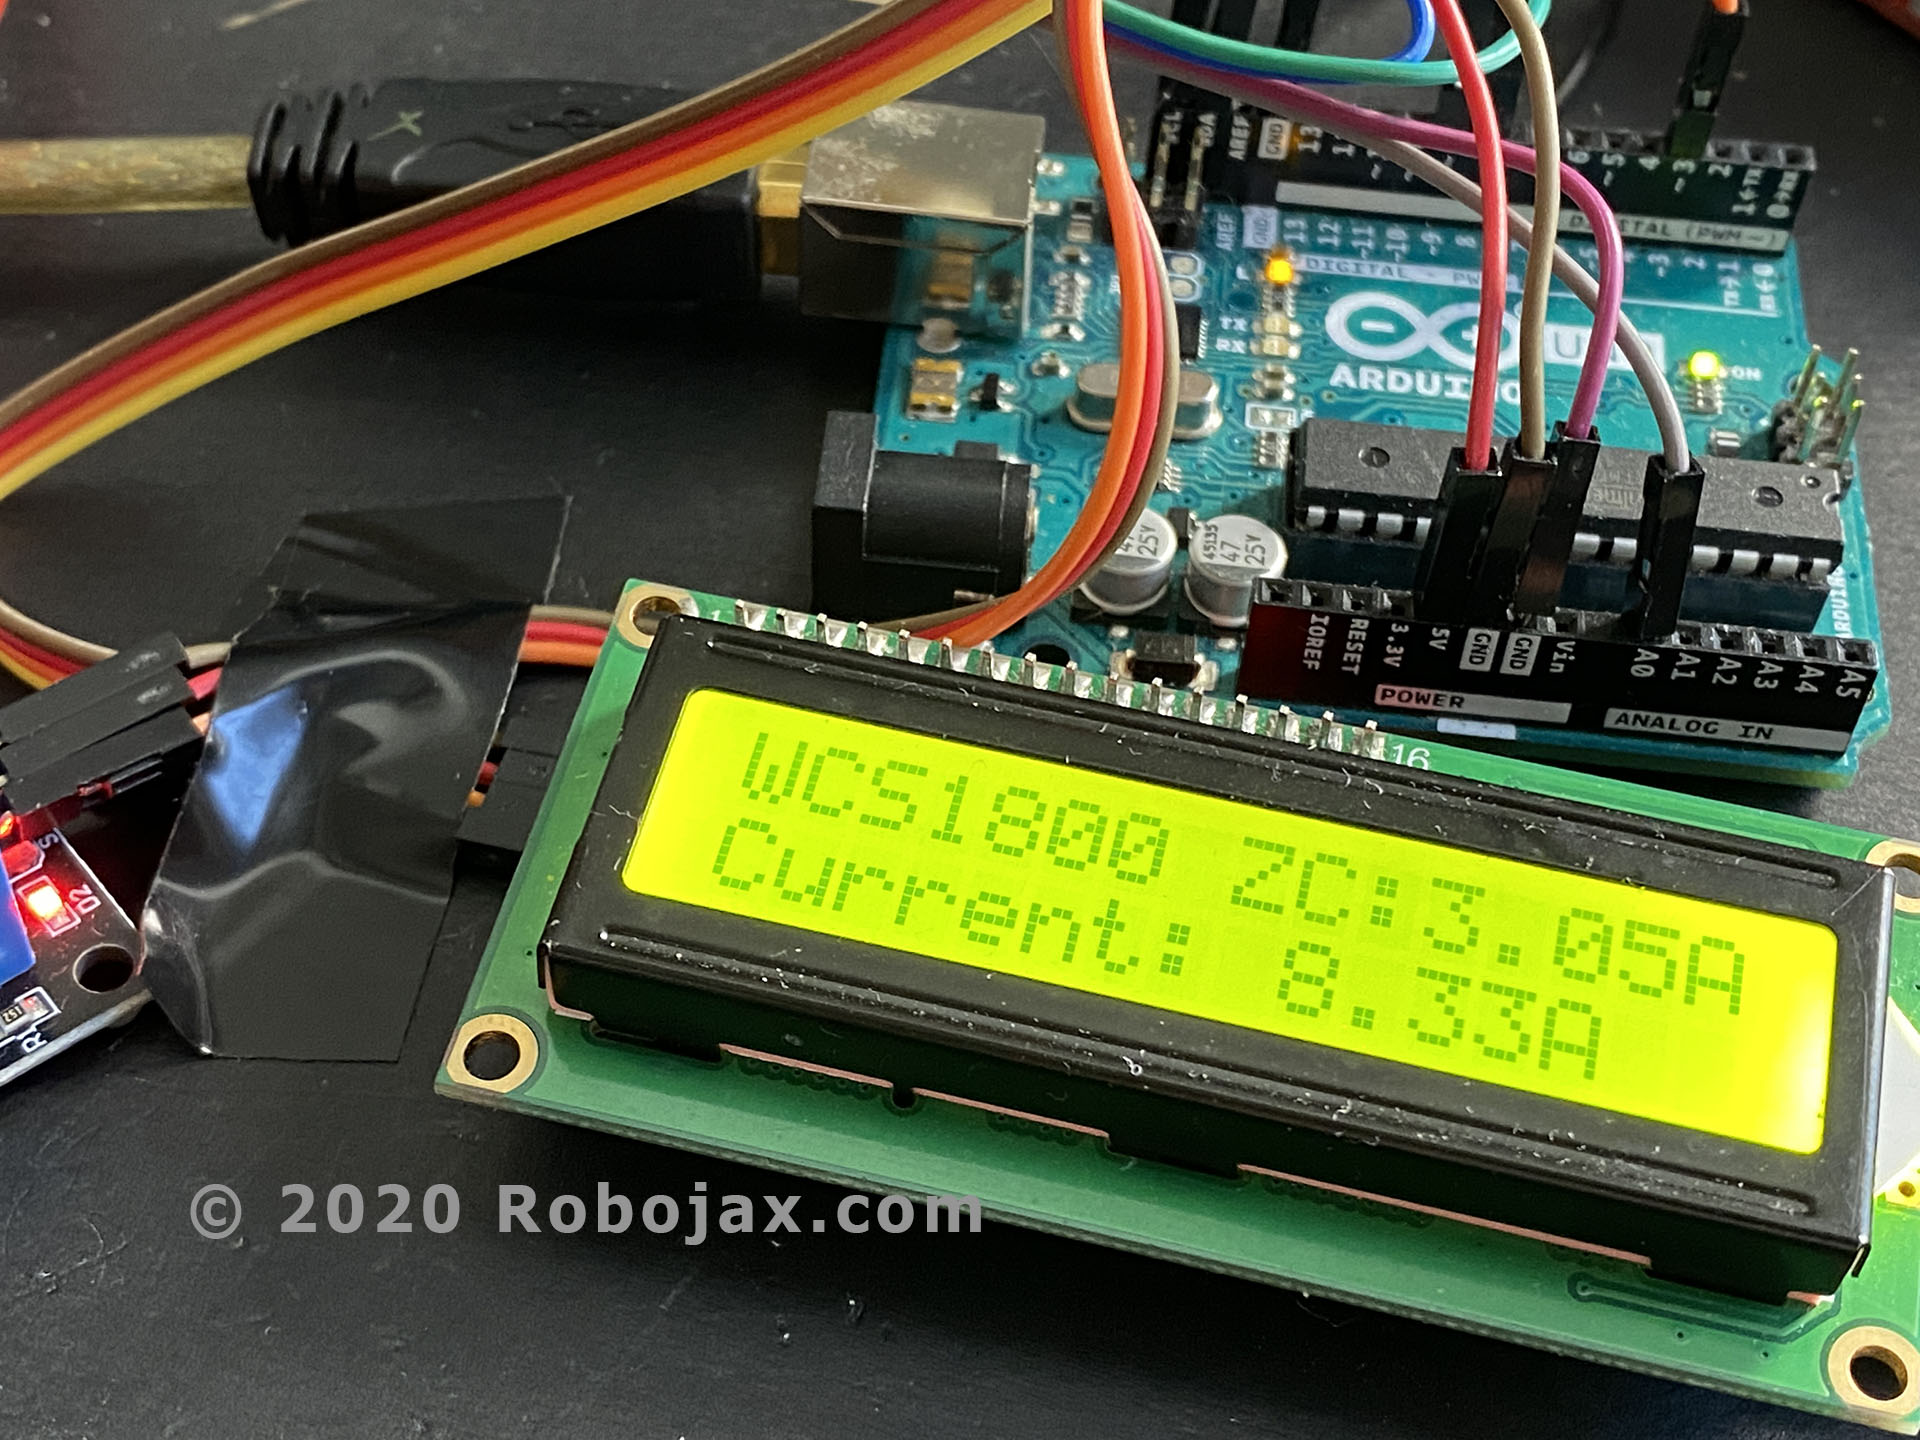
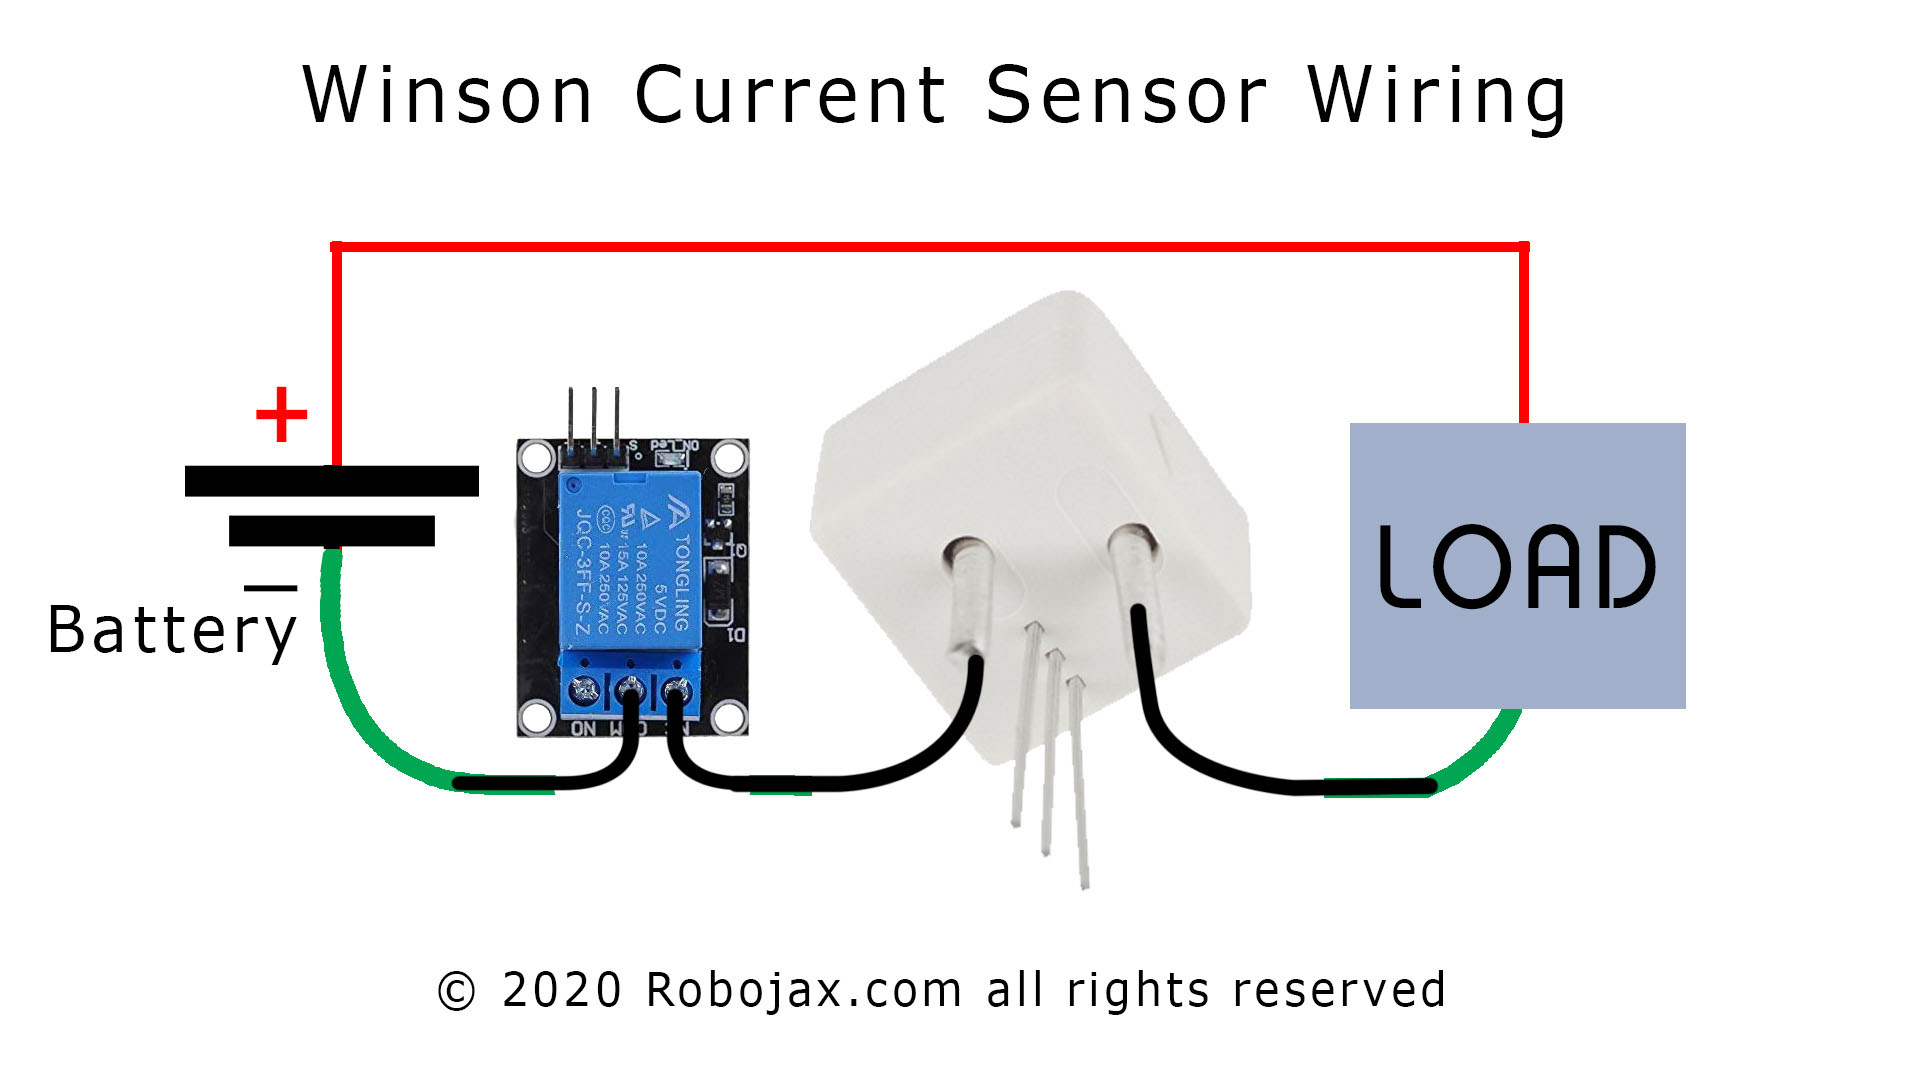
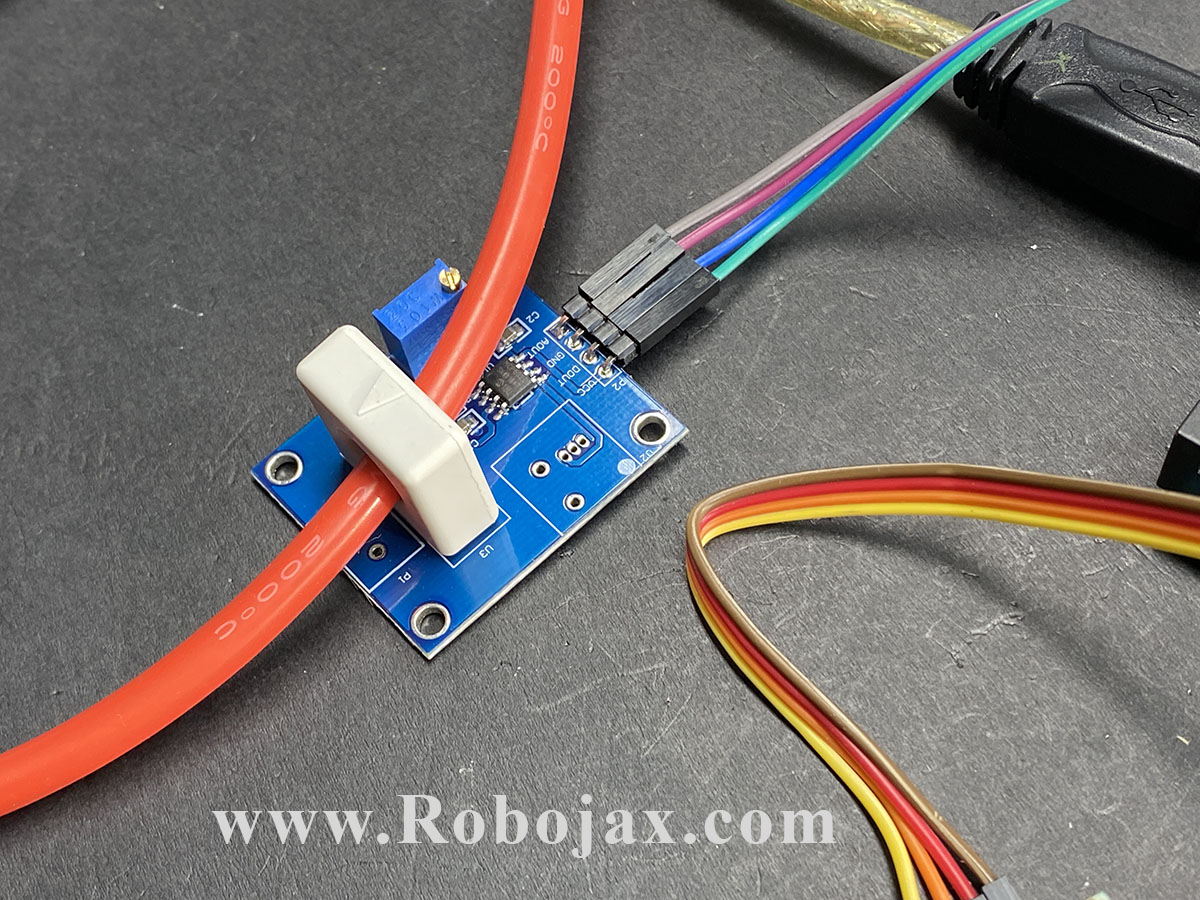
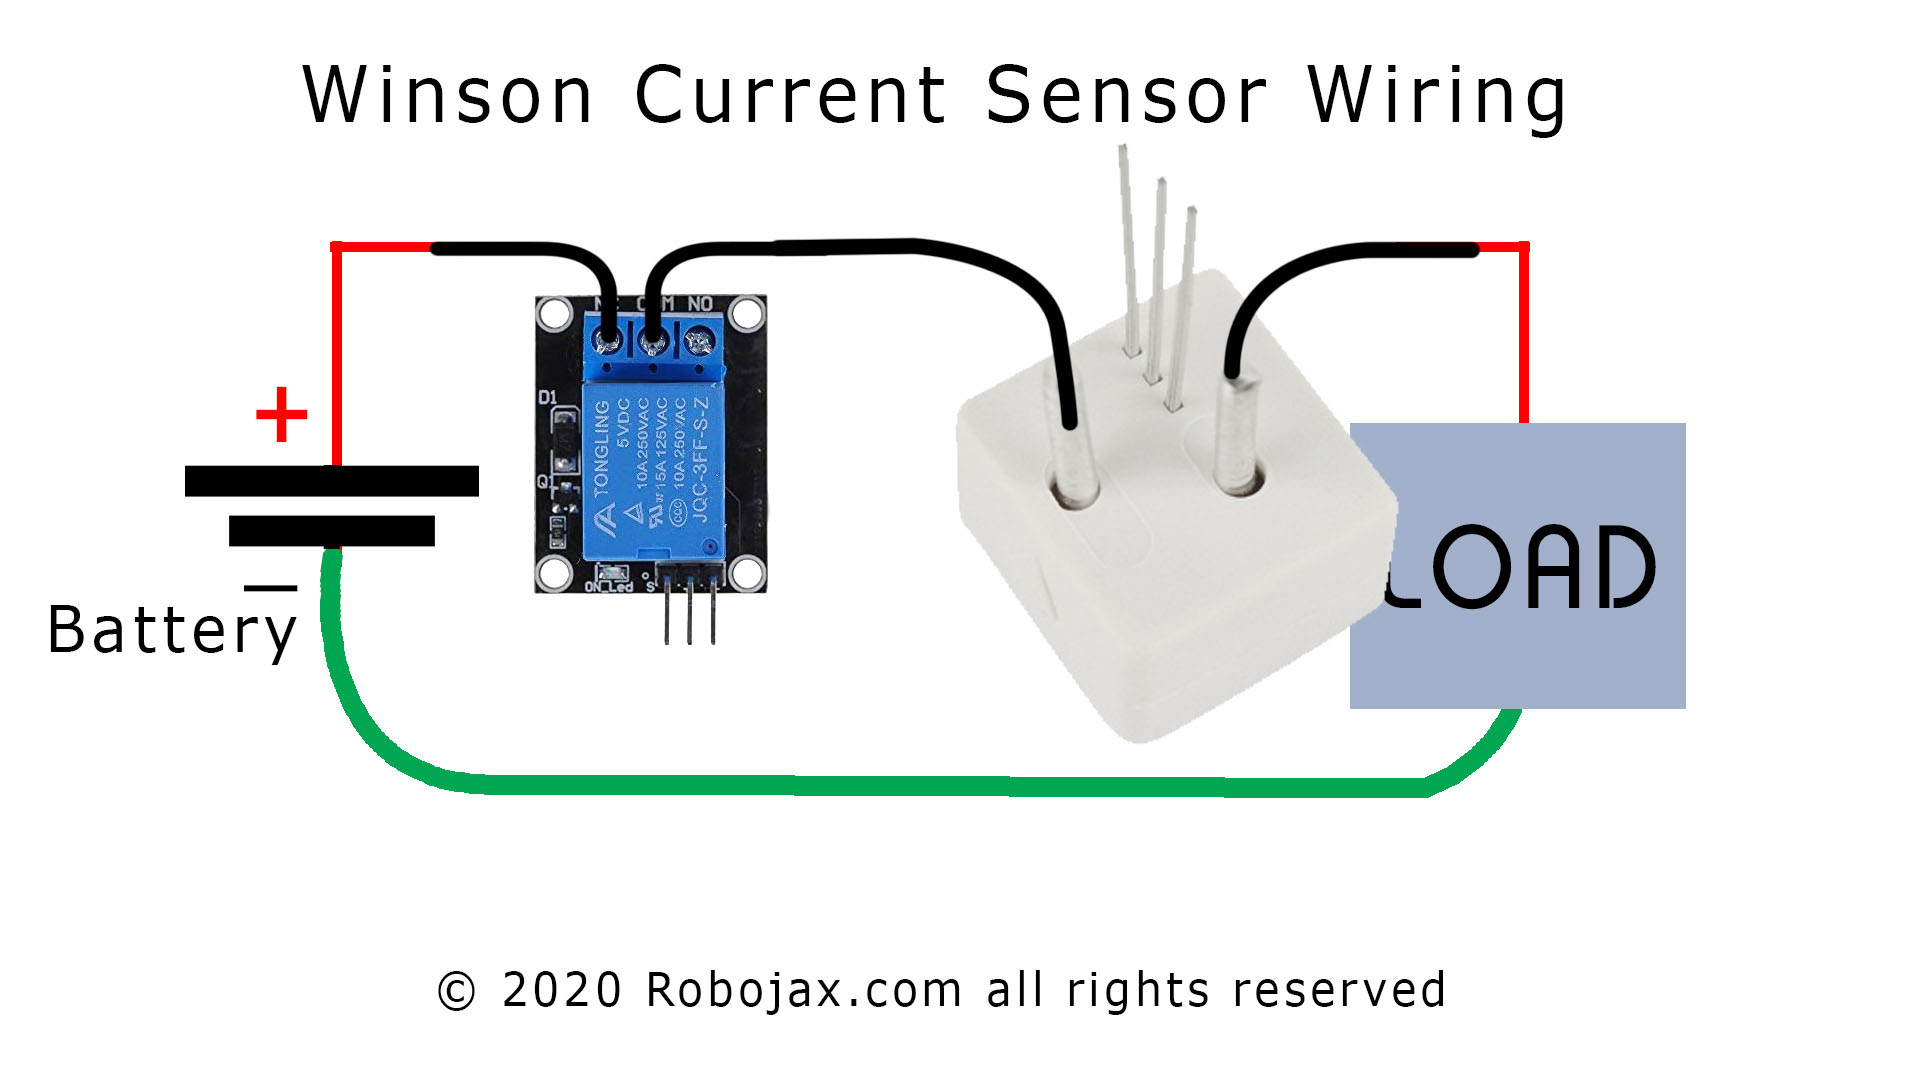
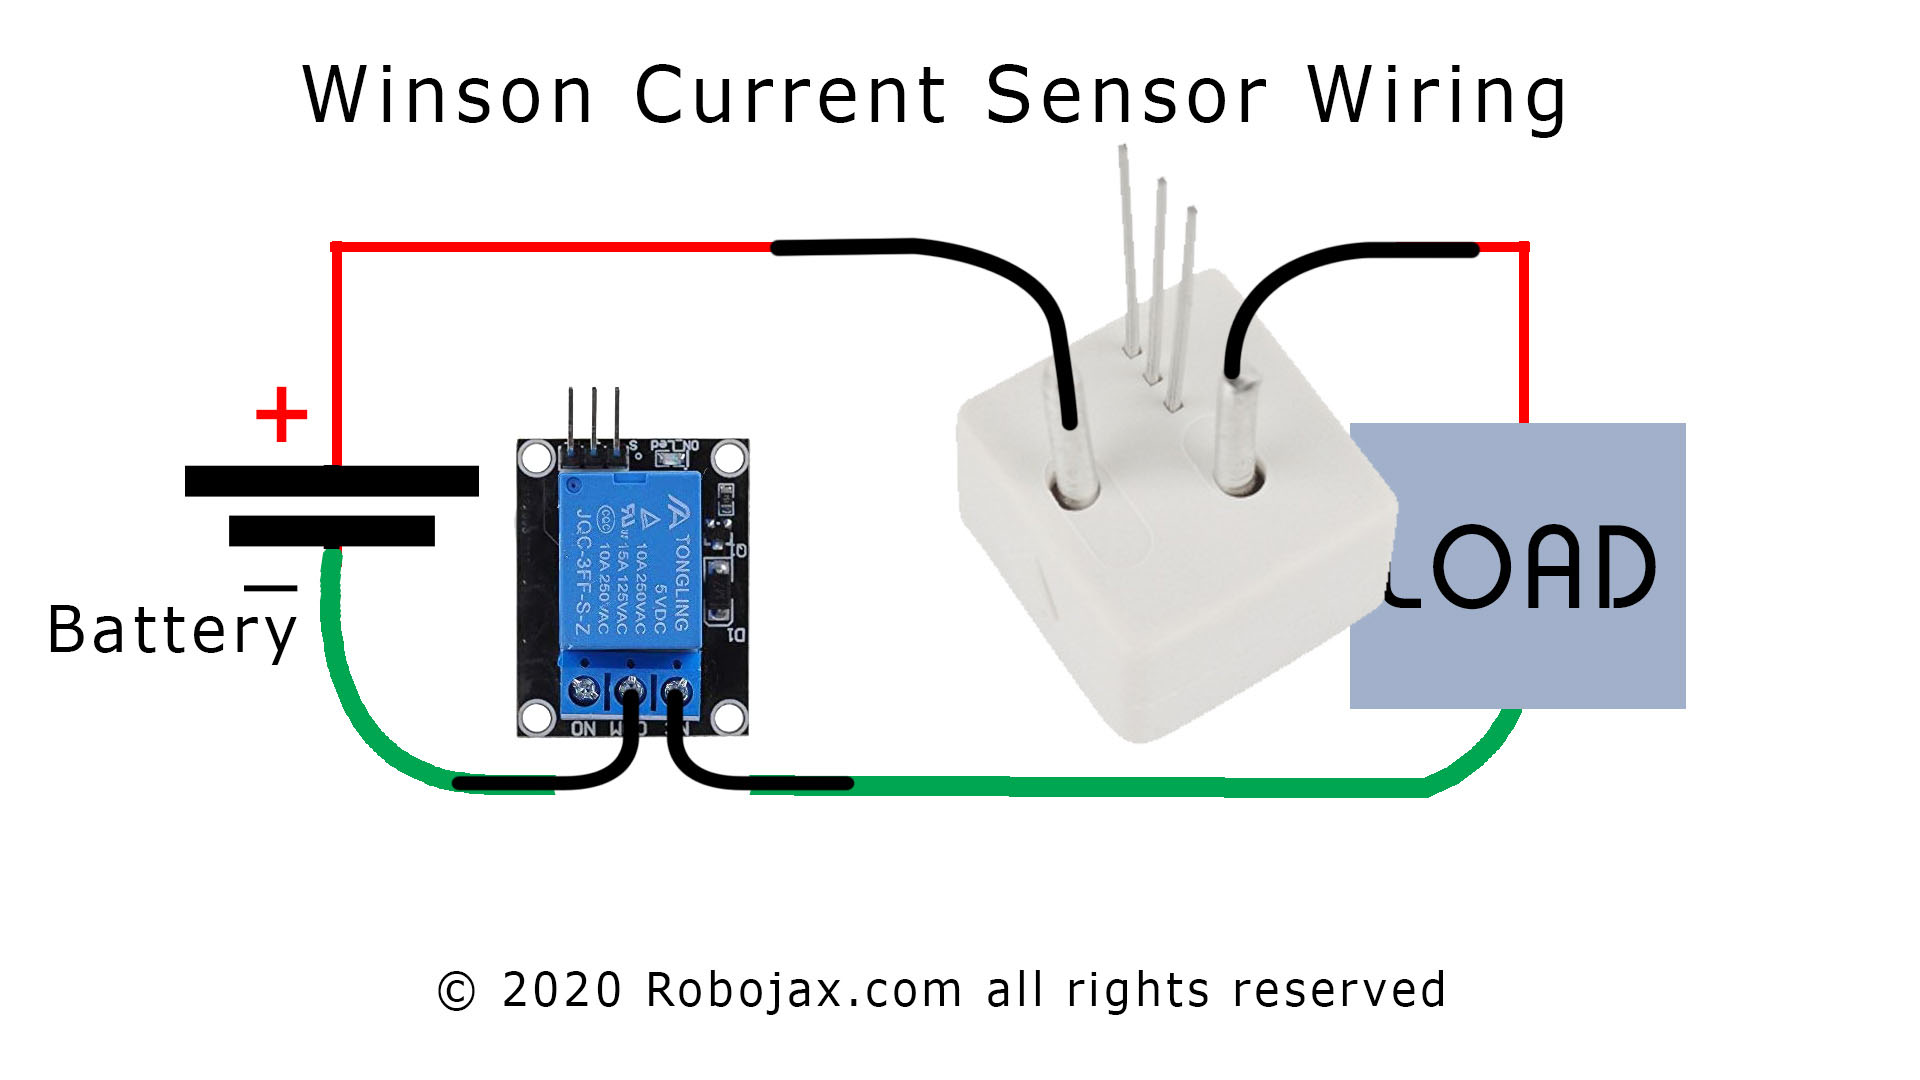
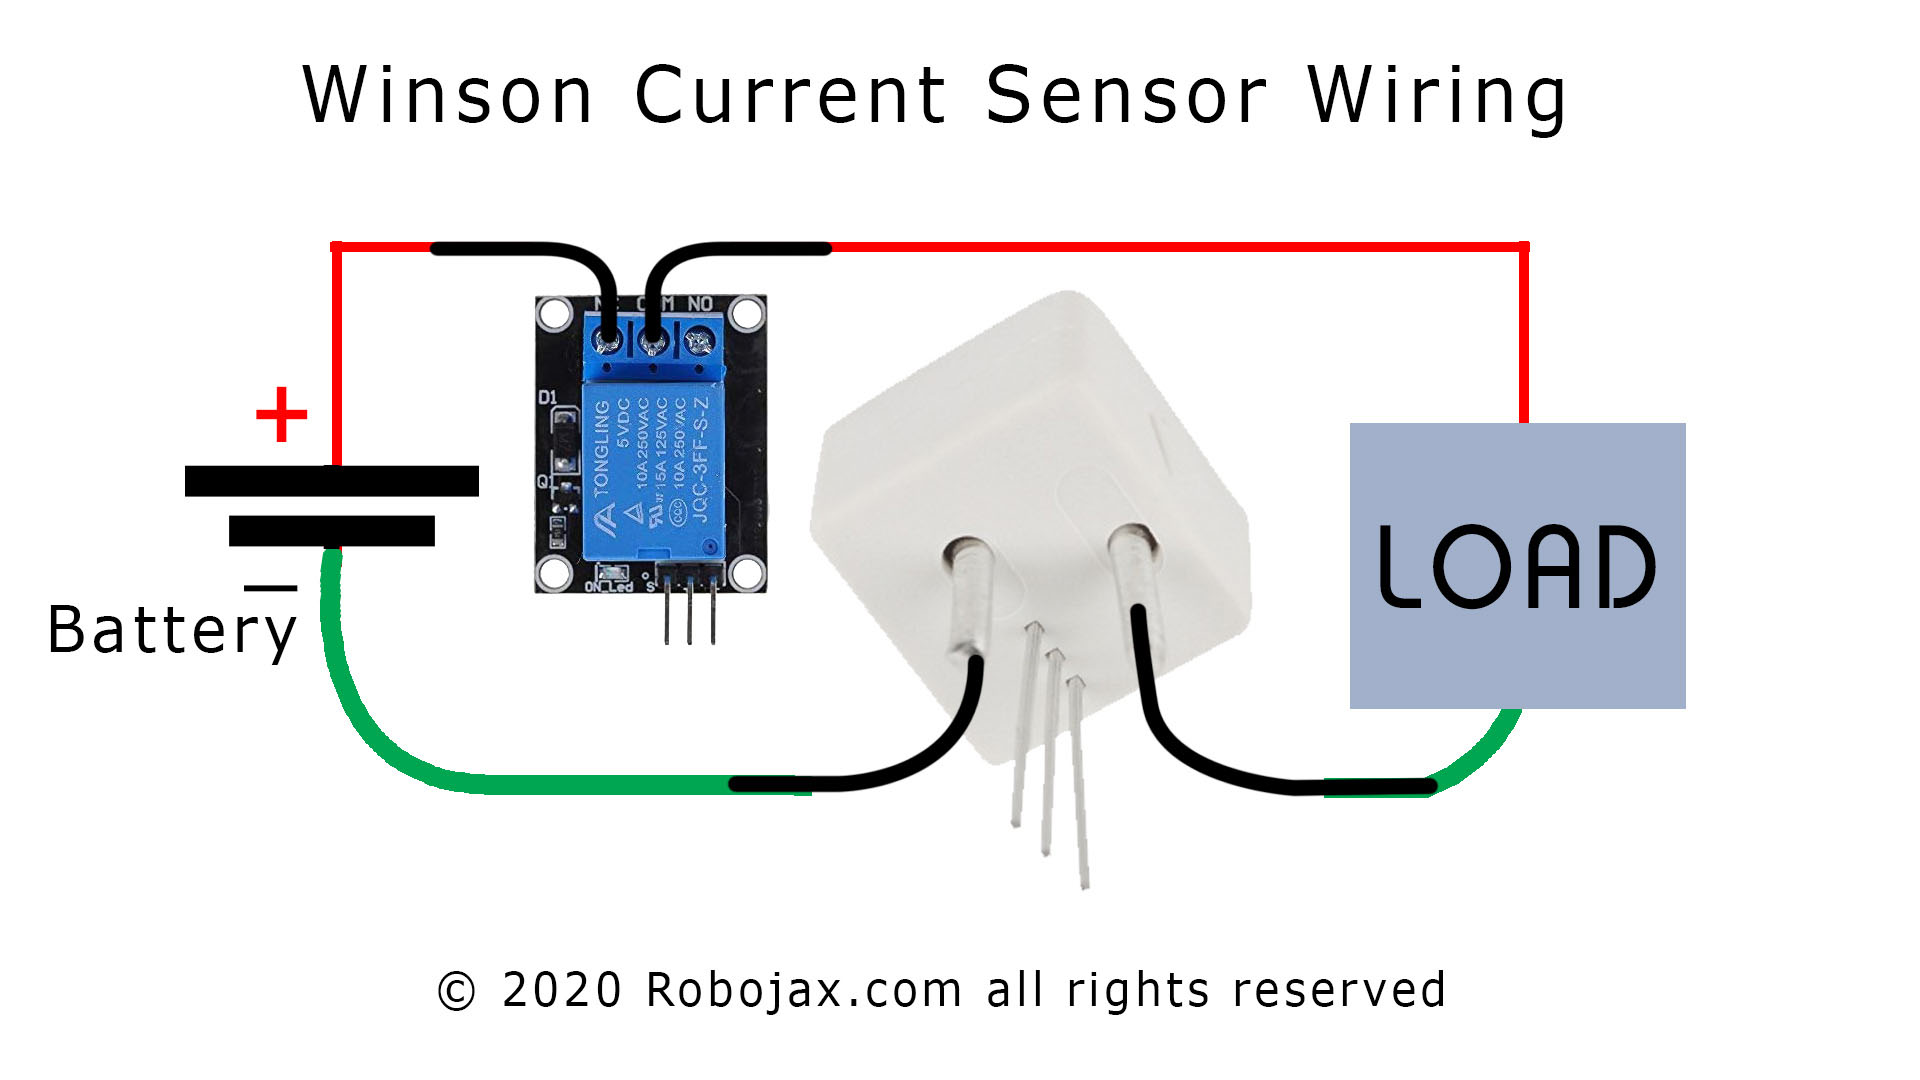
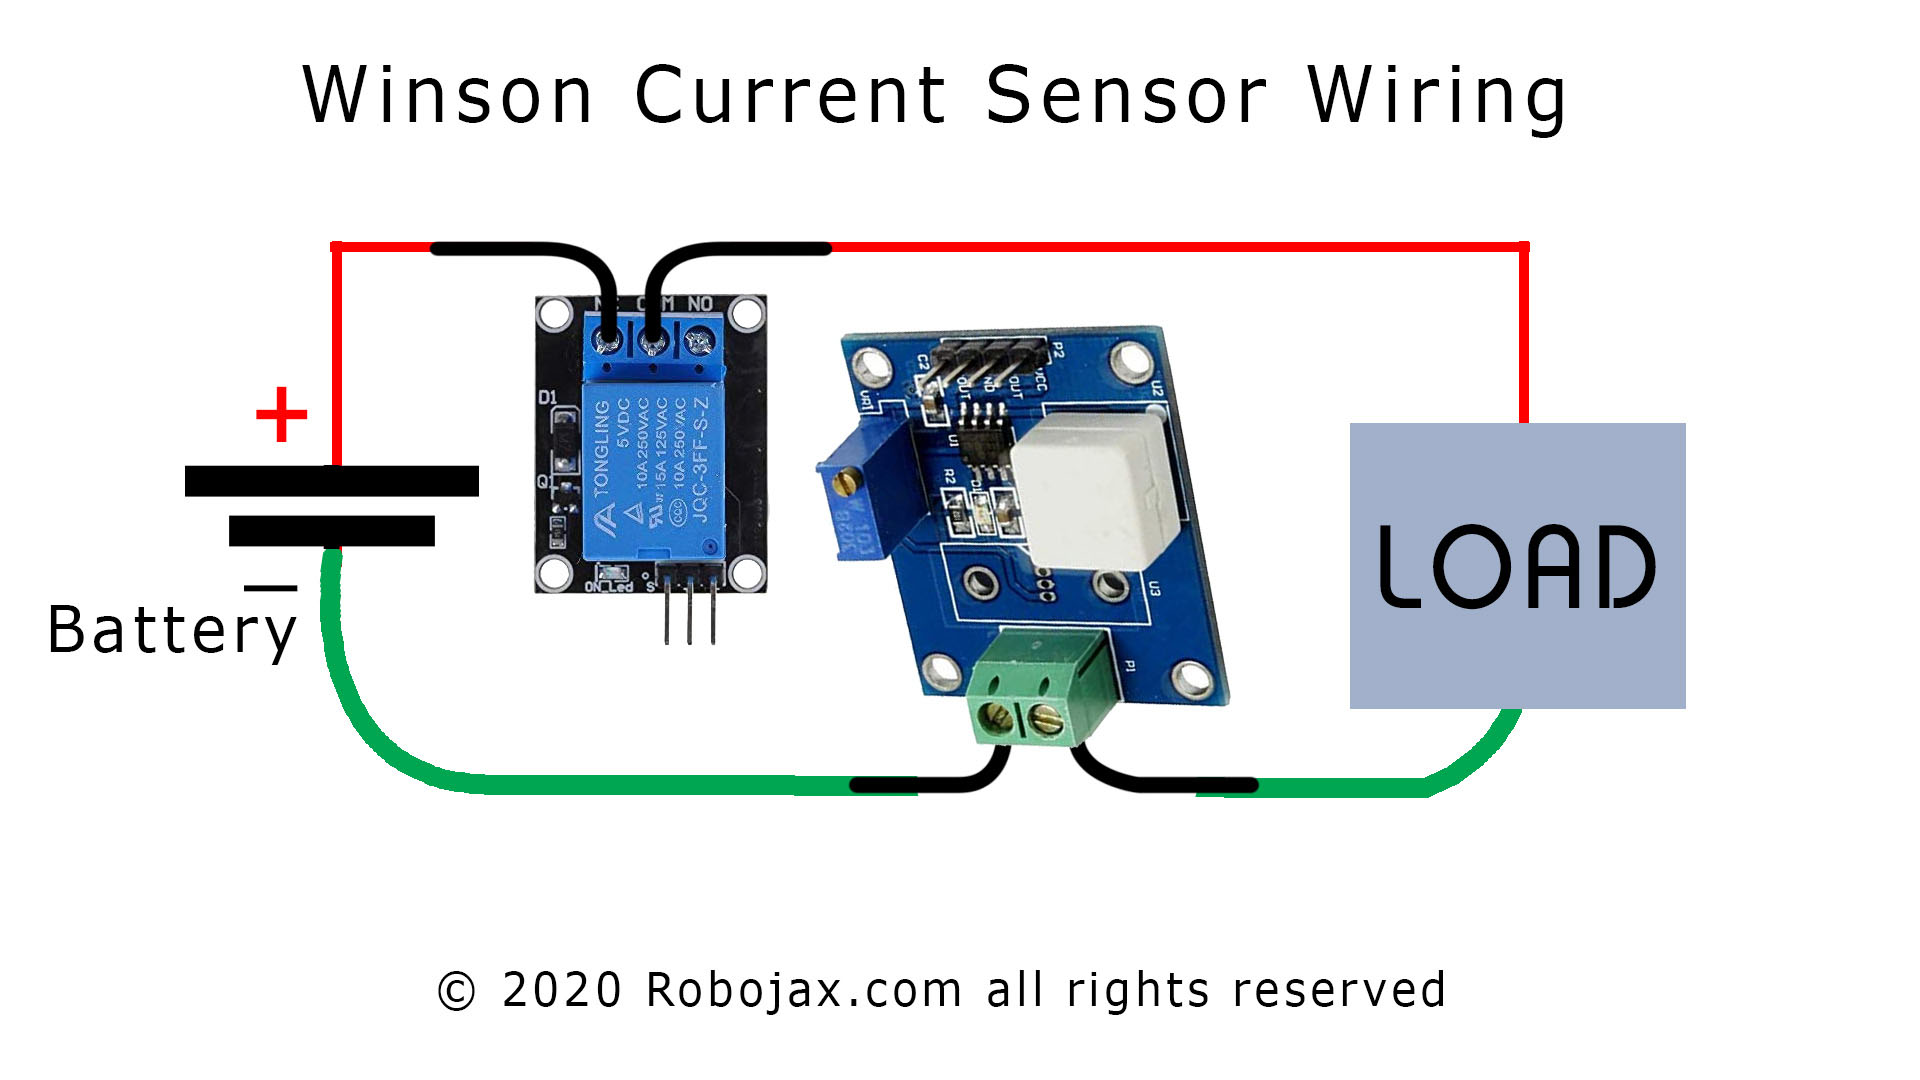
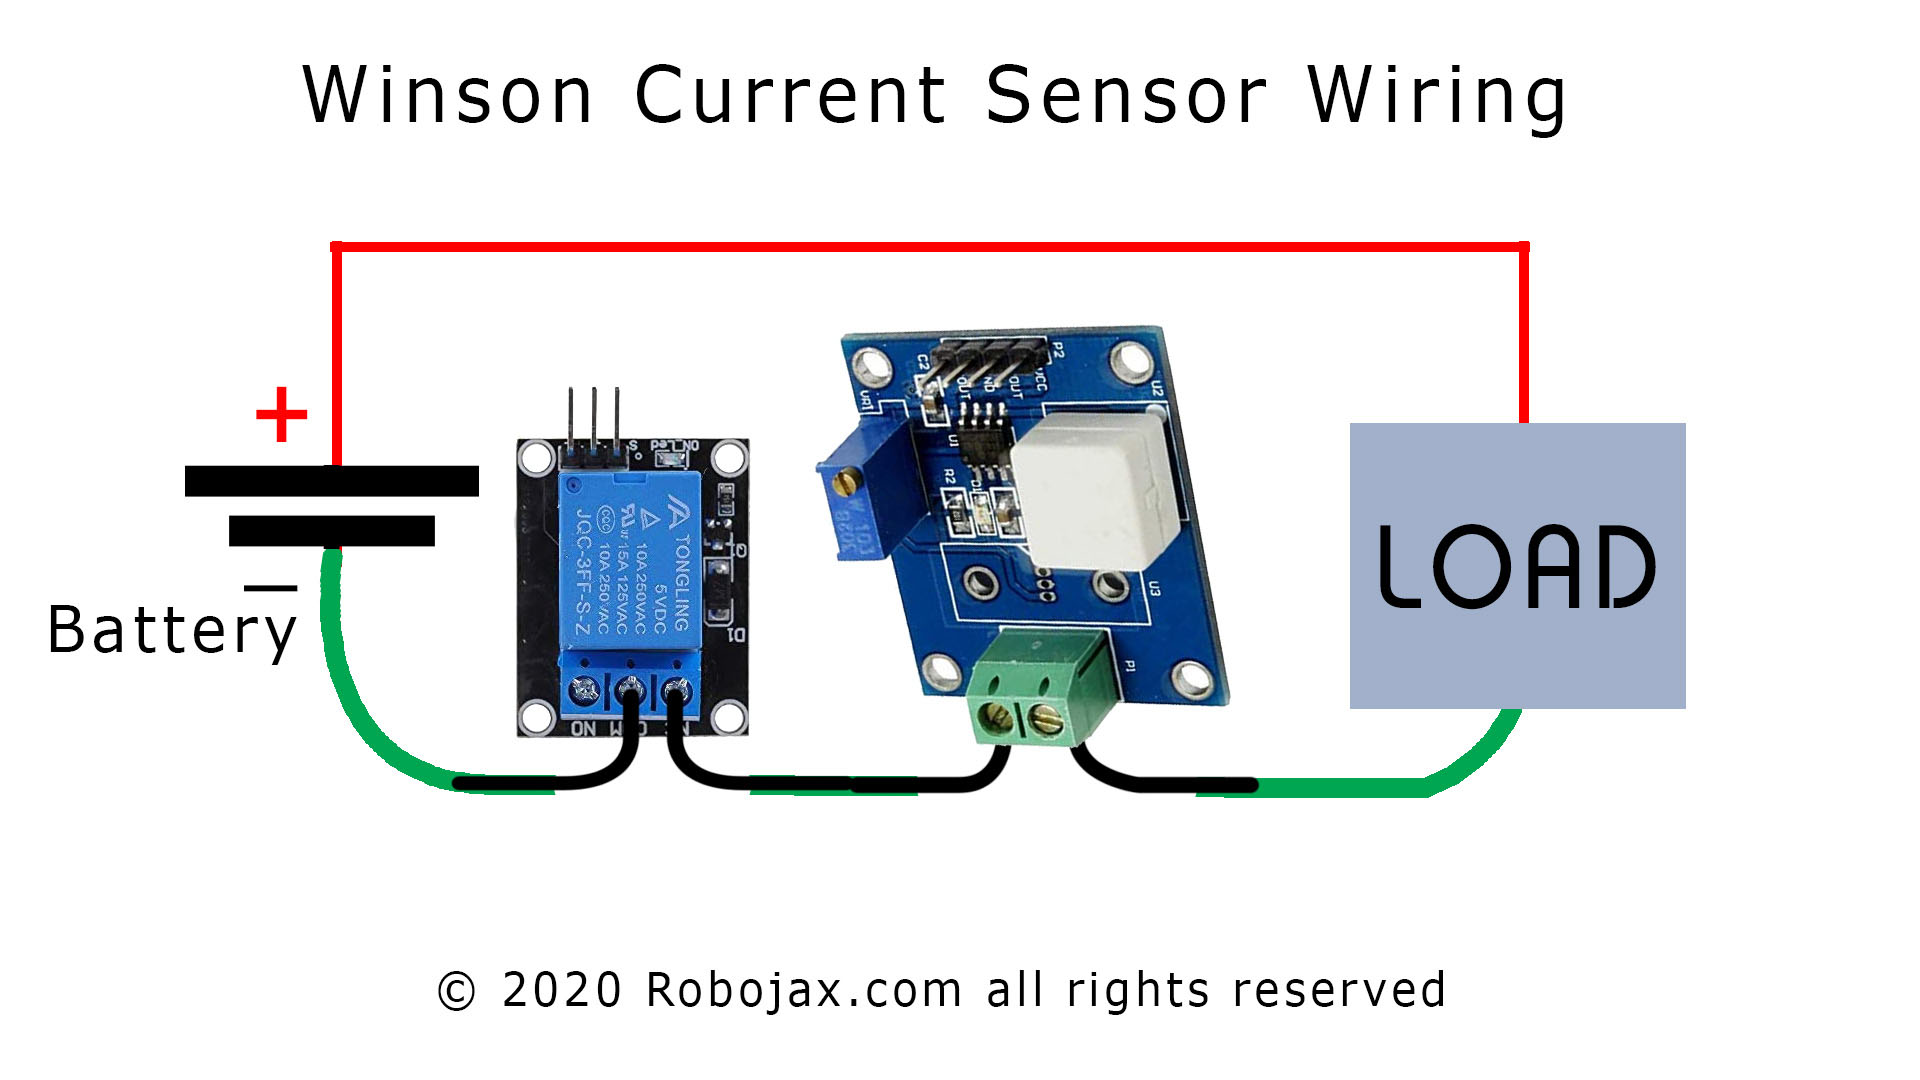
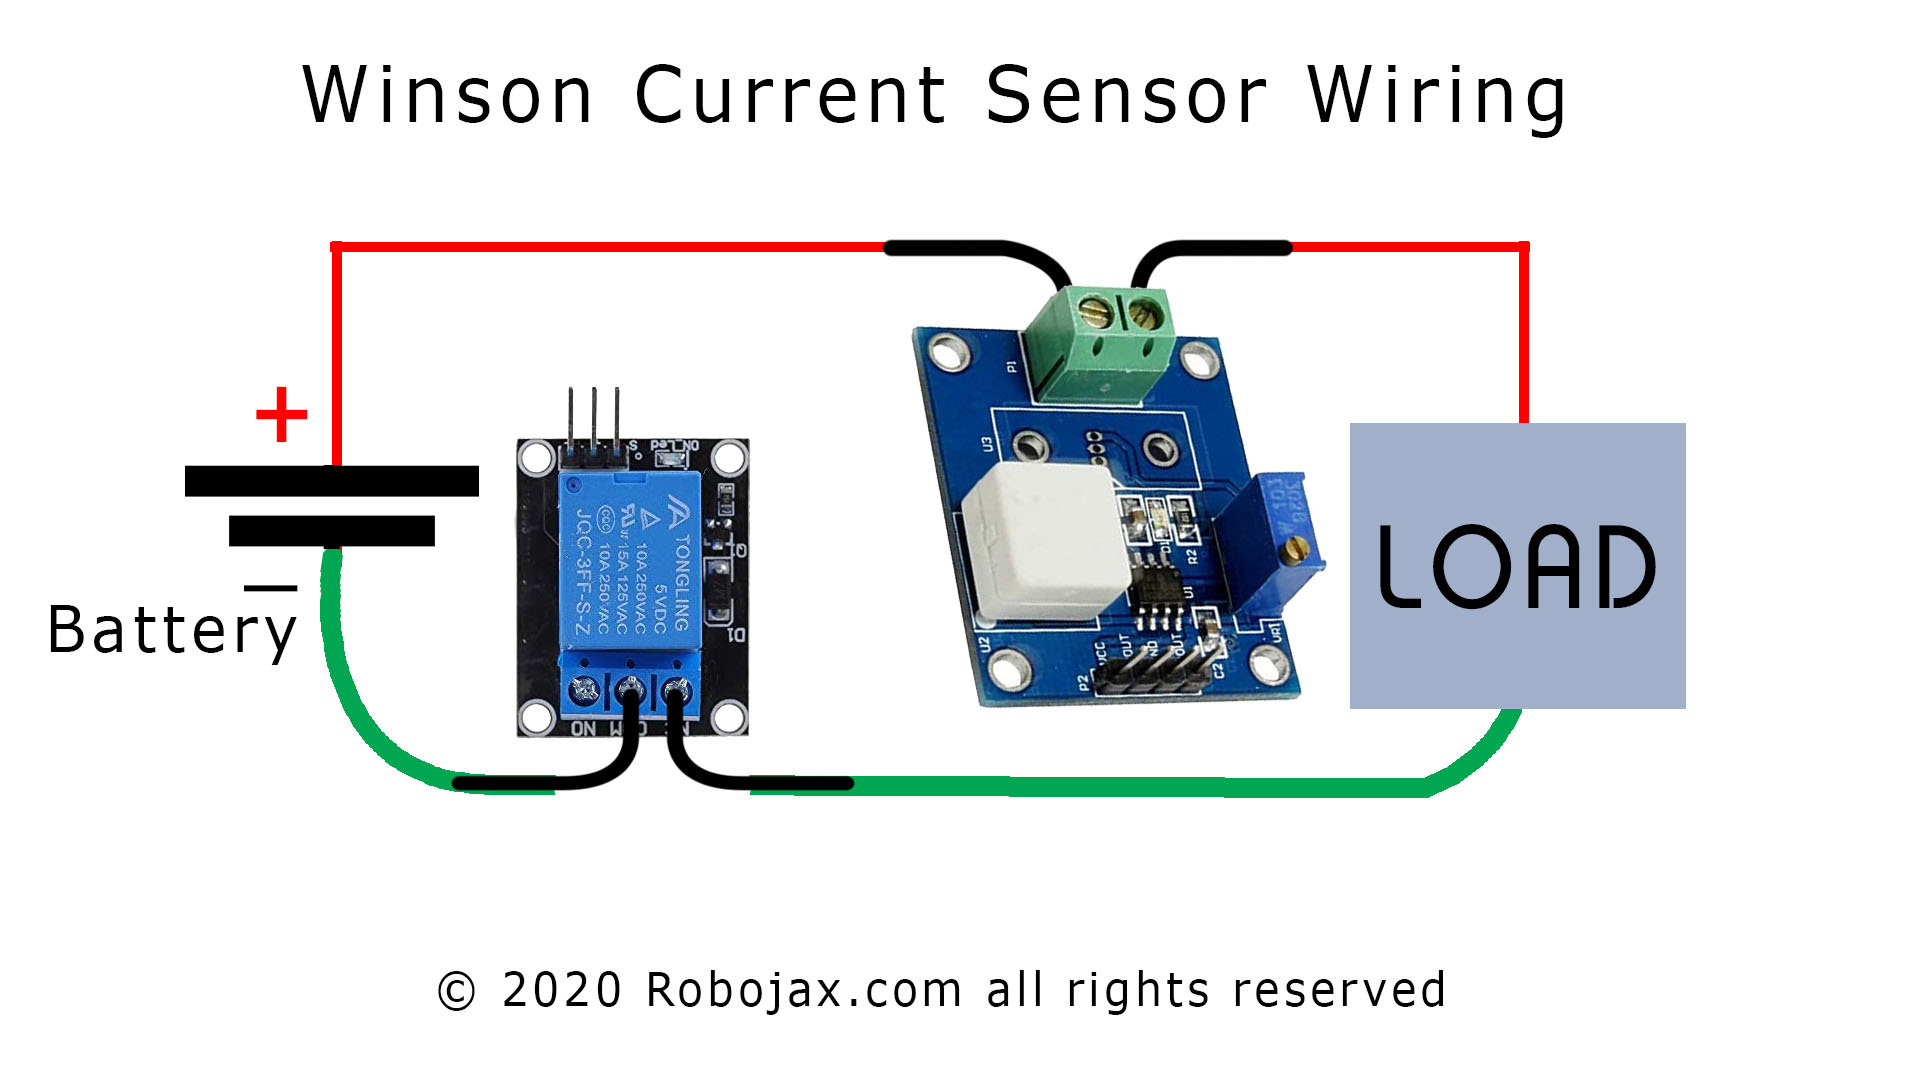
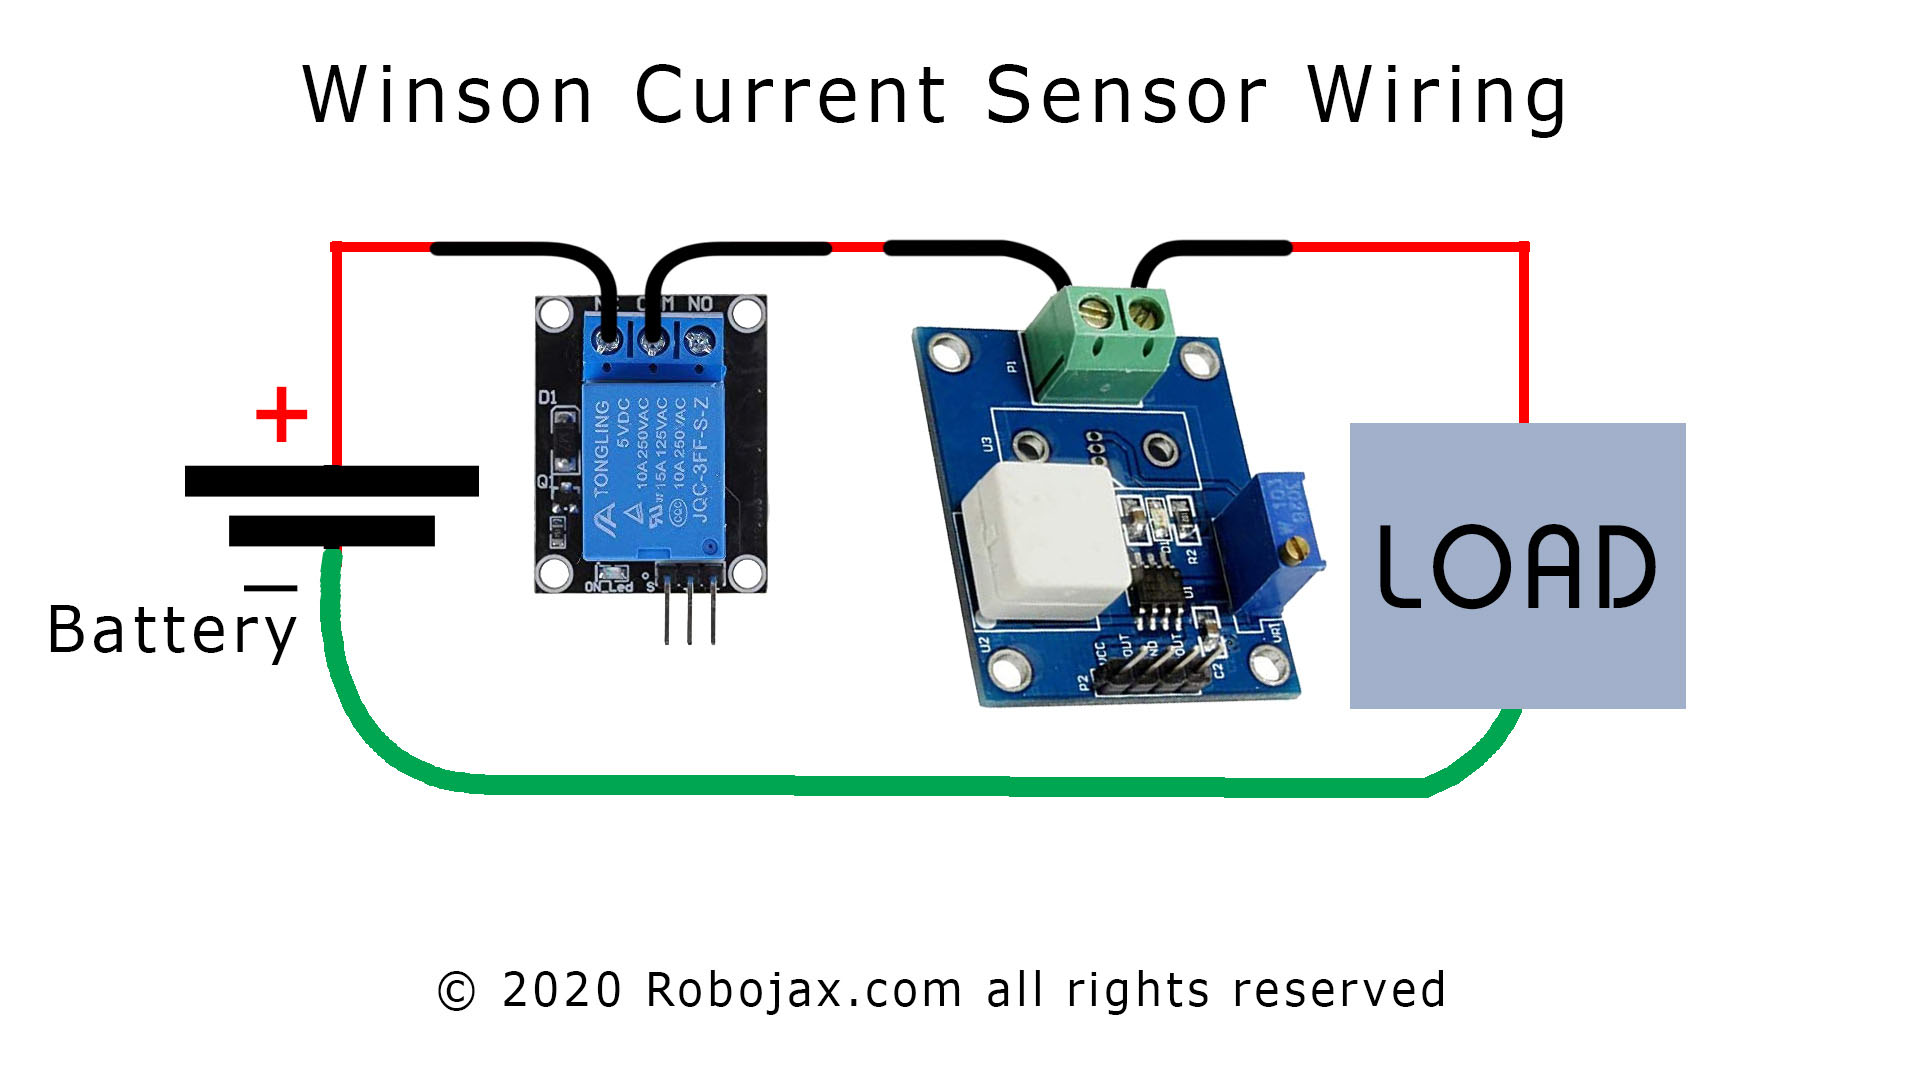
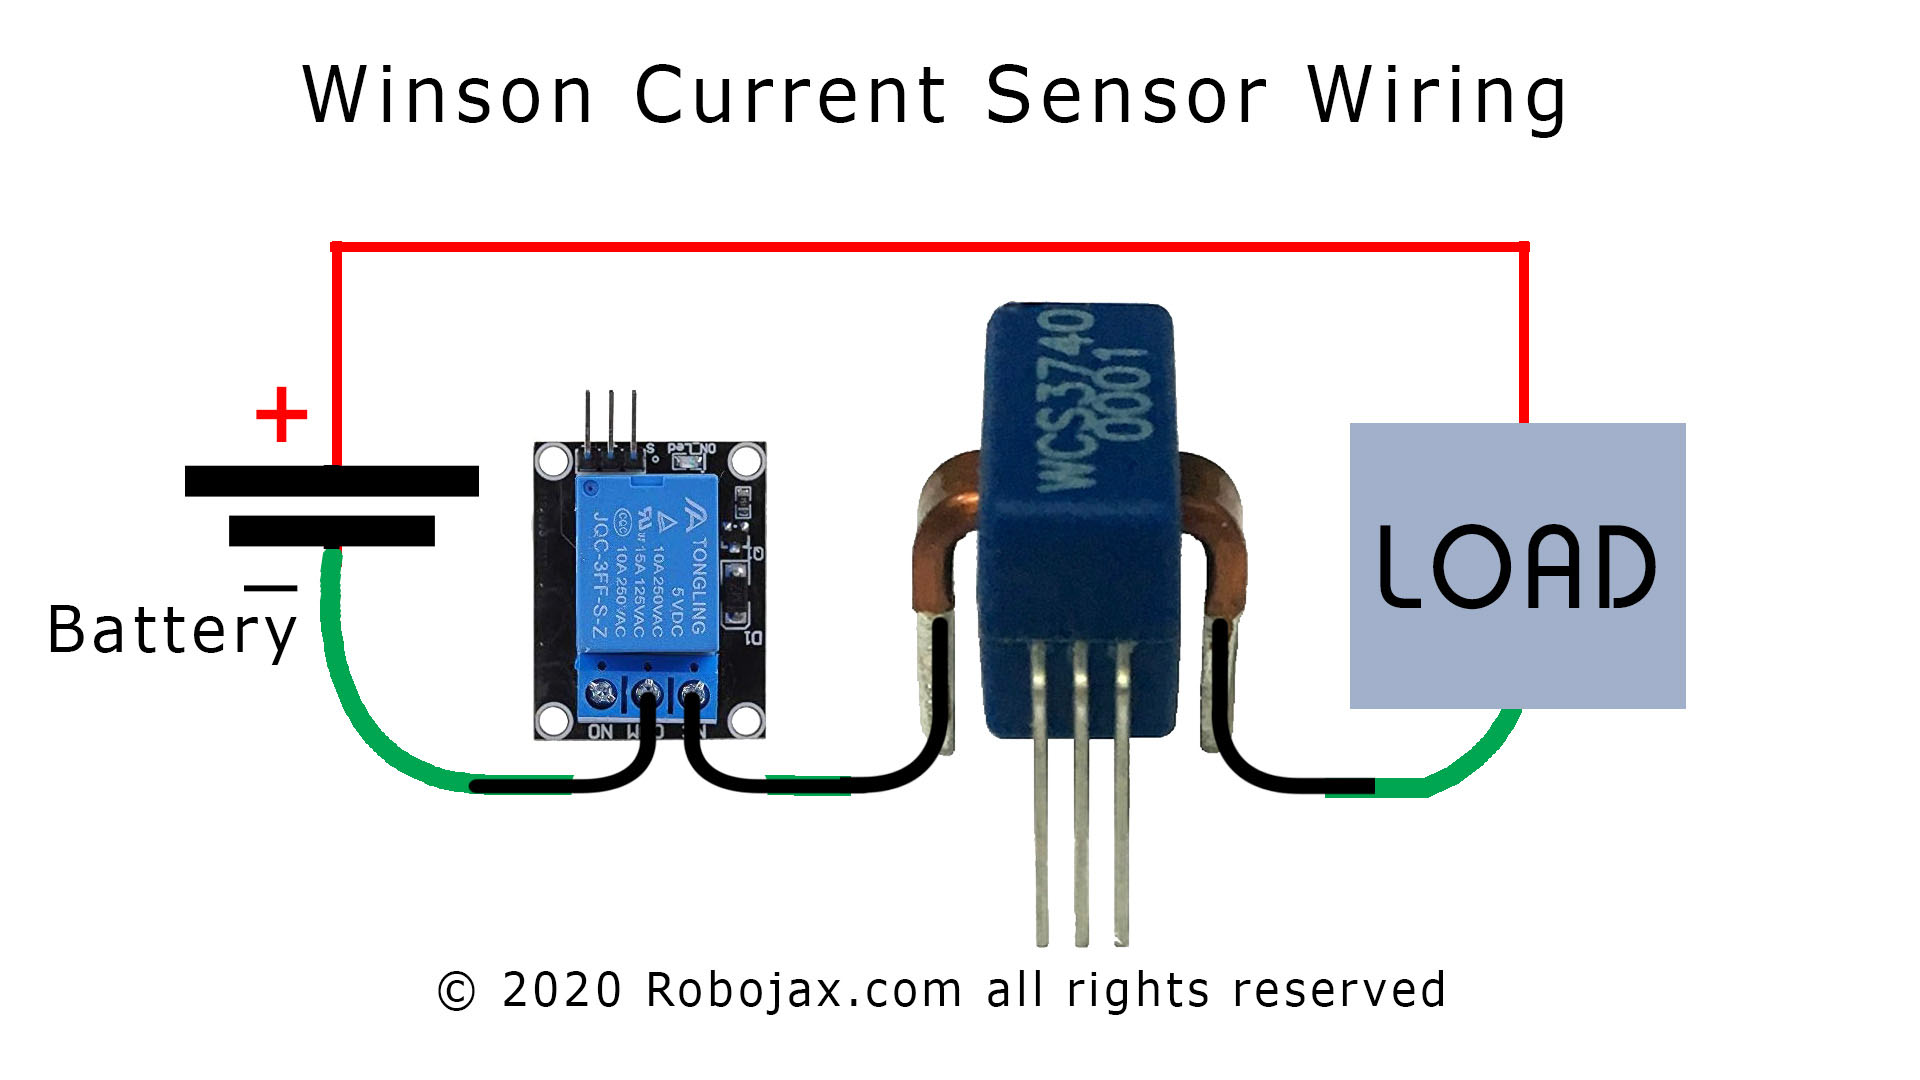
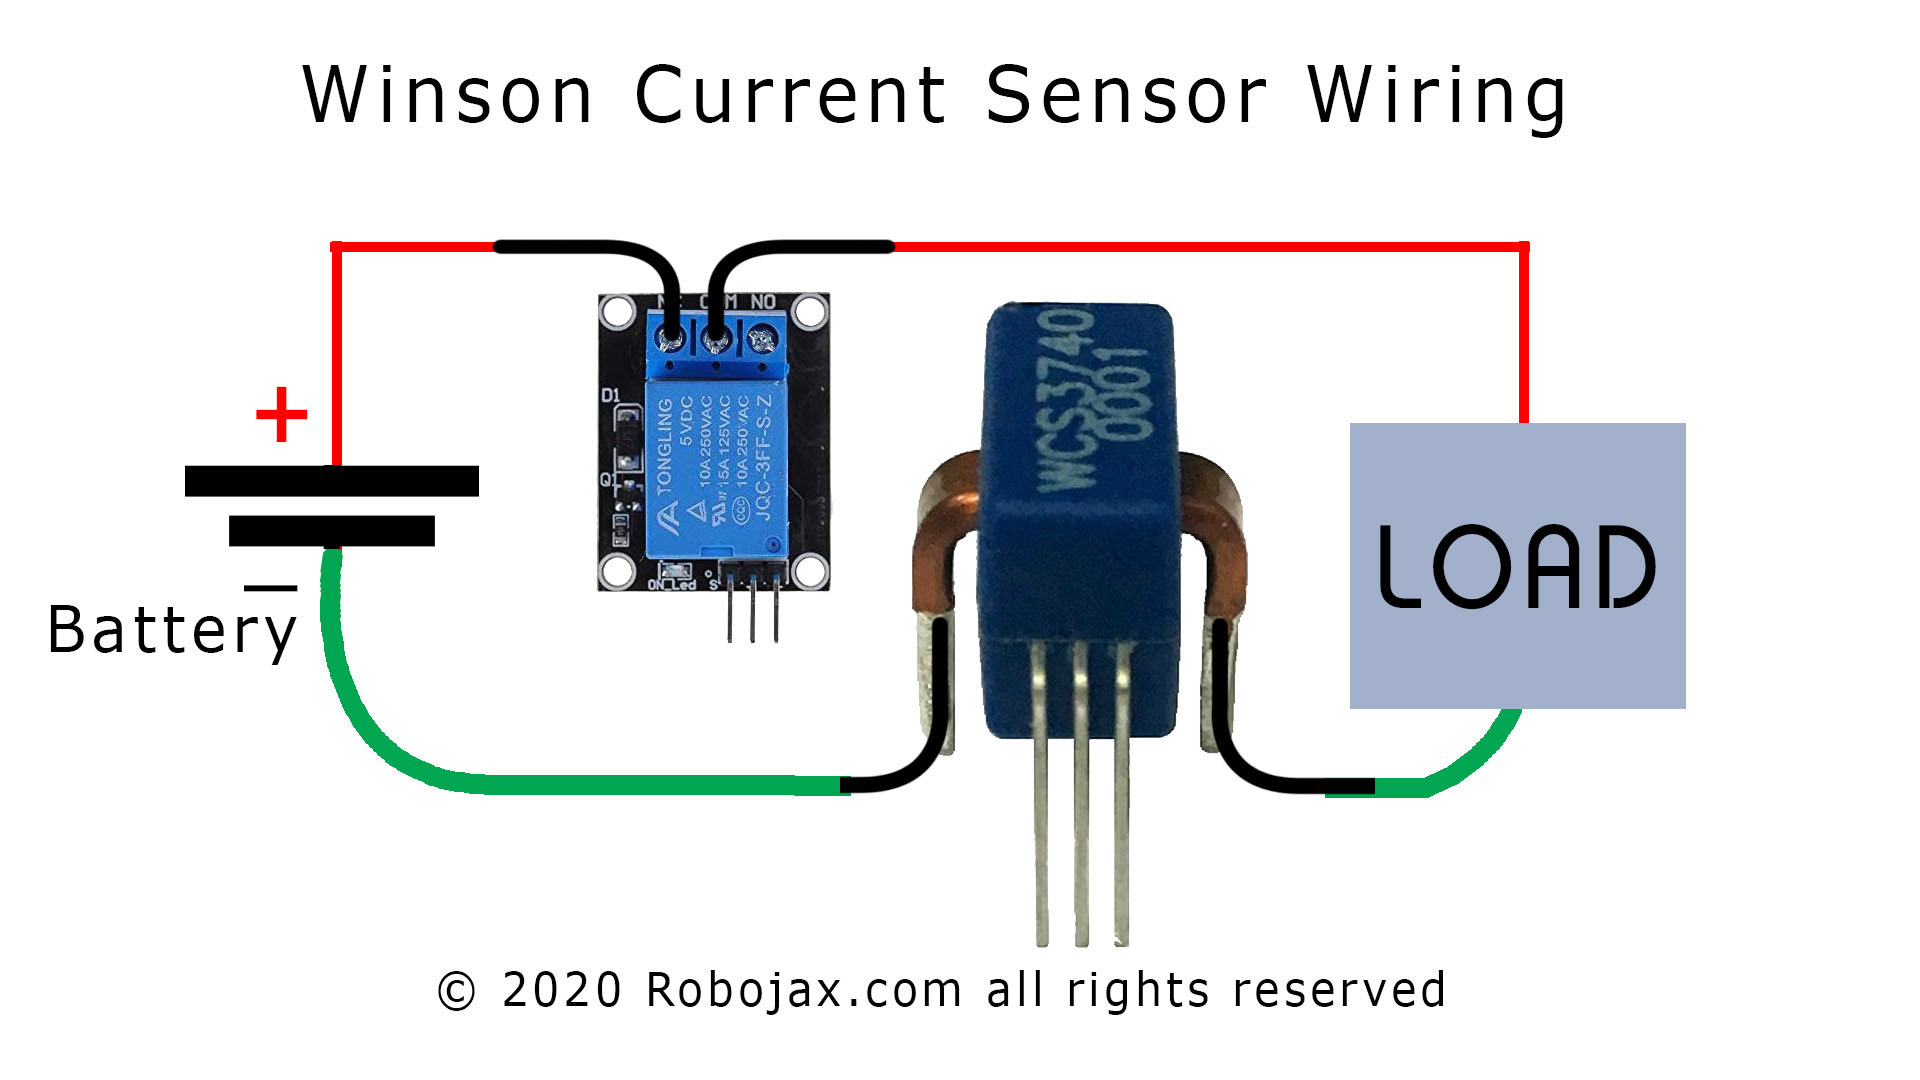
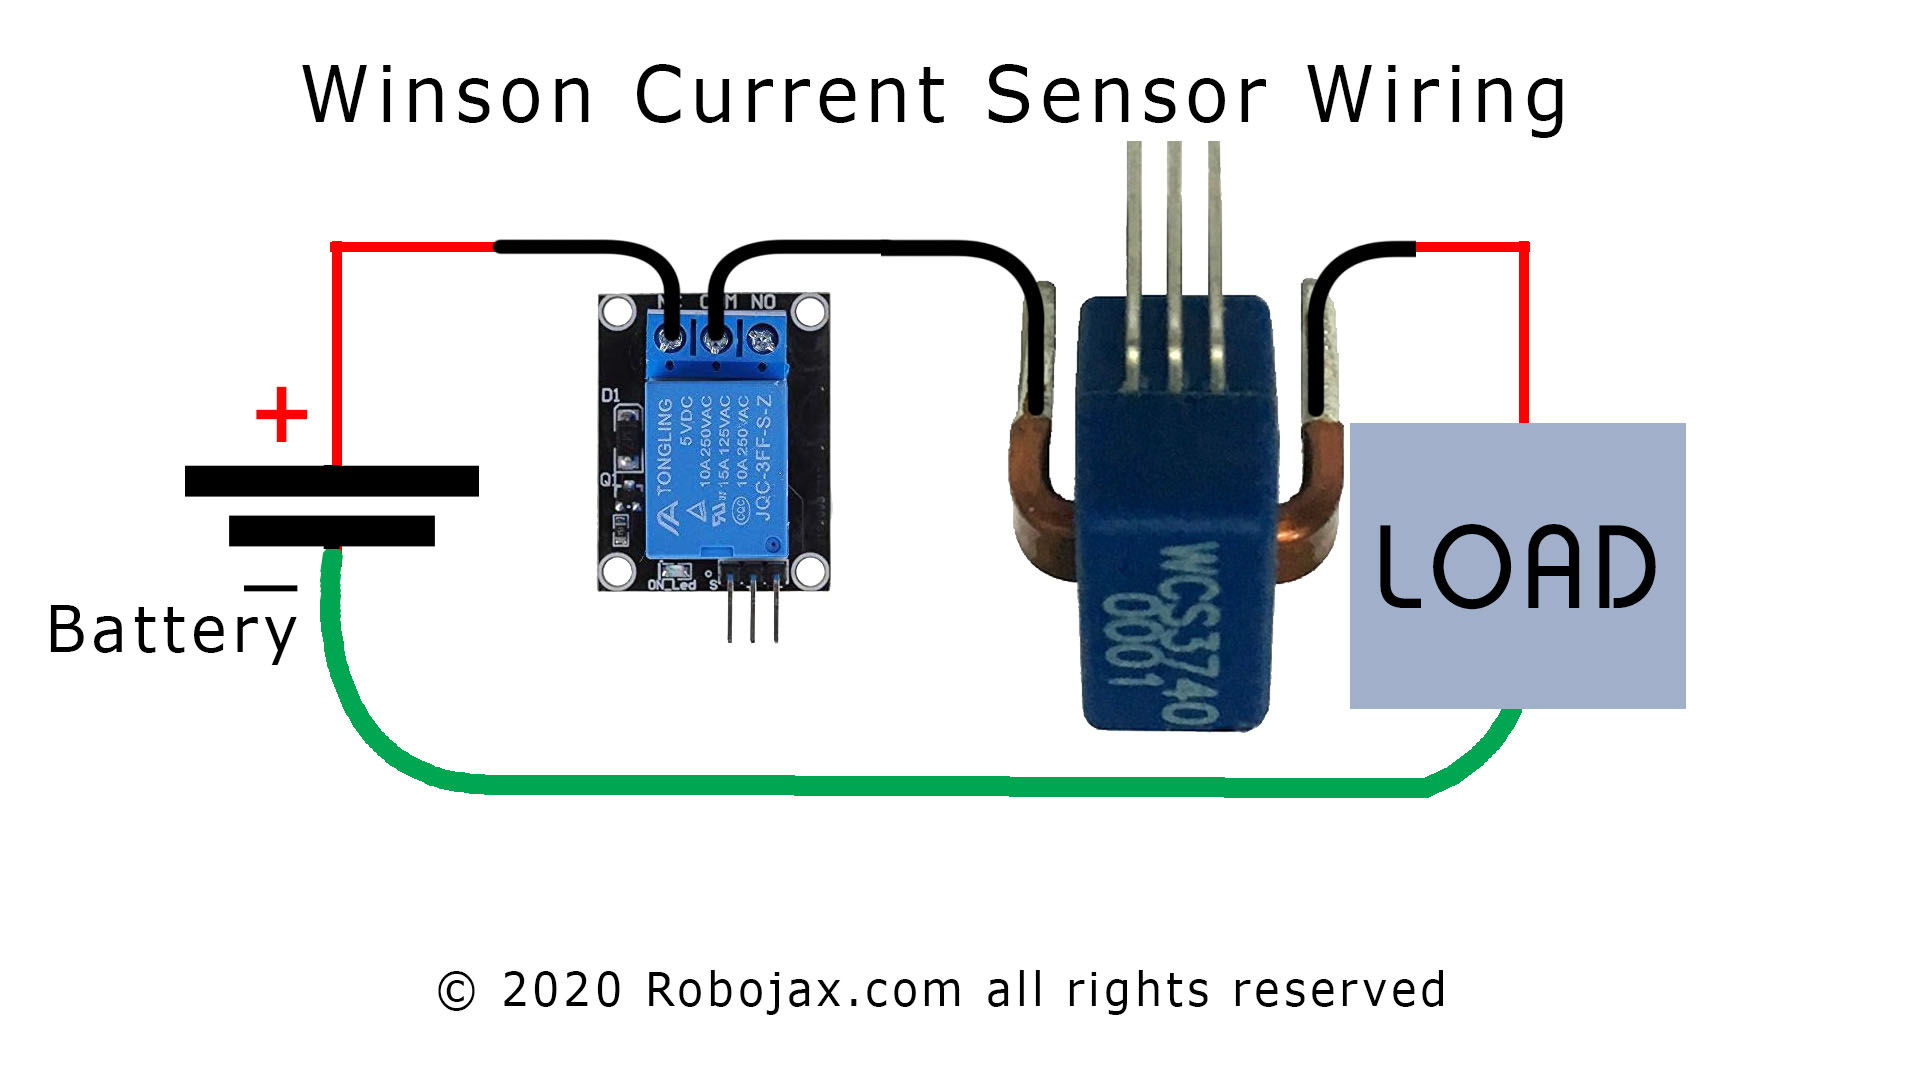
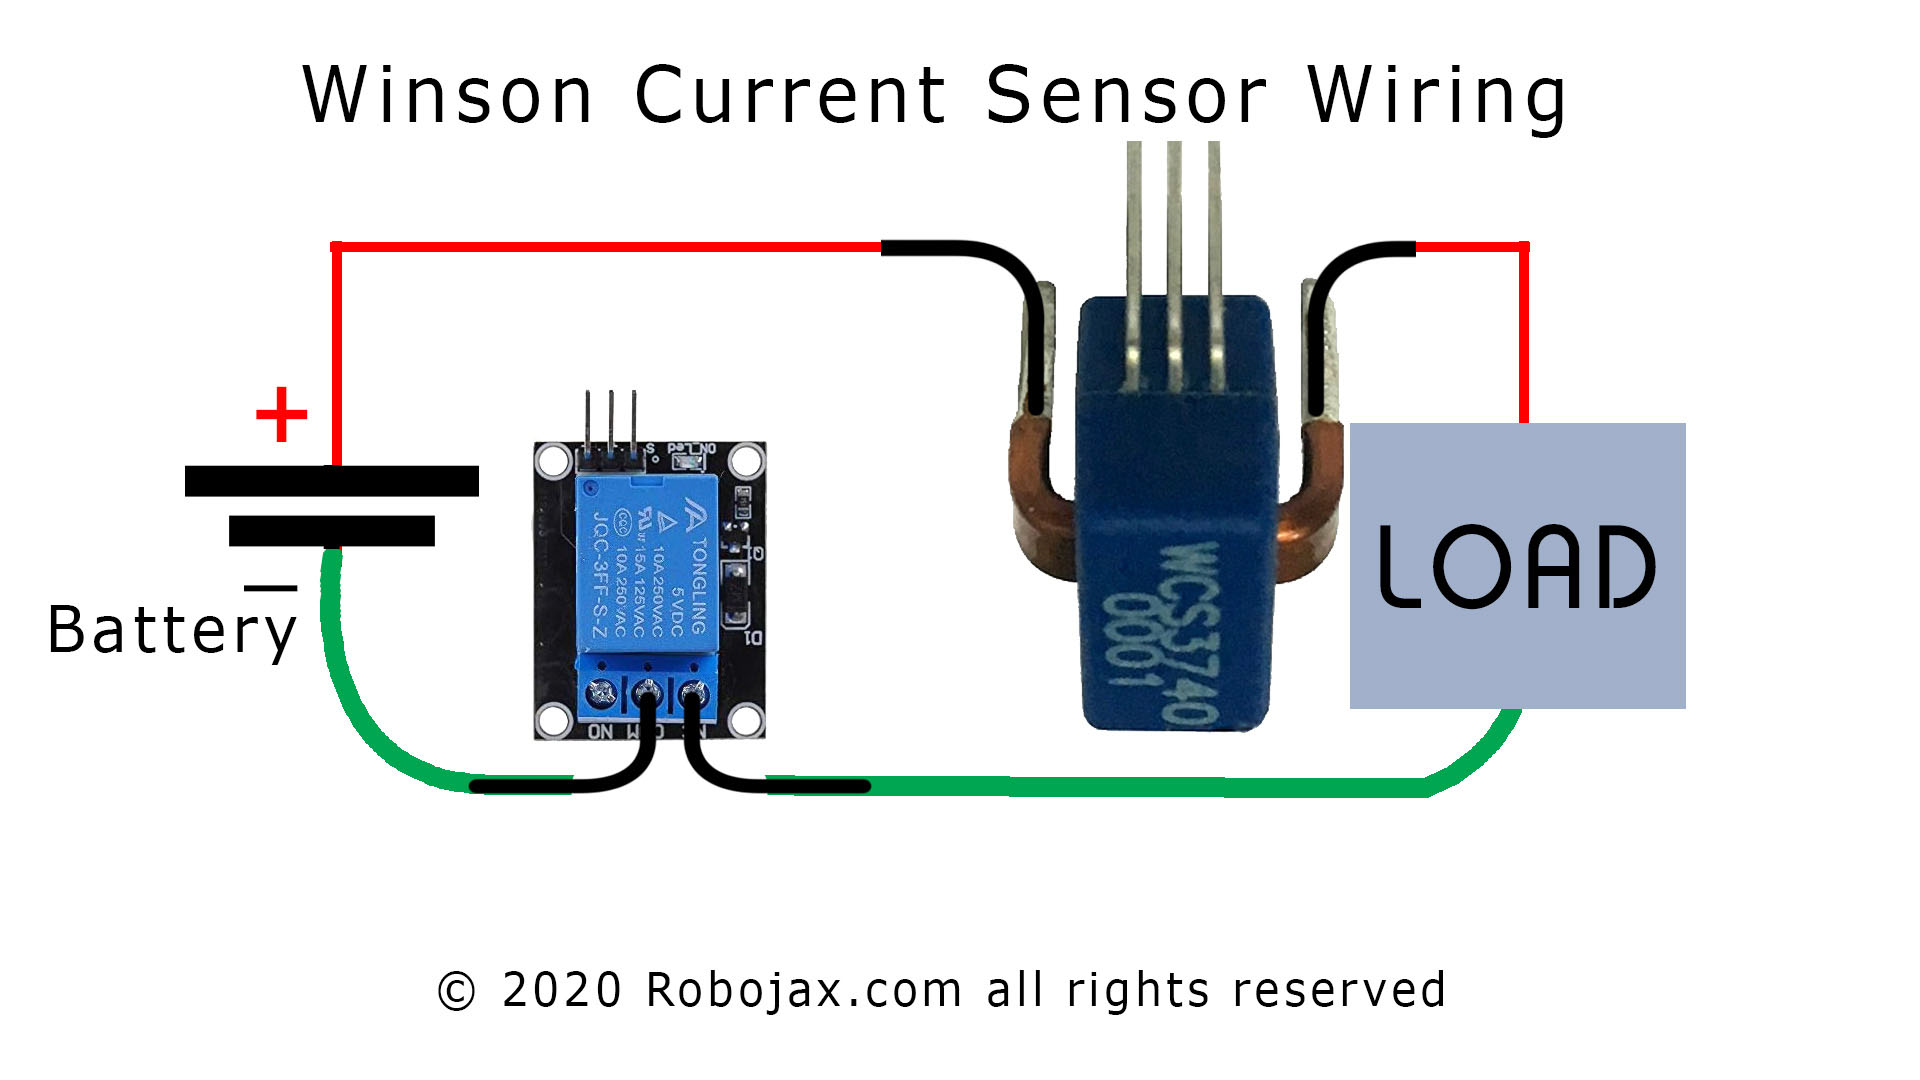
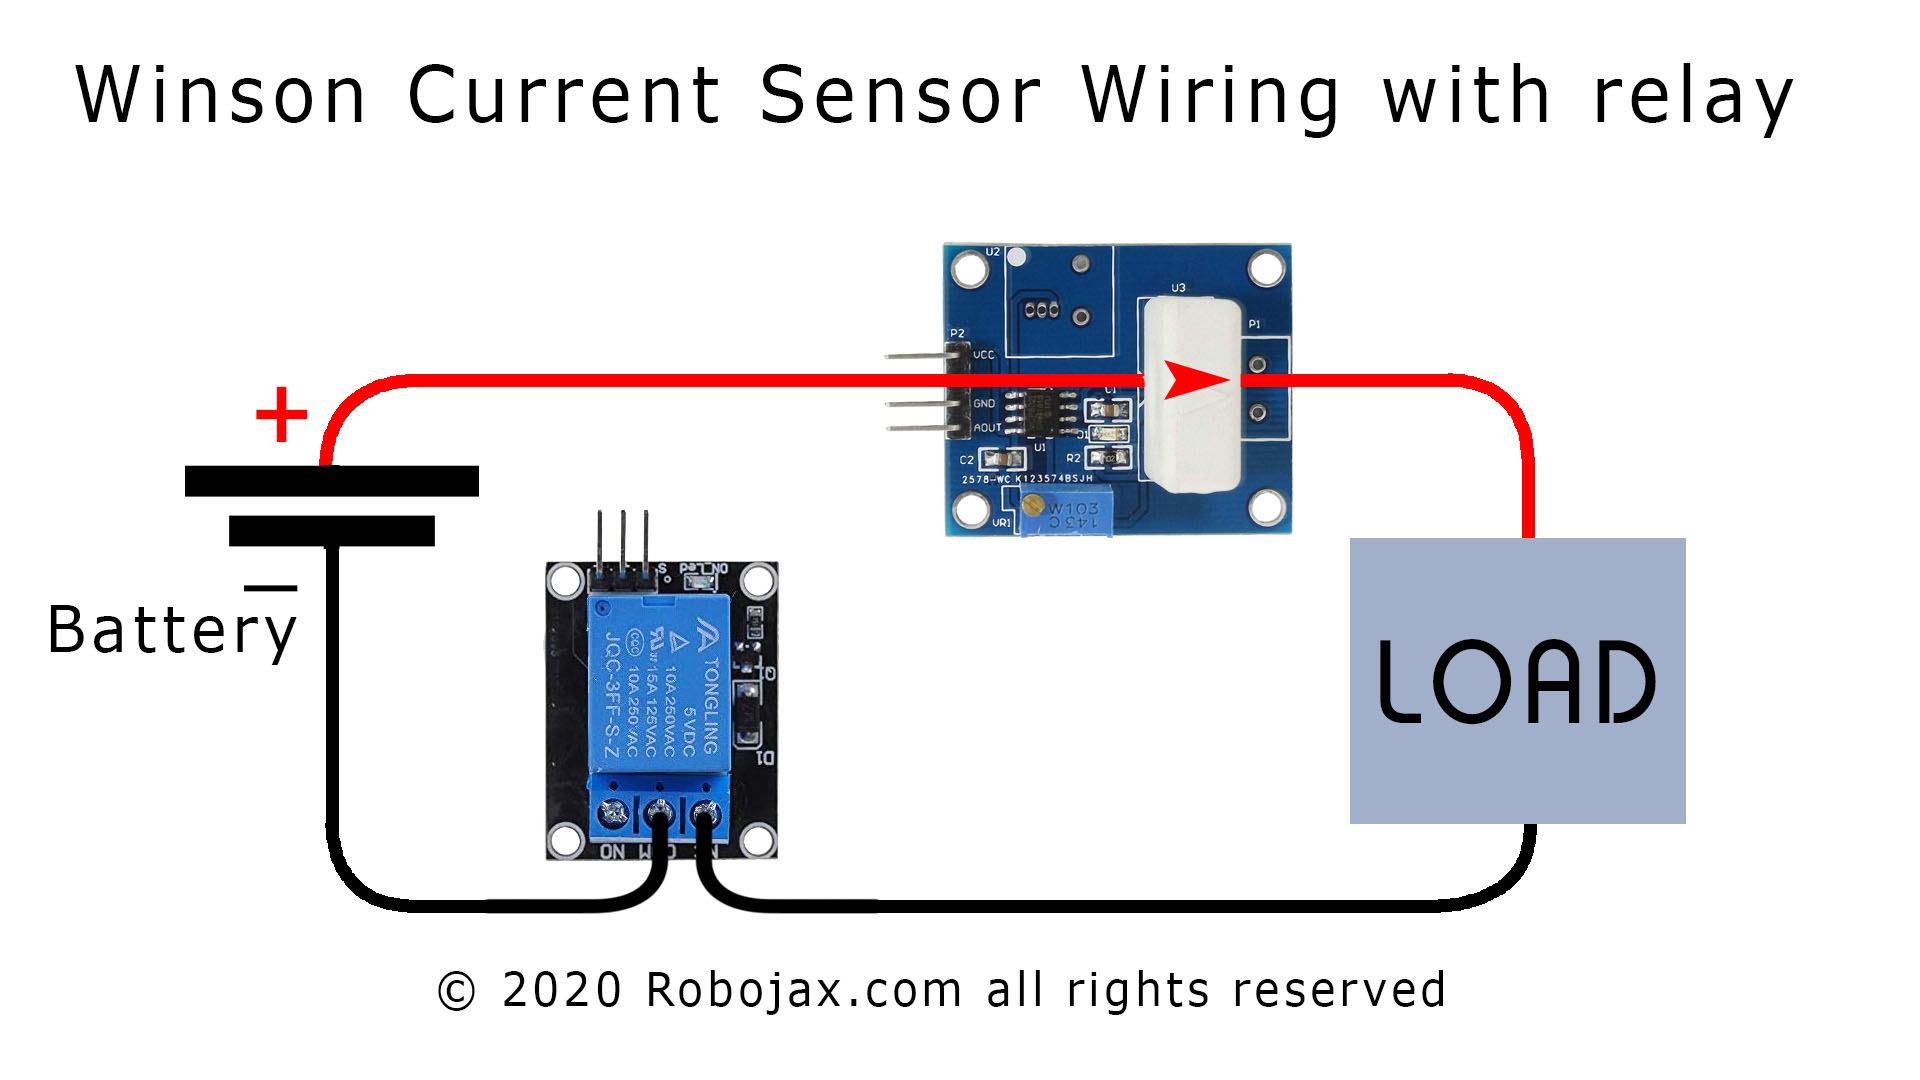
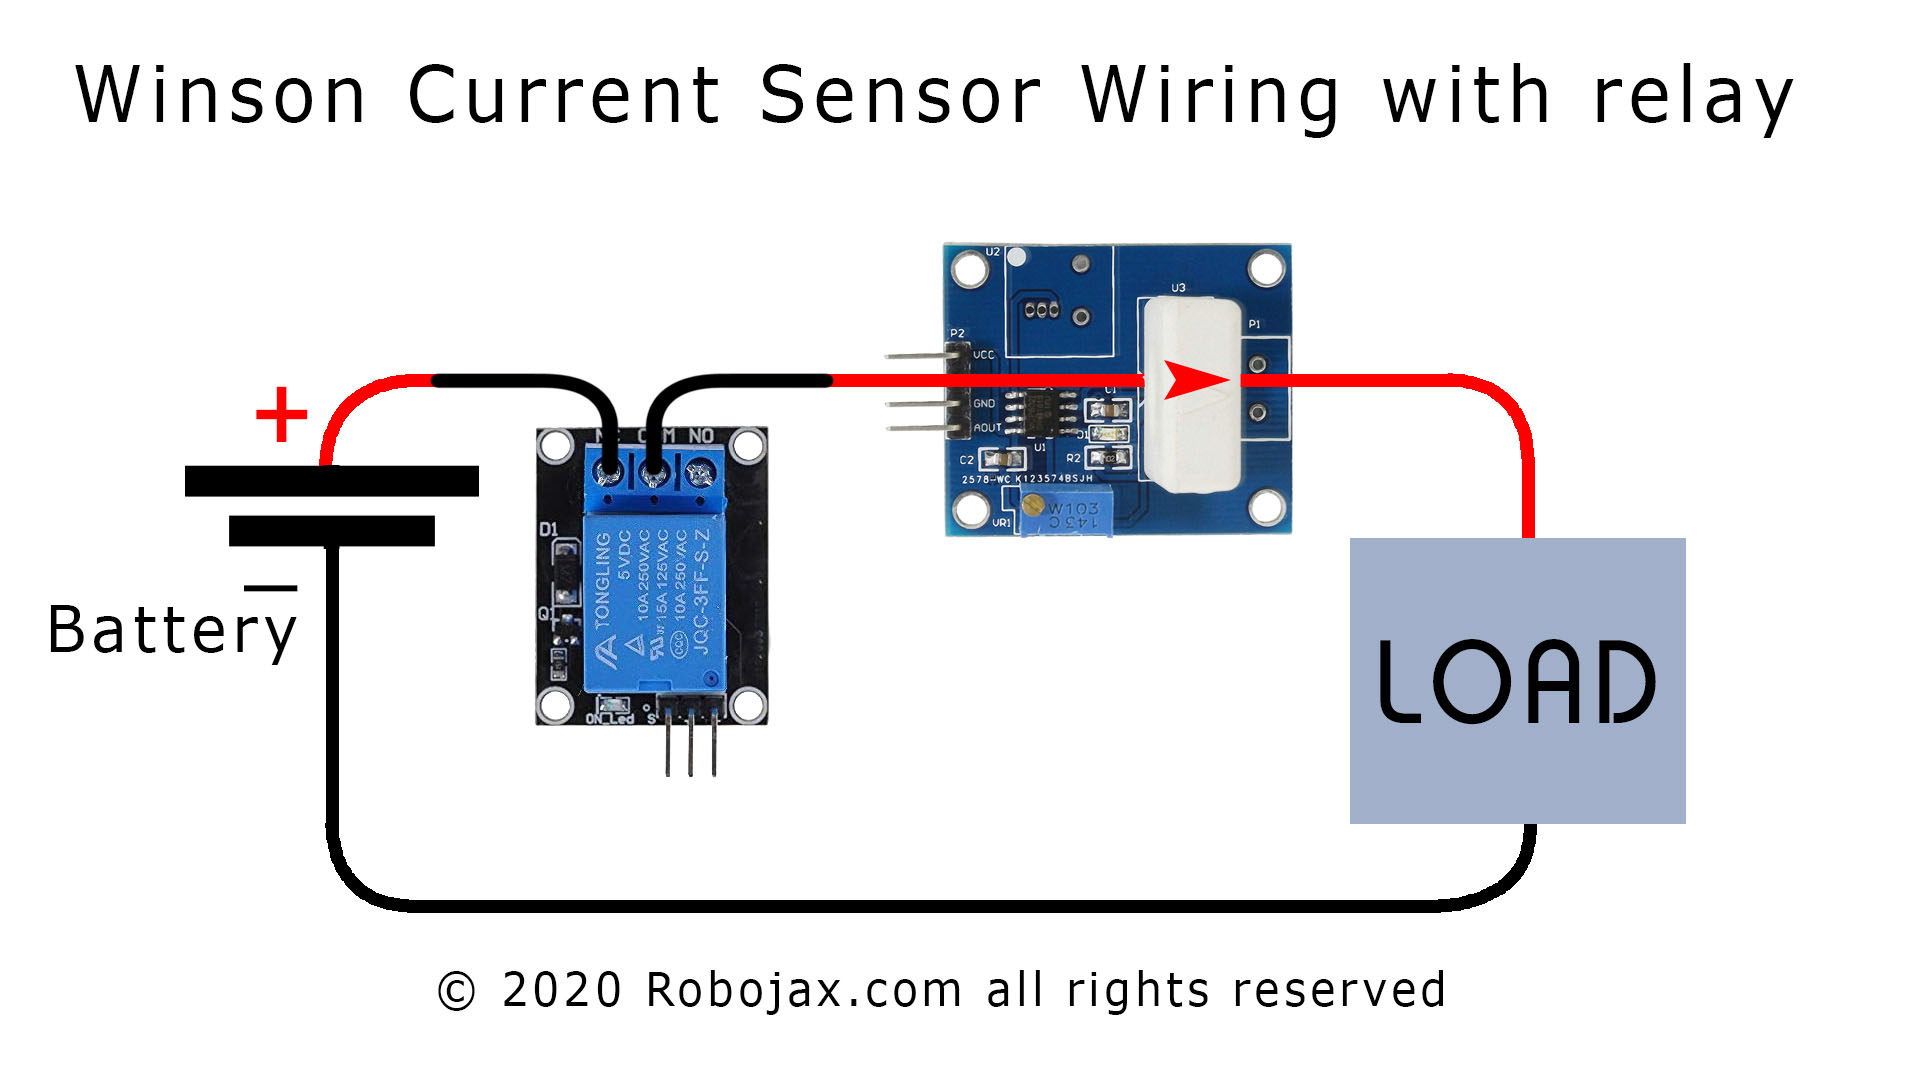
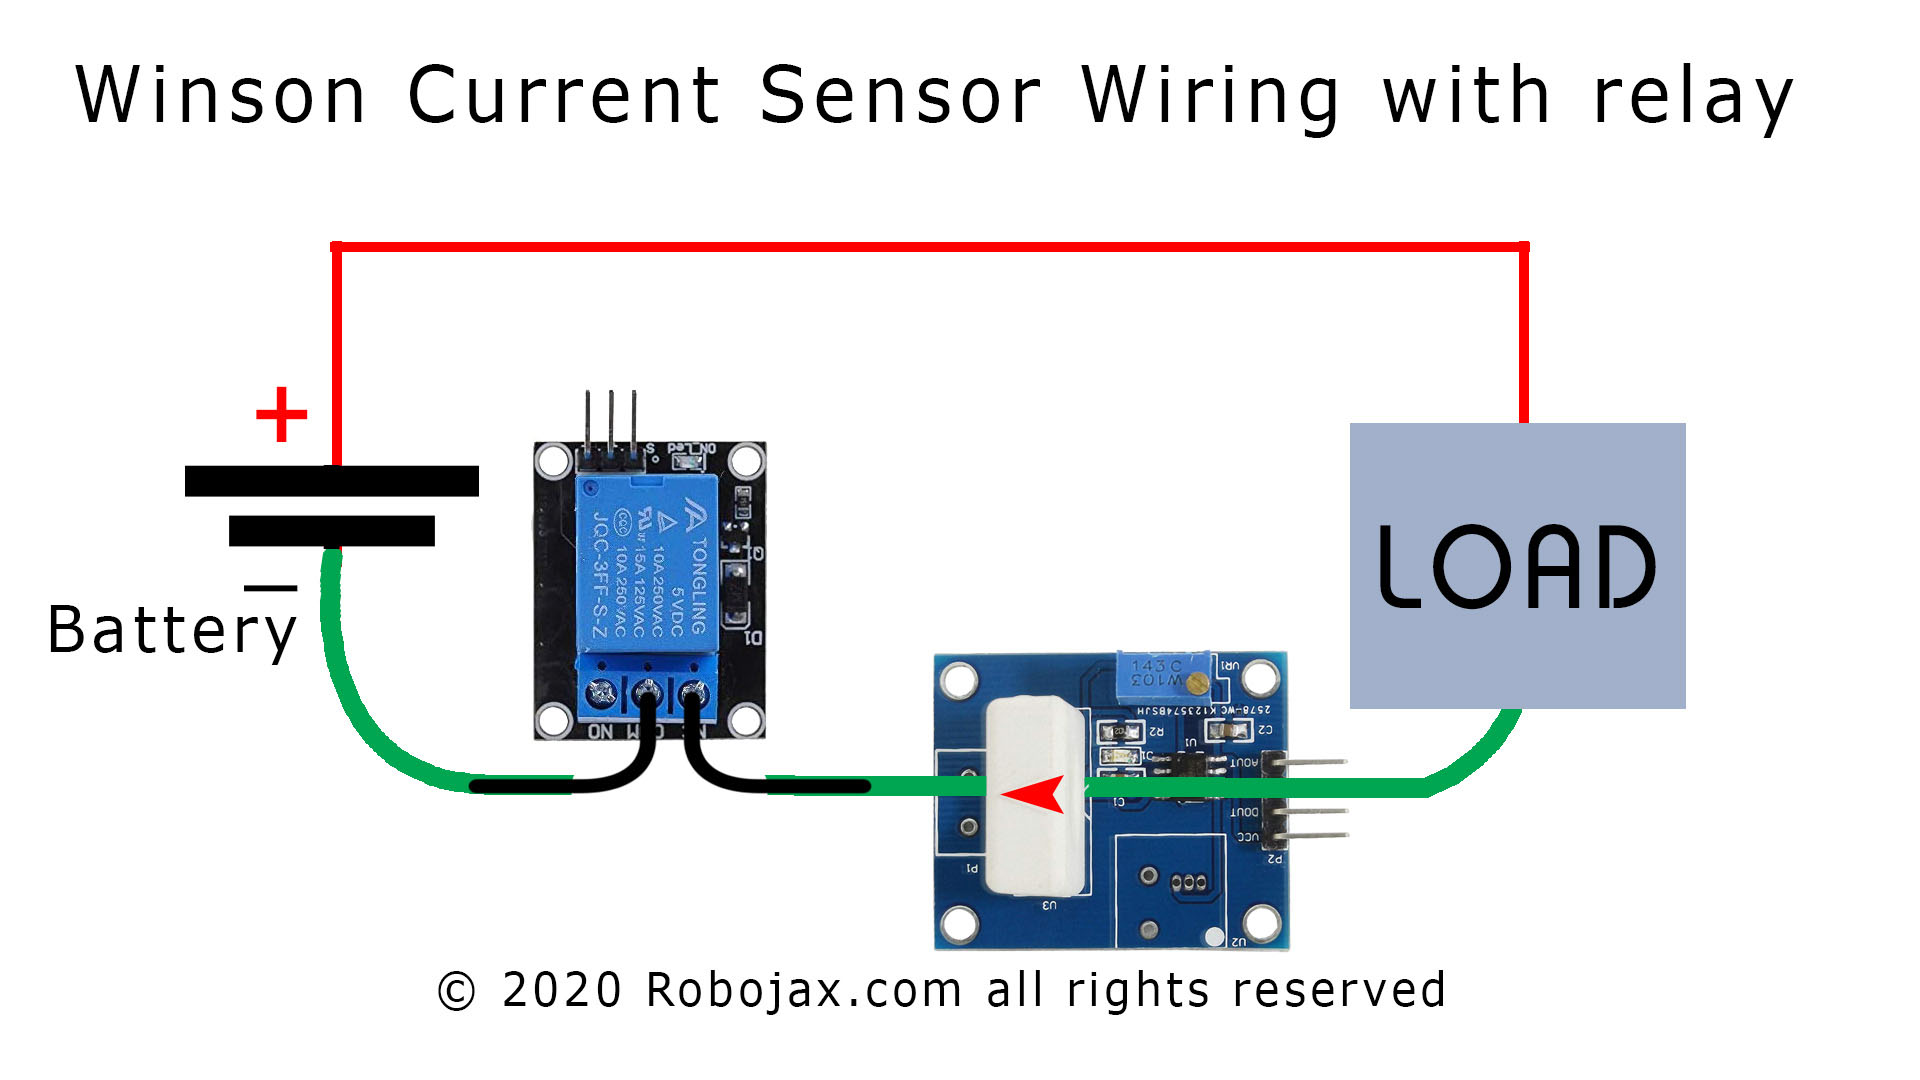
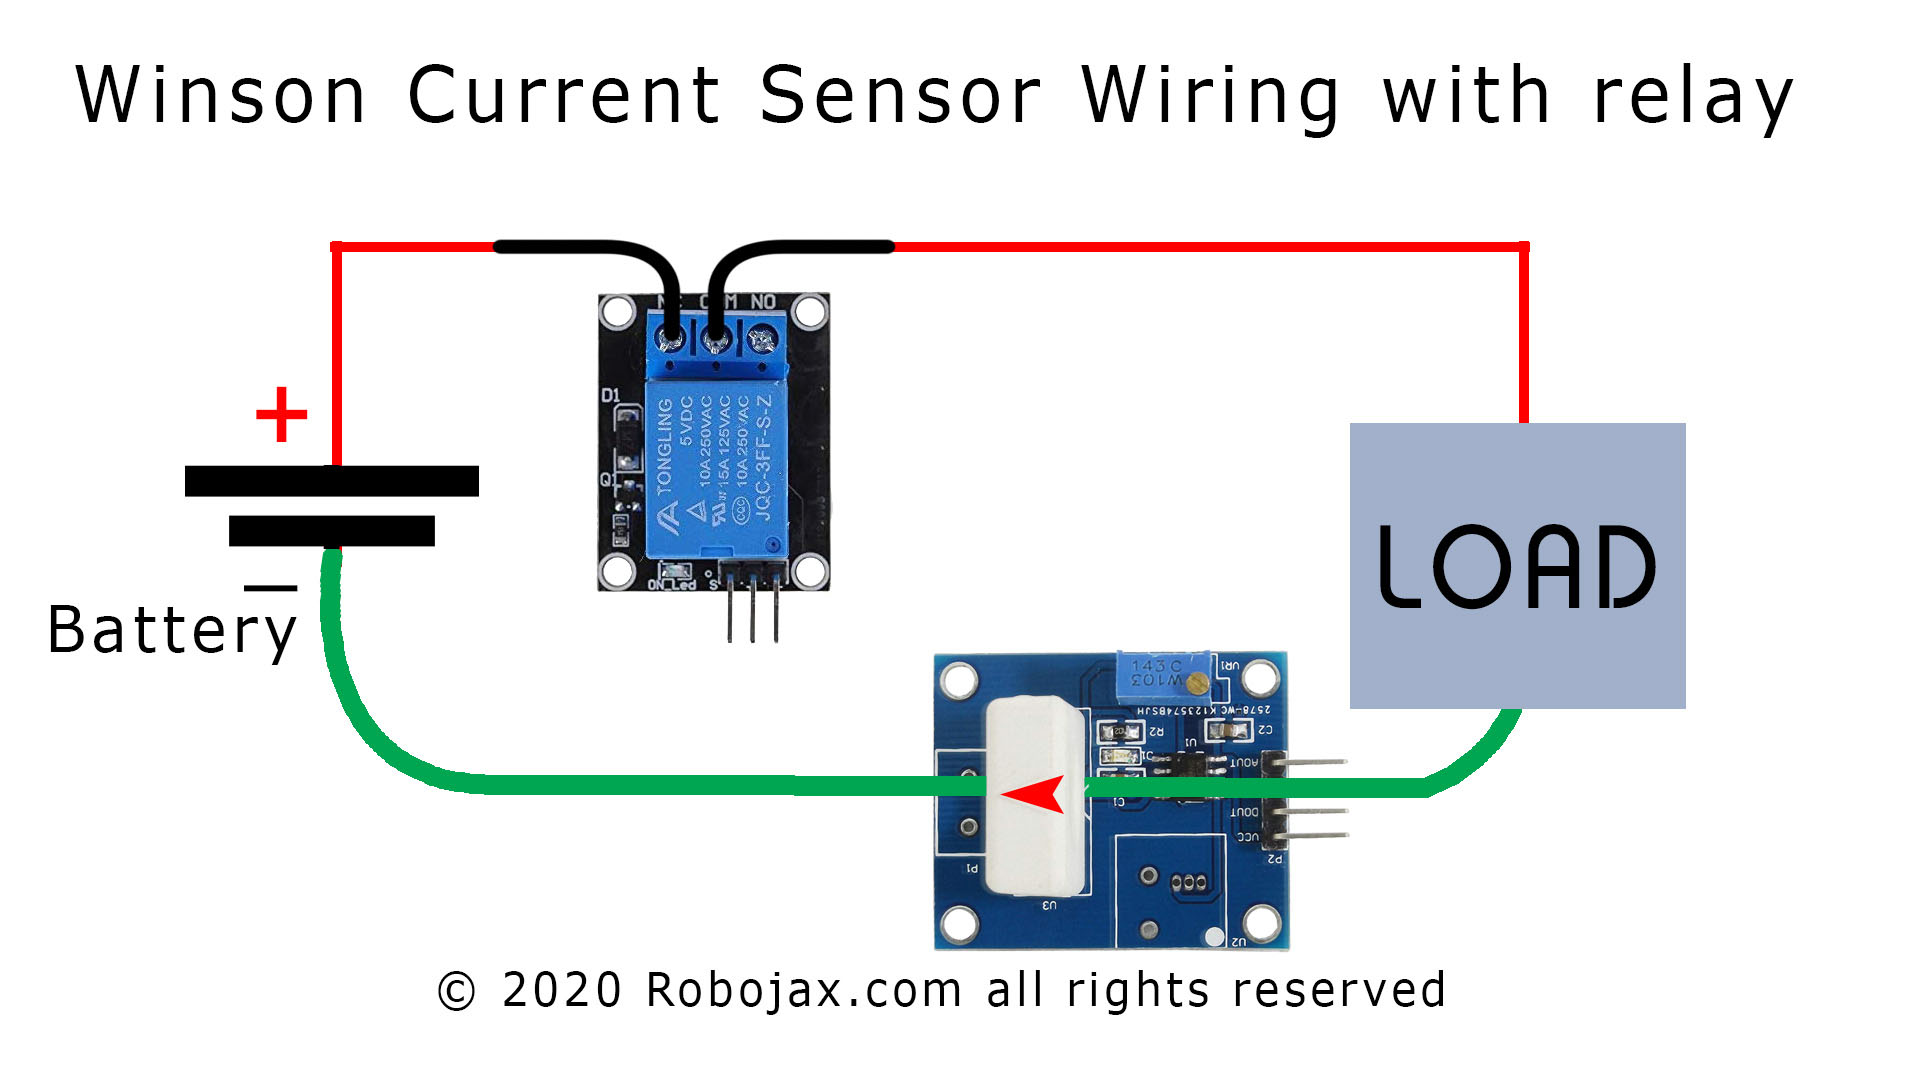
This tutorial by Robojax explains how to use Winson WCS Current sensor to measure DC current and use relay as Overcurrent protection to the current is disconnected when the current reaches to thershold value set in the code. Robojax WCS Library is used to measure current. this code will work with all Winson WCS Current sensor. This video requires Robojax WCS Library to be installed. The link is below.
This code is offered as 3 sketch.
1- OverCurrent Protection with LCD
2- OverCurrent Protection with LCD and pwering up LCD from digial pin
3- OverCurrent Protection without LCD
this code is included with the library. You don't have to download it from this page. Just download the library and this code is included.
 /*
 * Read the current Winson WCS Current sensor and display it on LCD1602 or LCD2004 with I2C
 * This is Arduino code based on Robojax WCS library
 * for Winson WSC Current Sensor to measure current

  get the Robojax WCS Arduino library: http://robojax.com/L/?id=230

 * Watch video instructions for this code with LCD : https://youtu.be/-pg7jbkaB6A
 *
 * Related Vidsos:
 * Introduction to Winson WCS Sensors: https://youtu.be/z-s8UvCWGxY
 * Using Relay to disconnect load at certain current:
 * Using Modules without Arduino to control relay at certain current:
 * Measure Current using ESP8266 NodeMCU, D1 Mino over Wifi
 * Measure current using ESP32 Bluetooth on mobile devices
 *

 * Written on July 26, 2020 by Ahmad Shamshiri in Ajax, Ontario, Canada
 * www. Robojax.com
  Model of the sensor to select
     //dirct wiring series
    0  "WCS38A25",//0
    1  "WCS37A50",//1
    2  "WCS2801",//2
    3  "WCS2702",//3
    4  "WCS2705",//4
    5  "WCS2810",//5
    6  "WCS2720",//6
    7  "WCS2750",//7
    8  "WCS3740",//8

      //through hole sensor
    9  "WCS1500",//9
    10  "WCS1600",//10
    11  "WCS1700",//11
    12  "WCS1800",//12
    13  "WCS2800",//13
    14  "WCS6800",//14

      //AC to DC Current sensor
    15  "WCS2202",//15


 * Get this code and other Arduino codes from Robojax.com
Learn Arduino step by step in structured course with all material, wiring diagram and library
all in once place. Purchase My course on Udemy.com http://robojax.com/L/?id=62

If you found this tutorial helpful, please support me so I can continue creating
content like this. You can support me on Patreon http://robojax.com/L/?id=63

or make donation using PayPal http://robojax.com/L/?id=64

 *  * This code is "AS IS" without warranty or liability. Free to be used as long as you keep this note intact.*
 * This code has been download from Robojax.com
    This program is free software: you can redistribute it and/or modify
    it under the terms of the GNU General Public License as published by
    the Free Software Foundation, either version 3 of the License, or
    (at your option) any later version.

    This program is distributed in the hope that it will be useful,
    but WITHOUT ANY WARRANTY; without even the implied warranty of
    MERCHANTABILITY or FITNESS FOR A PARTICULAR PURPOSE.  See the
    GNU General Public License for more details.

    You should have received a copy of the GNU General Public License
    along with this program.  If not, see <https://www.gnu.org/licenses/>.

*/
#include <Wire.h>
#include <Robojax_WCS.h>
#define MODEL 12 //see list above
#define SENSOR_PIN A0 //pin for reading sensor
#define SENSOR_VCC_PIN 8 //pin for powring up the sensor

//LCD settings
const uint8_t I2C_ADDRESS =0x3f;//watch video for details
const uint8_t LCD_CHAR= 16;
const uint8_t LCD_ROW = 2;
char *TITLE_CURRENT ="Current: ";
char *TITLE_ZERO_CURRENT ="Zero Current: ";
#define SHOW_ZERO_CURRENT true
//const int LCD_VCC_PIN =9;//define a VCC pin vor LCD see video for details

#define ZERO_CURRENT_WAIT_TIME 5000 //wait for 5 seconds to allow zero current measurement
#define CORRECTION_VLALUE 164 //mA
#define MEASUREMENT_ITERATION 300
#define VOLTAGE_REFERENCE  5000.0 //5000mv is for 5V
#define BIT_RESOLUTION 10 //Due or MKR, 12 bits
#define DEBUG_ONCE true

// creating object from Robojax_WCS Current sensor
Robojax_WCS sensor(I2C_ADDRESS, LCD_CHAR, LCD_ROW,
           MODEL, SENSOR_PIN, SENSOR_VCC_PIN,
          ZERO_CURRENT_WAIT_TIME, SHOW_ZERO_CURRENT,
          CORRECTION_VLALUE, MEASUREMENT_ITERATION, VOLTAGE_REFERENCE,
          BIT_RESOLUTION, DEBUG_ONCE, TITLE_CURRENT,  TITLE_ZERO_CURRENT
          );

// creating object from Robojax_WCS Current sensor
// this is used if you want to use a digital pin to supply 5V to LCD
// and leave the 5V pin free for other purpose
/// uncomment the 7 lines bellow by removing the // from the begining of lines
//Robojax_WCS sensor(I2C_ADDRESS, LCD_CHAR, LCD_ROW,
//           MODEL, SENSOR_PIN, SENSOR_VCC_PIN,
//          ZERO_CURRENT_WAIT_TIME, SHOW_ZERO_CURRENT,
//          CORRECTION_VLALUE, MEASUREMENT_ITERATION, VOLTAGE_REFERENCE,
//          BIT_RESOLUTION, DEBUG_ONCE, TITLE_CURRENT,  TITLE_ZERO_CURRENT,
//          LCD_VCC_PIN
//          );

void setup()
{
  Serial.begin(9600);
  Serial.println("Robojax WCS Library");
  sensor.begin();
  Serial.print("Sensor: "); Serial.println(sensor.getModel());
  Serial.print("Library Version:");Serial.println(sensor.version());
  //sensor.printModels();//prints all supported WCS models

}

void loop()
{
  //Robojax.com WCS Arduino Library
  sensor.readCurrent();
  delay(1000);
  //sensor.printDebug();
  //sensor.printCurrent();//prints the current on serial monitor
}

If you found this tutorial helpful, please support me so I can continue creating content like this. support me via PayPal 